Overview
A system Alert is used to communicate to a designated individual that a transaction has occurred and possible approval/review is needed. A system alert will indicate time, type of transaction, and who is responsible for approving or denying the transaction.
Set up a System Alert
To set up a system Alert, click on the Gear icon on the top right-hand corner of your home screen. Under the General section, select Alerts.
- You can generate an alert for each of your major transactions (i.e. Sales Order, Ship Doc, Receiving, Purchase Orders, Work Orders, Returns etc.). The system allows you to assign the alert to a group or an individual user.
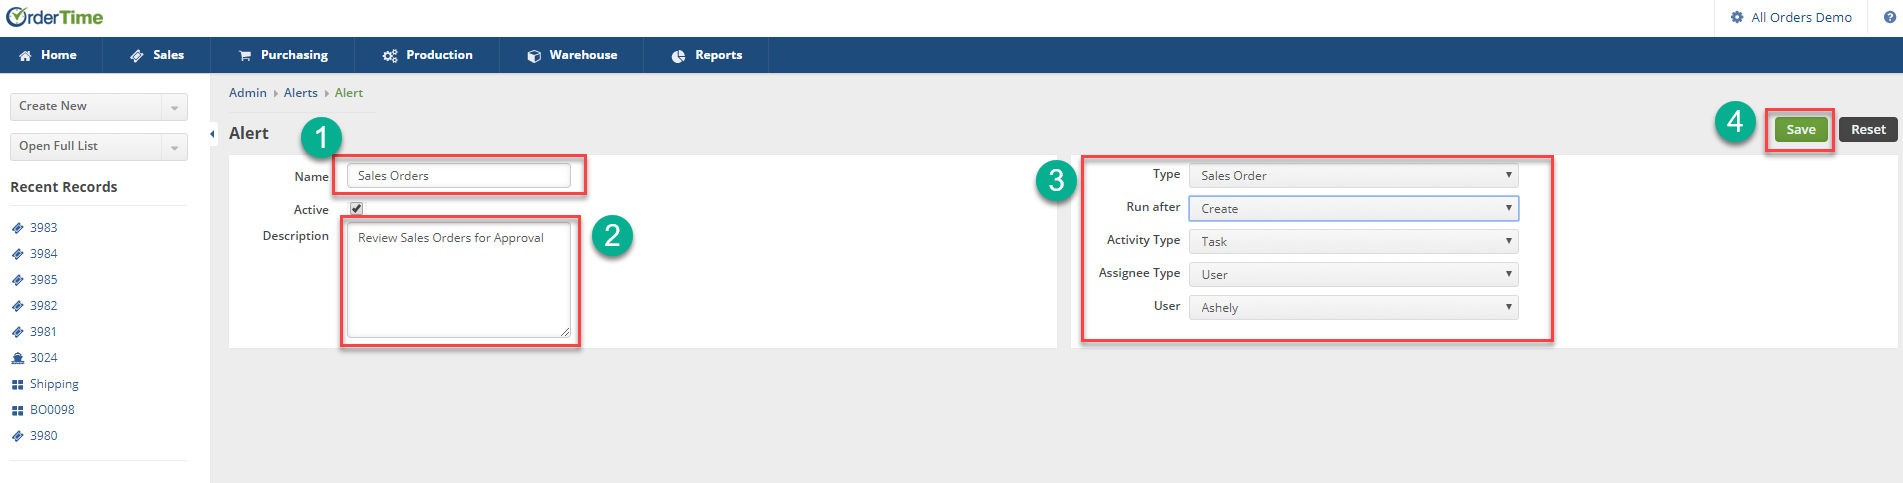
To create an Alert complete the following steps:
- Type a name for your alert, designate an accurate name to your Alert so it can be easily identified by the user.
- Enter a brief description for your Alert, define what the alert is for and what action is to be completed.
- Under Type select the type of transaction you need an alert for (i.e. Sales Order, Ship Doc, Purchase Orders, Work Orders, Inventory etc.).
- For Run After, you will be able to select when the Alert is generated.
- For Activity Type, select one of your Tasks.
- For Assignee Type, you will be able to select a group or an individual within your organization.
- This User Group selection feature will allow you to alert for a whole set of individuals within your group.
- The individual will assign the task to one person in your company to review/approve/decline the transaction.
In order to have a user or group, you first need to generate users and group under Users & Roles.
4. Click on Save when Done.
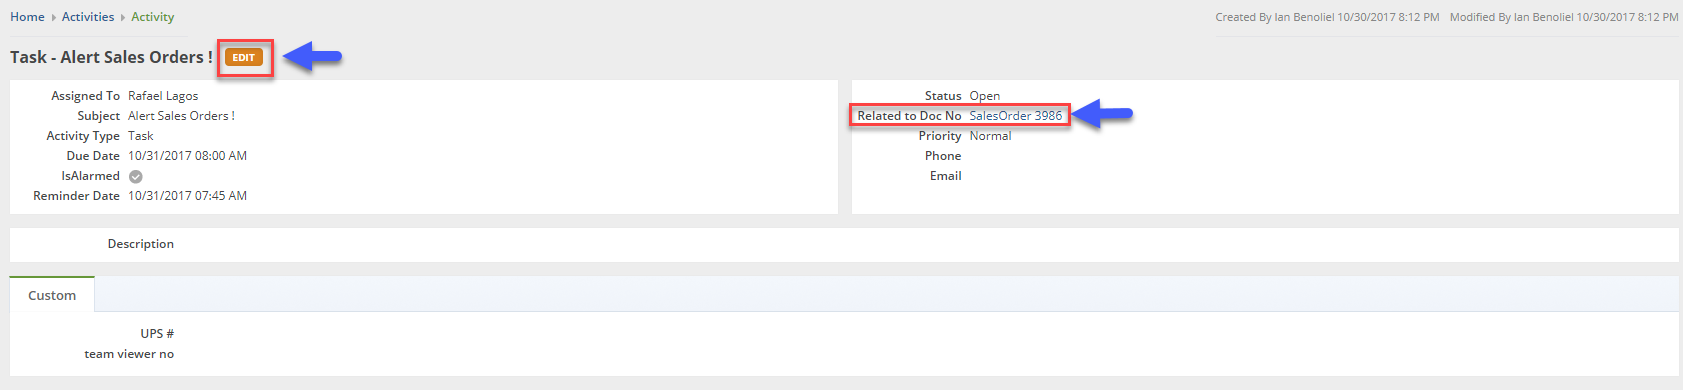
Depending on your setting, you will receive an Alert anytime a document is processed.

- Click on the link to review/approve/denied the transaction.
The link will take you to the Task section where you can review the task.
- Click on the "Related to Doc No" link to review the Document:
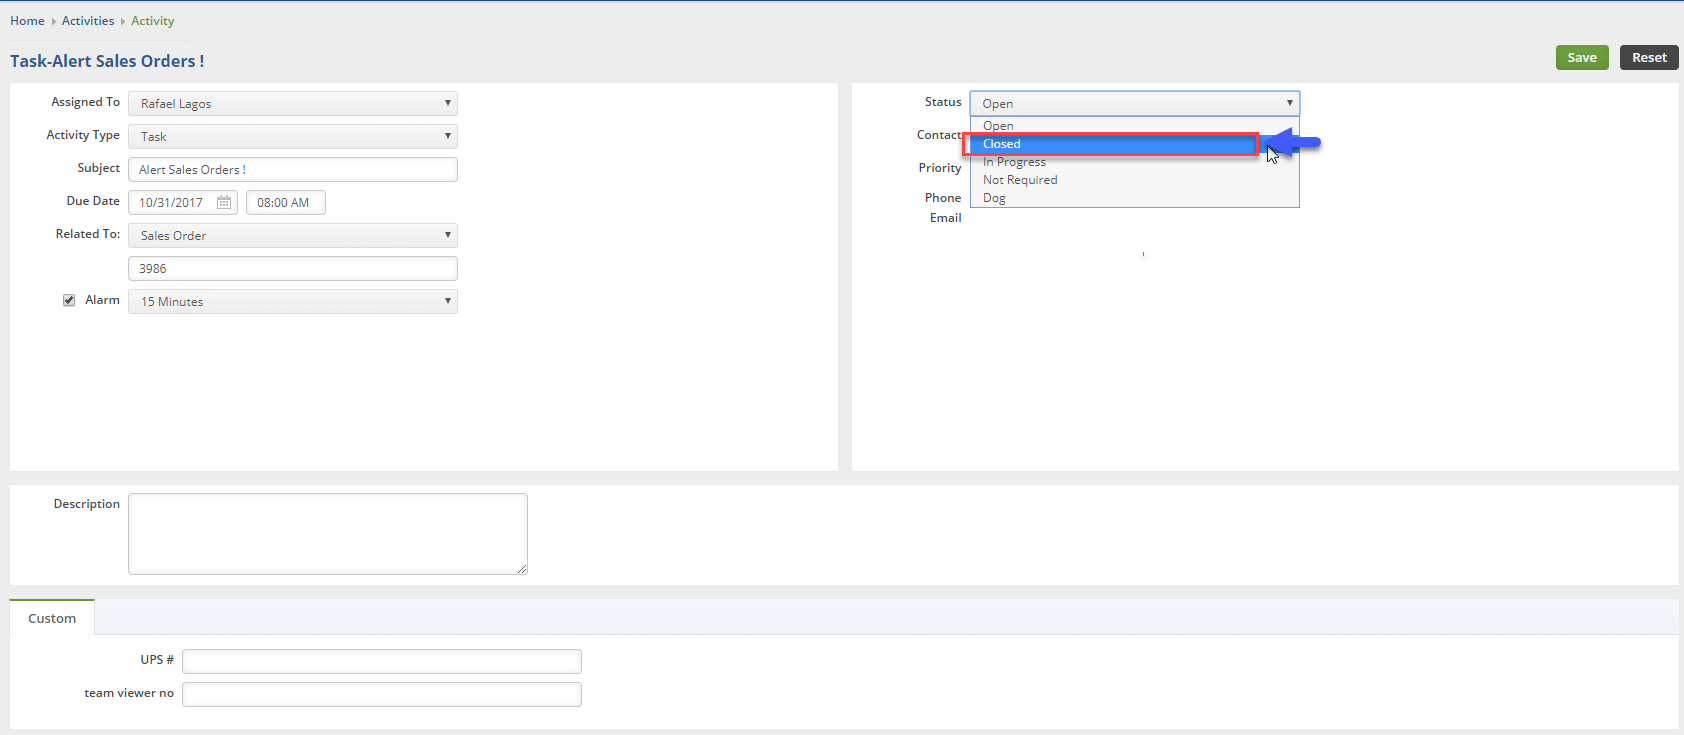
- Review transaction and Approve/Denied/ Cancel depending on your case.
To make your task completed, click on the Edit icon.
- Under the Status drop-down menu, select the desired action. Click on Save when done.
Run-After Conditions & Activity Types
| Run-After Condition | Activity Type |
| Change Status | |
| Delete | Task |
| Create | Event |
| Modify | Call |
Complete List of Alert Types
| Record Type | Run After | Activity Type |
| Adjustment | Change Status | Task |
| Delete | Event | |
| Create | Call | |
| Receiver | Change Status | |
| Delete | Task | |
| Create | Event | |
| Call | ||
| Work Order | Change Status | Task |
| Delete | Event | |
| Create | Call | |
| Ship Doc | Change Status | |
| Delete | Task | |
| Create | Event | |
| Call | ||
| Transfer | Change Status | Task |
| Delete | Event | |
| Create | Call | |
| Purchase Order | Change Status | |
| Delete | Task | |
| Create | Event | |
| Call | ||
| Sales Order | Change Status | |
| Delete | Task | |
| Create | Event | |
| Call | ||
| Disassembly | Change Status | Task |
| Delete | Event | |
| Create | Call | |
| Customer Return | Change Status | |
| Delete | Task | |
| Create | Event | |
| Call | ||
| Quote | Change Status | |
| Delete | Task | |
| Create | Event | |
| Call | ||
| Value Adjustment | Change Status | Task |
| Delete | Event | |
| Create | Call | |
| Count | Change Status | Task |
| Delete | Event | |
| Create | Call | |
| Item | Change Status | Task |
| Delete | Event | |
| Create | Call | |
| Modify | ||
| Customer | Change Status | Task |
| Delete | Event | |
| Create | Call | |
| Modify | ||
| Vendor | Change Status | Task |
| Delete | Event | |
| Create | Call | |
| Modify | ||
| Location | Change Status | Task |
| Delete | Event | |
| Create | Call | |
| Modify | ||
| Lead | Change Status | Task |
| Delete | Event | |
| Create | Call | |
| Modify | ||
| Payment | Delete | Task |
| Create | Event | |
| Modify | Call | |
| Cart | Create | Task |
| Change Status | Event | |
| Call |