Overview
Another benefit of our software is the ability for administrators to customize the roles in which their users have access. This allows Owners to decide exactly what features each user can access.
Access the Roles screen
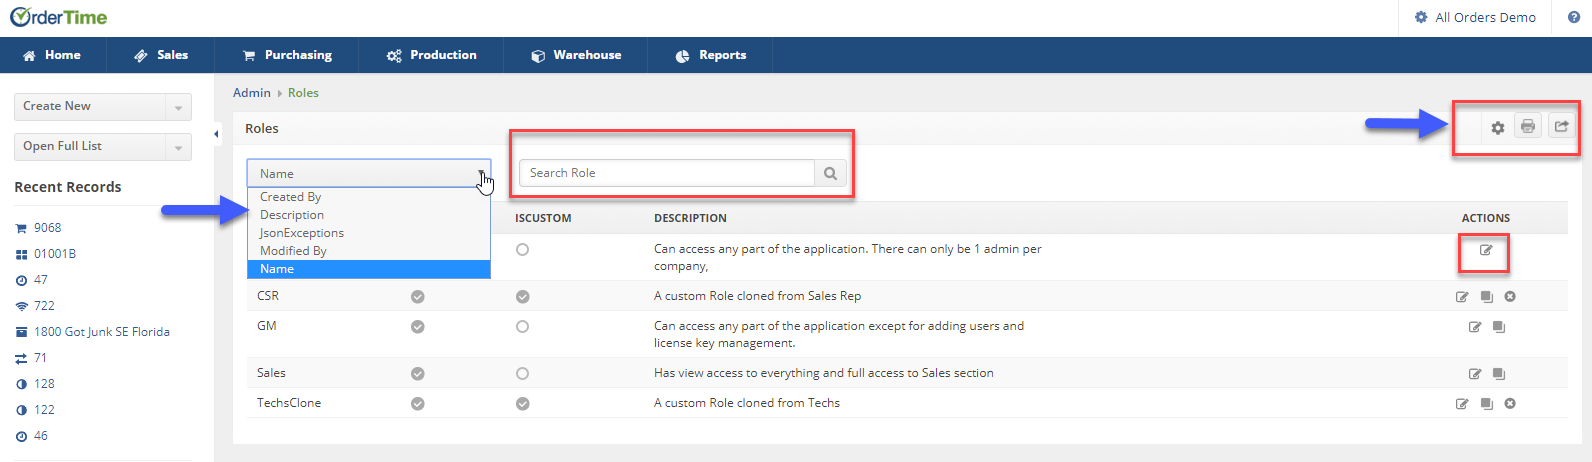
To access the Roles screen, click on the Gear icon on the top right side of the screen. The main Roles screen displays all roles in the system and allows you to search for a specific role using differing types of search terms by selecting the Search Field from the drop down located at the top of your screen and then typing in the specific term in the search bar to the right.
- If you want to filter the content, change what columns are shown (attribute data is organized on screen) or edit how many records are shown on the page/default search term, click on the Gear icon located on the right side of your screen to open the List Options menu.
- If you want to Print your User List, click the printer icon.
- To Export your User List via a CSV file, click on Export icon.
Edit a current Role
To edit a current Role, click on the edit note pad icon under the Actions column. This will allow you to edit all permissions for that existing Role. (Internal Systems Roles granted to your company's Admin cannot be edited.)
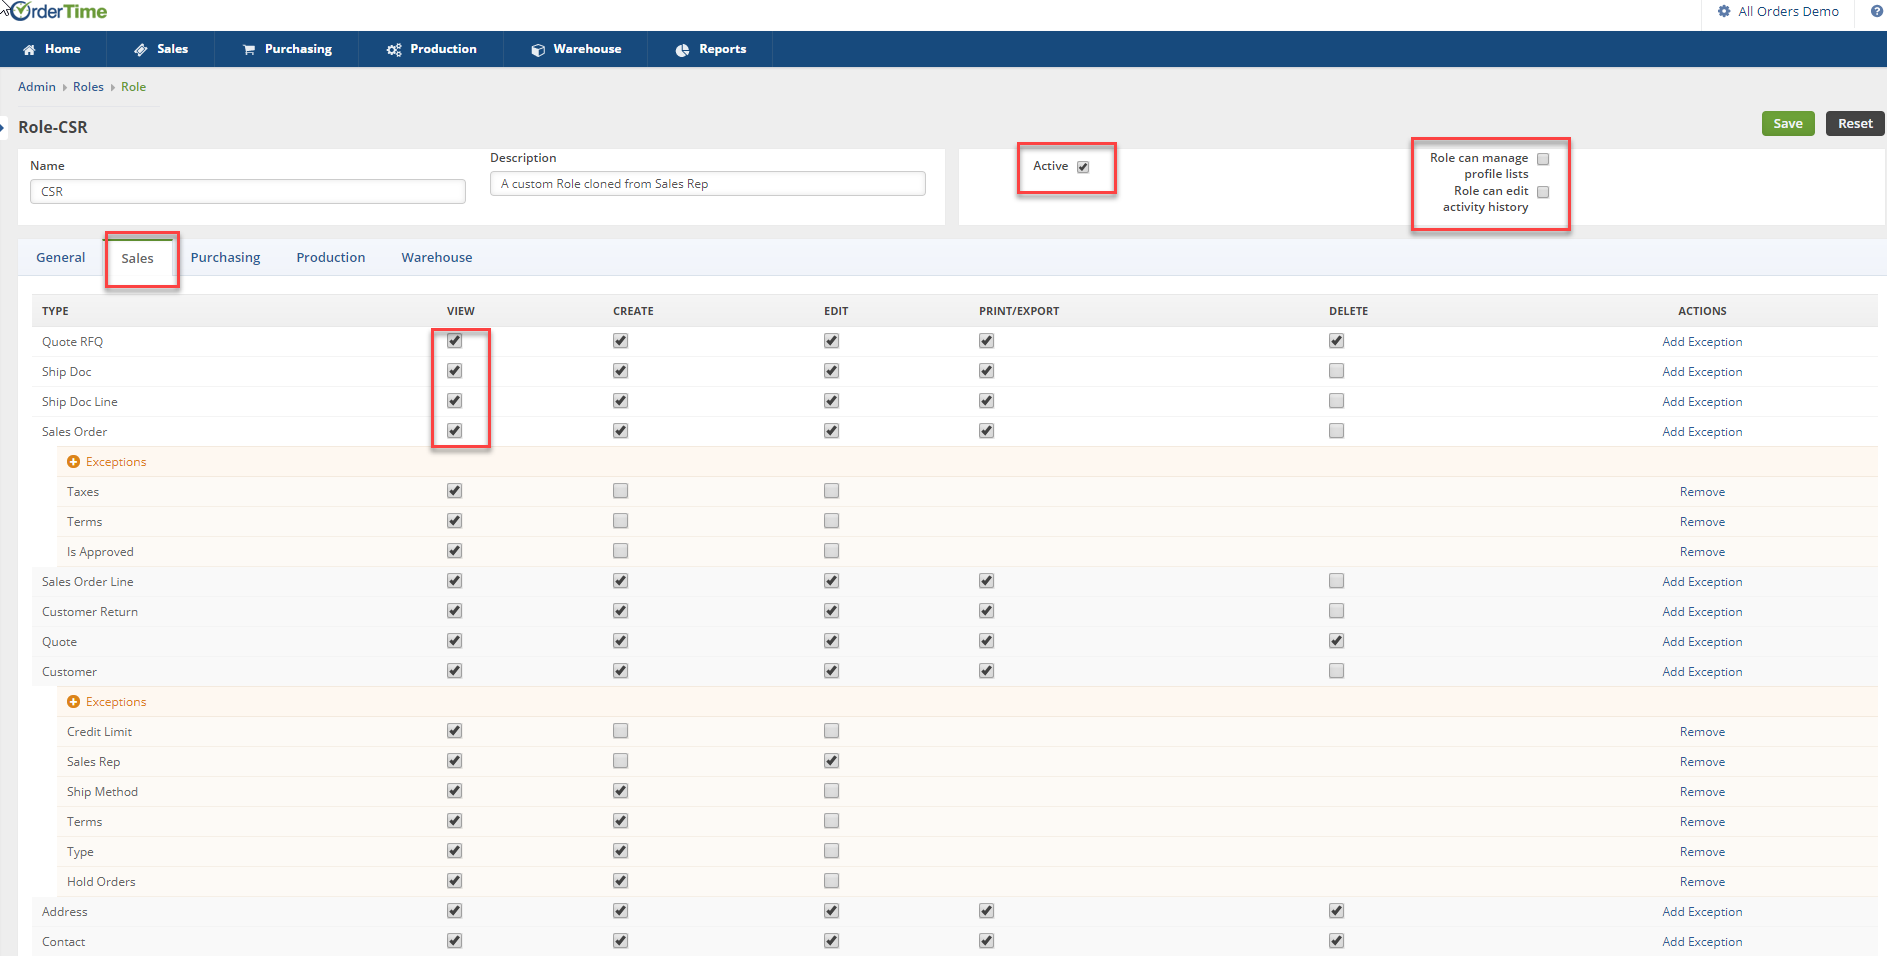
Once you have selected the specific Role to edit, you can begin to grant or restrict access to that Role. All the users assigned to a specific Role will have the same access and restrictions assigned to the Role. When you open the Roles screen, each tab provides access to a specific function within the Order Time (i.e. Sales, Purchasing, Production, Warehouse).
- The bottom panel is broken up into 5 sections. General, Sales, Purchasing, Production and Warehouse. Click on each of the tabs to grant or restrict access to the Role.
- Under the Type column, you can control the Role's access to the specific function.
- The tab titles on the top of the screen will allow you to select what can be viewed, created, edited, printed/exported, deleted and if any of the settings have Exceptions.
- Click on the box you wish to provide access to.
- Each tab (Sales, Purchasing, Production, Warehouse) provides you the ability to control the function the Role will have in the system.
- On the Role screen you can Activate/Deactivate the Role, Manage the Role Profile and Edit Activity History.
Creating a Role
The software will provide you with a list of Roles already set up for your company. To create another Role for your users, click on the Gear icon in the top right hand corner. Under User & Roles section, click on Roles. The Roles screen will display the current available Roles.
There are 3 default Roles in Order Time:
- Admin
- GM
- Sales
From these 3 main role templates you can build out your User Profiles, for example Production or Warehouse from them, and then assign your team to the Roles you have built. The Master Admin of the account is the only one who can create custom roles to be assigned to a user.
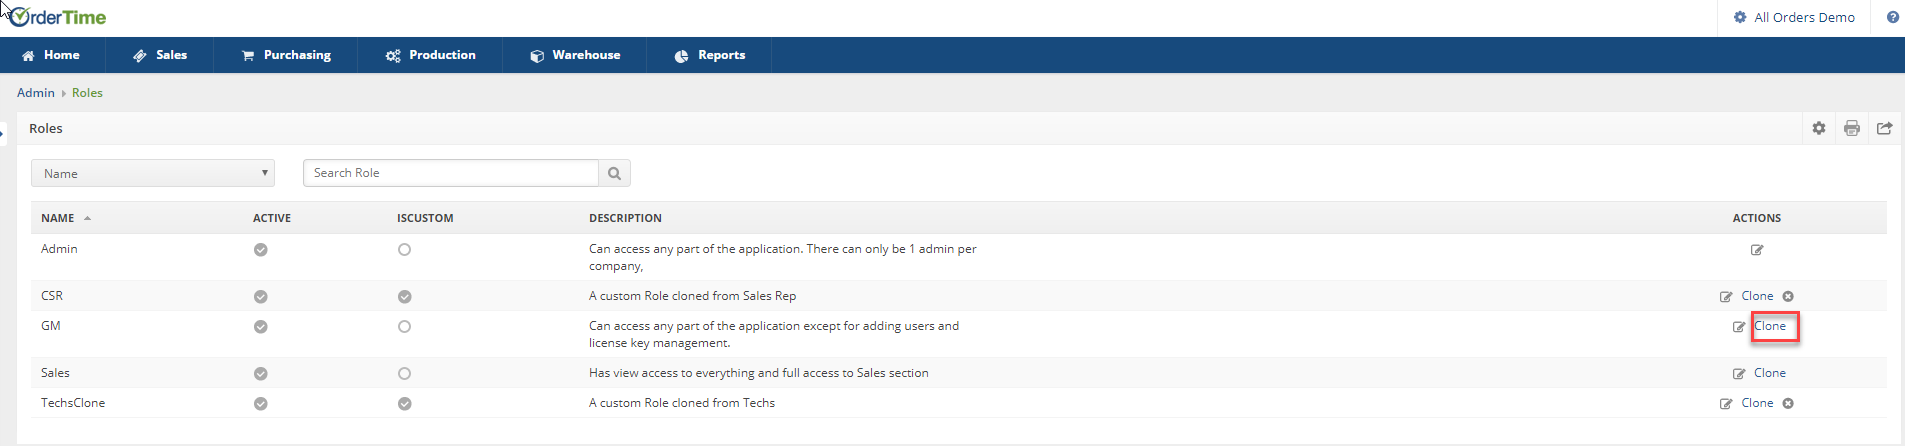
In order to create these customer roles you need to clone from an existing roles.
- You can clone the GM Role type or the Sales Role type. You cannot clone the Admin Role
- Once you click on the clone button for your new role type, you will be taken to the Roles Permission screen.
Best to clone from a role that approximates the parameters you want set to the new role you plan on creating
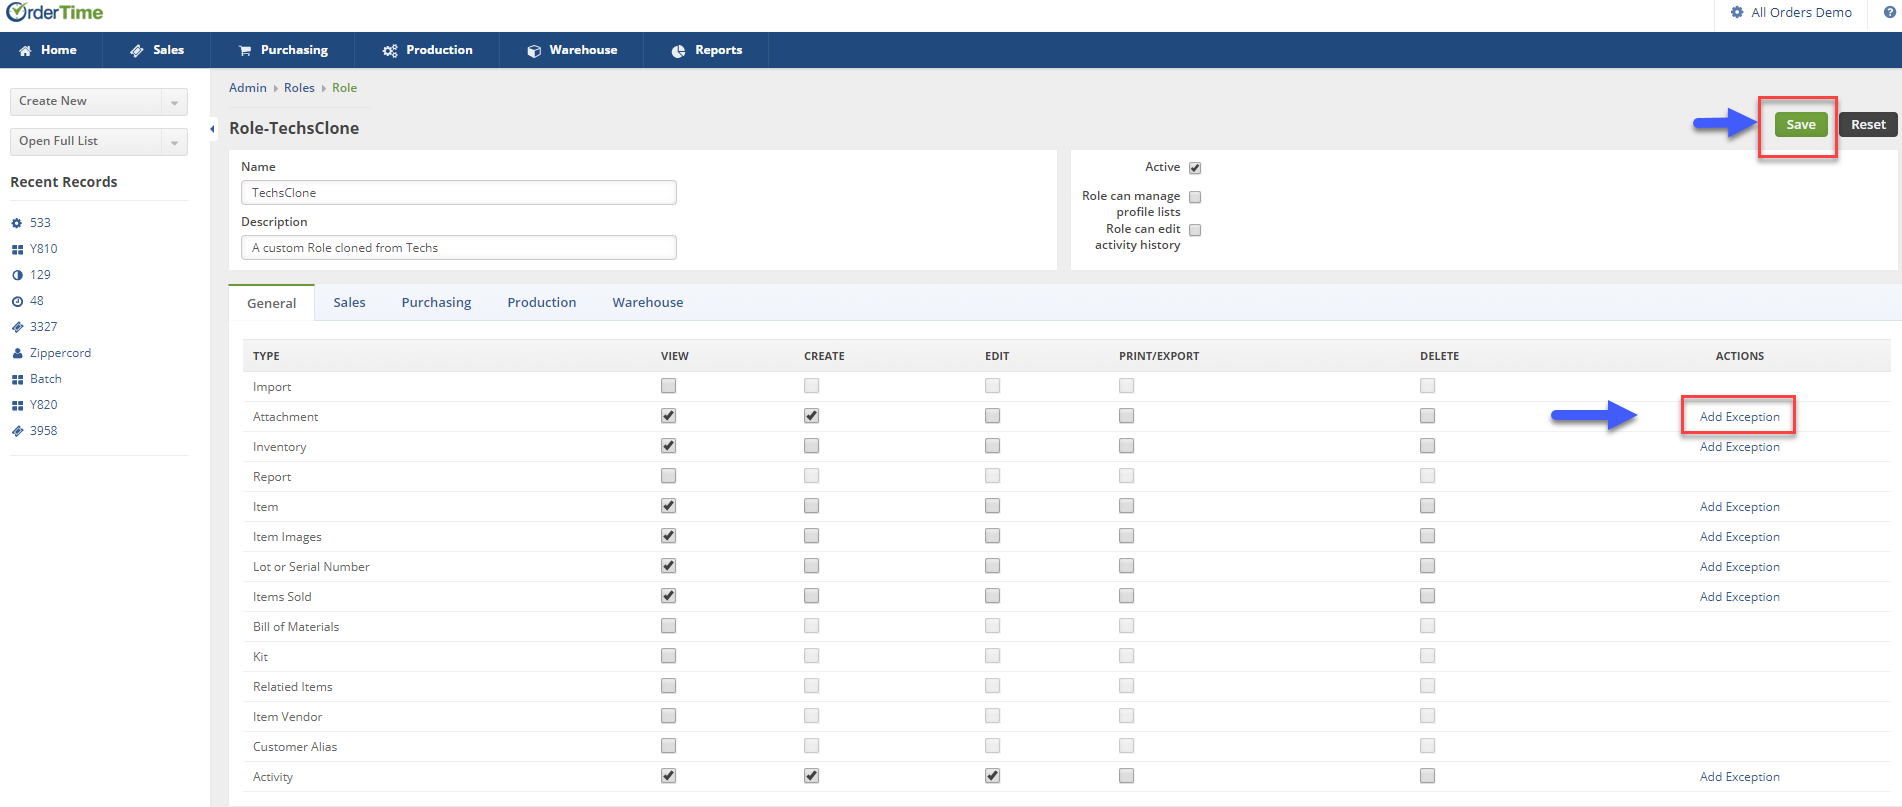
- This screen's top panel has a place for you to put a New Role Name, Description of the new Role, if the Role is Active and if the Users under this new Role have permission to manage the Profile Lists.
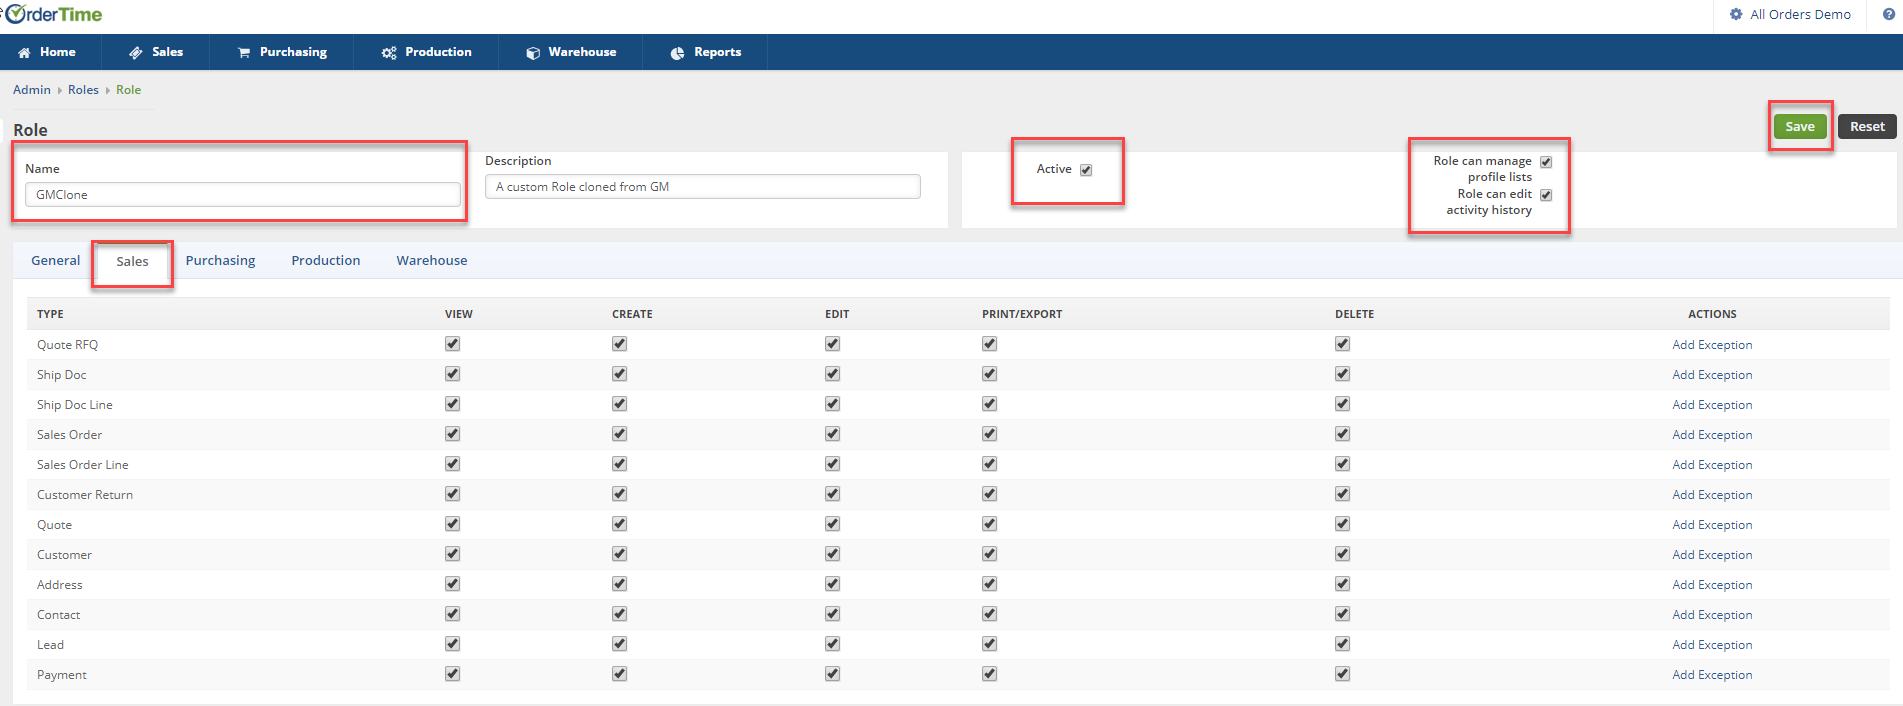 The 5 tabs under Creating a New Role (General, Sales, Purchasing, Production, Warehouse) are the same in the way that they allow you to select what field types can be viewed, created, edited, printed/exported, deleted by users assigned to the specific role you are currently setting up and if any of the settings have Exceptions.
- After you have all the permissions for the New Role set up properly, press Save which is in the upper right hand corner.
Exceptions
Roles also allow you to limit a specific Property or Field within a given Type. For example, say you want to limit a Sales Rep's ability to change the Sales Rep field on customers but otherwise have full access. In these cases you use 'Exceptions'. Select the Add Exception link, located under the Actions column.
This will bring you to the Add Exception screen. On this screen, you can select what corresponding field the exception is being applied too from the drop down menu. Then you will select if that field can be viewed, created or edited.
After selecting the Exception Field and what permission it has, press Save.