Adding Connection Settings
After you have generated the credentials for the Cart that you selected, enter the appropriate connection settings for your Cart in Order Time. Refer to Generating Connection Credentials for the instructions on how to generate connection credentials.
E-commerce Integration Considerations
Before the setting-up your e-commerce integration, ensure that you have the following:
- Your own business website
- You have generated the connection settings
To start adding and testing the connection settings:
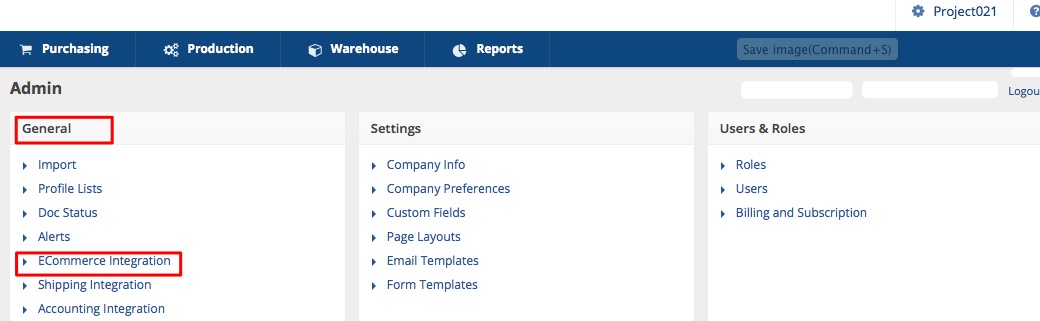
- Click on the Gear icon to access the Admin screen.
- Click Ecommerce Integration under the General section.
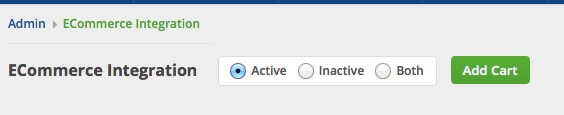
- Select Active and click the Add Cart button.
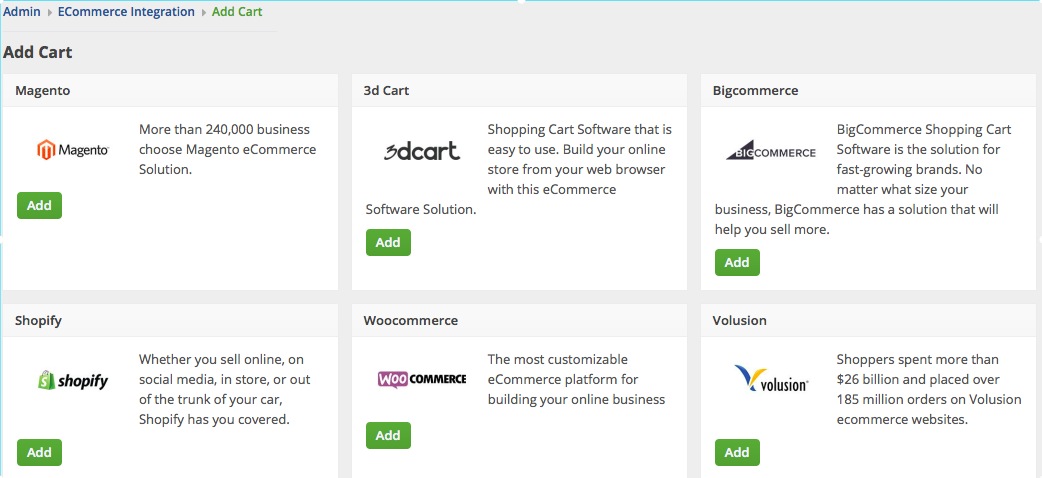
- Select the e-commerce cart that you want by clicking the Add button.
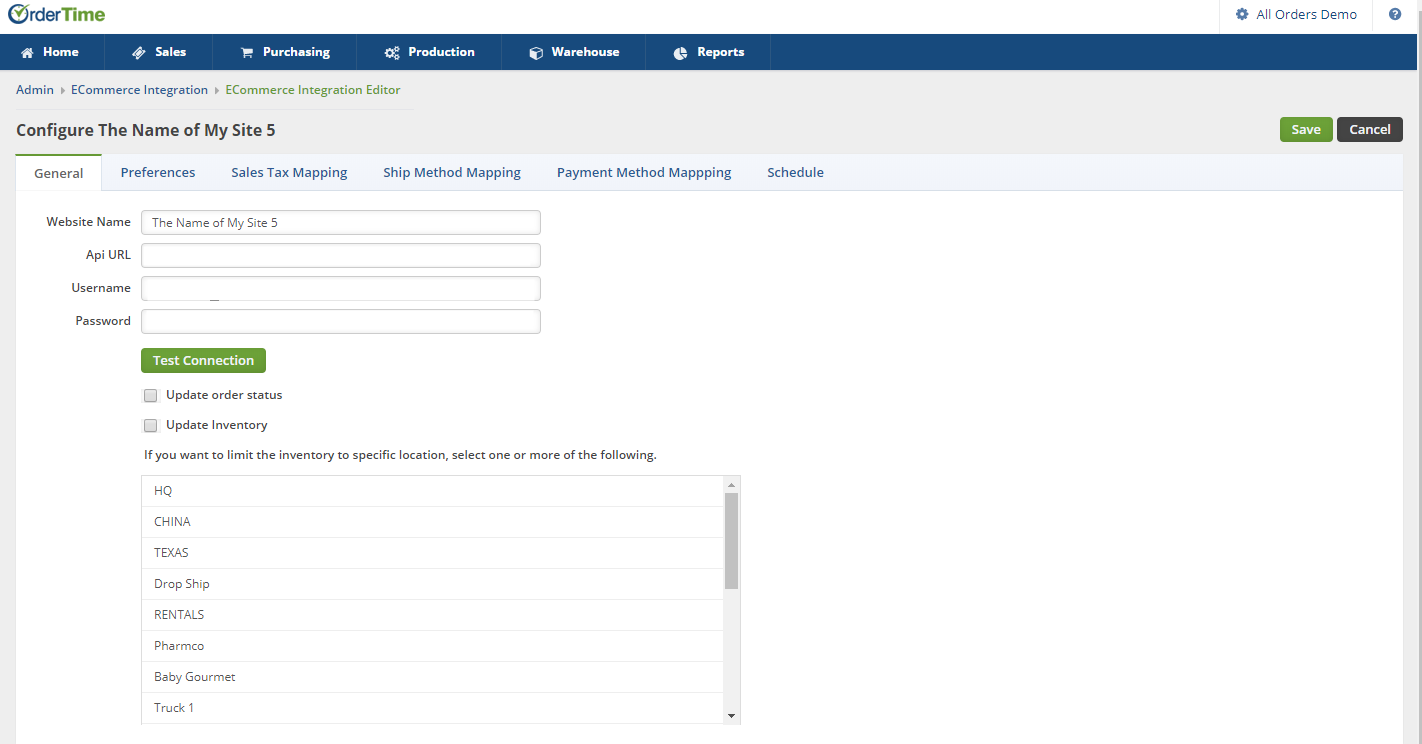
- In the ECommerce Integration Editor page, enter and set the connection settings in the General tab.
- Follow the steps below for the adding and testing the connection settings for your specific cart.
Shopify
- Website Name
- Enter or assign a name for your website.
- API URL
- This is the Example URL you generated from Generating Connection Credentials > Shopify > Step 9.
- Enter the Shopify Example URL for API URL.
- For example: https://apikey:password@ncintegration.myshopify.com/admin/orders.json should be entered as https://apikey:password@ncintegration.myshopify.com/admin
- Username
- This is the API Key you generated from Generating Connection Credentials > Shopify > Step 9.
- Enter the Shopify API Key for username.
- Password
- This is the Password you generated from Generating Connection Credentials > Shopify > Step 9.
- Enter the Shopify Password for password.
- Select what you need from the options provided by clicking the corresponding checkbox.
- Select at least one location if you want to limit the inventory to specific location(s).
- Click Test Connections.
- Click Save.
BigCommerce
- Website Name
- Enter or assign a name for your website.
- API URL
- This is the API Path you generated from BigCommerce: Connection Credentials and Settings >> Step 5.
- Enter the BigCommerce API Path for API URL.
- Username
- This is the Client ID you can see in BigCommerce: Connection Credentials and Settings >> Step 8.
- Enter the Username using the Client ID from the OAuth Connection Settings.
- Password
- This is the Access Token you can see in BigCommerce: Connection Credentials and Settings >> Step 8.
- Enter the Access Token for the password.
- Select what you need from the options provided by clicking the corresponding checkbox.
- Select at least one location if you want to limit the inventory to specific location(s).
- Click Test Connections.
- Click Save.
3dcart
- Website Name
- Enter or assign a name for your website.
- API URL
- Enter https://apirest.3dcart.com/3dCartWebAPI/v1/ for API URL.
- When you register and subscribe for 3dcart, you will be prompted to request for the endpoint URL which takes this format: https://apirest.3dcart.com/3dCartWebAPI/{version}/{service}. Read more about 3dcart URL request here.
- Username
- This is the Store that you generated from Generating Connection Credentials > 3dcart > Step 11.
- Enter the 3dcart Store for username.
- Password
- This is the Token you generated from Generating Connection Credentials > 3dcart > Step 11.
- Enter the 3dcart Token for password.
- Select what you need from the options provided by clicking the corresponding checkbox.
- Select at least one location if you want to limit the inventory to specific location(s).
- Click Test Connections.
- Click Save.
Volusion
- Website Name
- Enter or assign a name for your website.
- API URL
- This is the URL you generated from Generating Connection Credentials > Volusion > Steps 8-12.
- Enter the URL but delete the all the characters after ‘aspx’. The value should look something like this: https://abcd.efgh.ijkl.com/net/WebService.aspx
- Username
- Enter the username/email address that you use to log in to Volusion in the Username field.
- Password
- Enter the password that you use to log in to Volusion in the Password field.
- Select what you need from the options provided by clicking the corresponding checkbox.
- Select at least one location if you want to limit the inventory to specific location(s).
- Click Test Connections.
- Click Save.
Magento V1
- Website Name
- Enter or assign a name for your website.
- API URL
- Enter the URL with your website in the API URL: http://www.<yourwebsite>/index.php/api/v2_soap/index/
- For example: http://www.mywebsite.com/index.php/api/v2_soap/index/
- Enter the URL with your website in the API URL: http://www.<yourwebsite>/index.php/api/v2_soap/index/
- Username
- This is the Username you entered in Generating Connection Credentials > Magento >Step 4.
- Enter the Magento Username in the Username field.
- Password
- This is the API Key you entered in Generating Connection Credentials > Magento >Step 4.
- Enter the Magento API Key in the Password field.
- Select what you need from the options provided by clicking the corresponding checkbox.
- Select at least one location if you want to limit the inventory to specific location(s).
- Click Test Connections.
- Click Save.
Magento V2
- Website Name
- Enter or assign a name for your website
- API URL
- Enter the URL with your website in the API URL: http://www.<yourwebsite>/rest/V1/
- For example: http://www.mywebsite.com/rest/V1/
- Enter the URL with your website in the API URL: http://www.<yourwebsite>/rest/V1/
- Username
- Enter the username that you use to log in to Magento V2 in the Username field.
- Password
- Enter the password that you use to log in to Magento V2 in the Password field.
- Select what you need from the options provided by clicking the corresponding checkbox.
- Select at least one location if you want to limit the inventory to specific location(s).
- Click Test Connections.
- Click Save.
WooCommerce
- Website Name
- Enter or assign a name for your website.
- API URL
- Enter the URL with your website in the API URL: http://www.<yourwebsite>/woocommerce/wordpress/wc-api/v2/
- For example: http://www.mywebsite.com/woocommerce/wordpress/wc-api/v2/
- Enter the URL with your website in the API URL: http://www.<yourwebsite>/woocommerce/wordpress/wc-api/v2/
- Username
- This is the Consumer Key you generated from Generating Connection Credentials > WooCommerce > Step 9.
- Enter the WooCommerce Consumer Key in the Username field.
- Password
- This is the Consumer Secret you generated from Generating Connection Credentials > WooCommerce > Step 9.
- Enter the WooCommerce Consumer Secret in the Password field.
- Select what you need from the options provided by clicking the corresponding checkbox.
- Select at least one location if you want to limit the inventory to specific location(s).
- Click Test Connections.
- Click Save.