Overview
An Assembly is taking two or more items and combining them to create a new item. Creating a configurable bill of materials (BOM) is essential in modern manufacturing, it supports make-to-order production strategies by allowing quick adjustments for various product variations.
In this article you will learn:
- How to create a Configurable Bill of Materials
- How selections are chosen on the Sales Order
- How to create and jump to a Linked Work Order with the selections that were chosen
- How to create Rules to limit the configuration selections that are shown when adding the Assembly Item to your Sales Order
* A Kit and an Assembly are not interchangeable. Please see Kits vs Assemblies for details. *
Configurable Bill of Materials
Order Time allows you to offer your customers selections and options when ordering kit items or a configurable bill of materials. Once you have created them, you can establish choices and options; and you can add them to a quote or sales order later on.
The configurable Bill of Materials interface has been updated and now functions VERY similarly to the Kit interface. This article is going to assume that you know how to create an Assembly Item and a Bill of Materials, if you don't, head to this article.
FIRST - Enable the feature by going to Company Preferences >> Production >> Advanced and enabling Configurable Bills of Material and clicking SAVE.
Now head to your Assembly Item that you want to make configurable and click on the Edit Bill of Materials button.

Keep in mind with BOM Revisions turned on, your interface at the top of a Bill of Materials will look like this:

Bill of Materials Revisions and Configurable BoM cannot be used simultaneously for the same Assembly Item.
We recommend that you clone your current one and make the clone Configurable to try this out.
Once you make your Bill of Materials configurable, the BoM Revisions interface will disappear for that BoM:

Creating a Configurable Bill of Materials
Click on Config BOM to begin the process:

Here you will see an interface that is very similar to the Kit Config one:

- The EDIT button will take you back to your Bill of Materials
- The RULES can be used to set limitations based on what is chosen during the configuration, more on this later
- Config Group is where you add the different groups you want to work with. Group types include Variable and Yes/No.
- A Variable group allows you to choose 1 option. When you see it on the Sales Order it will be a choice with a radio select button.
- The Yes/No group allows you to choose any option. It's like a multiple choice selector where you can choose as many options as you would like.
- Config Selection is where you will add the selections under each Config Group

Clicking the Add button under Config Group lets you add as many as you need. In the example above I'm naming it, setting it as Variable, adding a description and clicking on Save.

The currently selected Config Group is highlighted, now I can add selections below by clicking the other Add button

Add your Selections, choose the price per, quantity per, whether it is a One Time use, and click Save

Make sure to add the Step column and any other columns you deem useful via the cogwheel on the upper-right of the Config Selection section. As you can see it automatically assigned this selection to the default Picking Step on my BoM. If you have multiple Steps, it will give you the choice of which one to apply it to.

On a Variable Config Group you can click on the check mark icon on any of the selections to make that selection the DEFAULT.
At any time you can click the EDIT button up top to jump back to the BoM to see the newly linked Components.

Add the Config Group Column to your Component section within the Bill of Materials via the cogwheel as well. This will show you which Components are linked to which Config Group. Any Components on your BoM that are not linked to a Config Group will ALWAYS be present for the construction of your Assembly Item. So you can add Components to your Steps as normal and use the Config BoM for JUST the configuration options on the Item.

Next I'll be adding another Config Group called ADD-ONS, it is a Yes/No type. With this I will add four different selections that can be chosen at random.

With that Config Group selected, I will add my selections below just like before.

I added another Step to the BoM, so for all of my ADD-ONS I'm going to choose that Step. Keep in mind, choosing Optional will make the selection default to Yes when you are configuring from the Sales Order.

Now I've added all of my selections for the Yes/No Config group.

They all show up under my Chambering Step on the BoM, as part of the ADD-ONS Config Group
Let's See It In Action on a Sales Order
Create a new Sales Order and add your Assembly Item to it. This will open a special configuration wizard:

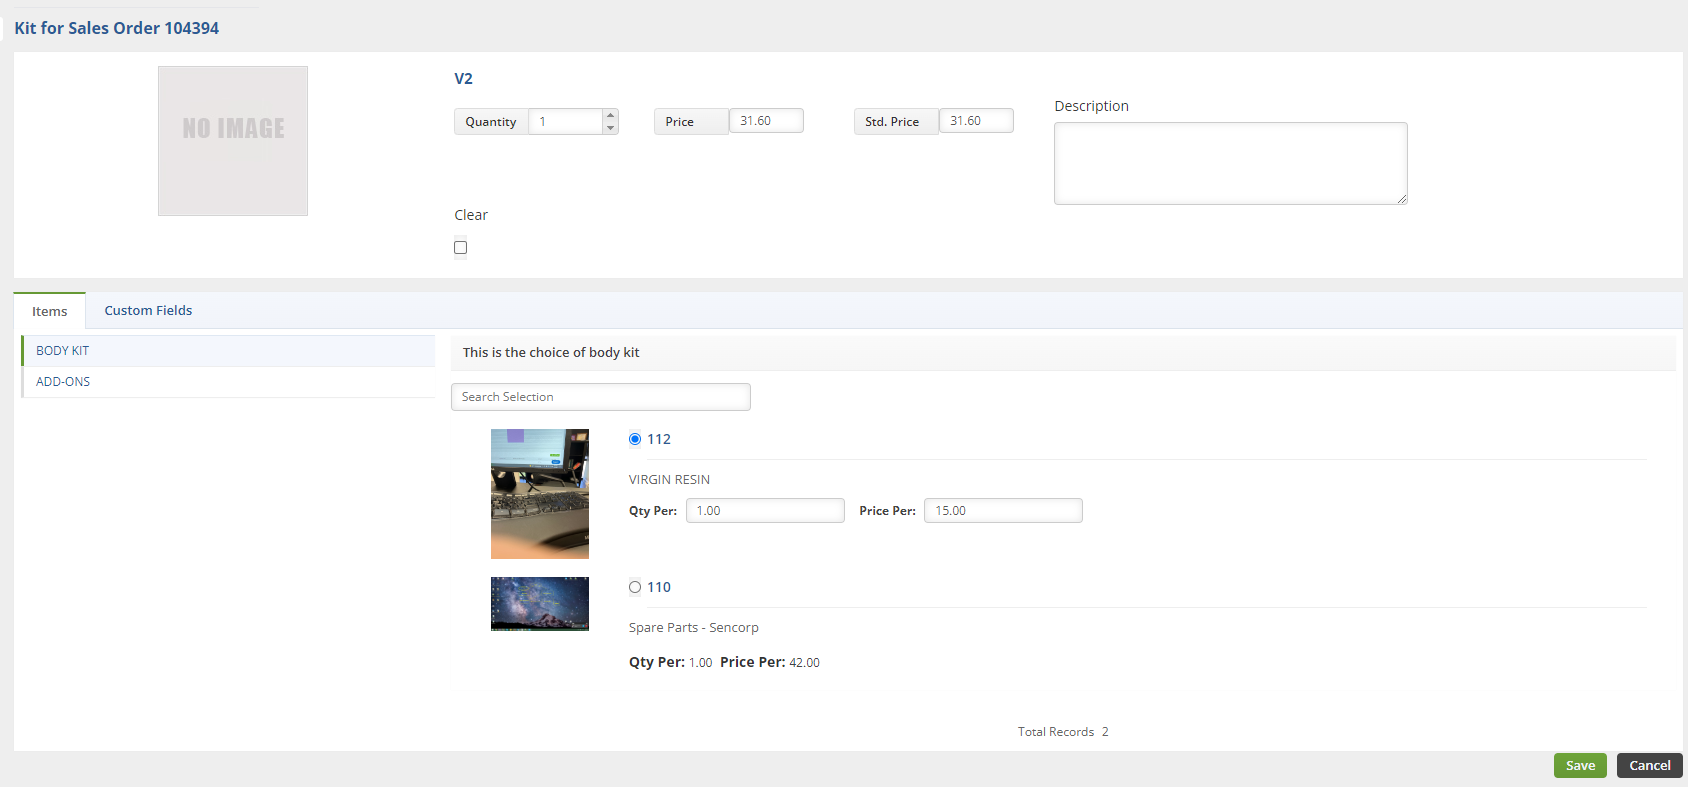
- It allows you to choose the Quantity, price, add a description and then make your choices.
- As you can see the description I chose for the BODY KIT Config Group shows at the top of the selections.
- The BODY KIT Config Group is Variable so I have to make 1 choice for this group, I can set the quantity, unless one time was selected, and the price.
- Then click on the next Config Group on the left, in this case ADD-ONS

For my ADD-ONS Config Group which is a Yes/No, I'm only going to choose 2 of the 4 selections. Once all selections have been made, you click Save at the bottom-right.

The Sales Order now shows that I have added 1 Qty of this Assembly Item to the order. My selections and their quantities are shown below it.

Change your Sales Order to the Approved status and click on the Dependency tab. From here you can click on the Linked WO button to create a Linked Work Order immediately.

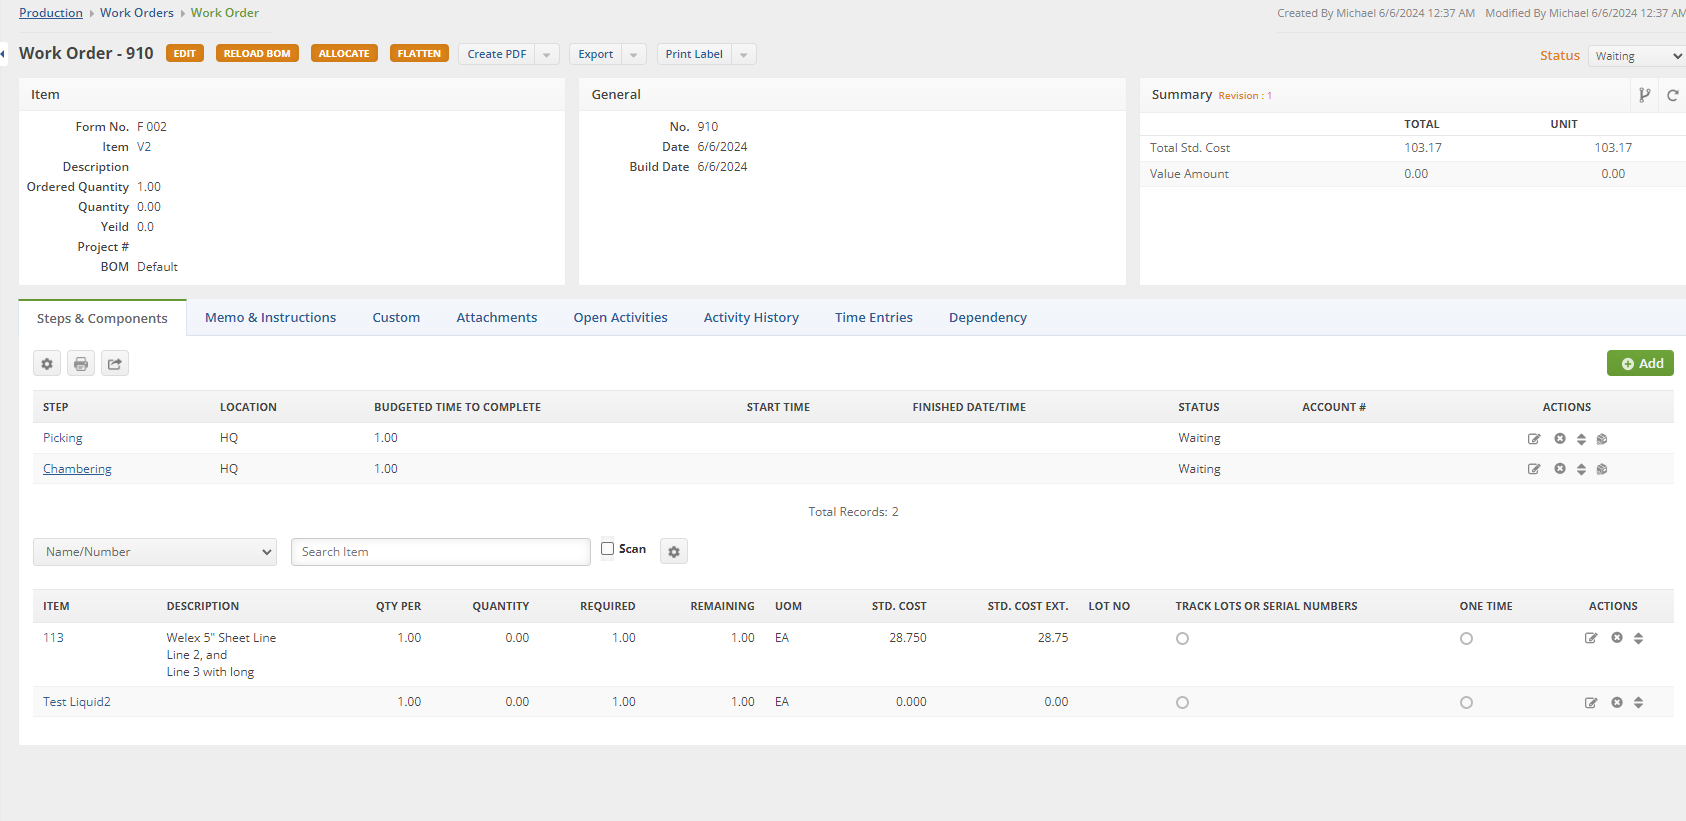
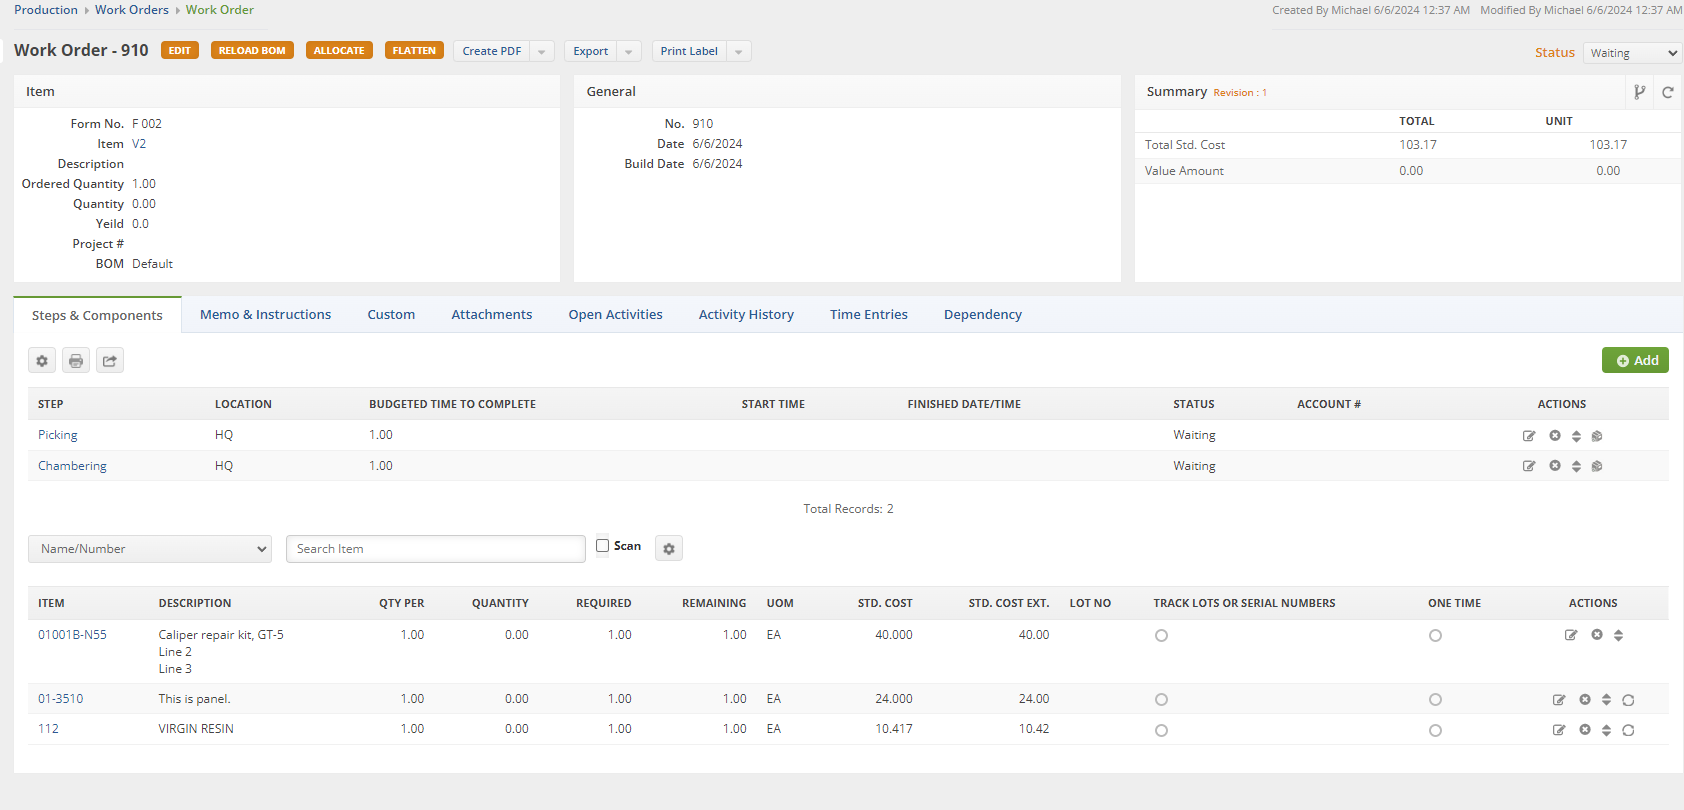 Linked Work Order Showing the selections I made - Picking Step
Now all that's left is to complete the Make-To-Order Item via the Work Order, and complete the Sales Order. Using a configurable Bill of Materials can help you make sales and jump directly into production very quickly with all of the selections in place.
Using Rules to Limit Configuration Selections

To limit selections, click on the RULES button on the top of your Configurable BOM.
You'll see this interface:

Using this tool we can limit the Selections of our Yes/No groups so that they Depend on the choice that is made in our Variable groups. You can create as many Variable and Yes/No groups as you need, and because of this you can also make as many Rule sets as necessary to limit the Yes/No selections. This is an advanced feature!
Example -

For this example I am making it so that if Item 112 is chosen from my BODY KIT Variable Config Group, then the only selections for my ADD-ONS Yes/No Config Group that will show are 113 & 113A.
Click Add and then Save

 Now back on my Sales Order I choose the 112 Item from the Variable Group
 This limits the Yes/No choices down to just the two I chose
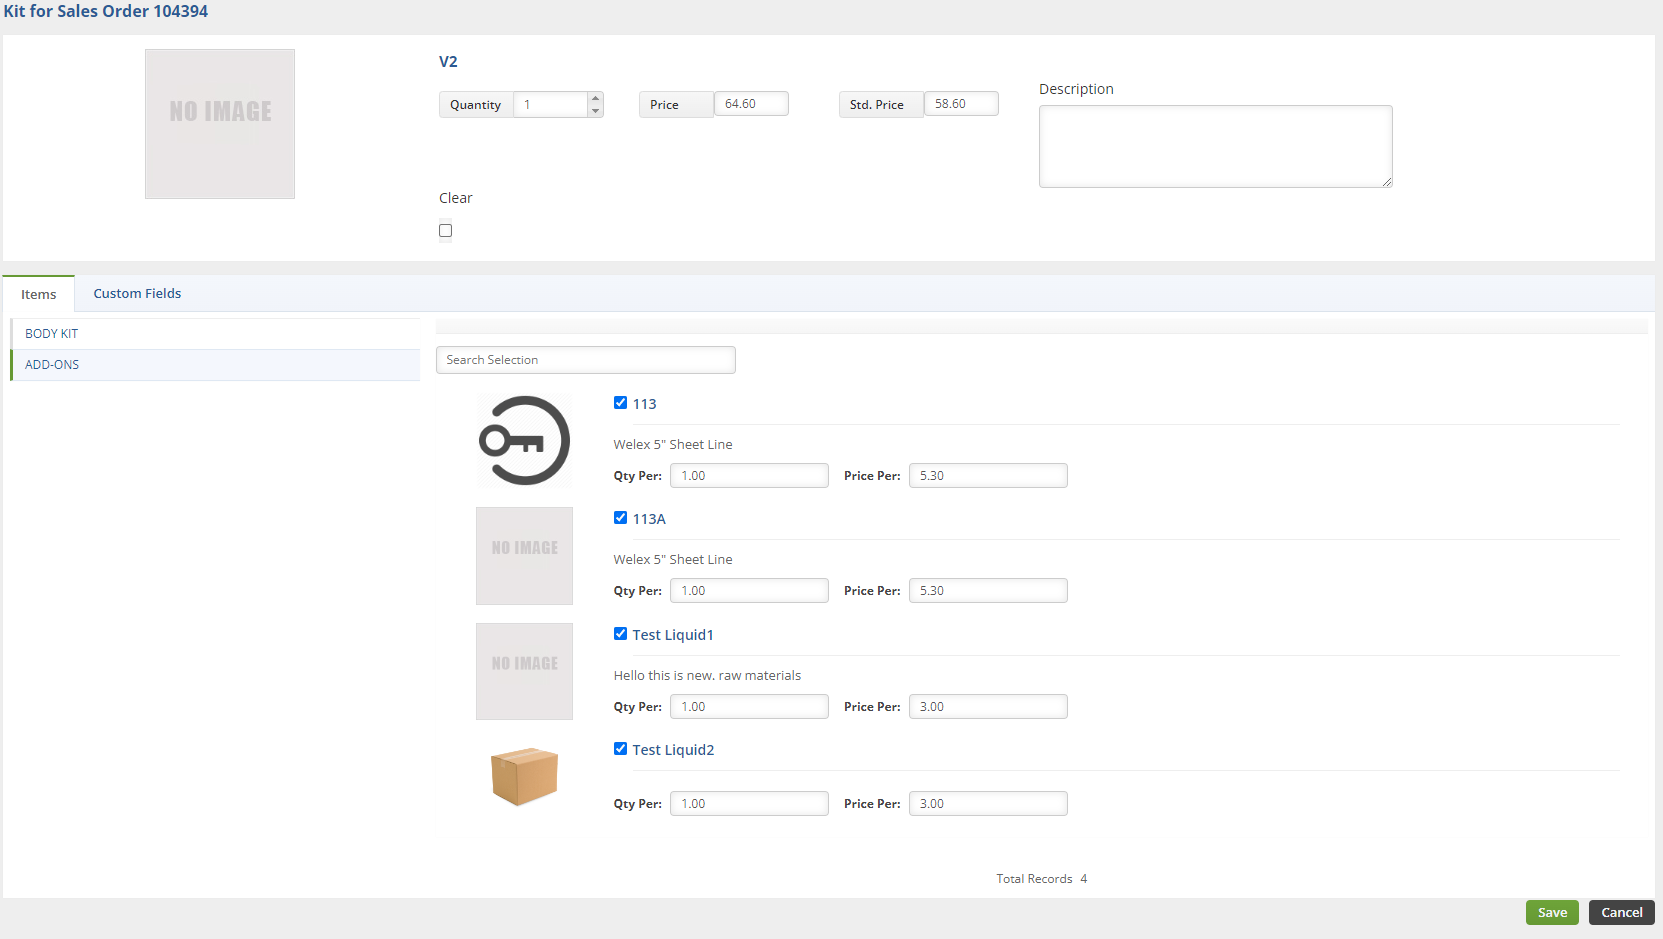 If I go back and choose a different selection from the Variable Group, then ALL of the Yes/No selections are available
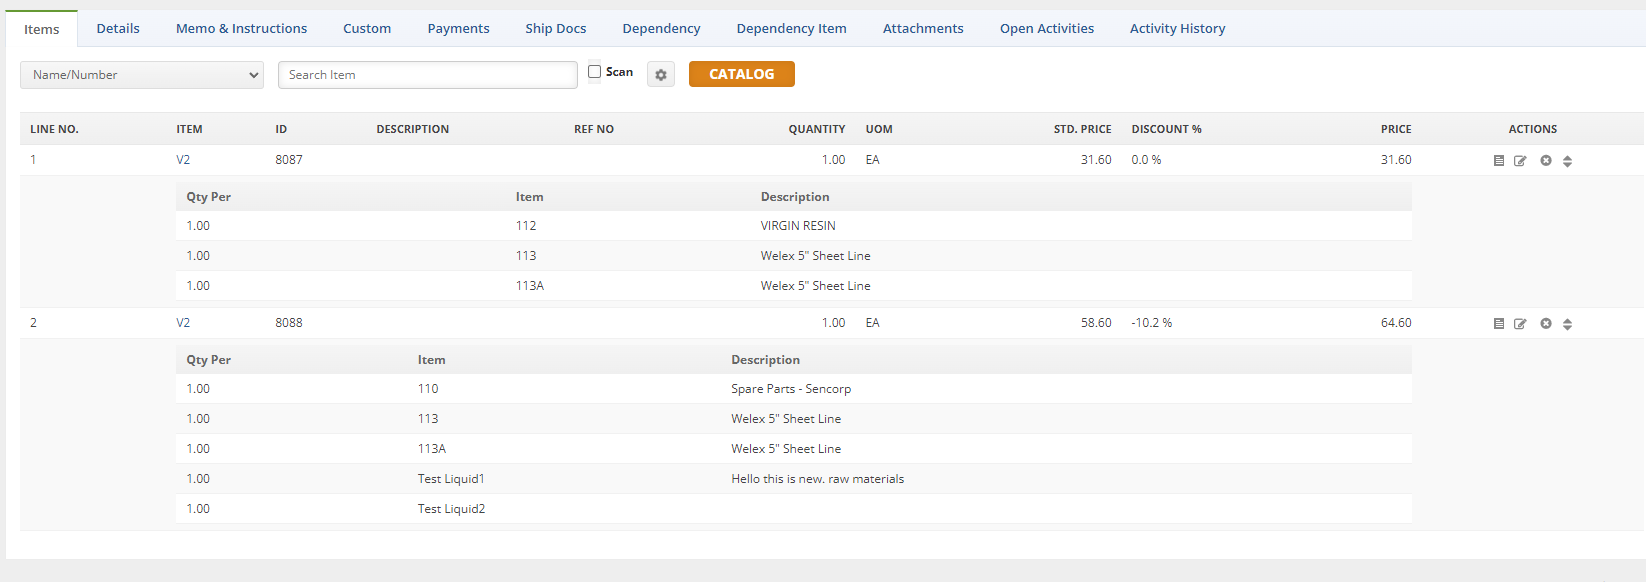 In the end, I added two of the same Assembly Item to my Sales Order. I made completely different selections on both of them.
 All of the selections are shown in the matrix view below the line item.
Clicking on the Edit button for the Line Item takes you back to the wizard so that you can make different selections.
By using the Rules, you can create incredibly complex Configurable Bills of Material with tons of selections to choose from. Limiting the selections makes it so that any configuration that is not possible can be blocked from being chosen.
As always, if you need some in-depth training, please reach out to us at support@ordertime.com
