Overview
There might be occasions when you need to return an Item or Items back to the Vendor, like the following scenarios:
- When there is an error in shipping.
- The Item (s) arrives damaged.
- You have a special arrangement with the Vendor to return unused stock.
Vendor Returns are transactions that show what Items are shipped by you back to the Vendor.
There are two ways to start Vendor Returns in OrderTime:
- Creating a new Vendor Return from the Side Menu.
- Creating a new Vendor Return from the Receiver page (tied to a closed Receiving Doc).
Creating a new Vendor Return from the Side Menu
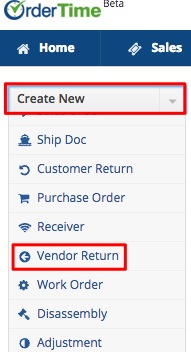
Vendor Return can be easily processed by selecting the Create New drop down menu and selecting the Vendor Return option.
- Click on the Side Menu.
- Select Create New.
- Select Vendor Return from the drop down menu.
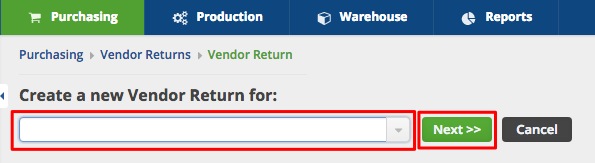
- Enter the vendor name on the Create a new Vendor Return for box. A drop-down menu will provide you with a list of customers that are already in your database. Select the appropriate vendor.
- Click the Next>> button to proceed to the next screen.
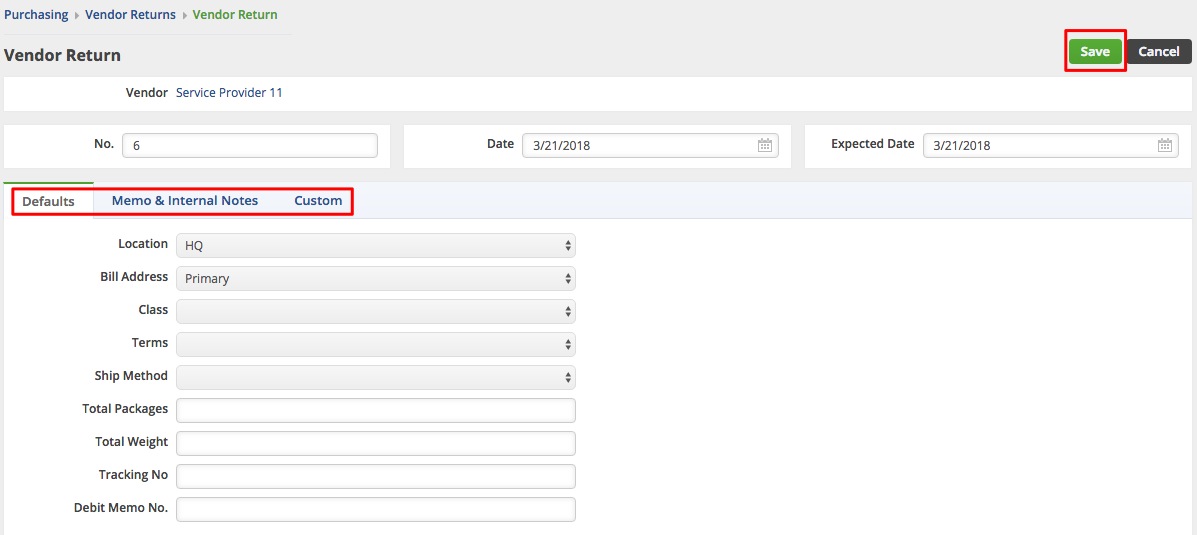
- Review the vendor information.
- Select the Date if it is different from the day of origination. (Date is auto-filled)
- Select the Expected Date if it is different from the day of origination. (Date is auto-filled)
- Provide more details by completing the other tabs: Default, Memo & Instructions and Custom.
- Click Save.


Creating a new Vendor Return from the Receiver page
A Vendor Return can be directly created from the Receiver page. When the status of a Receiving Doc is updated to Closed, the Vendor Return function will be available on the Receiver page.
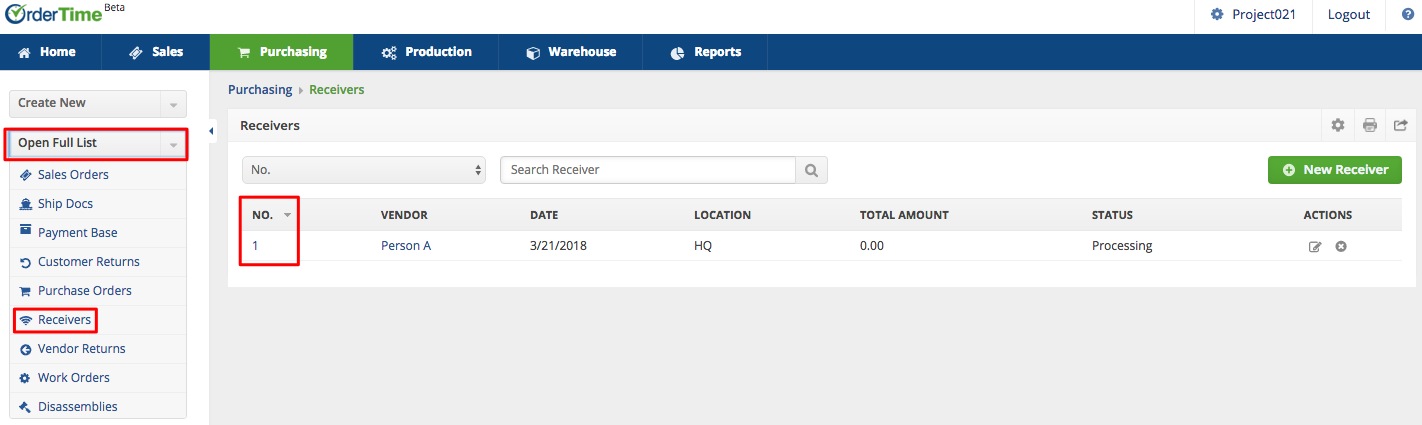
- Click on the Side Menu.
- Select Open Full List.
- Select Receivers from the drop down menu.
- Click the number of the Receiving Doc that is associated with the Vendor Return that you are about to process. Note: Alternatively, you can click on the Receiving record under the Recent Records section on the Side Menu.
- Change the status in the top right corner of the reviver to closed in order for the return button to appear.
- On the Receiver page, click the Return button.
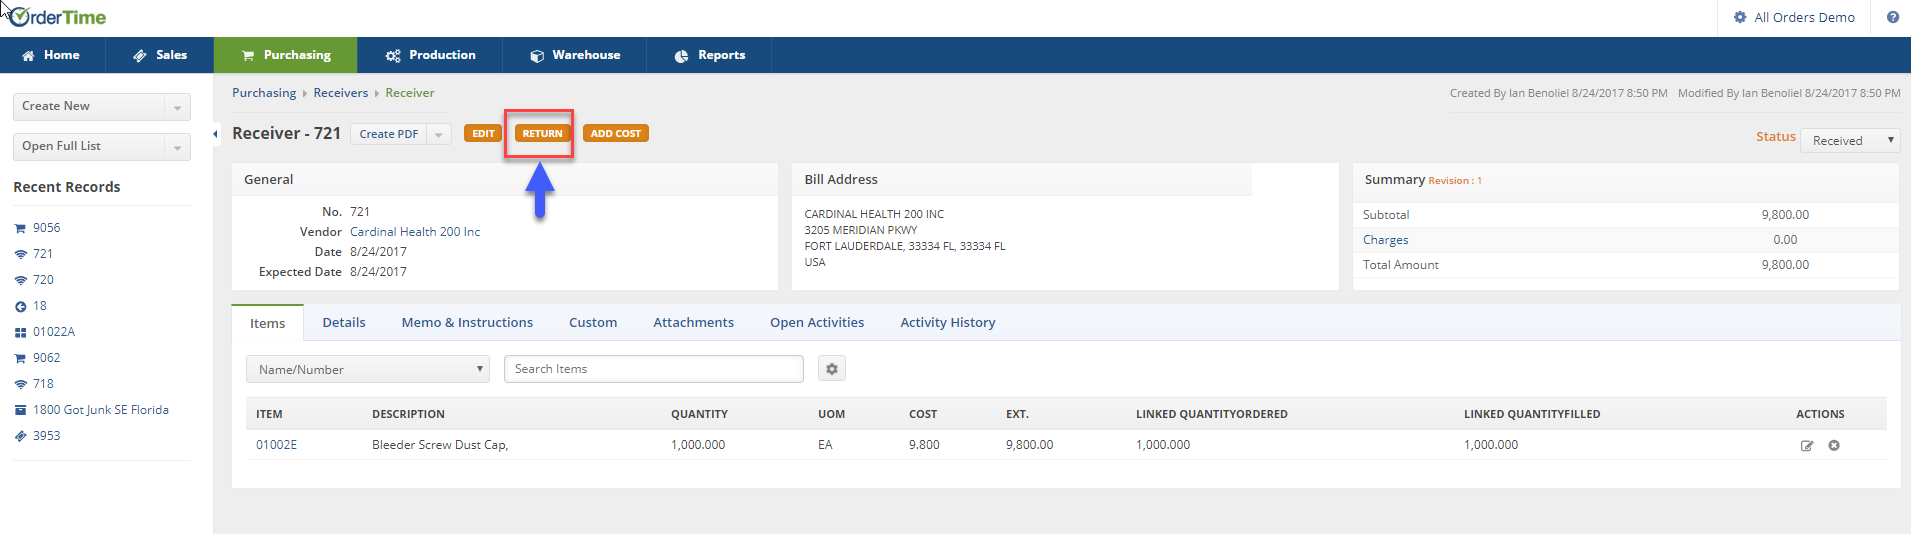


The ADD COST icon allows you to enter an Amount set/cost for this transaction. A pop-up screen will open up, you can enter the amount associated with this return, the account to be used, select the vendor, enter a reference number, how it will be allocated (i.e. Cost, Quantity, Volume, Weight).
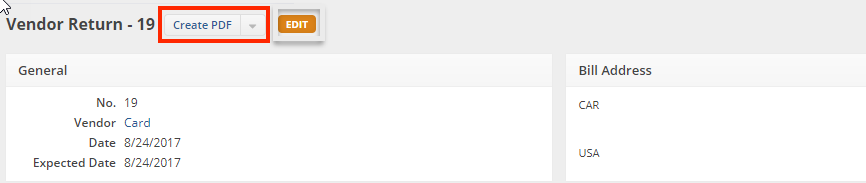
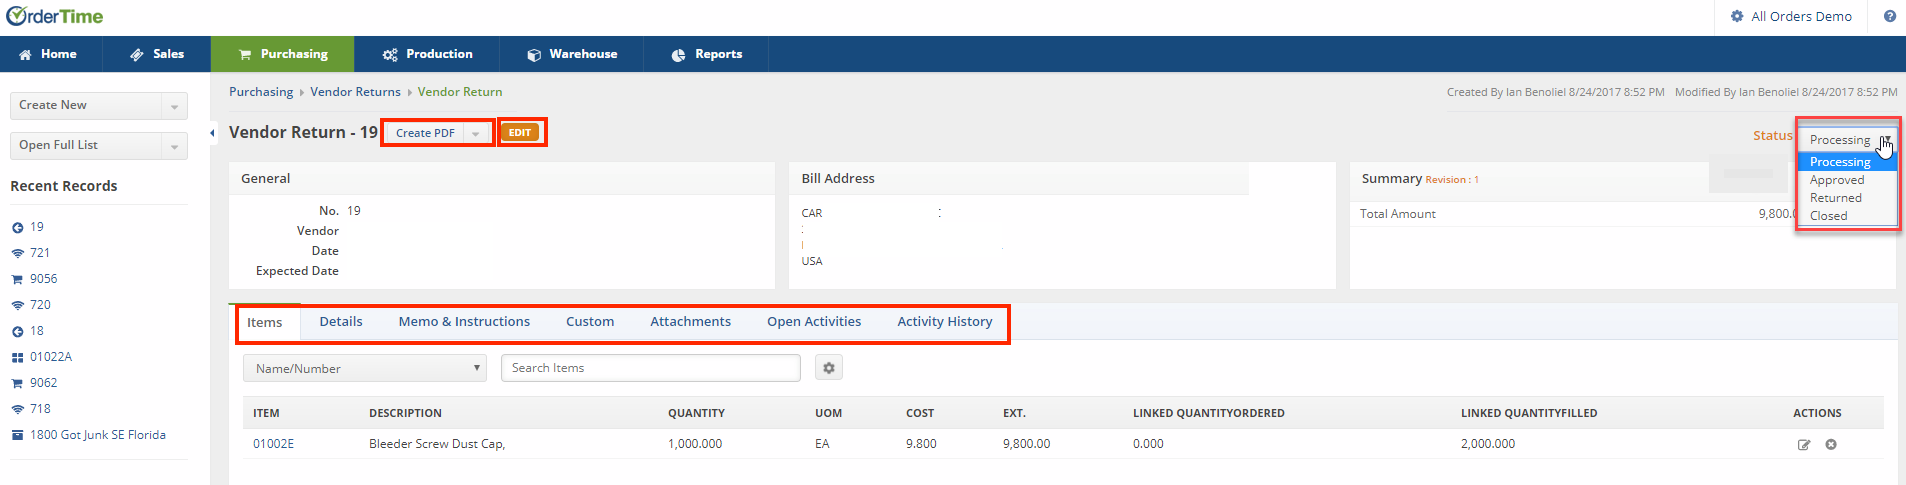
6. On the next screen, the Vendor Return page will display. Click Create PDF to print and/or email the Return to Vendor form to the addressee.
You can also do the following in Vendor Return page:
- Use the Edit button next to the Create PDF drop down menu to make changes.
- Process returns, send emails, add attachments, create a log, and add notes to your Vendor Return.
- Under the Memo & Instruction tab, you can include notes and Date Stamp as needed.
- Create a PDF file of the Vendor Return.
- Update the status of the Vendor Return.
You can directly change the field values by clicking on the line item (item row). Field boxes will appear, and you can add details or edit the information accordingly.
Processing Partial Vendor Returns - Return Select Items From Receiver
There are certain situations where you may need to return part of an original shipment to a Vendor. You have the capability of processing these returns as mentioned above by selecting the "Return Select Items From Receiver" option in Company Preferences.
From your Admin screen select Company Preferences and navigate to the Receiving preference. This will present the Receiving preferences available for Vendor return processes and you will find the "Return Select Items From Receiver" checkbox. Check the box and select Save in the upper right hand corner of the screen to allow for Partial Vendor Returns. 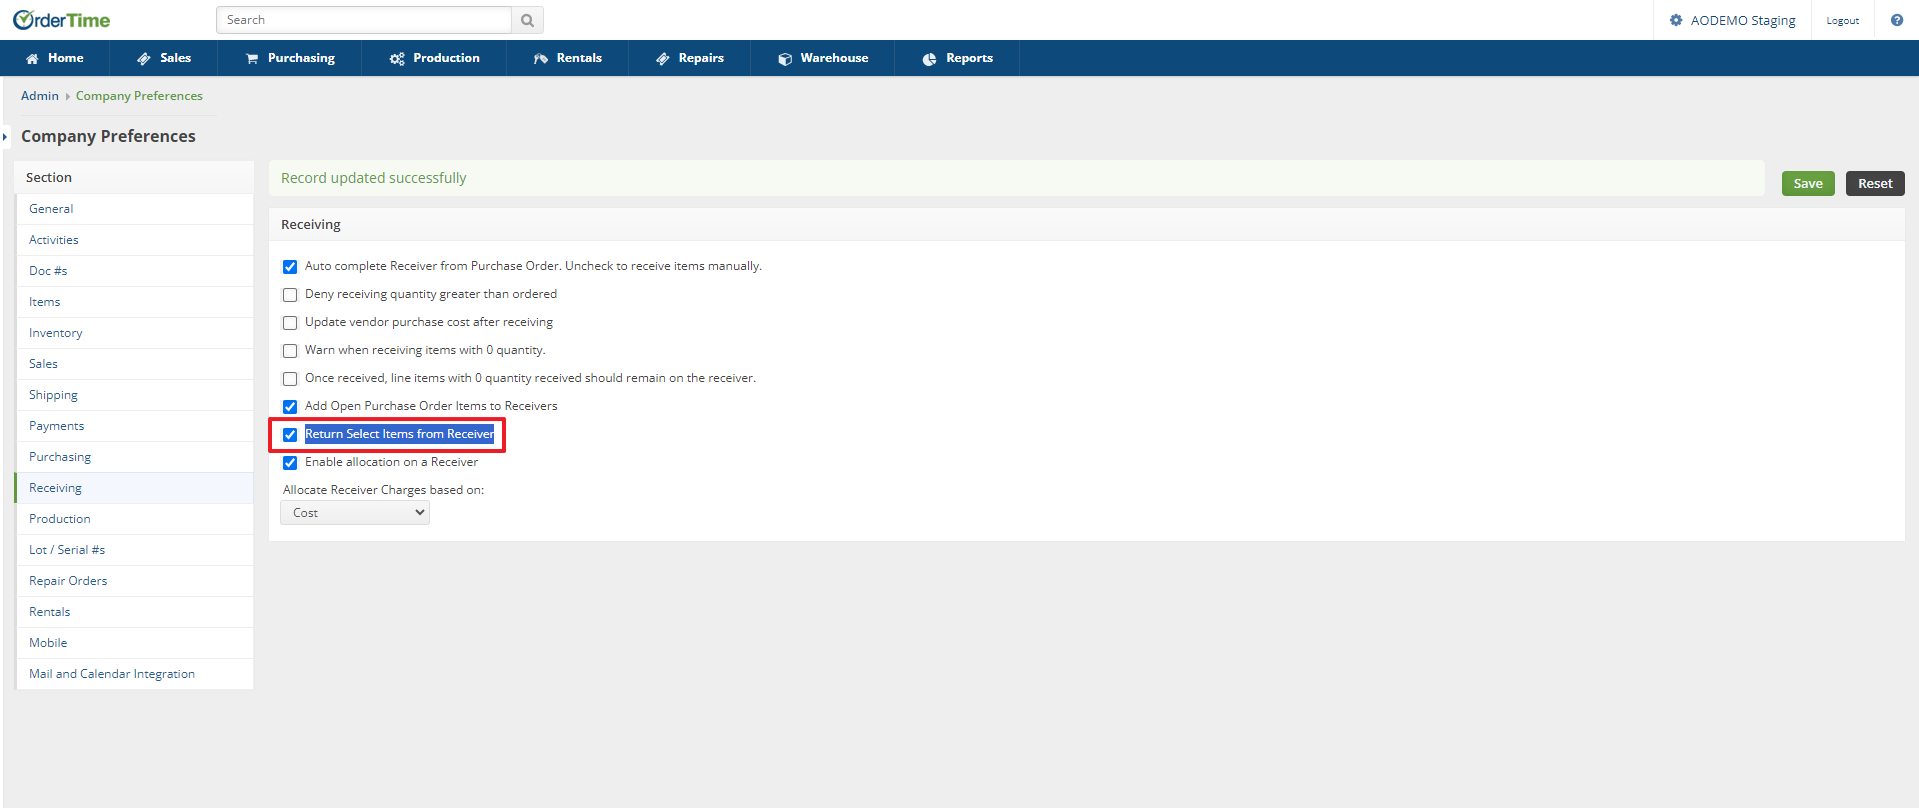
Creating a PDF File for the Vendor Return
A Return to Vendor form can be printed and/or emailed to the addressee.
- Click the Create PDF button next to the Vendor Return number.
- The PDF version of the Vendor Return form will open.
- Click the Save and Email button to send out the PDF file. Alternatively, you can Save (only) the PDF file by clicking the Save button.
- The Send Email screen will pop up. Fill out the fields. You will have the option to attach additional information, carbon copy individual in your company.
- An email template is provided, select the appropriate template from the Template drop down box.
- Click Send.
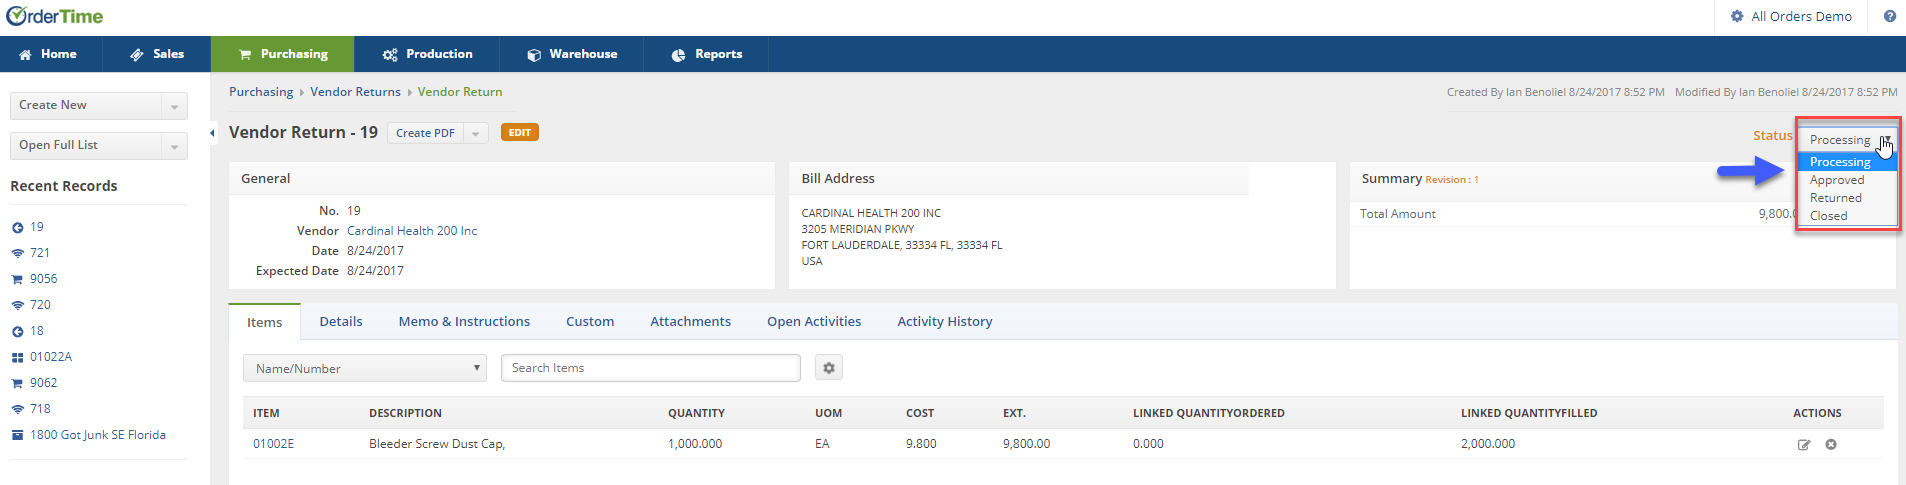
Changing the Status of the Vendor Return
Once the Vendor Return has been created, the status of the Vendor Return can be updated by selecting the appropriate status from the drop down menu. On the top right side of the screen next to Status, use the drop down menu to change the status of the Vendor Return. The following status options will be available for the Vendor Return:
- Processing: Vendor Return is in progress and in the process of updating documents or records.
- Approved: Vendor Return has been approved and the return shipping will be initiated.
- Returned: The Items have been returned to the vendor.
- Closed: The Vendor Return is closed.