Overview
Work orders are internal documents that specify the finished goods that need to be produced as well as the components required to produce them. You must first create one or assembly type items before creating work orders. Typically, an assembly item will have a bill of material.
* A Kit and an Assembly are not interchangeable. Please see Kits vs Assemblies for details. *
Create a Bill of Materials
The Bill of Materials or BOM is like a recipe, it tells the system which components are required to make the finished good. When a work order is created, the system knows how much of each component is required and display the quantity available for each component on the work order. A BOM will also have one or more production steps. Production steps allow you to split the BOM into multiple processes.
Please see the article, Nested Bill of Materials Vs Steps, to understand the differences between the two concepts.
Follow the steps below to generate a Bill of Materials (BOM).
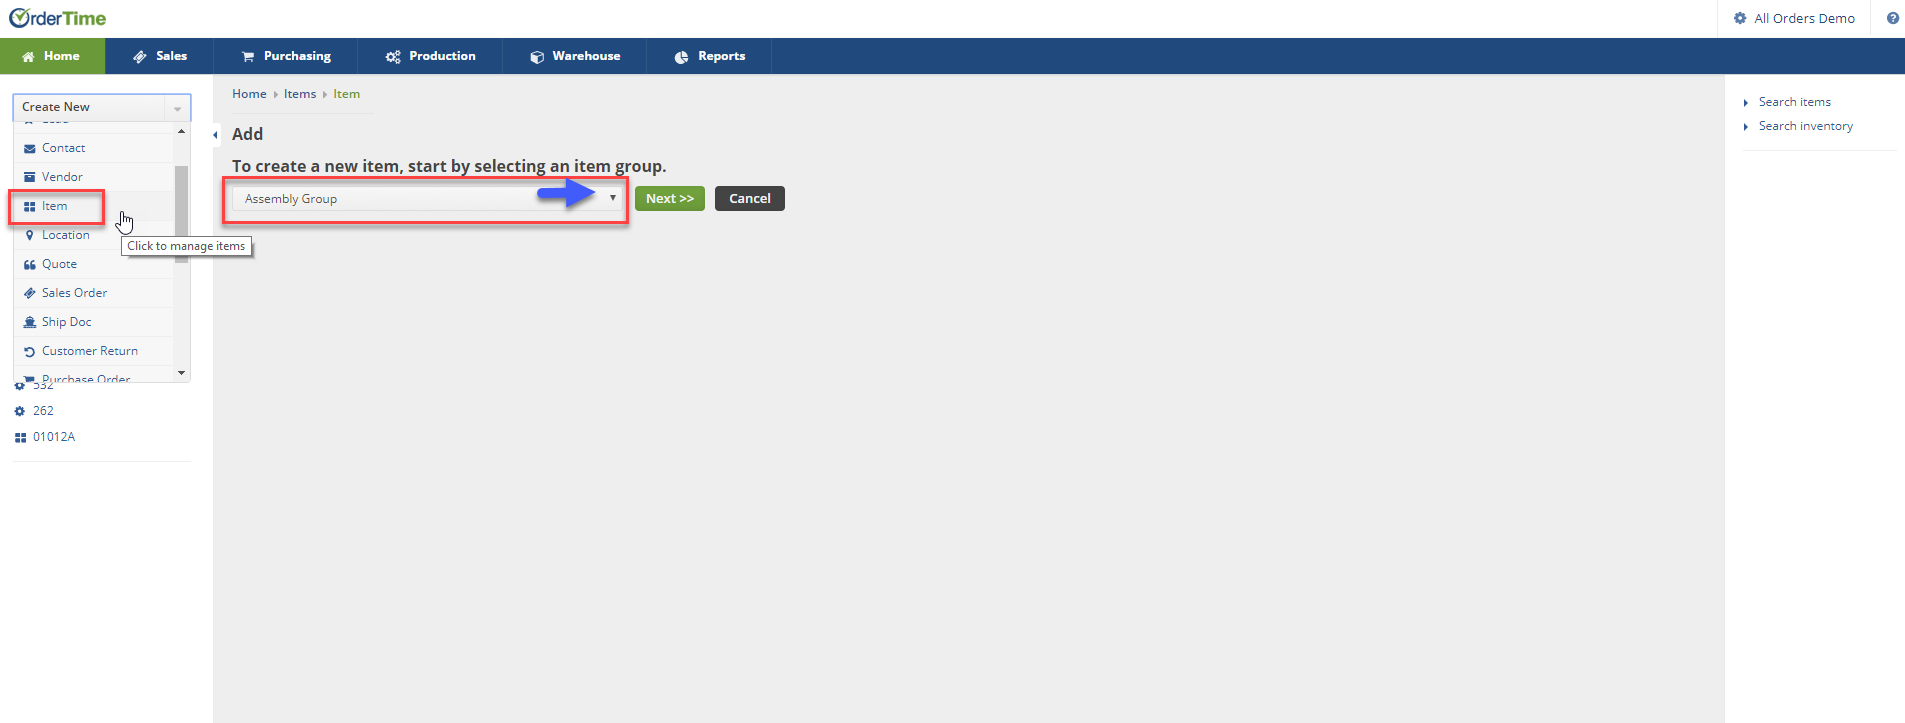
- Click on the side menu then, click the Create New drop down menu and select Item.
- Under the drop down list, select Assembly Group. Click the Next>> button to continue.
3. On the Item screen, enter a name for the Assembly Group. Under the Unit of Measure (UOM), select desired unit of measure.
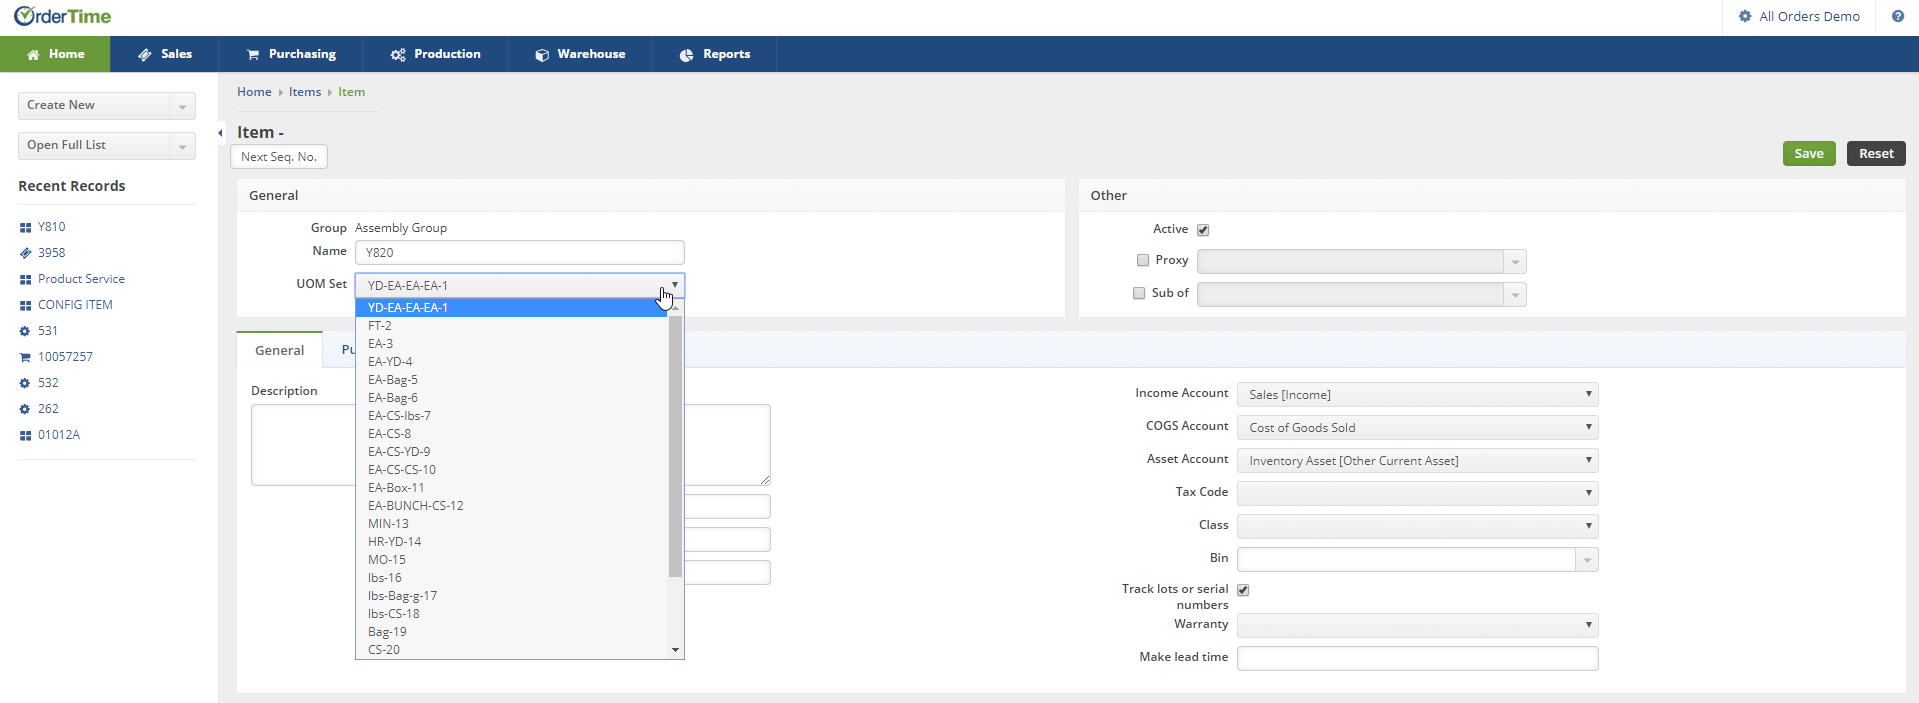
4. Complete each tab (General, Purchasing, Notes and Custom) as needed. Tabs use information that will be added to your item characteristics.
5. Click Save to move to the next screen.
Adding Steps and Components to your Bill of Materials
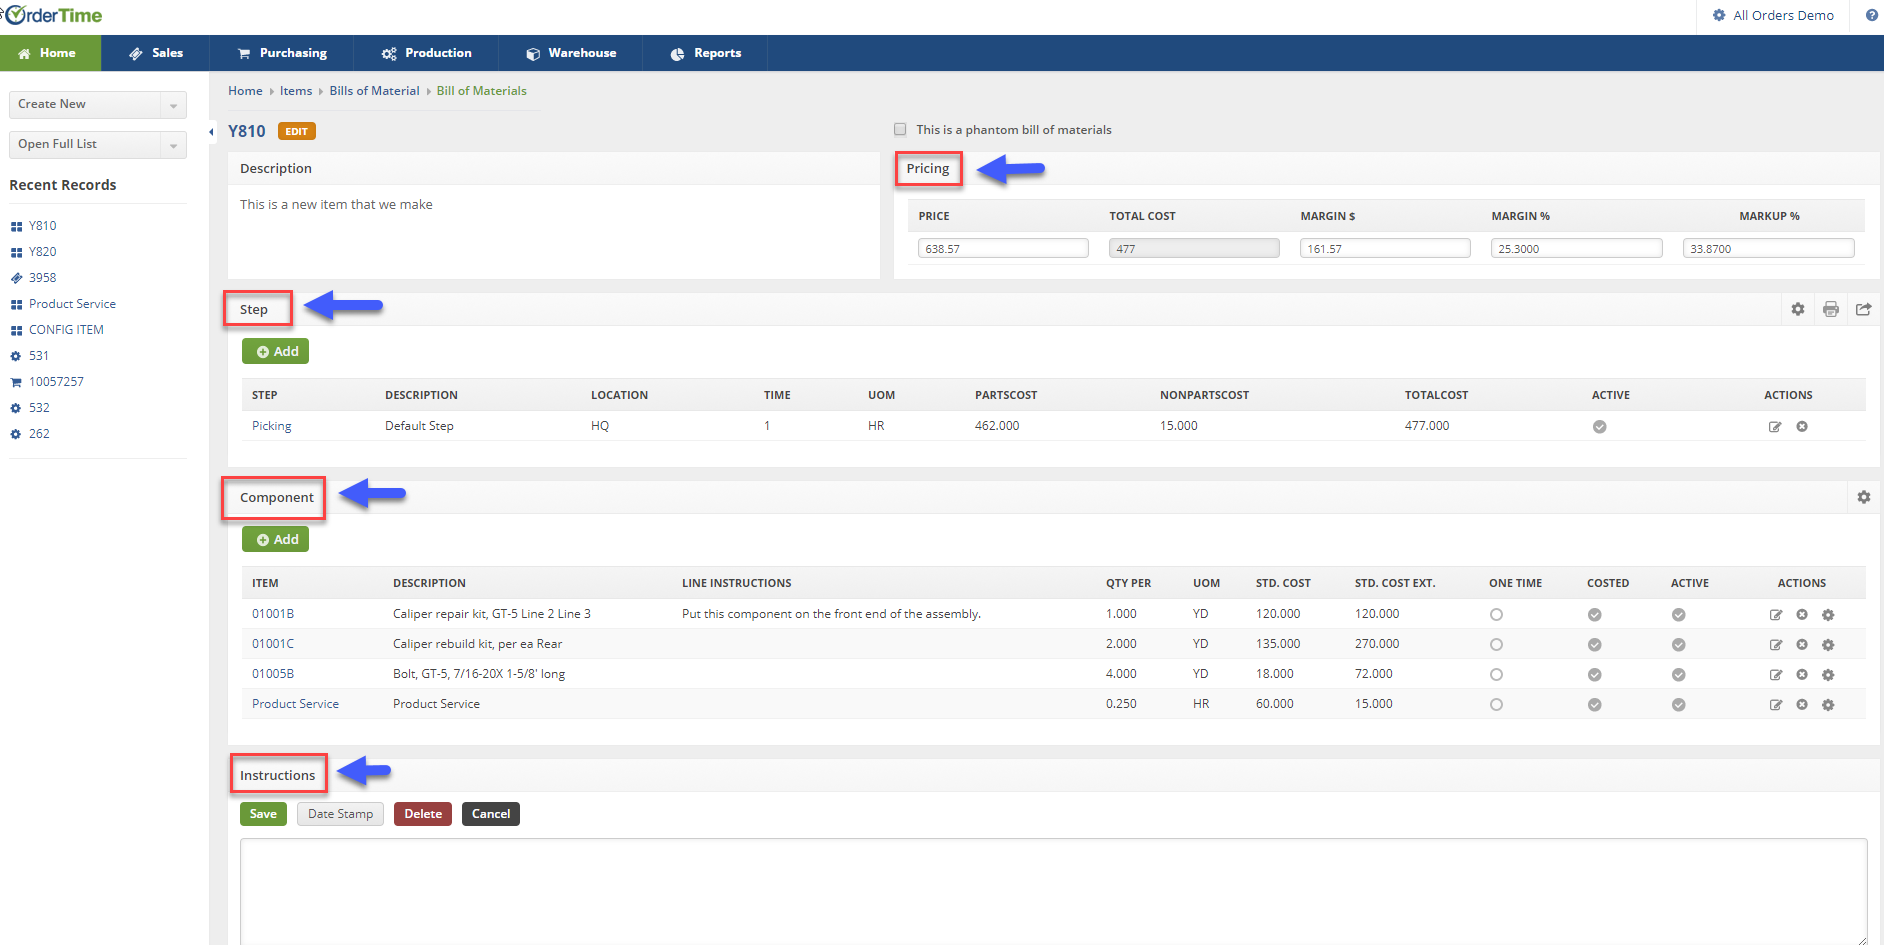
- The next screen will display a section for adding your Steps to the Bill of Material and Adding Components.
- You will also be able to review or change price, review total cost, change dollar margin, percentage margin, and total percentage markup.
Adding Steps
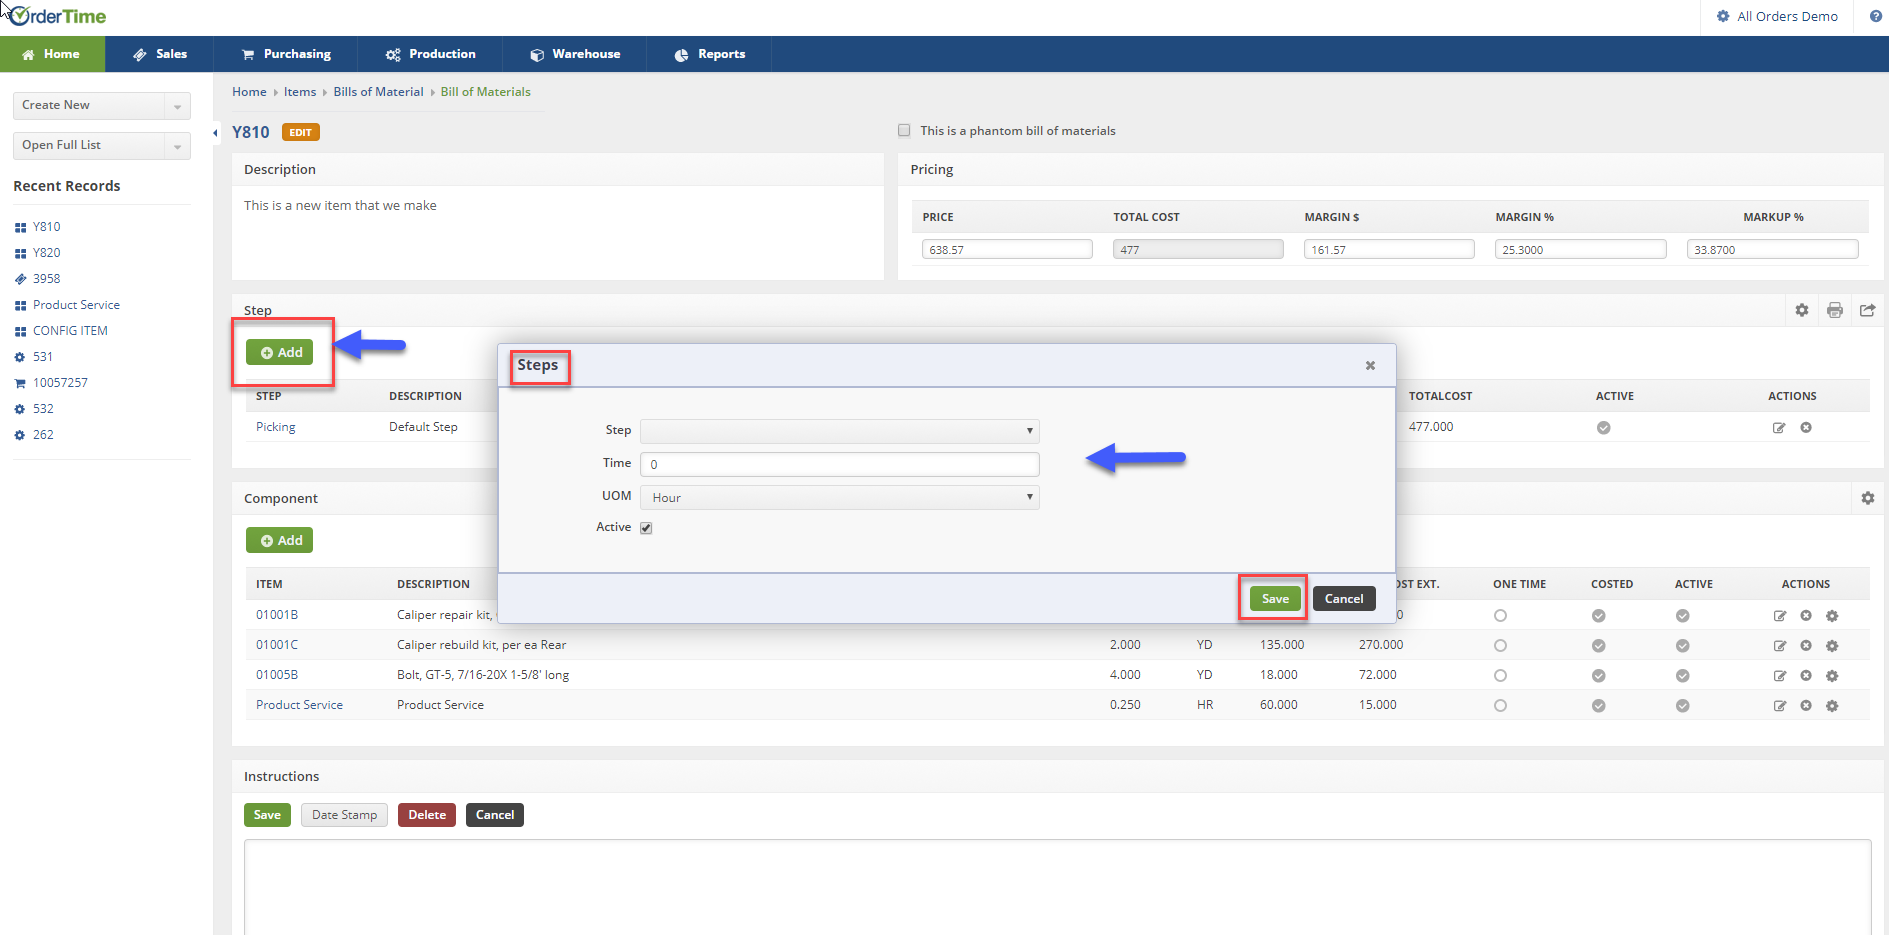
- To add a step to your Bill of Materials click the +Add button under Steps section.
- The Steps pop-up dialog box will be displayed. Complete the following information:
- Enter the steps required for the assembly process (i.e. Picking, QC, Assembly, etc.).
- Enter Time needed to complete this task.
- Select Unit of Measure (UOM) to be used (i.e. Hour, Week, Month).
- Select if steps are Active.
- Click Save.
Adding Components
- To add components to your Bill of Materials, click the +Add button under the Components section.
- The Components pop-up dialog box will be displayed. Complete the following information:
- Enter an Item.
- Type in a Line Instruction.
- Enter the Quantity Per (Qty Per).
- Select if this is a One Time process.
- Select if Active.
- Click Save.

Adding Instructions
In the Instruction section, you will have the ability to type in additional instructions for the employees working on the Production process.
Instruction can streamline your lines of communications between the employees working on the work order.
- A Date Stamp is available to mark a Date when the instruction was entered.
- Click Save when done.

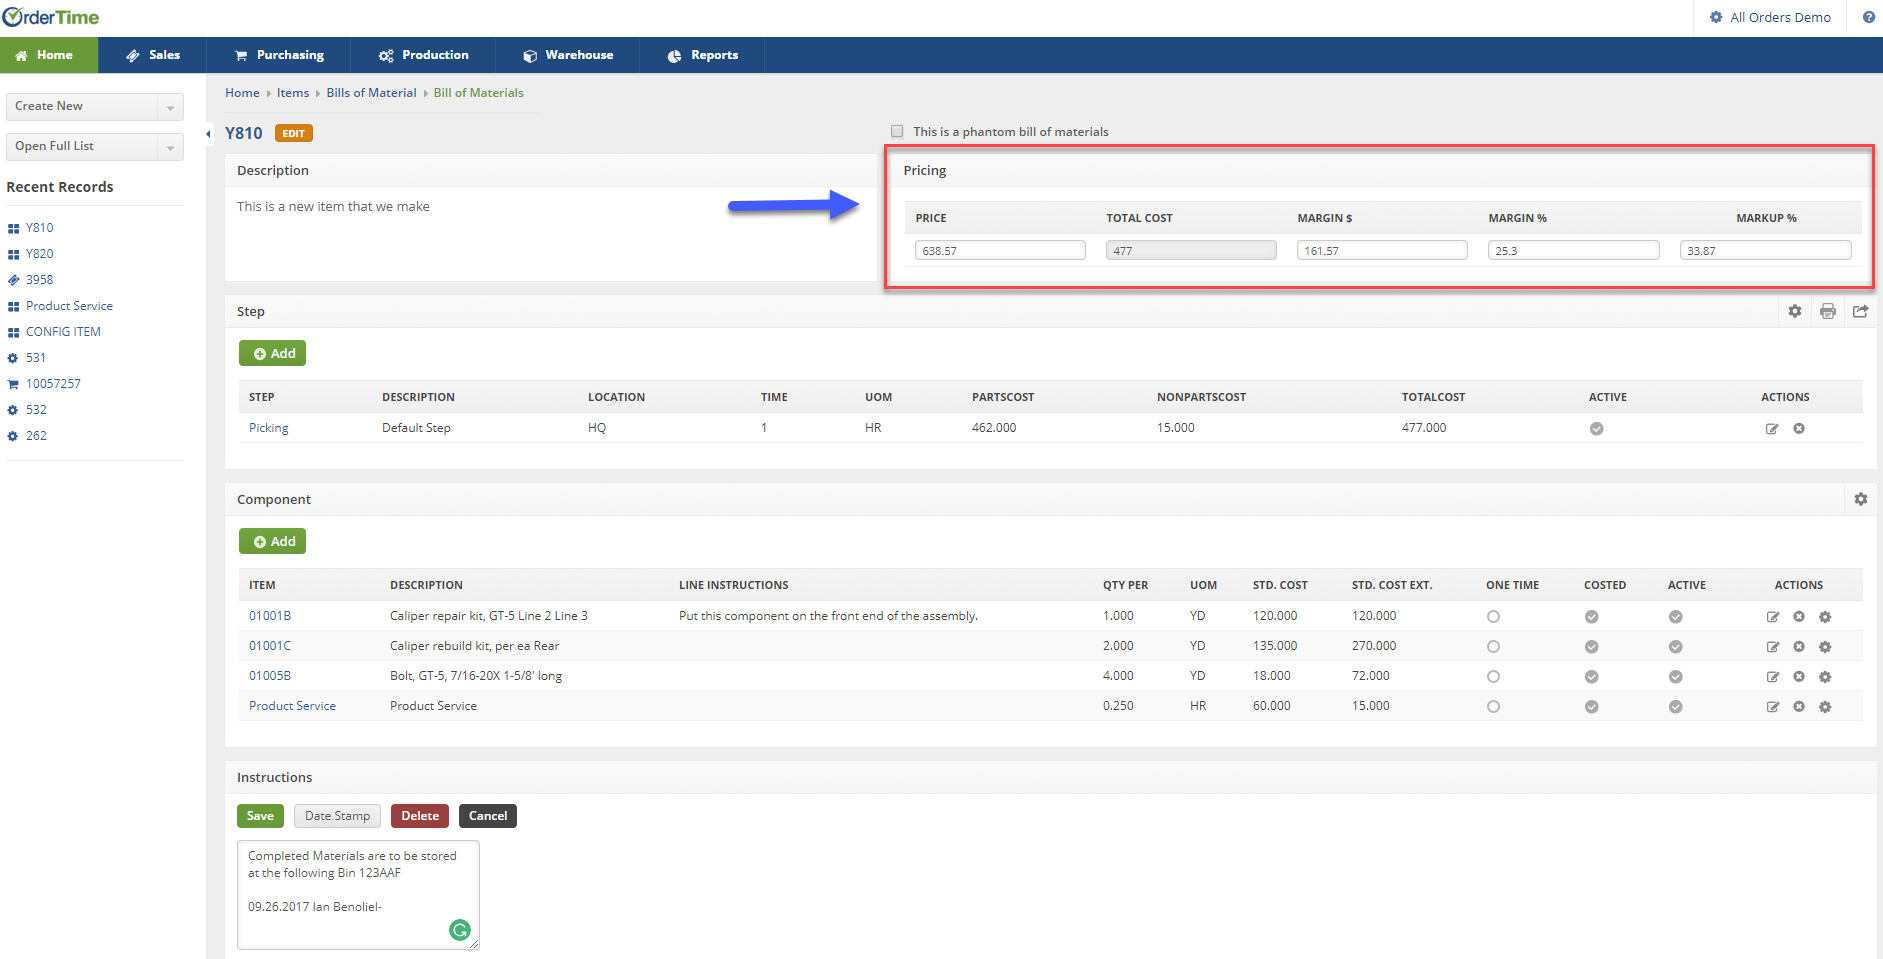
Adding/Reviewing Pricing
Once you have selected steps and added components to your Bill of Materials, you can review the Pricing associated with it.
- Price can be manually entered OR can auto calculated based on the Cost and Margin or Markup entered.
- Total Cost will indicate your current accounting cost to create a product.
- The MARGINS% will indicate your profit margins.
- The MARKUP% will indicate your product mark up.
You can enter a new value in the Price field and the system will calculate your margin and markup. If you want to set your pricing based on your desired margin, enter a value in the Margin % field and the system will compute the price.
At this point, you have already created a Work Order with the Bill of Materials.