The following article is based on features coming in Release 1.0.31
Overview
Defining Consignment: Consignment is a business arrangement in which a business, also referred to as a consignee, agrees to pay a seller, or consignor, for merchandise after the item sells. The business accepts items for sale and agrees to pay the seller a percentage of the proceeds if and when the goods do sell.
- Consignment is an arrangement in which goods are left with a third party to sell.
- The party that sells the goods on consignment receives a portion of the profits, either as a flat rate fee or commission.
- Selling via a consignment arrangement can be a low-commission, low-time-investment way of selling items or services.
- Most consignment shops and online dealers will offer terms, but some are willing to negotiate.
- Consignment is a good workaround if you don't possess a physical store or online marketplace in which to sell your goods.
Turning on Consignment
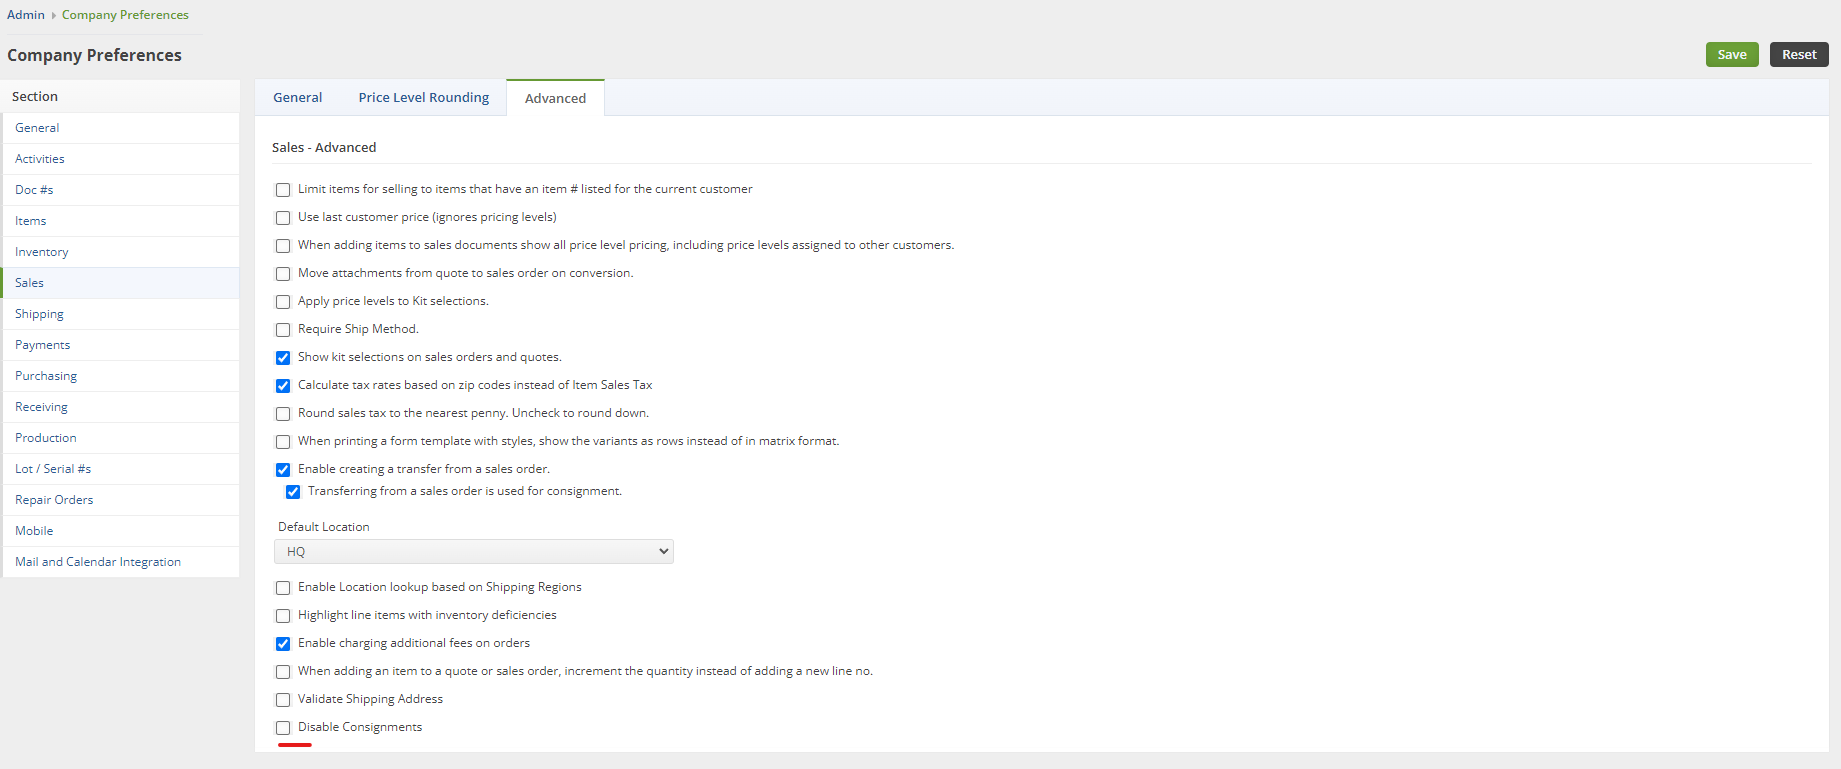
- Head to Admin > Company Preferences > Sales > Advanced Tab
- Uncheck the preference called Disable Consignments
- Click Save
Preparing to create a Consignment
- Make sure to have the Consignment Customer as a Customer in the system.
- Learn more about creating customers here.
- Create a new Location in the system that also has a similar name to that Customer.
- Learn more about creating Locations here.
Creating a Consignment
Click the Create New drop-down list and select Consignment:
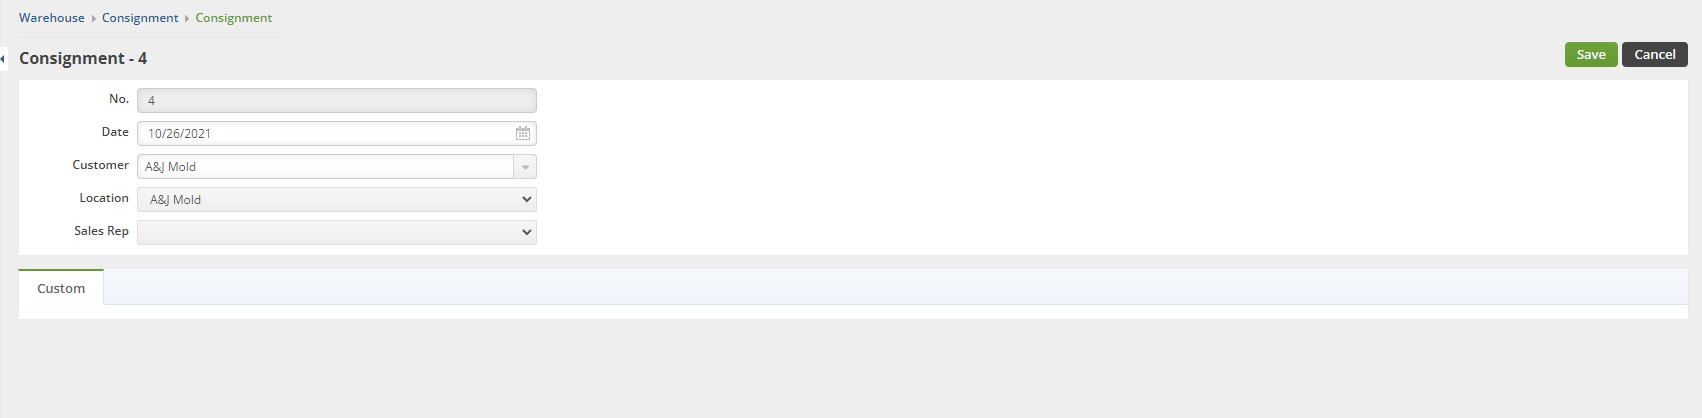
Here you will select the Customer and Location that you created in the previous steps.
Then click Save.
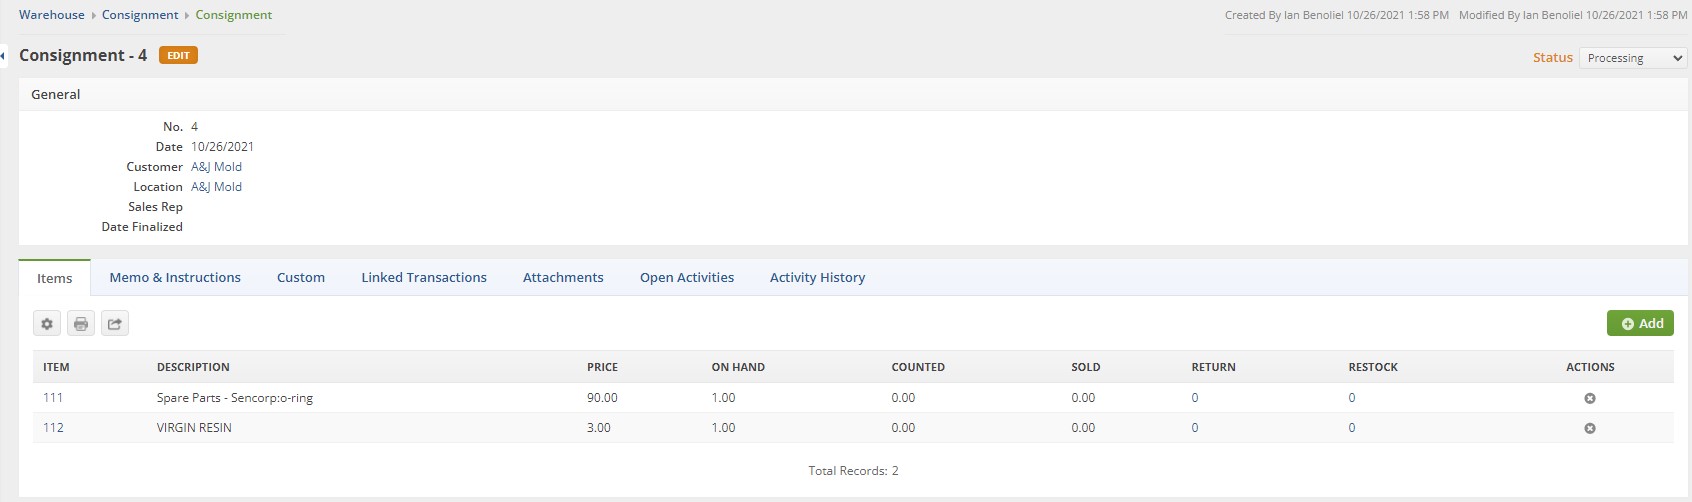
On this next screen you will see the current Items that are at that location.
- The Counted auto-updates when some Items are set to Sold, the Consignment Location should double-check that the Counted matches up with what is left in stock at the store/location
- Select how many have been Sold, if any
- This will create a Ship Doc when the Consignment is Approved, Finalized and Closed
- The Ship Doc serves as the invoice for the Sales at the Consignment Location
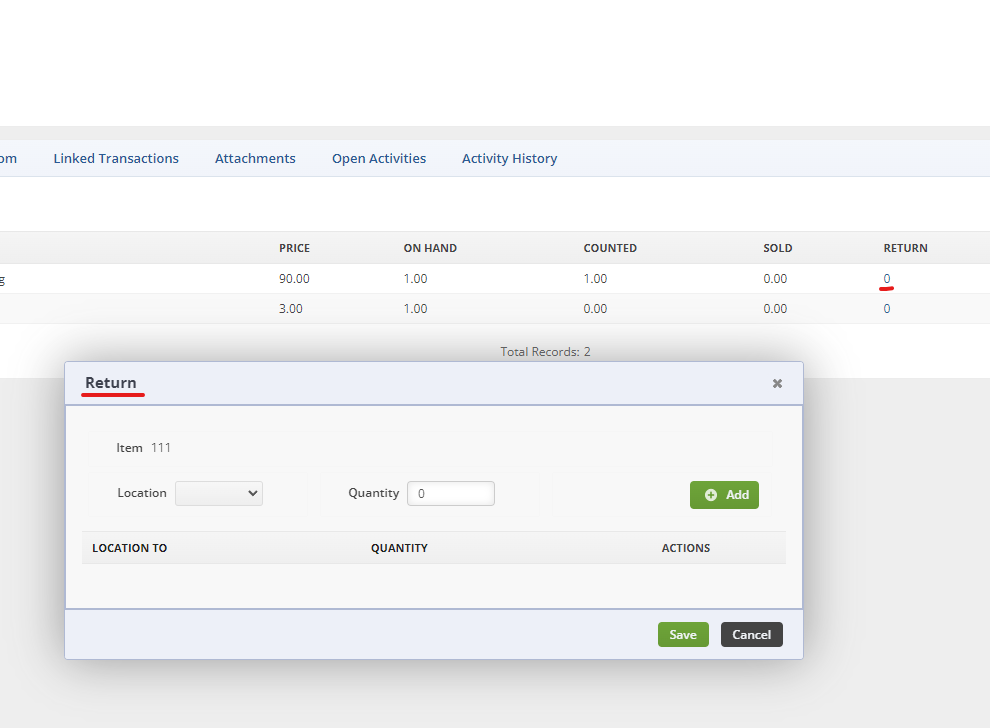
- Click on a value under Return to select which Location you want to Return some of those Items to
- This opens a separate screen where you can see your other Locations
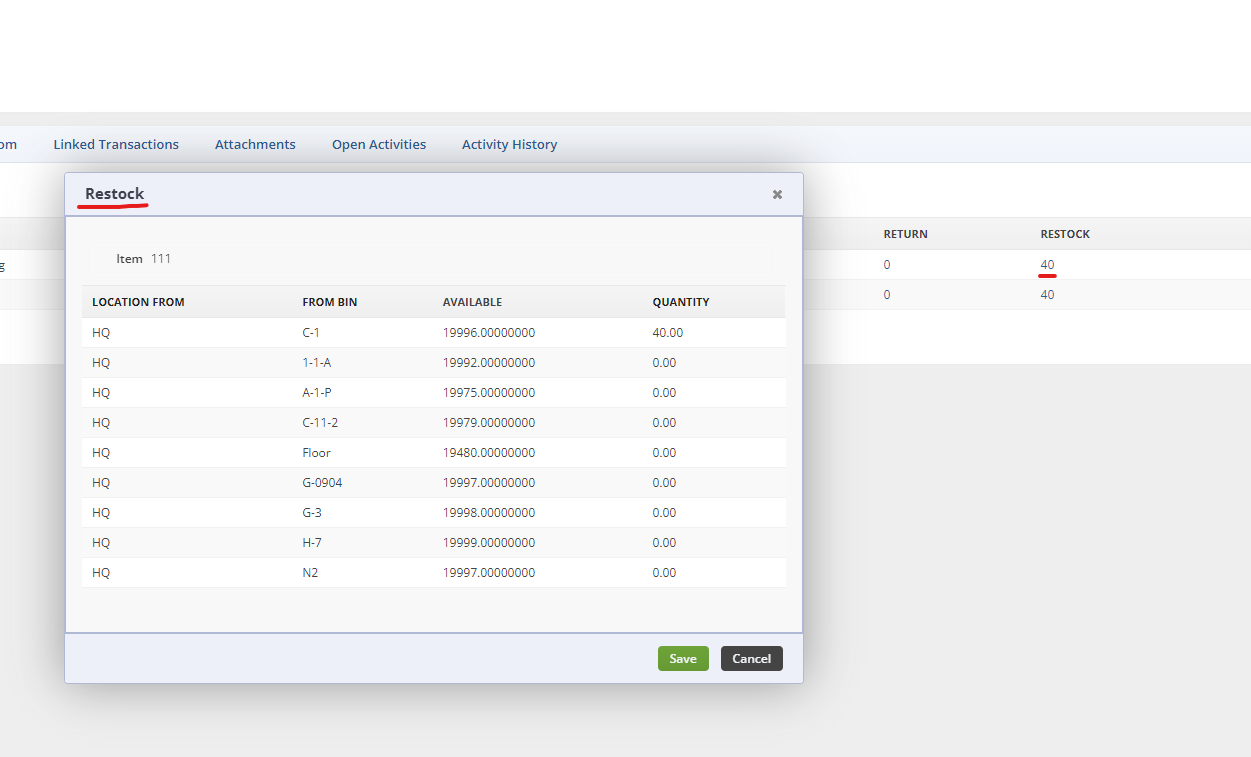
- Click on a value under Restock to select how many Items you want to Restock at the Consignment Location
- This opens a separate screen where you can see your other Locations that have stock of that Item.


When you have selected the values you'd like an reassigned Inventory for the Consignment Location, Change the Status to Approved.
Make sure it is all correct and then click the Finalize Button:
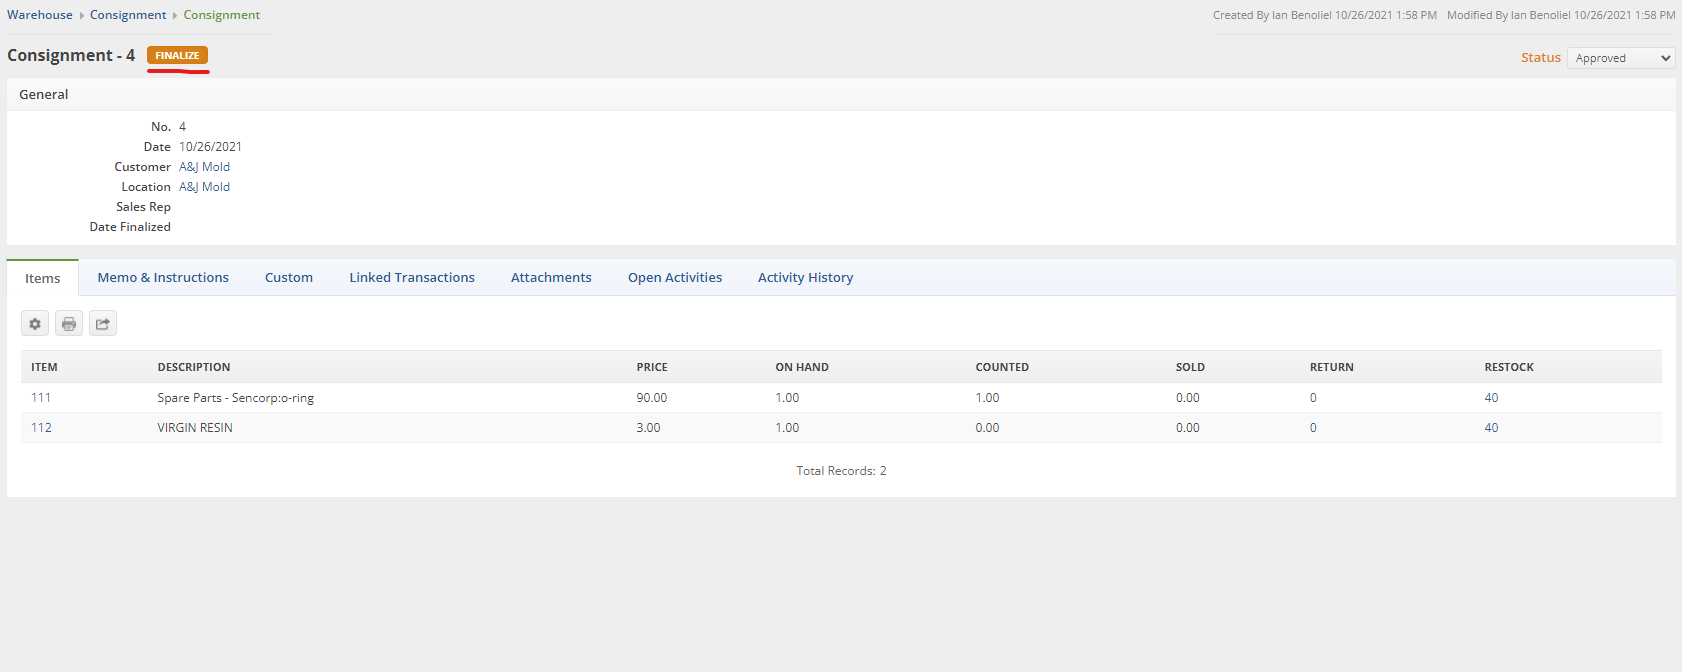
In this example, I just counted 1 and Restocked 40 of each Item to the Consignment Location.
This creates a Transfer of 40 each to that Location:
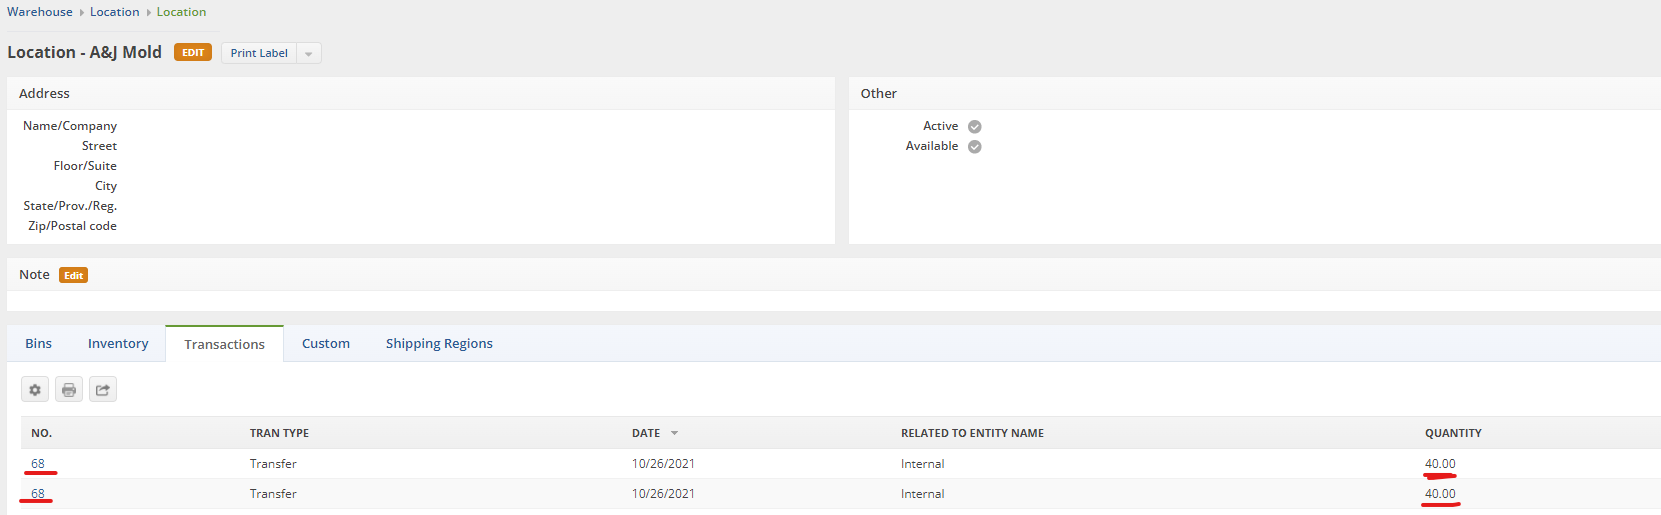
Remember, the Transfers and other documents created by the Consignment must still be dealt with. The Transfer created must be completely Shipped in order to restock this Consignment Location.
When Items are Sold
Next I'll show you an example of when the Consignment Location Sells some stock:
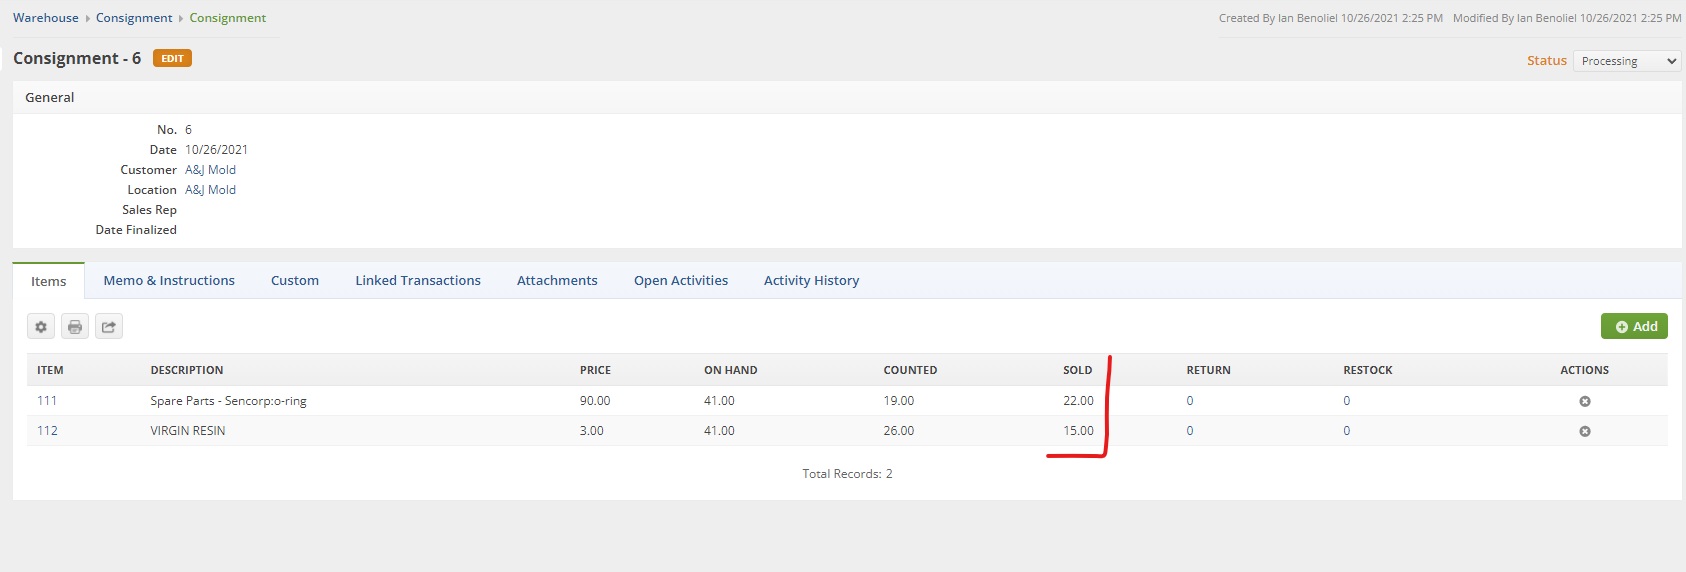
- In this example the Consignment Location has sold 22 of Item 111 and 15 of Item 112.
- As you can see the Counted auto-updates to show the rest of the stock that wasn't sold.
- Set the Status to Approved.
- Click on the Finalize button.

- This immediately jumps us to the Ship Doc to create the Invoice for the Sold Items.
- Process this Ship Doc the way you would for any other one.
