Overview
If you find that you need to set up information for one of your lists where there is no corresponding field, you can assign a Custom Field to fill that role. For example, if you're in the habit of sending your customers a greeting card every year on their birthday, you can establish a custom field that will let you track their birthday information.
Using the Custom Fields function allows you to establish your own criteria for each one of the Types (i.e. PO, Sales Orders, Repair Orders etc.) by creating a custom field where additional action is required.
In addition to information, custom fields can now contain calculations. Calculated Custom Fields allow you to create complex inventory formulas and add them to any Page or List in Order Time Inventory.
Setting up Custom Fields
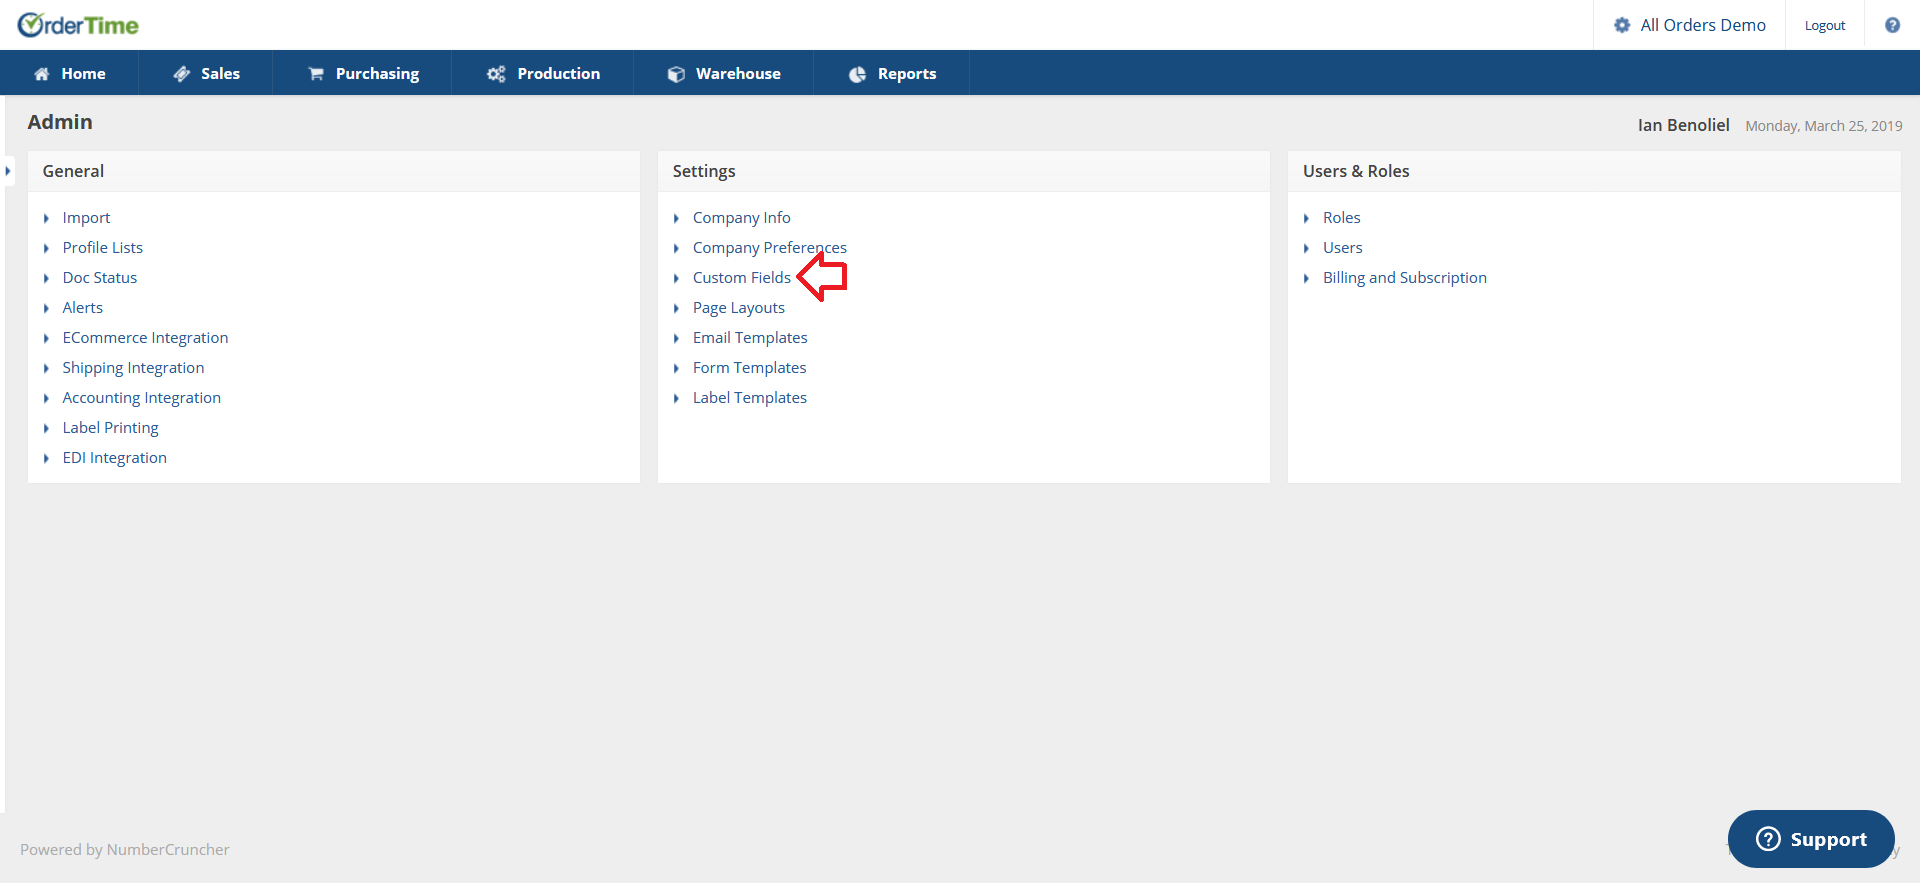
To create a custom field you must be logged in as the Admin user. Click on the Gear icon on the top right of the screen then select Custom Fields under the Settings Section.
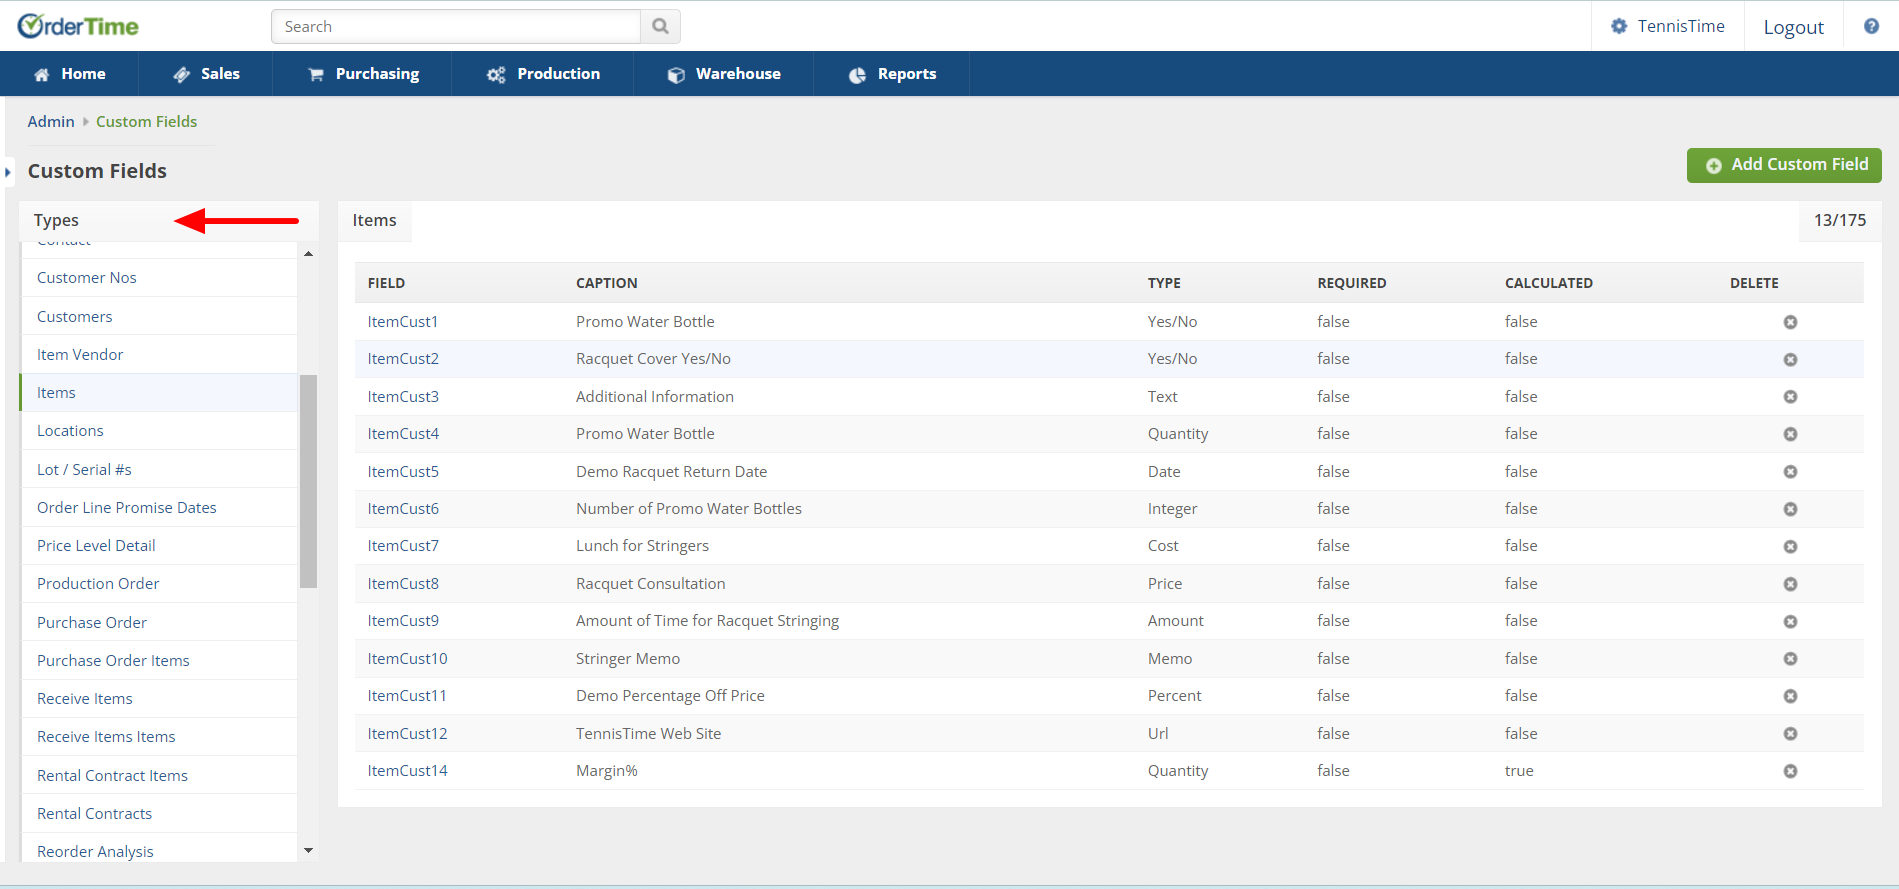
In the scrolling list, on the left-hand side of your screen you will see a list of Record Types for which to create the Custom field. For example if you want to create a custom field for a customer, click the Customer Type from the left-hand side list.
Custom Field Record Types:
- Activity
- Address
- Adjustment
- Adjustment Items
- Attachments
- Bin
- BOM Components
- Consignment
- Contact
- Customers Nos
- Customers
- Item Vendor
- Items
- Locations
- Lot / Serial #s
- Order Line Promise Dates
- Price Level Detail
- Production Order
- Purchase Order
- Purchase Order Items
- Receive Items
- Receive Items Items
- Rental Contract Items
- Rental Contracts
- Reorder Analysis
- Repair Order
- Repair Order Item
- Repair Order Item Component
- Repair Order Item Problem Code
- Sales Order
- Sales Order Items
- Sales Rep
- Ship Doc
- Ship Doc Items
- Ship Doc Package
- Ship Doc Package Item
- Ship Method
- Transfer
- Transfer Items
- Value Adjustment
- Value Adjustments Items
- Vendor Address
- Vendors
- Work Order
- Work Order Components
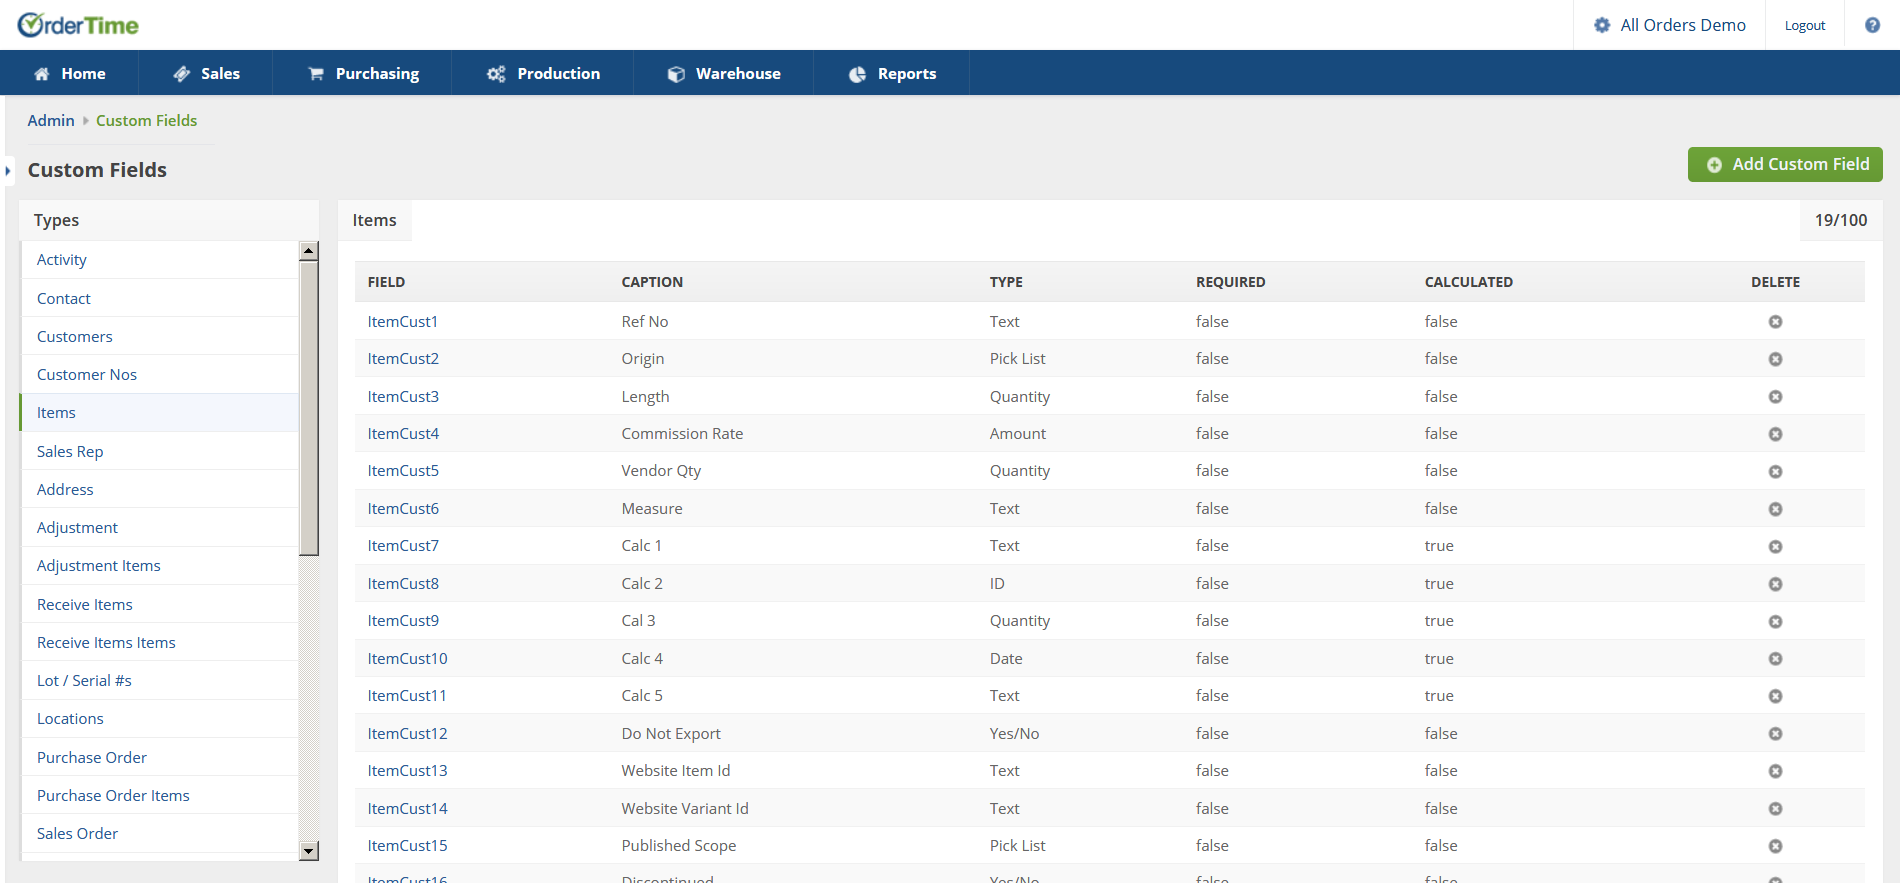
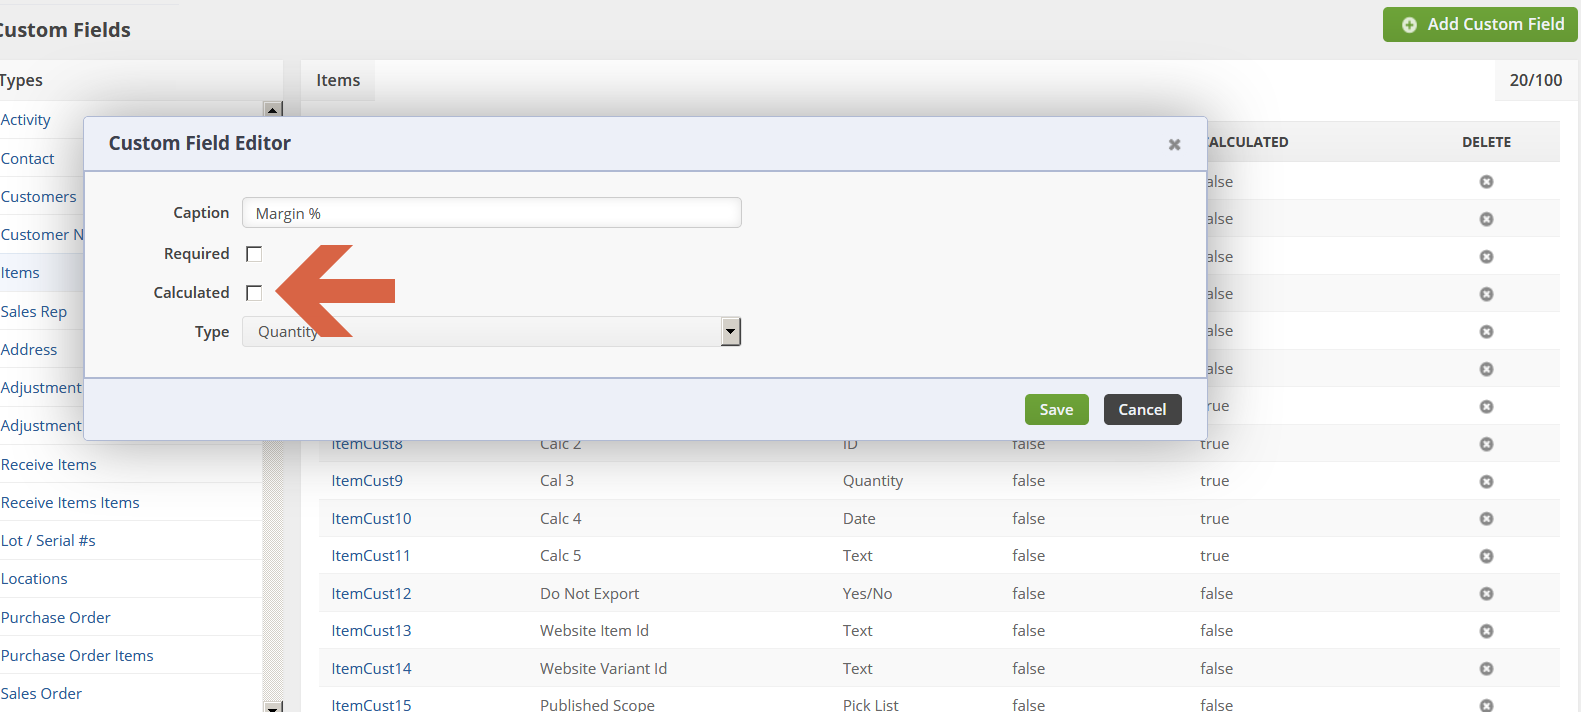
After you click the desired Record Type, you will see a list of custom fields. The list contains the following columns.
- Field - Represents the actual name of the field in the database.
- Caption - Represents the name of the custom field that the users will see when entering data.
- Type - Is the type of field the user will be prompted to enter (i.e. Text, Date, Pick List, Yes/No).
- Required - Is the type of field where the user must input data.
- Calculated - Is the type of field where a calculation takes place based on the formula created.
- Delete - Remove the custom field.
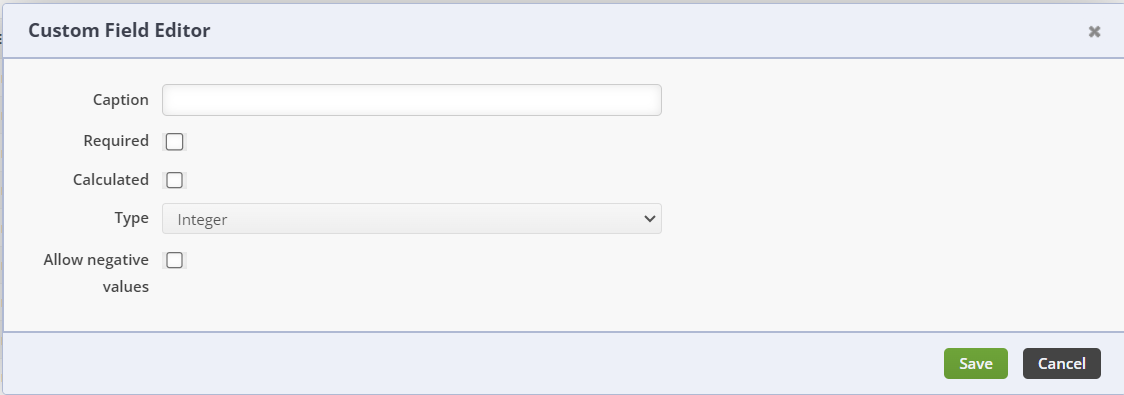
Click the Add Custom Field in the upper right hand corner of the screen.
- The first thing you will enter is the Caption that will appear when users enter their data.
- Type a caption you want added to a specific function (i.e. Tracking Number)
- After writing the caption, you will select if the user is Required to enter a value in the custom field before being able to save.
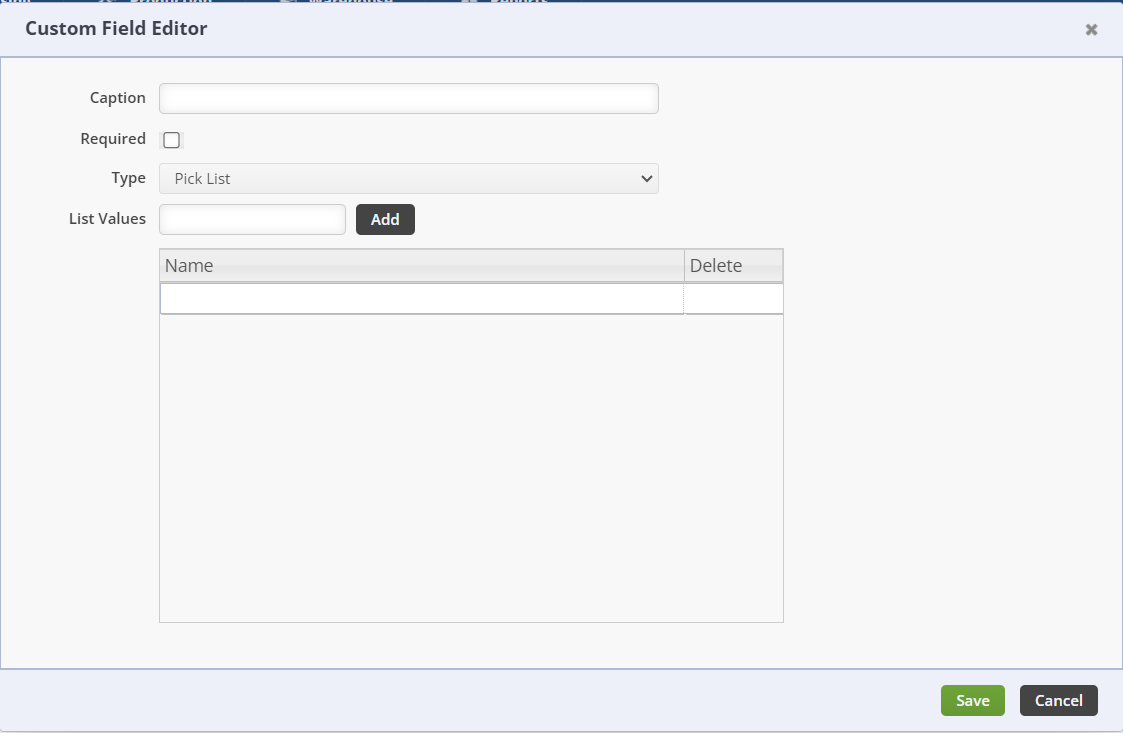
- Next you will select the Type of Custom Field
- Text (you can select the Length of text in this field and whether Required or Calculated)
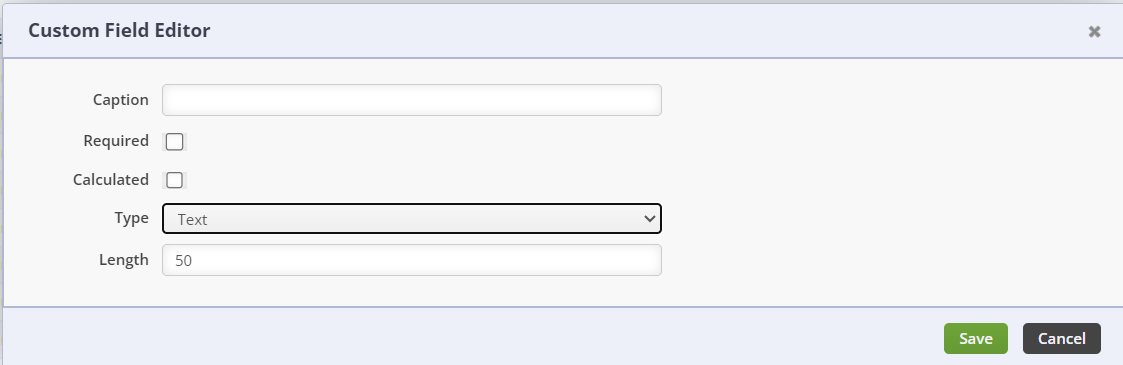
- Date (you can select if Required or Calculated)
- Integer (you can select to Allow negative values)
- Cost (you can select to Allow negative values)
- Yes/No (you can select if Required or Calculated)
- Quantity (you can select to Allow negative values)
- Pick List (you can select the List Value)
- Price (you can select to Allow negative values)
- Amount (you can select to Allow negative values)
- Memo (you can select if Required or Calculated)
- Percent (you can select if Required or Calculated)
- URL (you can select if Required or Calculated)
- Text (you can select the Length of text in this field and whether Required or Calculated)
- Click on Save when done


The software will automatically copy custom fields between records when the custom fields Have the Same Name and Type. For example, if you also had 'Cancel on B/O' on the Sales Order and Ship Doc custom fields, you would enter the value once on the Sales Order and it would be copied to the Ship Doc when the Sales Order is filled. The following table shows how custom fields are copied:
| Custom Fields From | Copied To |
| Item | Sales Order Line Item
Work Order Work Order Component Purchase Order Line Item Receiver Item Line Item Ship Doc Line Item |
| Customer | Sales Order
Ship Doc |
| Vendor | Purchase Order
Receiver |
| Sales Order | Ship Doc |
| Purchase Order | Receiver |
| Sales Order Line Item | Ship Doc Line Item
Purchase Order Line Item (Linked POs Only) |
| Purchase Order Line Item | Receiver Line Item |
Calculated Custom Fields
Alright let's create a basic calculation and add it to our Item Detail Screen & Item List.
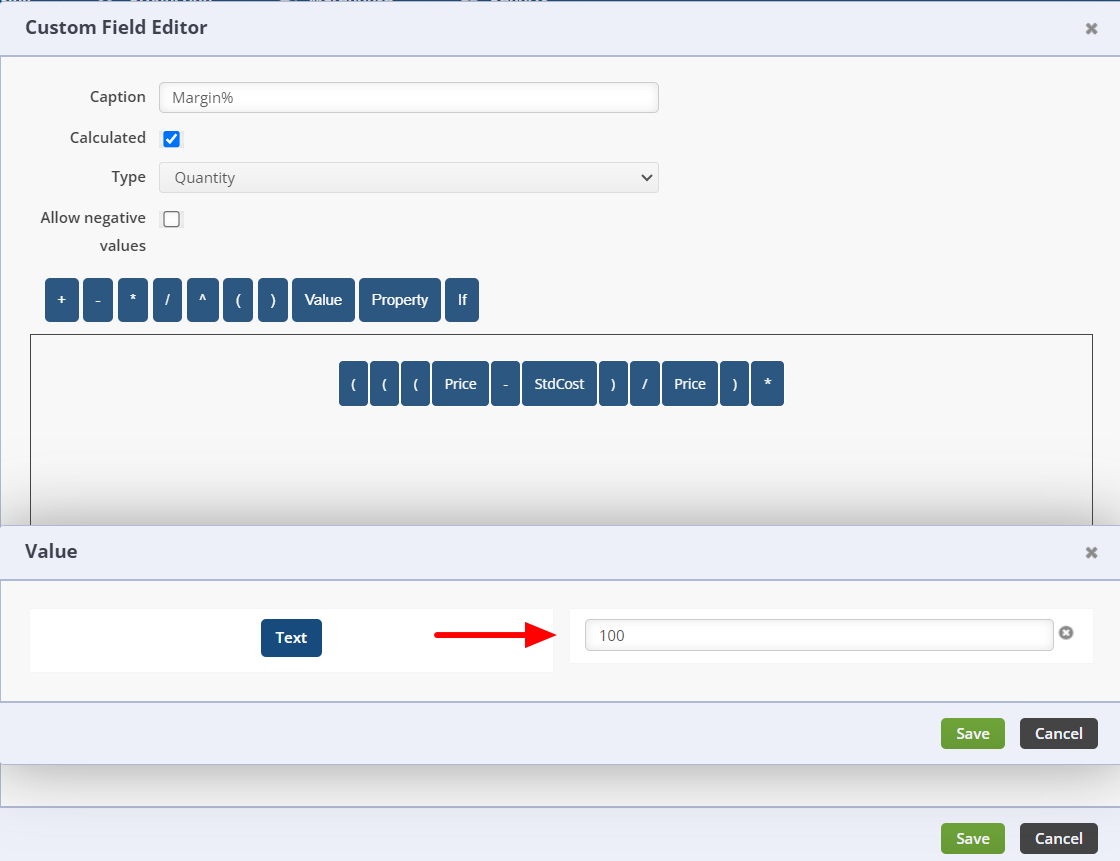
Creating a Margin % Field —
Margin %
This is the amount of gross profit a business earns when an item is sold. For example, if you have to pay $15 for each sweater, and you then sell it to customers for $39, your retail margin equals $24. This in turn is a 61.5% Margin.
Margin % Formula = ((Retail Price - Cost) ÷ Retail Price) x 100)
 Click on Add Custom Field
--
 Add your Caption and check Calculated
--
 Choose the appropriate Type
 For this example we are using Quantity
 Building a Calculated Formula
- Please note in building a Calculated Formula in Order Time you MUST ALREADY KNOW THE FORMULA YOU WISH TO ENTER.
- The Calculated Formula field requires you to enter the formula items correctly. You are not able to move items around the field but you can Delete an item entered by right clicking on the item and selecting Delete.
- When dragged into the Calculated Formula field the items will automatically be placed at the end of the formula being created.
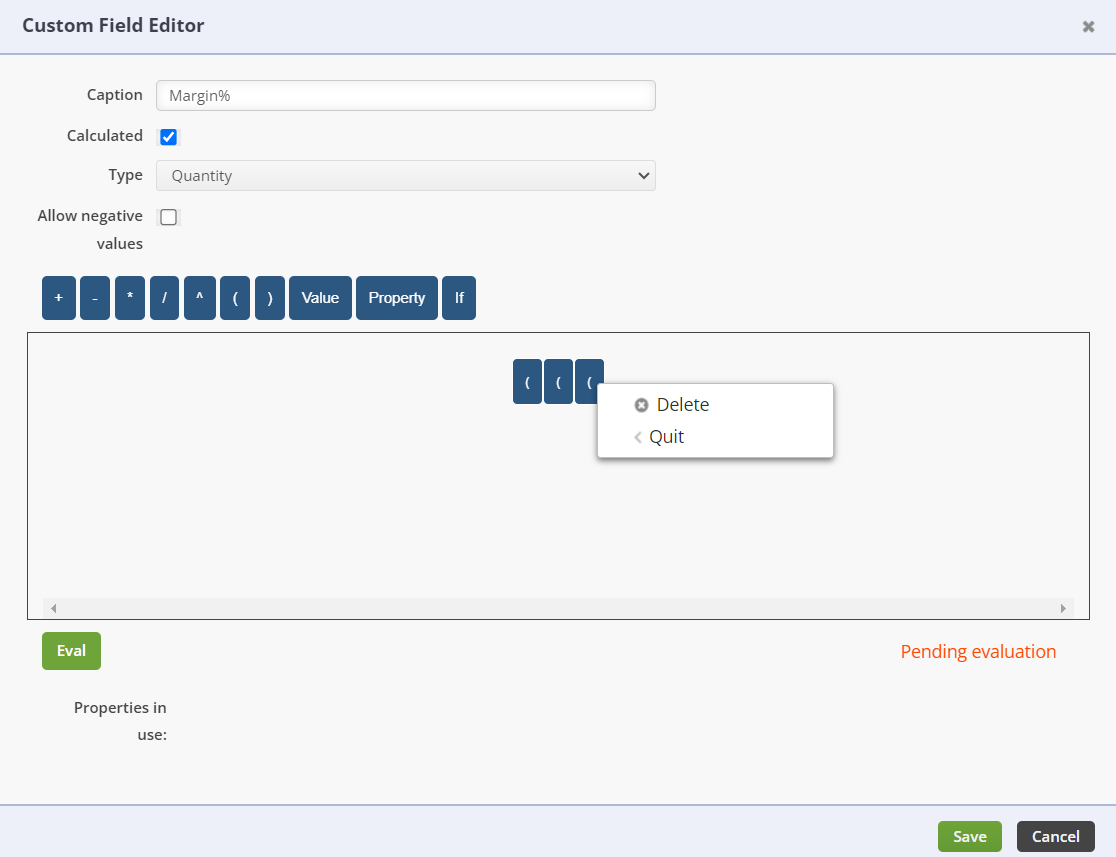
- When selecting your Value you must click on the Value button. You are presented with a Text field to input your Value for the Calculated Formula.
- Once you have completed your Calculated Formula click the green EVAL button in the bottom left hand corner of the field. If your Calculated Formula is correct the system will reflect Passed in green print on the bottom right of the field.
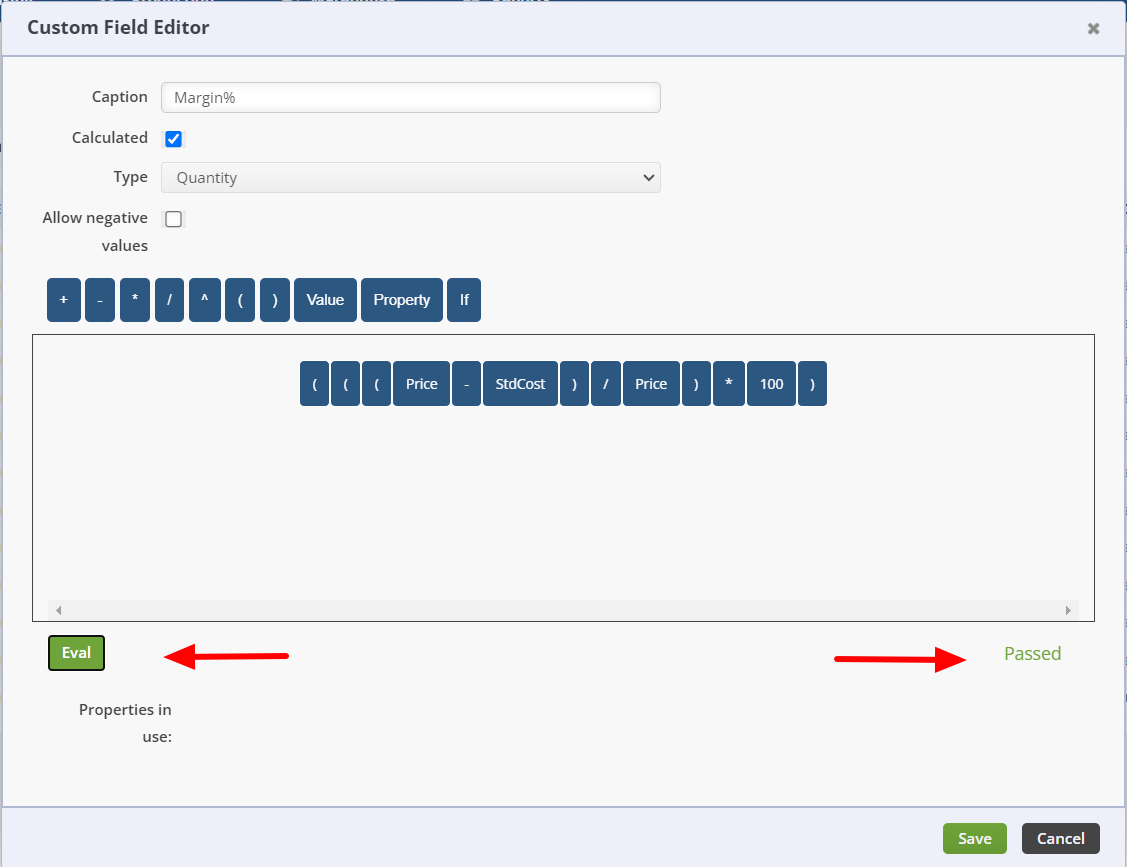


** If the calculation includes a denominator that is equal to 0 then Order Time will set it to 1 to prevent a divide by 0 error. **
During Release 1.0.35a we added the ability to add Entity Refs to your Calculated fields. This allows you to concatenate with fields like UOM and MANY others.
Adding a Custom Field to a Page
We'll Add our Margin % to the Item Details Page —
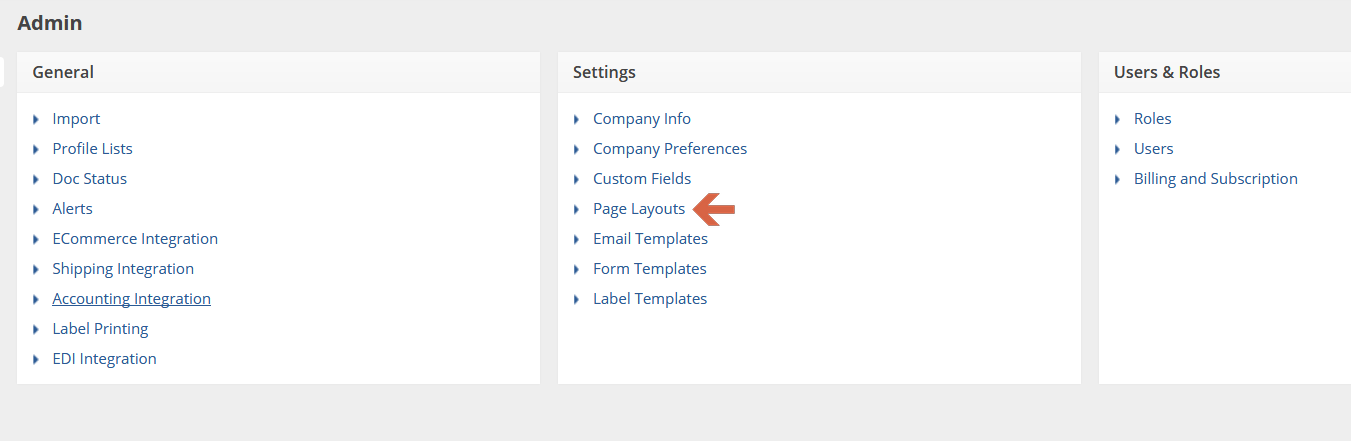 Go to your options and click on Page Layouts
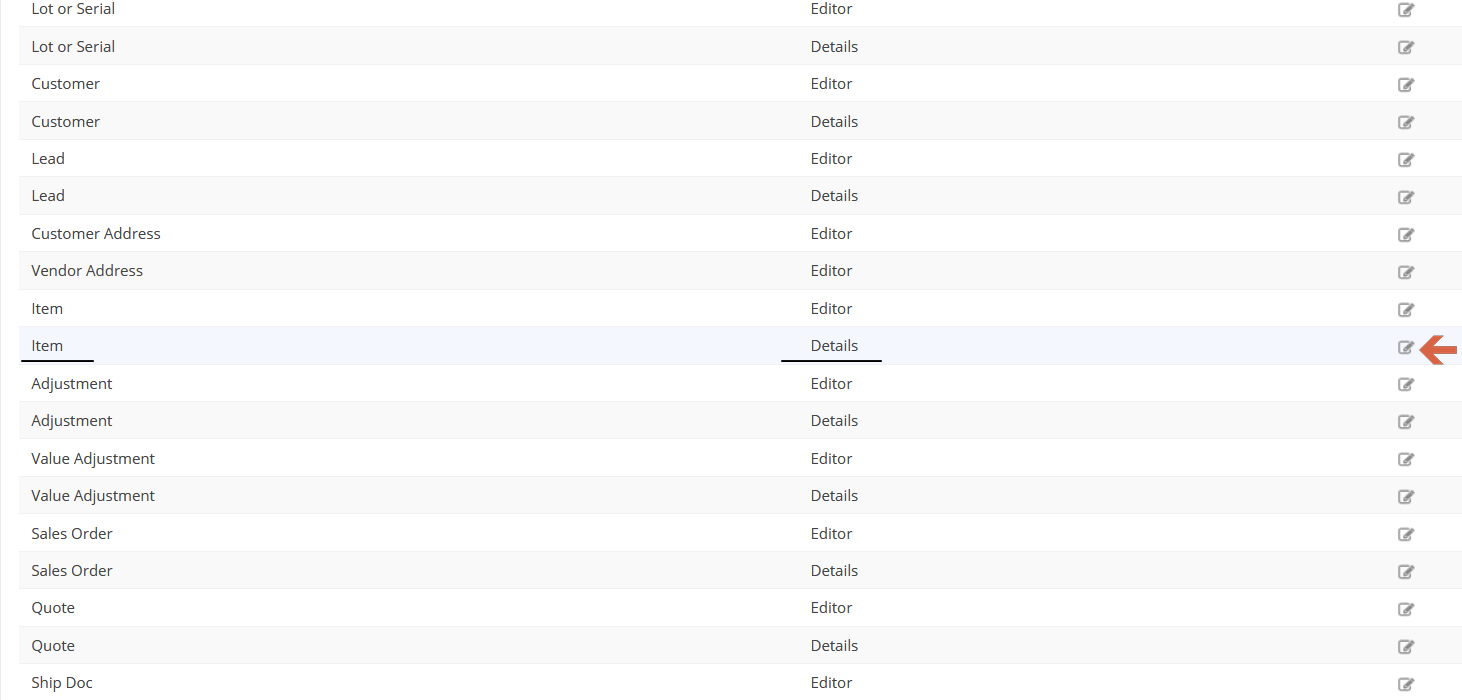 Scroll down to the Item - Details Layout and click the Edit button
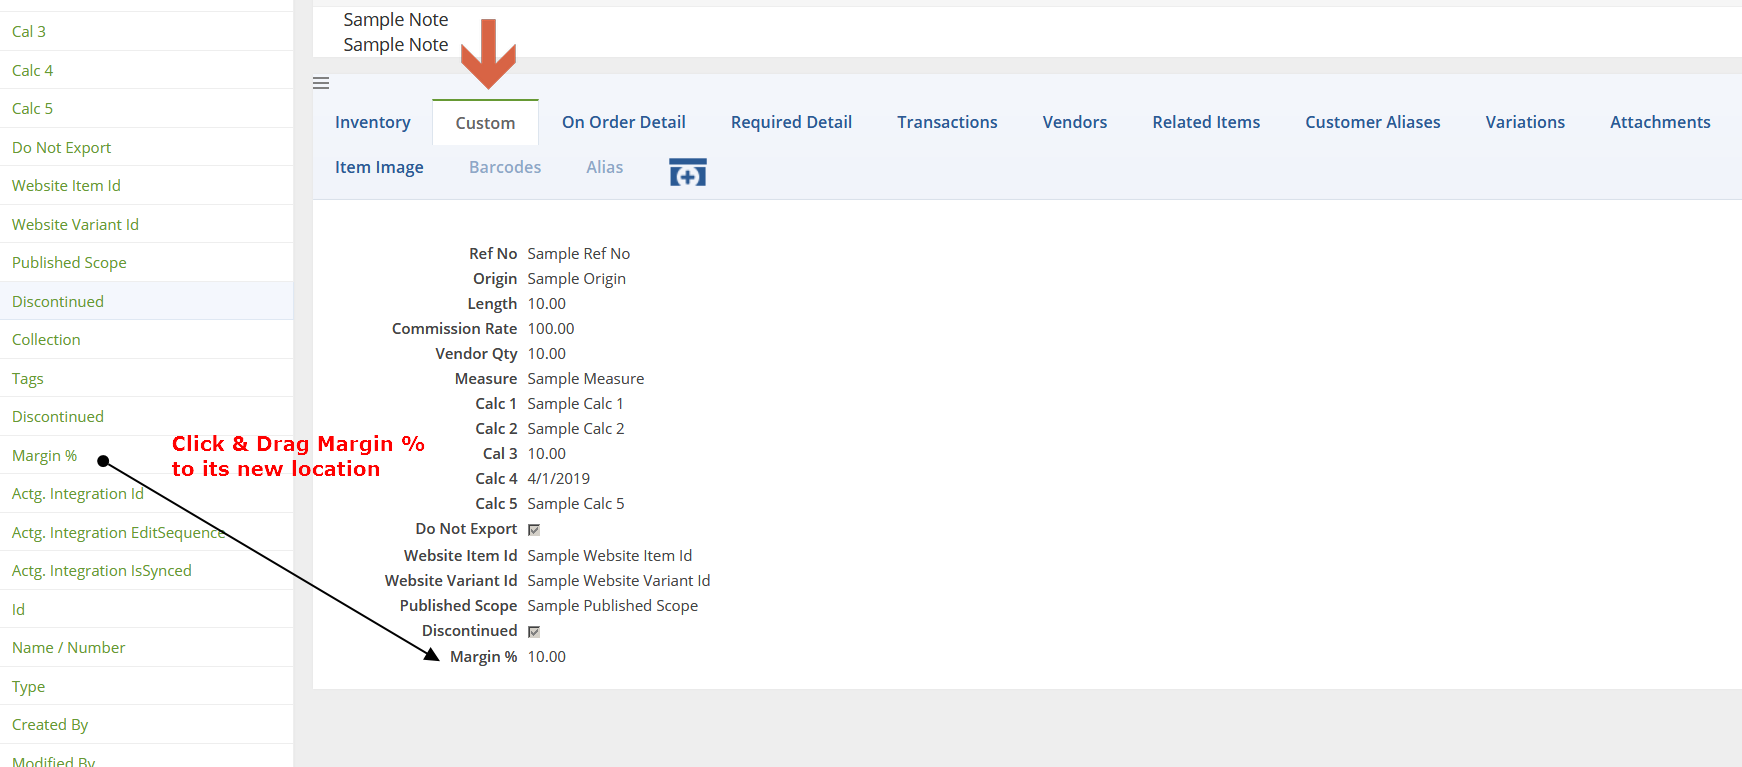 Click on the Custom Tab (Your Custom Field can be placed virtually anywhere)
Click and Drag the new Margin % field over where you'd like it
Click Save up at the top-right to save your new layout
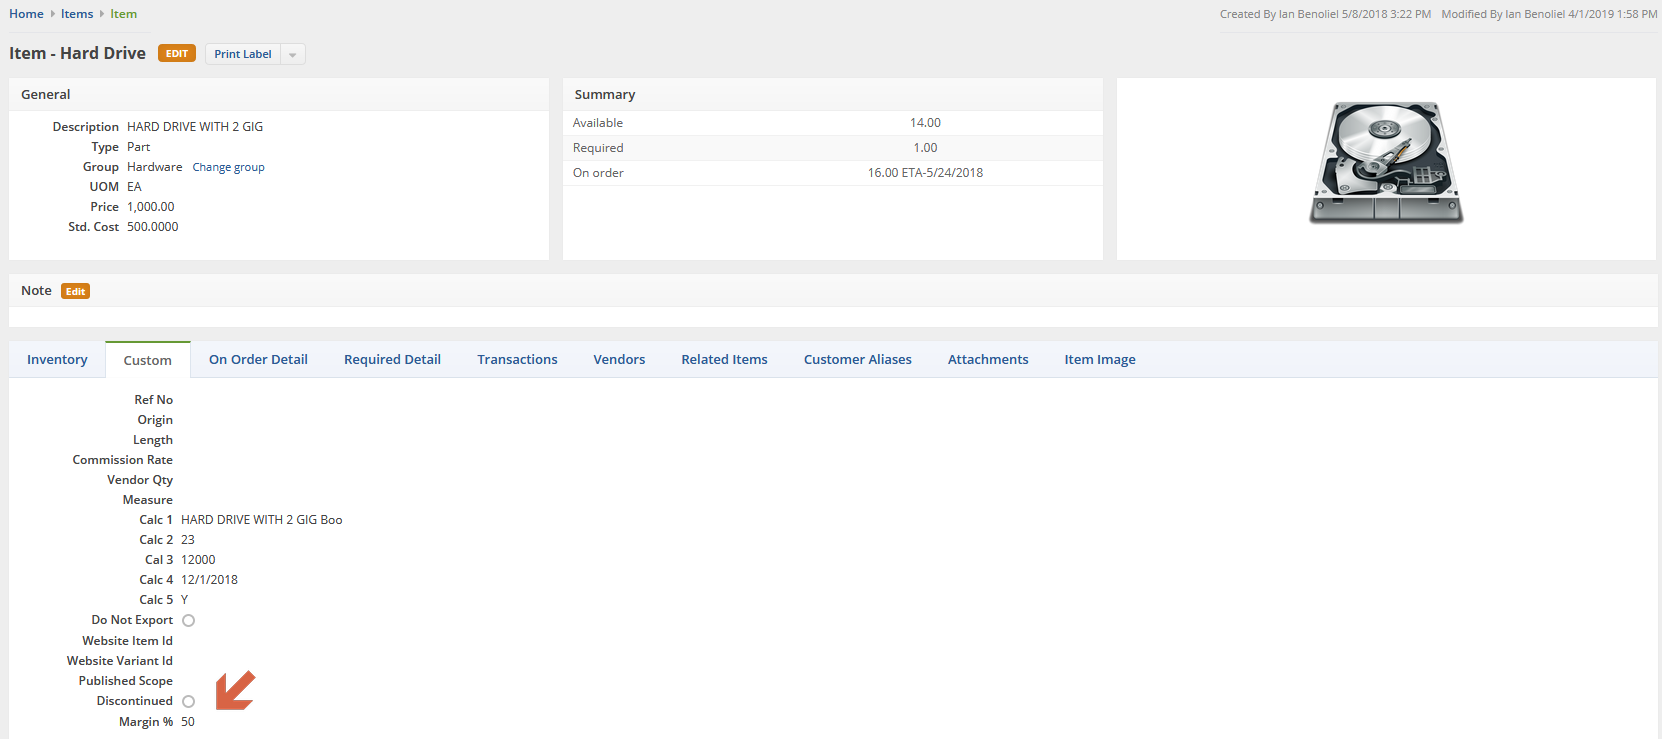 Now when you go to an Item Details page and click the Custom tab, you'll see the new Margin % field.
We'll Add our Margin % to a column on the Item List —
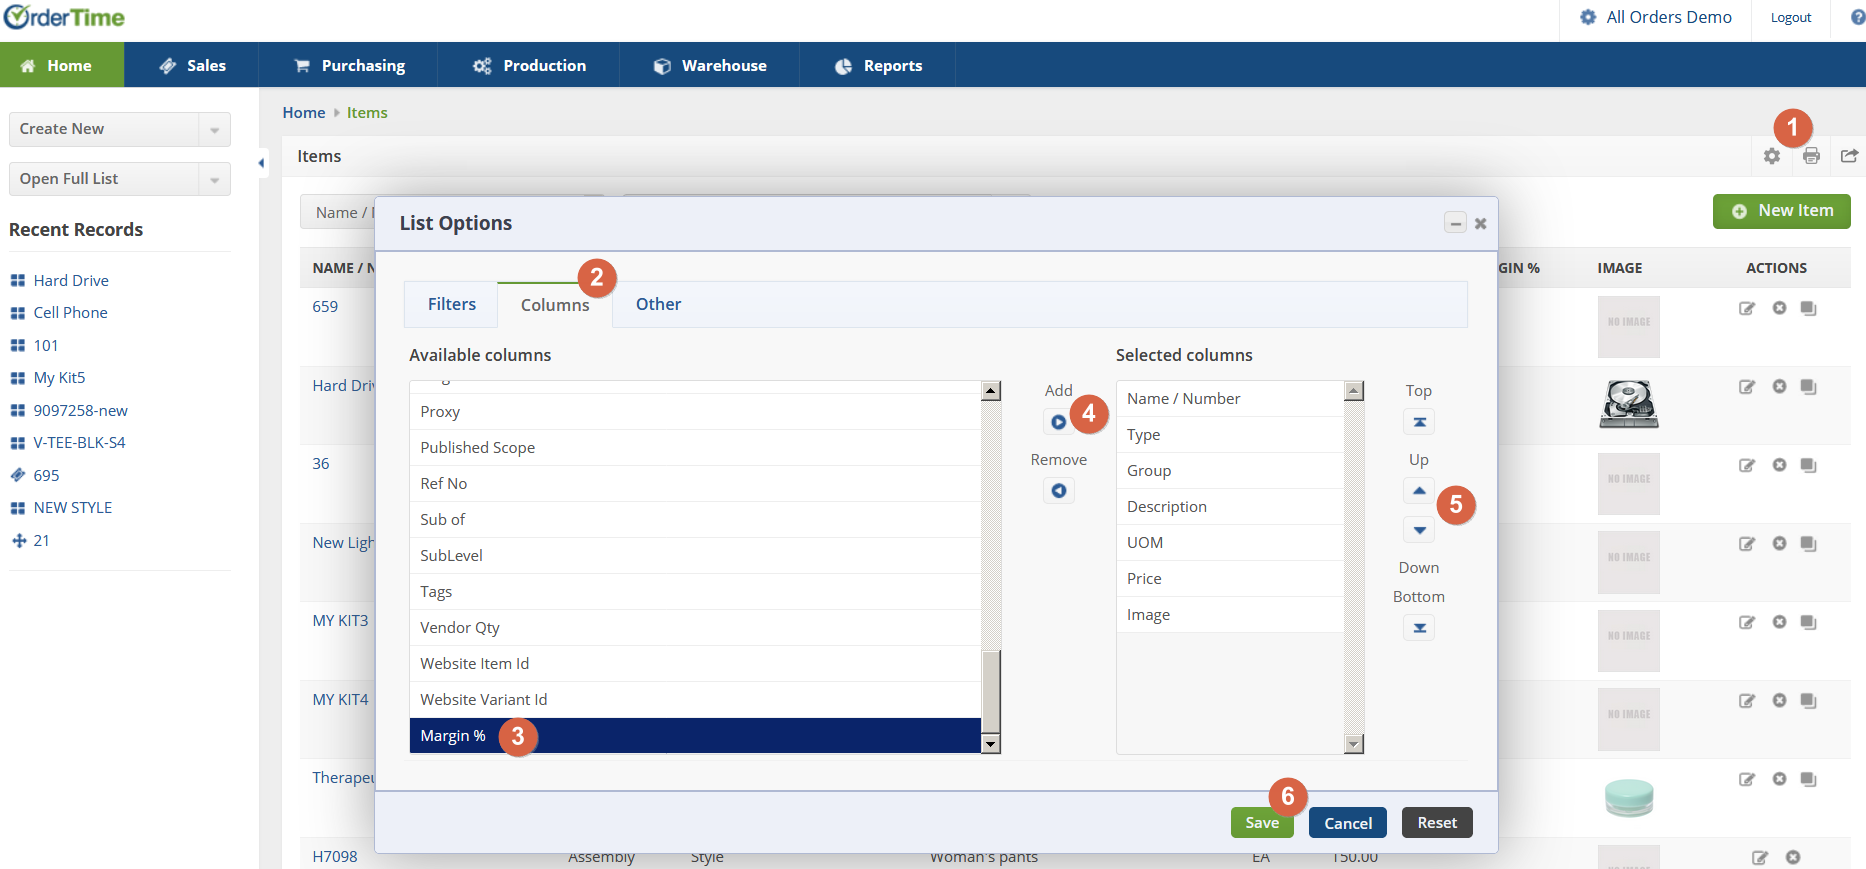 If you wanted to add it to your Item List, click Open Full List on the left and click on Items
1. Click on the cog to set List Options
2. Click on the Columns tab
3. Click on the new Margin % field in the menu
4. Click Add to move it over into the Selected Columns
5. Sort it to the position you want, remember everything is customizable
6. Hit save when you are finished and enjoy your new Margin % Column on the Item List
Changing a custom field when a Doc is closed.
- Go to Company Preferences - General - Advanced and check, 'Allow editing custom fields from a transaction's details page, even when the transaction is closed'.
- Go to Custom Fields, find the Type on the left, then click the custom field. When the custom field editor shows, check, 'Allow editing this custom field from a transaction's details page, even when the transaction is closed'
- Open the closed Doc and you will see a button that would allow you to edit the custom field.