Overview
The Report tool provides useful options to help you customize your reports based on your business needs and evaluation requirements. You can design your reports by selecting the settings of tables and columns; and modifying properties to suit your requirements.
Below are the steps to begin customizing your report(s):
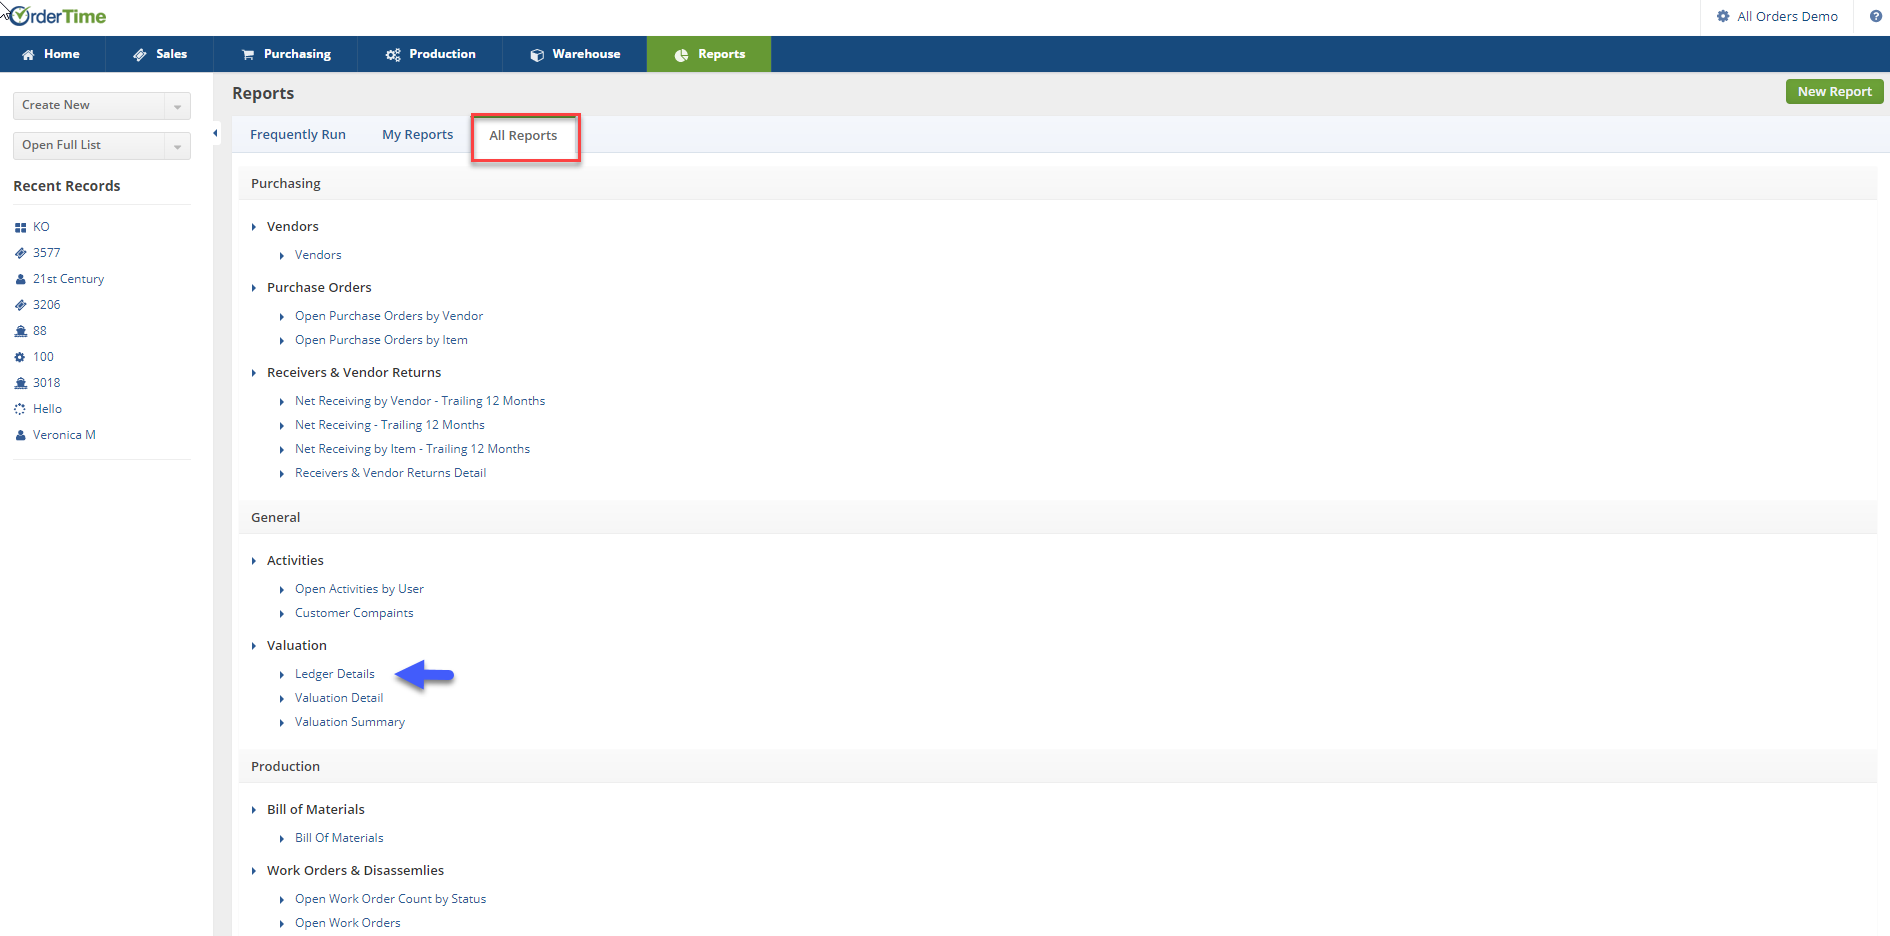
- Access the report that you want to customize from the Reports page.
- Use any of the tabs (Frequently Run, My Reports and All Reports) to locate your report.
- Click the link of your report.
The following are some of the different actions that you can take for customizing your reports.
Adding a Section
- Click the Customize Report button (from the View Report page).
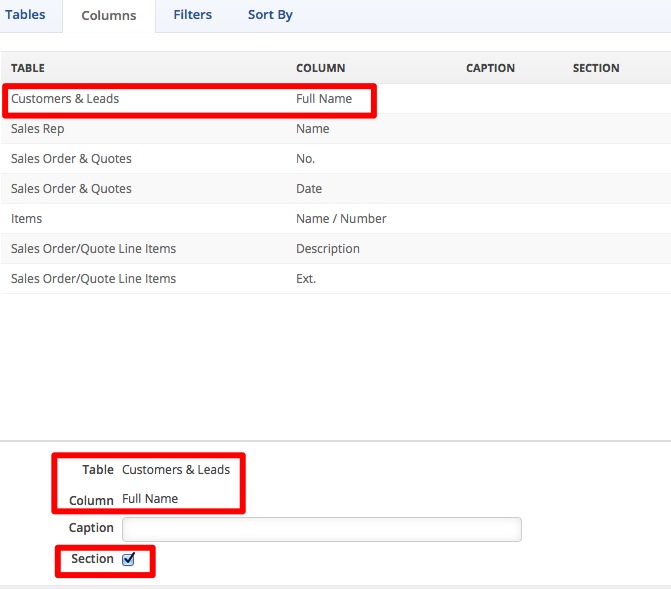
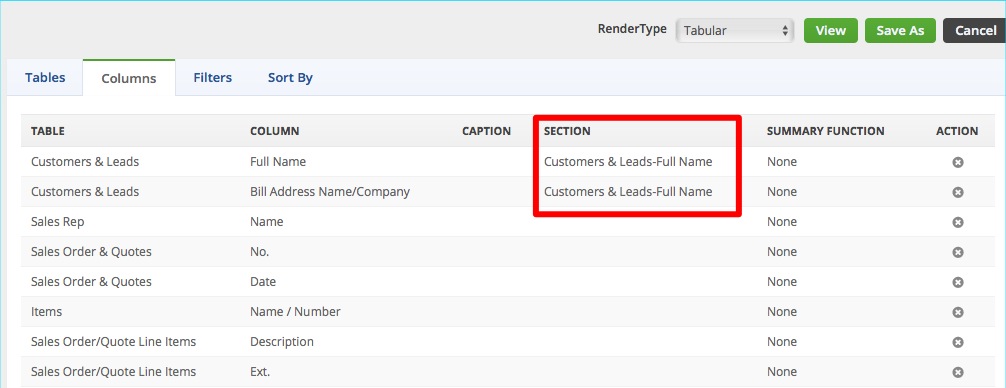
- Click the Columns tabs.
- Select the row containing the table-column combination that you want your section or grouping to be based on, for example, customer grouping.
- Click on the Section checkbox.
- Click Save.
- Click View.

The report in the example below is organized by Customer. Every row is grouped and listed under an identified header (Customer-Full Name). 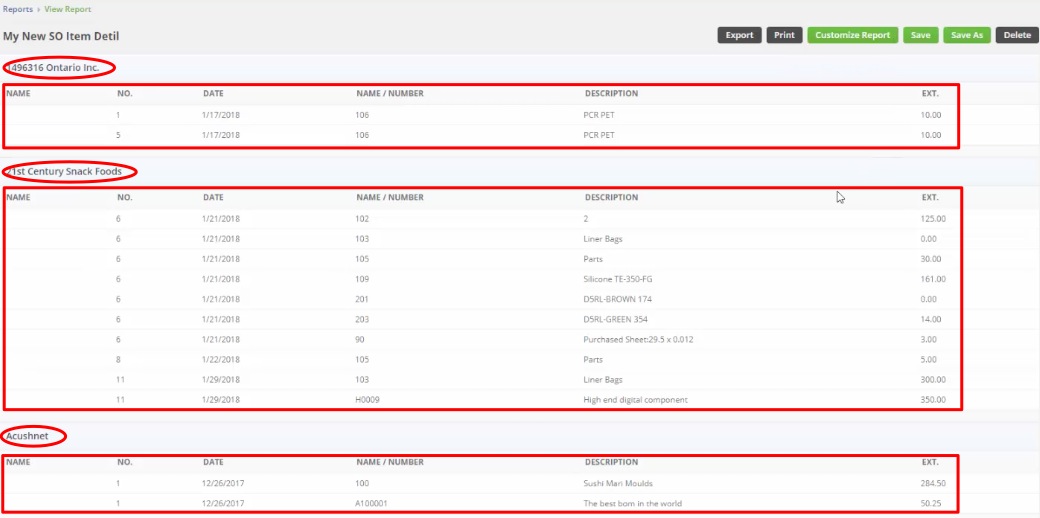
Renaming Column Names
Another way of customizing the report is renaming the column names to be more specific and to make the report more intuitive.
- Click the Customize Report button.
- Click the Columns tabs.
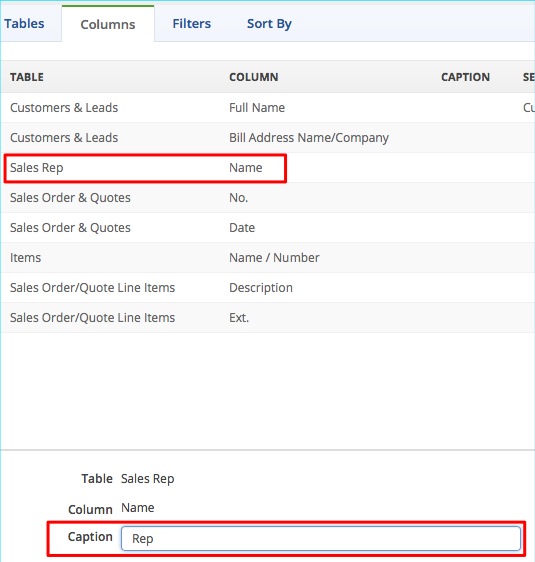
- Select the row containing the table-column combination that you want to make the change(s) to.
- Enter the new report column name in the Caption field. Example: The column Name for the Sales Rep table will be labeled as Rep.
- Click Save.
- Click View to see the changes in the report.


Adding Columns to a Section
You can also add new columns and make it part of a section.
- Click the Customize Report button.
- Click the Columns tabs.
- Select the columns that you want to include in the report by dragging and dropping the column name inside the box.

- Choose the section from the Section picklist.
- Click Save.
- Click View to check if report reflects the update.


Adding a Summary Function
One of the most common and helpful information in reports is the total of numeric data. You can add a summary function in your report. This is useful for reports that include, for example Sales Order/Quote Line Items.
- Click the Customize Report button.
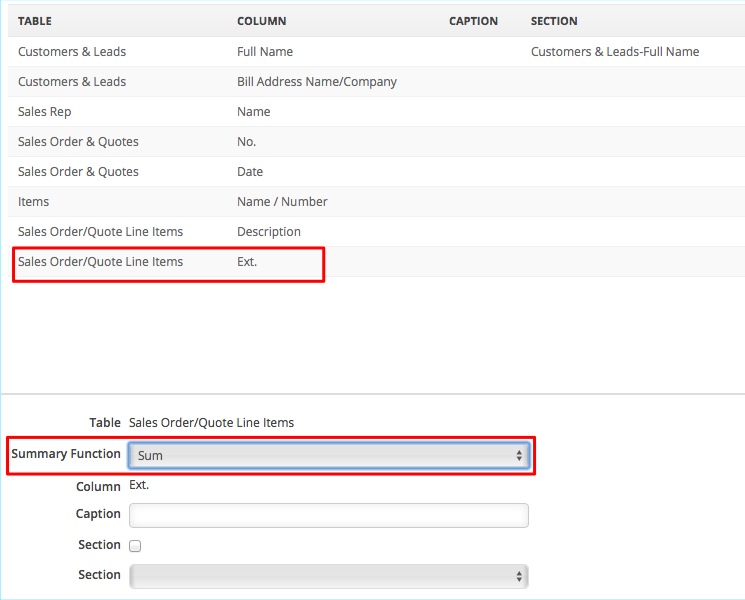
- Click the Columns tabs.
- Select the row containing the table-column combination that you want to make the change(s) to.
- Select Sum from Summary Function picklist.
- Click Save.
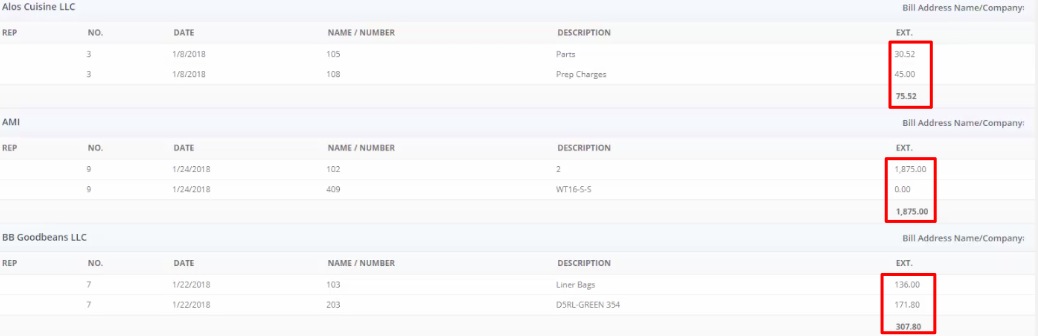
- Click View to check the sub-total(s) and grand total (at the bottom) in the report.


Using Filters
Use the filter function for instances that you need only very specific information for your reports.
- Click the Customize Report button.
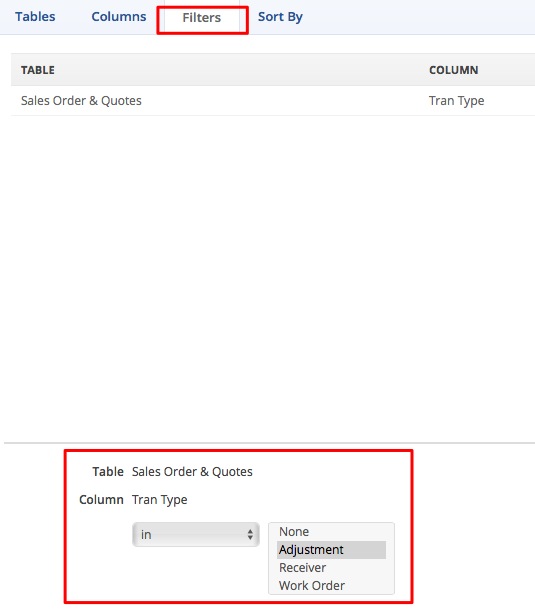
- Click the Filters tab.
- Drag and drop the column that you want to filter in the box.
- Set your filter specification by using the picklist and entering a value in the field or selecting from the dropdown.
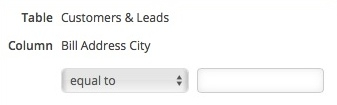
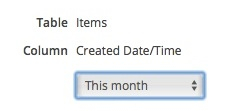
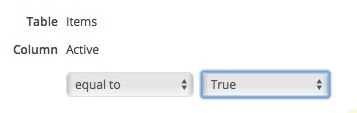
- The operator and criteria that will be available depend on the column (also know as field type) selected, such as the examples below.
- Entity Ref - After selecting an operator, select the value from the dropdown. If you have a multiple selection, hold down the Ctrl button while clicking with your mouse.
- Text and Numbers - After selecting an operator, enter the appropriate value in the field.
- Dates - Select the timeframe from the dropdown.
- Boolean - After selecting an operator, choose True or False accordingly from the drop down.
- Entity Ref - After selecting an operator, select the value from the dropdown. If you have a multiple selection, hold down the Ctrl button while clicking with your mouse.


When combining fields the logical joiner is AND meaning all filters must resolve to true in order for the entire statement to be true. List Filters has additonal information about using filters.
5. Click Save or Save As.
6. Click View.
Sorting Reports
Reports can be sorted by almost any field, but only up to three fields can be selected at a time. Most reports have a default sort order that can be customized.
- To access your reports screen, click on the Reports tab on your main landing page. The Reports screen will be represented by three tabs (Frequently Run, My Reports and All Reports).
- Select the appropriate tab to customize a report.
- Access the report you would like to edit and click Customize Reports.
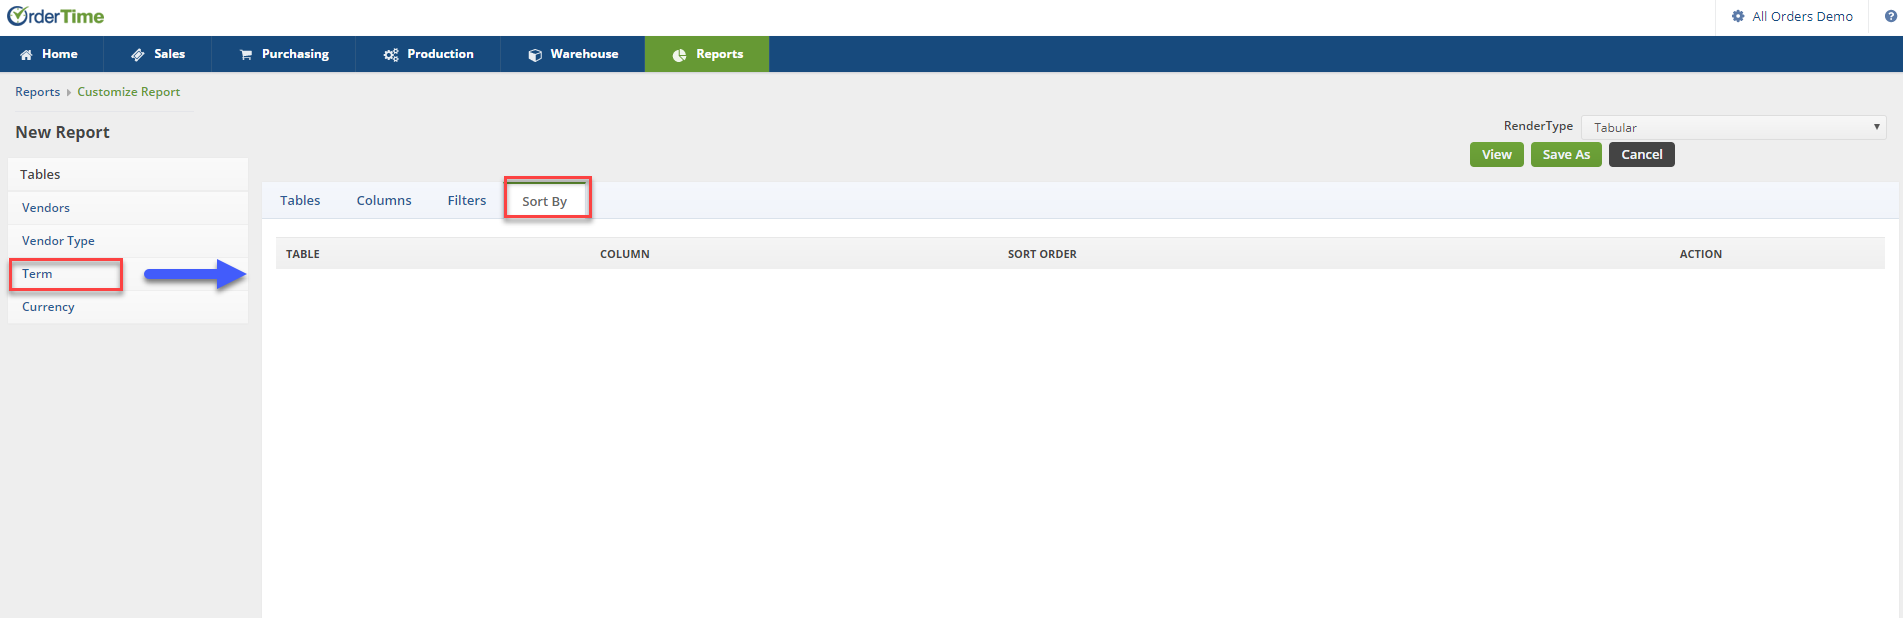
- Next click Sort by, which is located in the center of your screen.

- On the left side of your screen you will find all the available Sort By topics. Click the corresponding topic to populate all the available Sort Fields.
- Simply click and drag the fields you would like, onto the Sort By list.

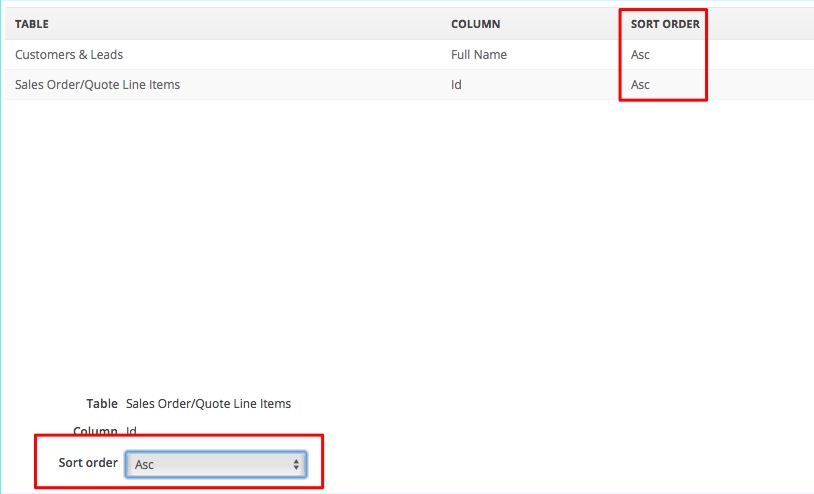
You can also sort the fields by using the Sort Order picklist. You can choose either Asc for ascending or Desc for descending.