Overview:
The purpose of this article is to demonstrate the steps taken to import item images. The best way to import images for your items would be with Web Resources.
To import your item images you will use the import function found in the admin panel of your Order Time file. You will want to create a CSV file containing the item name, that it is a web resource and the web address of the item image.
Step 1:
Create a CSV file containing the items you want to add images to. Your CSV file should contain three headers called Item, IsWeb and Name. The Item column will contain the name / number of your items. IsWeb will contain either the word TRUE to indicate to Order Time that you are uploading a web resource. And Lastly a column called Name. The Name column will contain the web link for the image.
Test each image link to make sure you have the link to the image and not the page that the image is on.
Ex.
| Item | IsWeb | Name |
| SEL-BEG-21 | TRUE | https://numbercruncher.com/nc/images/main_logo.png |
Step 2:
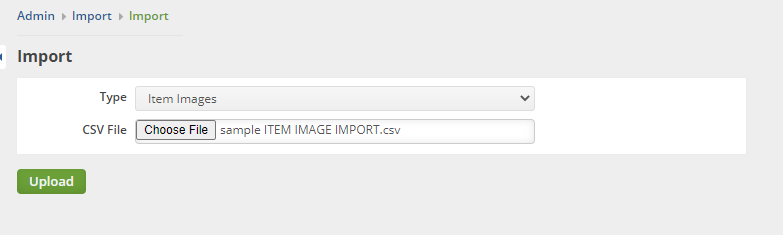
Import the CSV file. Select the admin and then import. Choose Item Image as your import type. Then select your CSV file that we have just created. Next click "Upload".
Step 3:
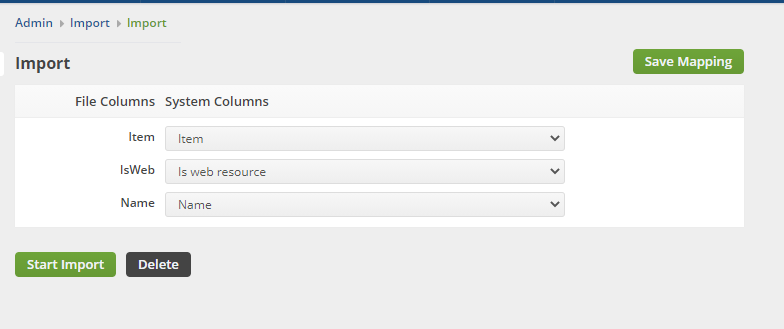
Now that you have your file uploaded you just need to ensure the mapping is complete. Make sure the Item is mapped to Item. IsWeb is mapped to Is web resource and Name is to Name. Once the mapping is complete select Start Import.
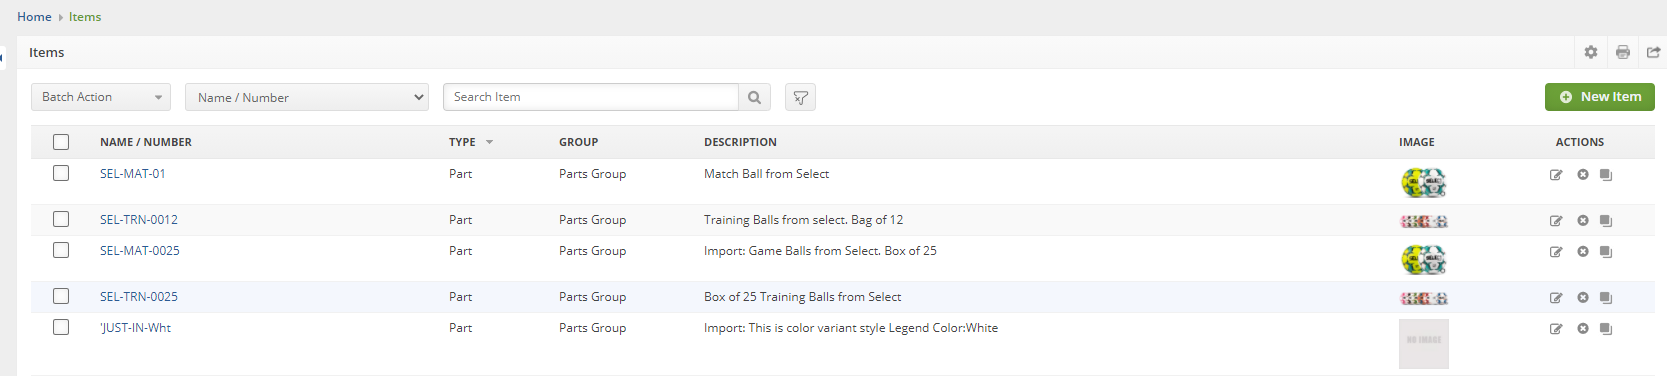
Once the import is complete you can now view your items list and add the column images. Here you will be able to see all the images for your items that you have uploaded. You can also use this view to find the images that still do not have images attached for updating at another time.