Overview
With Reorder Analysis, you can create purchase orders and you can use it as a planning tool.
Purchasing is considered the most challenging part of inventory management. Buying too much comes with high cost but buying too little may potentially lose opportunities and eventually, the business.
If you purchase based on ‘just in time’ demand, then it is easy to determine purchases based on sales orders or work orders. The Reorder Analysis has the capacity to provide you with figures that can help in your business decisions.
Based on the selected criteria, OrderTime, through Reorder Analysis, will present you a set of data that you can analyze and utilize for forecasting purchases. The data, which is based on historical records, will serve as guidance for you to arrive at well-informed business decisions.
You can use any of the following Reorder Analysis modes depending on what you need to accomplish:
- View Details - This shows the summary of the scenario that you created for a specific Reorder Analysis and the list of items that meet the criteria you specified.
- Start Ordering - Create purchase orders by identifying the items that need to be purchased at a particular time, based on certain business rules and filters.
- Recalculate Reorder - The Recalculate Reorder Points screen allows you to generate new reorder points and lead times based on historical data.
View Details
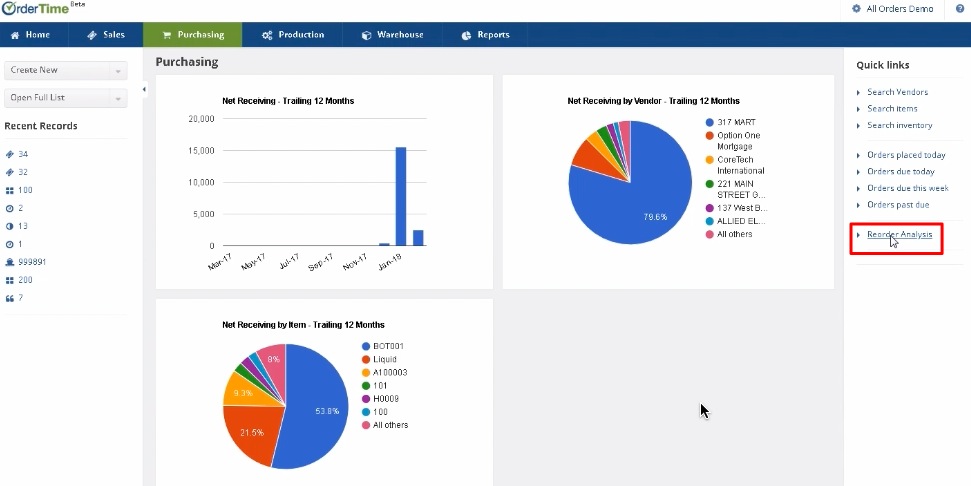
You can launch Reorder Analysis from the Purchasing tab, then click the Reorder Analysis link on the right side of the screen, under Quick Links.
A list of created Reorder Analysis items is displayed on the Reorder Analysis page. Click the Reorder Analysis that you want to view, edit, run or process by clicking the link under the Name column.
You can edit, delete and re-run your Reorder Analysis from the Reorder Analysis page.

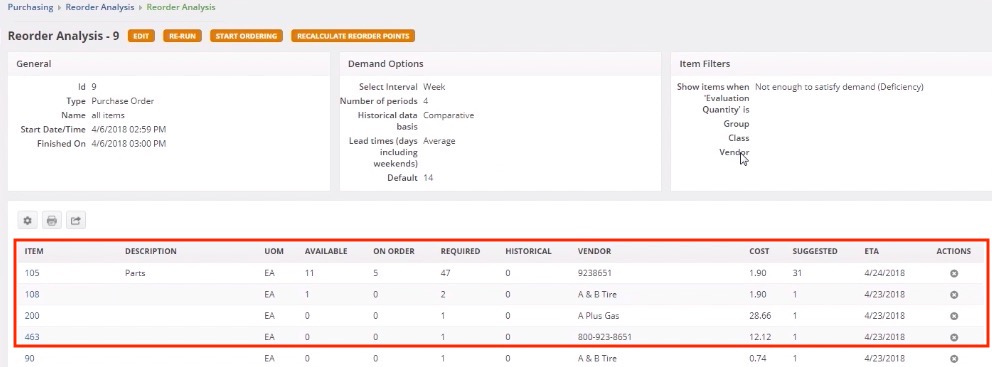
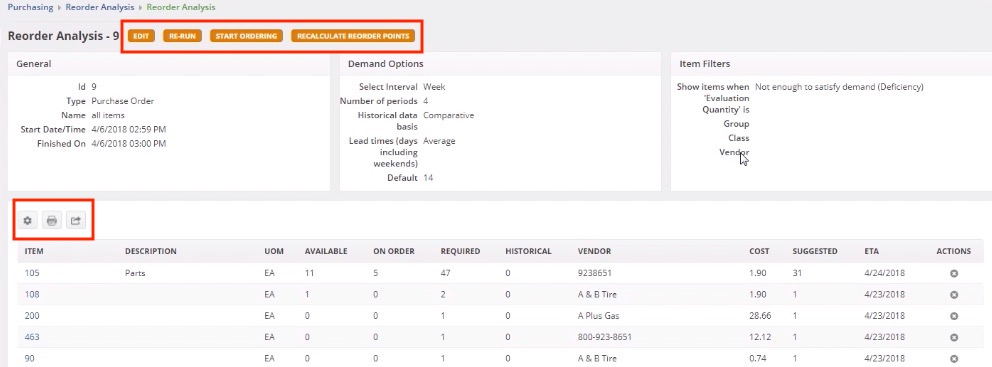
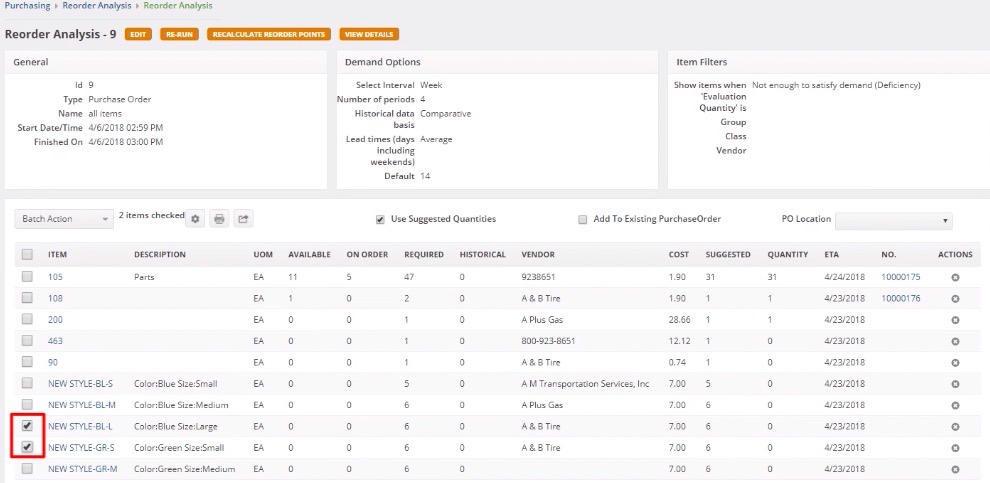
View Details mode provides you the summary of the scenario that you created for a specific Reorder Analysis. You will see the details under General, Demand Options and Item Filters. The details on these sections are the specifications that you entered when you were creating that Reorder Analysis.
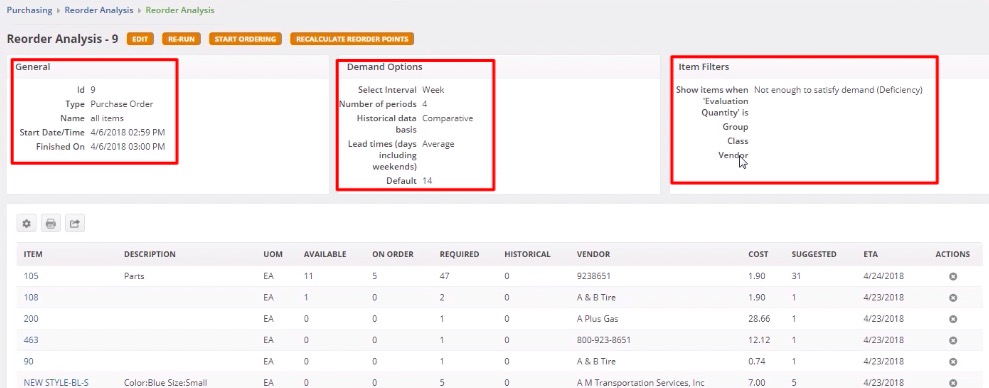
Based on the selected criteria, Order Time will present the list of items on the panel below the summary.
These are the items that you can process by Start Ordering or Recalculate Reorder Points.
You can also do the following in the View Details mode:
- Use the Edit button to make changes in your Reorder Analysis.
- Re-run the Reorder Analysis.
- Modify list option to add or remove columns, apply filters and specify the number of records you want to be displayed on a page.
- Print the list.
- Export the list to a CSV file.
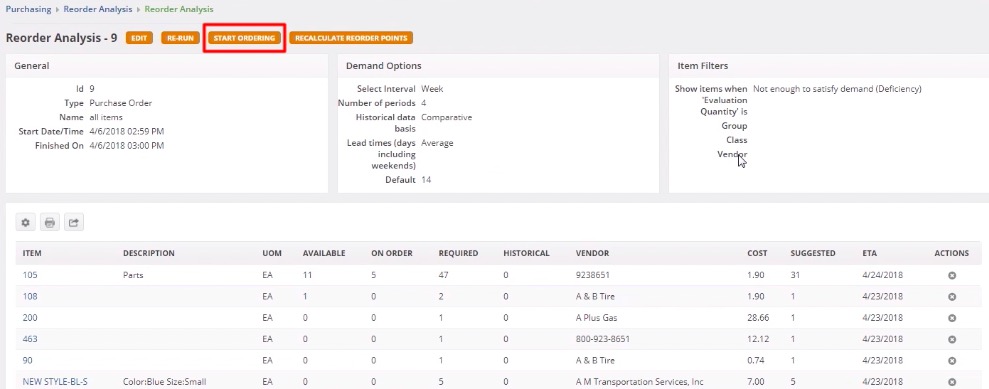
- Start ordering for items by clicking the Start Ordering button.
- Initiate recalculating reorder points for items by clicking the Recalculate Reorder Points button.
Attention: On the Reorder Analysis if you click on Recalculate Reorder Points, the calculations will not run if you have removed the Daily Avg. or Safety Stock Days columns.
Start Ordering
To create orders using Reorder Analysis, follow the steps below.
- Adding to Existing Purchase Order
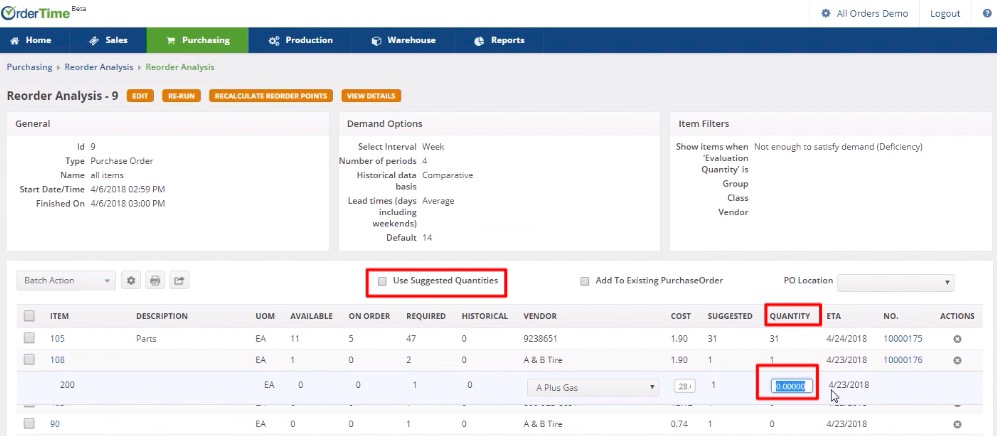
- Click Start Ordering.
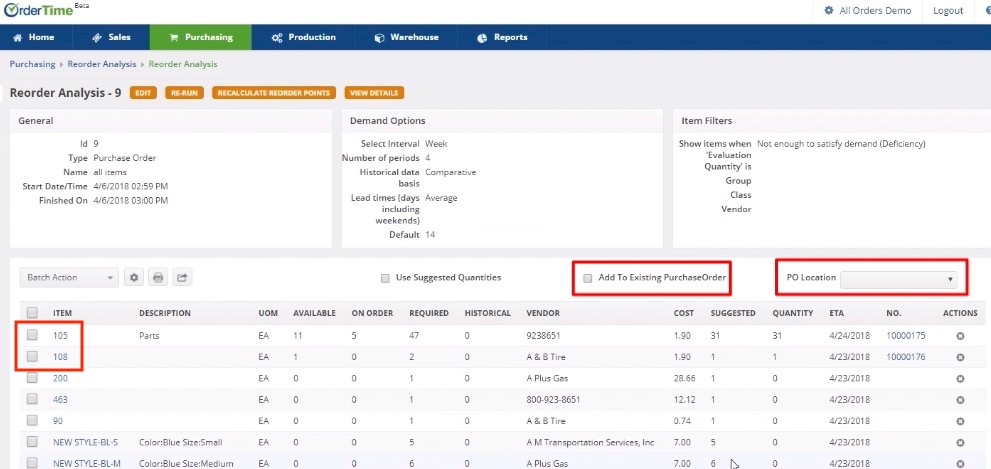
- Select the checkbox of the item(s) that you will include in the order.
- You can also change the vendor, cost and order quantity as appropriate, by clicking on the value under the corresponding column.
- Alternatively, you can select the Use Suggested Quantities checkbox. This means that quantity will be the value under the Suggested column.
- Select Add To Existing Purchase Order.
- Choose which location to put the PO by selecting from the PO Location picklist.
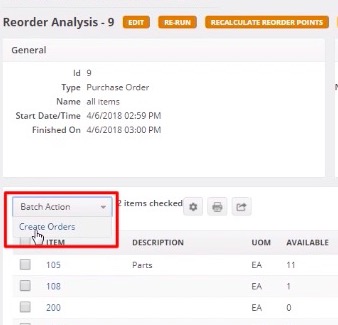
- Select Create Orders from the drop-down menu.


Make sure that you have a value in Vendor.
Check the Item's Quantity and Cost fields. The values of both these fields must be greater than zero, otherwise, you will need to adjust them manually before the order is created.
- Creating a New Purchase Order
- Click Start Ordering.
- Select the checkbox of the item(s) that you will include in the order.
- You can change the vendor, cost and order quantity as appropriate, by clicking on the value under the corresponding column.
- Alternatively, you can select the Use Suggested Quantities checkbox. This means that quantity will be the value under the Suggested column.
- Alternatively, you can select the Use Suggested Quantities checkbox. This means that quantity will be the value under the Suggested column.
- Choose which location to put the PO by selecting from the PO Location picklist.
- Select Create Orders from the drop-down menu.


A notification pop-window will appear and inform you that Orders were created. Click OK. 
The interface will refresh with the PO number(s). Click the PO No. under the No. column to access the PO.
Recalculate Reorder Points
Reorder Points (ROP) is the level of inventory at which a purchase order should be issued to replenish inventory and avoid out of stock situations. It is a minimum amount of an item which a firm holds in stock, such that, when stock falls to this amount, the item must be reordered.
The principle states that you should place a purchase order with the supplier at the point where you have enough inventory on hand until the purchase order is received.
To start recalculating reorder points, follow the steps below.
- Click Recalculate Reorder Points.

- Click on the line item to see which fields under each column are available for modification.


The columns on the list include:
- Item - The name of the item.
- Description – The description of the item.
- UOM - The unit of measure used for purchasing the item.
- Historical - Past-period data, which is used usually as a basis for forecasting the future data or trends.
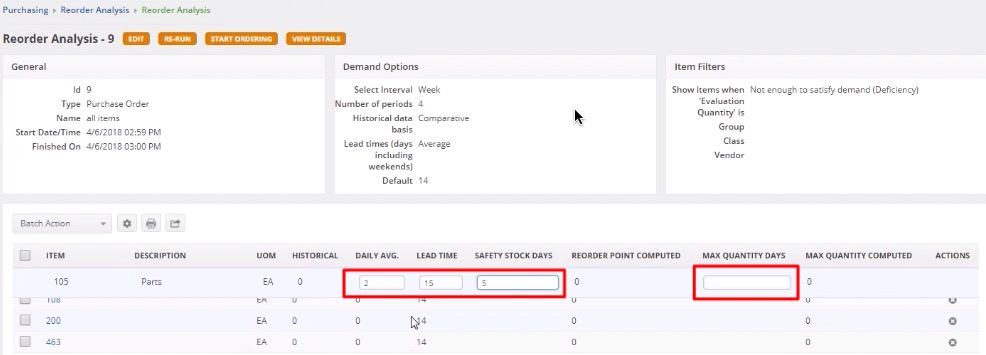
- Daily Ave. - The total usage quantity divided by the number of days in the date range specified when setting up the scenario gives the average amount used for each day. Enter a value for the Daily Average.
- Lead Time - If the Default lead time was selected when setting up the scenario, then the lead time will be the default value assigned to the items. Otherwise, the lead time shown will be the actual number of days between the last time the item was received and when it was placed on a purchase order. This is the time span that measures the time it takes a supplier to deliver stock to your door. For example, if you placed a purchase order with your supplier on December 1 and received it December 15, the lead time is 14 days. The lead time can also be manually entered.
- Safety Stock Days – Safety stock is used to account for unforeseen spikes in demand and/or delivery delays (i.e. longer lead time). If you want additional days to be added to the new reorder point you can enter it here.
- Reorder Point Computed - This is the newly calculated reorder point. It is based on the:
Reorder Point = Daily Average x Lead Time + Daily Average x Safety Stock days
Example:
Lead Time = 15 days
Daily Average = 3
Safety Stock days = 5 days
Reorder Point = 3 x 15 + 3 x 5 = 60 units
- Max Quantity Days - Enter the number of additional days, that if added to the total reorder point, should be yield the maximum quantity in stock at a given time.
- Max Quantity Computed – This is the maximum quantity of a particular item you should have in stock. It is computed by:
Max Quantity = Daily Average x Lead Time + Daily Average x Safety Stock days + Daily Average x Maximum Quantity days
Example:
Lead Time = 15 days
Daily Average = 3
Safety Stock days = 5 days
Maximum Quantity days = 2 days
Max Quantity = 3 x 15 + 3 x 5 +3 x 2 = 66 units
3. Click the checkbox of the item which you want to apply the batch action. 
4. Depending on what you need to, select a Batch Action from the drop-down menu. The choices are:
- Update Lead Time
- Update Reorder Point
- Update Max Quantity
- Update All

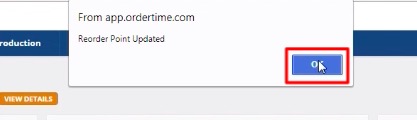
A notification pop-up window will appear and inform you about the update. Click OK.