Overview
In any production environment, particularly for for-stock manufacturers, job shops, and custom-build retailers, occasionally you will have an order cancellation or return that will necessitate breaking an Item back down into its base components.
Creating a New Disassembly
You will find the user interface of the Disassembly form remarkably similar to that of the Work Order. The only difference is that the process is flowing in reverse. Rather than taking components to build an Item, you are disassembling the Item into its original components.
Every Disassembly consists of a number of Steps. This describes the labor and manufacturing involved with breaking down the Item in question. All Steps are drawn from the Profile List > Steps. Just select the Step from the drop-down menu.
Each Step can contain one or more Components. These are the Items that will be added to inventory as a result of the disassembly.
Follow the steps below to create a new Disassembly.
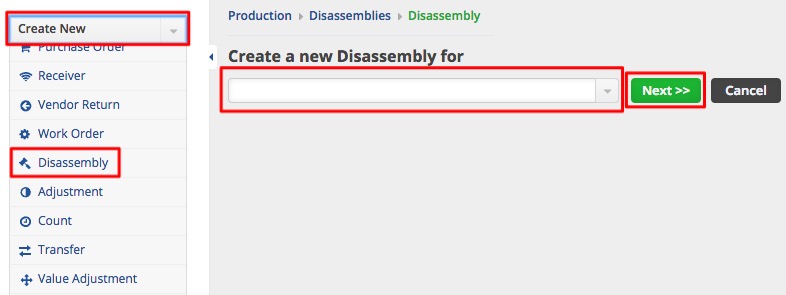
- Click on the side menu then, click the Create New drop down menu and select Disassembly.
- Under the drop down list, select an Item. Click the Next>> button to continue.
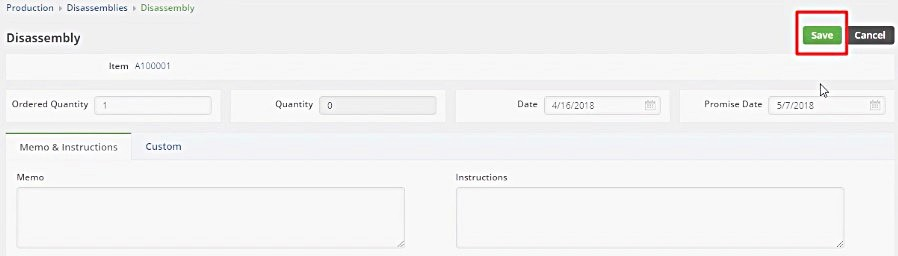
- Set the Quantity Ordered and Date parameters. You can add Memo and Instructions for your production team.
- As you go into production, you can also tally how many of the ordered units have actually been broken down thus far.
- Enter both the order date and the date the order is due. You can alter these dates using the drop-down calendar control.
- Click on Save to continue to the Disassembly screen.


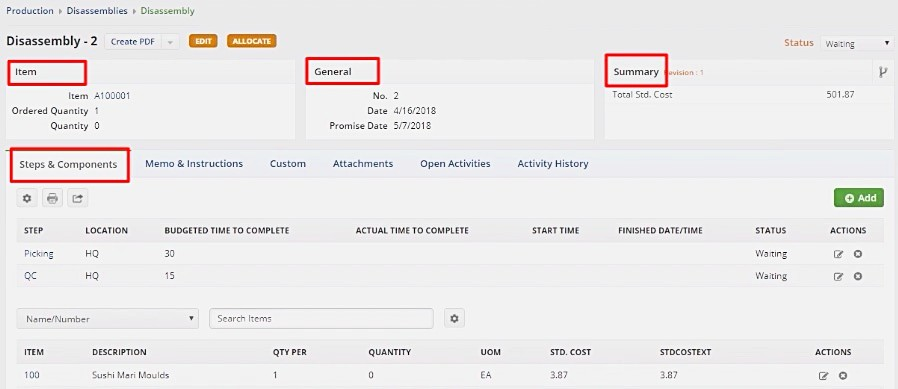
6. The following screen will display the Disassembly which includes the Steps and Items needed in the disassembly.
- The Disassembly will remain in a Waiting status until it is allocated to the production team.
- By clicking on the Edit icon, you can add the Quantity, review or add additional information to the Disassembly.
- Under the Item section, the Item #/Name, Quantity Ordered, and Quantity will be displayed.
- Under General, the Disassembly #, Date, and Due Date will be displayed.
- Under the Summary section, the Total Std. Cost will be displayed.
Under the Steps and Components tab you can complete the following:
- Under the ACTIONS you can click the Note icon to edit or delete your Steps and Items.

You can also do the following in the Disassembly page:
- Use the Edit button next to the Create PDF drop down menu to make changes.
- Send emails, add attachments, create a log, and add notes to your Disassembly.
- Under the Memo & Instruction tab, you can include notes and Date Stamp as needed.
- Create a PDF file of the Disassembly.


7. Once all the information is completed, you are ready to allocate the Disassembly by clicking the Allocate button. 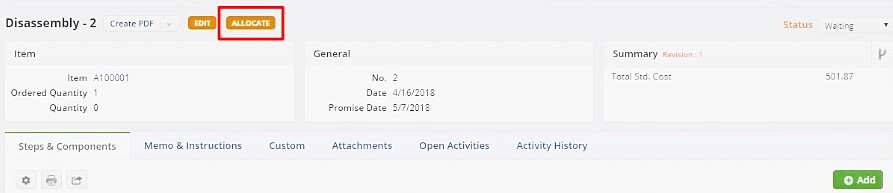
Once the Order has been ALLOCATED, the Disassembly status will be changed to "Ready". The status can be changed according to the Stage in which the Disassembly is at. Communication with your team is essential to keep the correct status on the Disassembly.
Once you have changed the Status to complete, the Disassembly will be marked as completed and the items (BOM or parts of BOM) that were pulled apart in Disassembly will be added back to inventory.
