The Adjust functions allows you Add (increase) or Deduct (decrease) inventory. Ultimately this function will result in one or more Quantity Adjustments in Order Time.
Click the Adjust button from the Warehousing Menu. On the following screen you will select the Location from the drop down list. Select one of your locations then click Next.
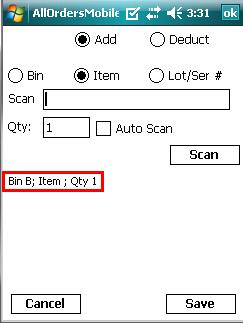
You will then see the standard warehouse adjustment screen.
![]()
First using the radio button you select to either Add or Deduct inventory. In this case, I want to Add inventory.
Next I would generally scan the Bin to which I am adding the inventory and therefore I clicked the Bin radio button to tell All Orders Mobile what I am going to scan. In this case I scan the Bin B. The next scan All Orders Mobile is expecting is Item and the radio button is automatically selected. Also note that the status label (in red below) now shows the Bin.
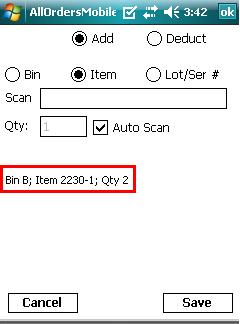
Depending on how you work you can either continuously scan or scan, enter the quantity and click the Scan button. If you prefer the former, scan continuously, then check the Auto Scan check box. You will note that the Qty box and Scan button disappear. Each time you scan now the quantity will be incremented by 1. In the example shown below I scanned the Item 2230-1 twice.
I can continue to scan different Bins and Items or I can press the Save button to add the adjustments to the Pending Adjustments List.
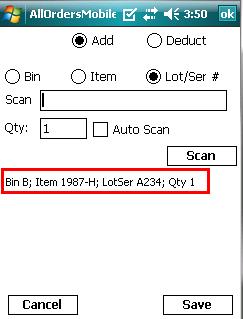
I did not have to scan the Lot/Serial # since it is not required for item 2230-1 but for Item 1987-H I needed to scan the Lot/Ser # since it's required by Order Time.
When I click the Save button, the above scan and all the previous scans where added to the Pending Adjustments List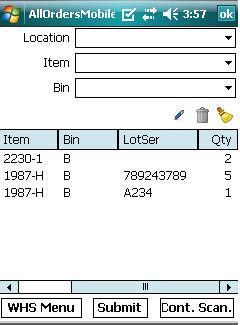 .
.
