Overview
An Assembly is taking two or more items and combining them to create a new item.
* A Kit and an Assembly are not interchangeable. Please see Kits vs Assemblies for details. *
Creating a Bill of Materials
To set-up a new Bill of Material:
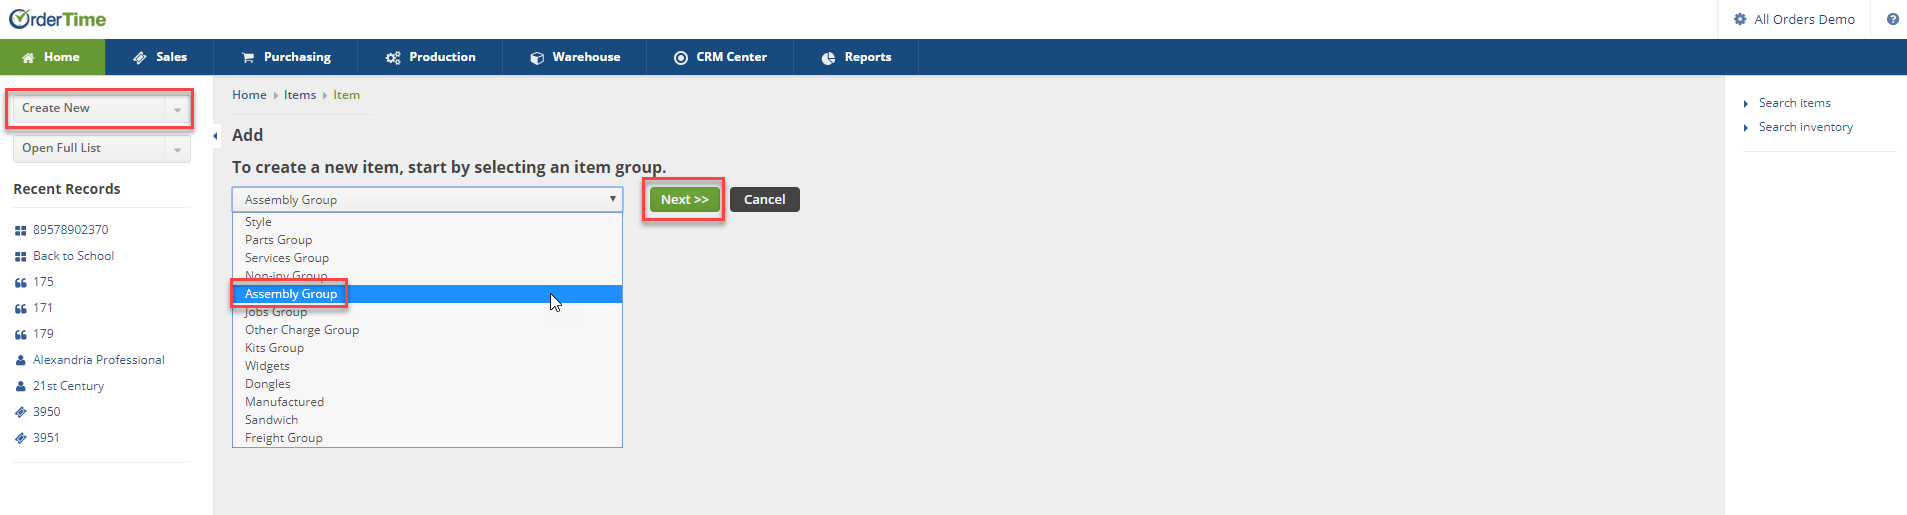
- Select Item from the Create New drop-down menu, or click the +New Item button located on the Items listing screen.
- Select Assembly Group from the drop-down.
- Click the Next>> button.
This will bring up the Create a New Assembly screen. The New Assembly screen is broken up into two areas: General/Other and the Tabs.
- On the General/Other section, you have the ability to either manually enter a name for your Assembly, or automatically generate one by pressing Next Item No.
- Next you will choose the Unit of Measurement (UOM) Set associated with the new Assembly.
- You can set up the UOM Set inside the Profile List section.
- Other available options on the New Assembly screen include the ability to select if the Assembly is Active.
- The Tabs section gives you the ability to select General options, Purchasing options, Notes and Custom specifications about the new Assembly.
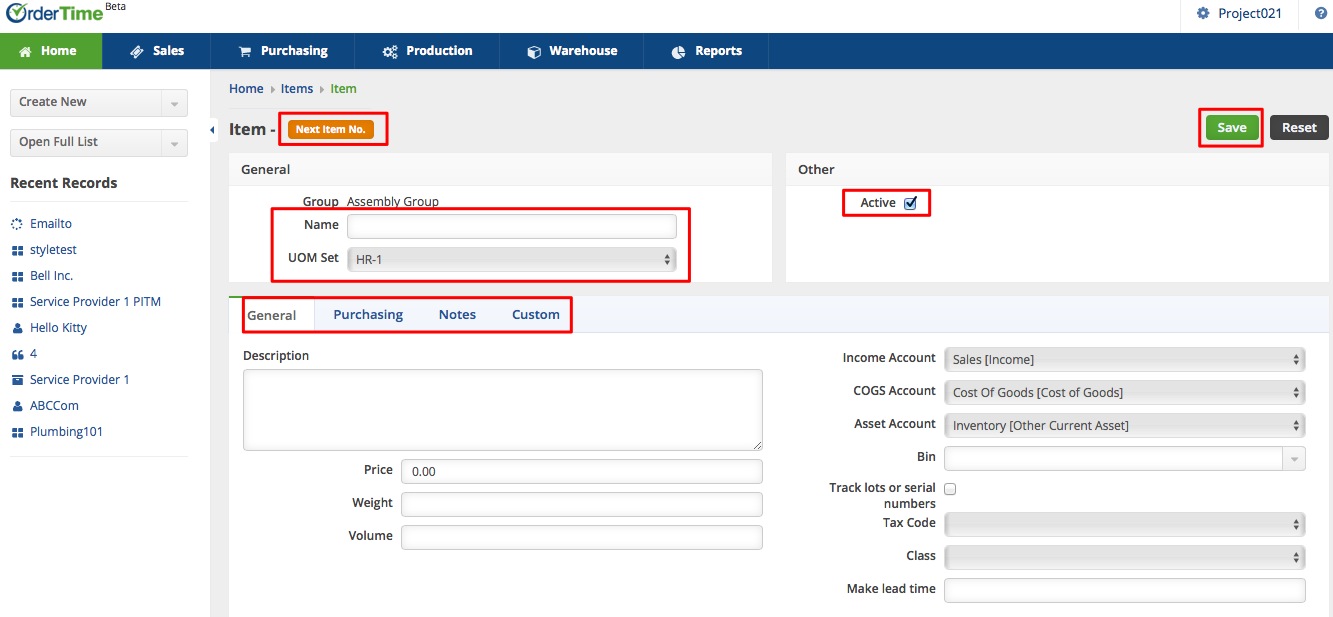 Once all the information are entered click Save.
Add Components and Selections
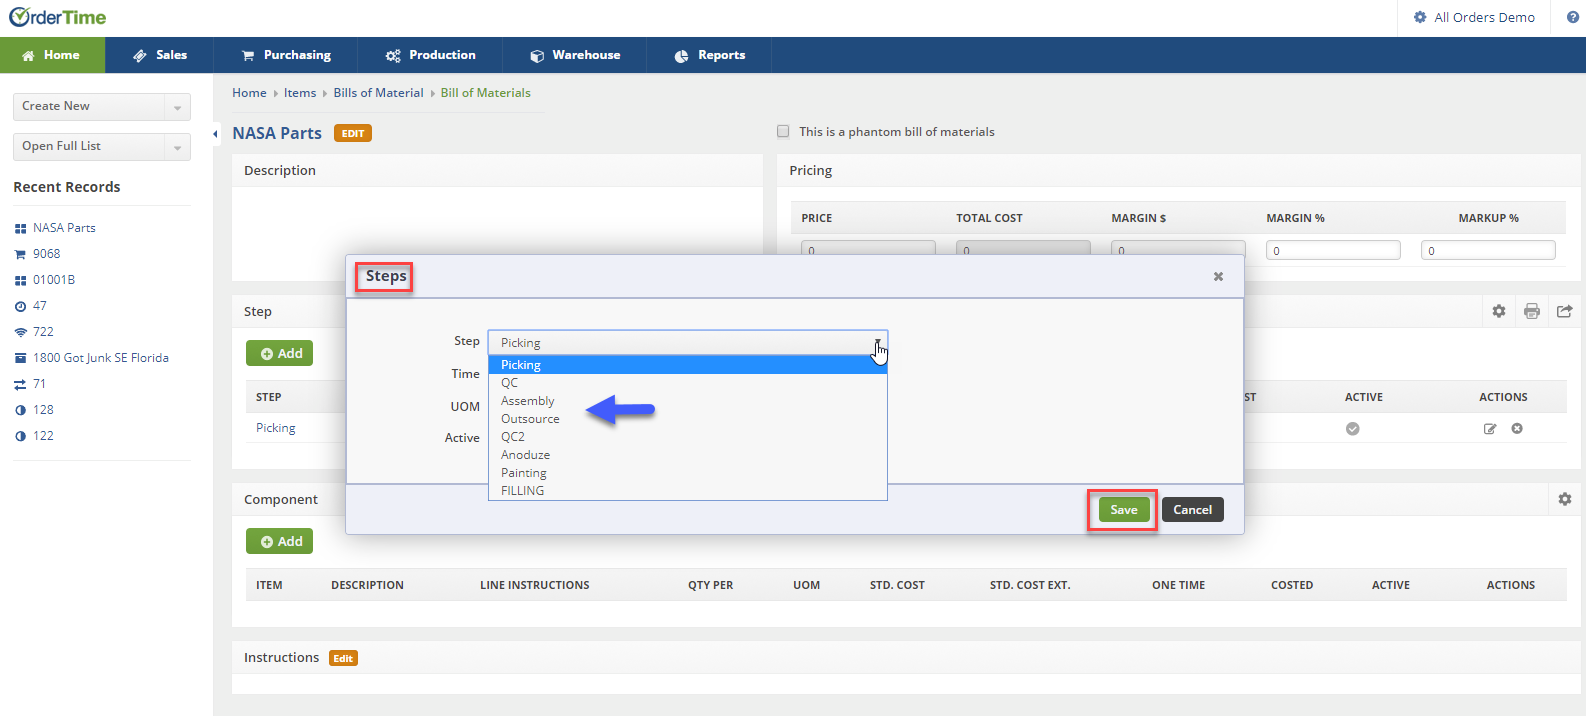
After the Assembly Group is created, you can select the Assembly from the Item menu and then Add Components and Selections.
- Open the Assembly Group record and click the Edit Bill of Materials button.
- Once the edit screen opens, click the +Add button next to the corresponding area.
- The Steps pop-up allows you to enter the Steps, Time, Hours and select if it is 'Active'. (https://help.ordertime.com/help/creating-a-step)
- Click Save.
- In the Add/Edit Component section, enter the Item Number, Production Line Instructions, Quantity Per and select if it is being used only One Time and if the selection is 'Active'.
- Click Save when completed.

Once you have entered the necessary information to generate a Bill of Material, the next screen will indicate the items chosen and the steps needed to create it. If needed, you can add pricing to the Bill of Materials to include the labor or any other cost associated with the Bill of Materials.
Remember, you always have the option to make changes to your Bill of Materials by simply clicking on the Edit icon under the ACTIONS Column. Editing capabilities are available for the Steps and Components section.

