Overview
If your business operates from multiple locations, then it's likely that you'll need to shift inventory between them at some point. Since it's vital to keep track of where exactly your Items are located at any given time, OrderTime offers the Location Transfer process to facilitate transfers.
Complete a Location Transfer
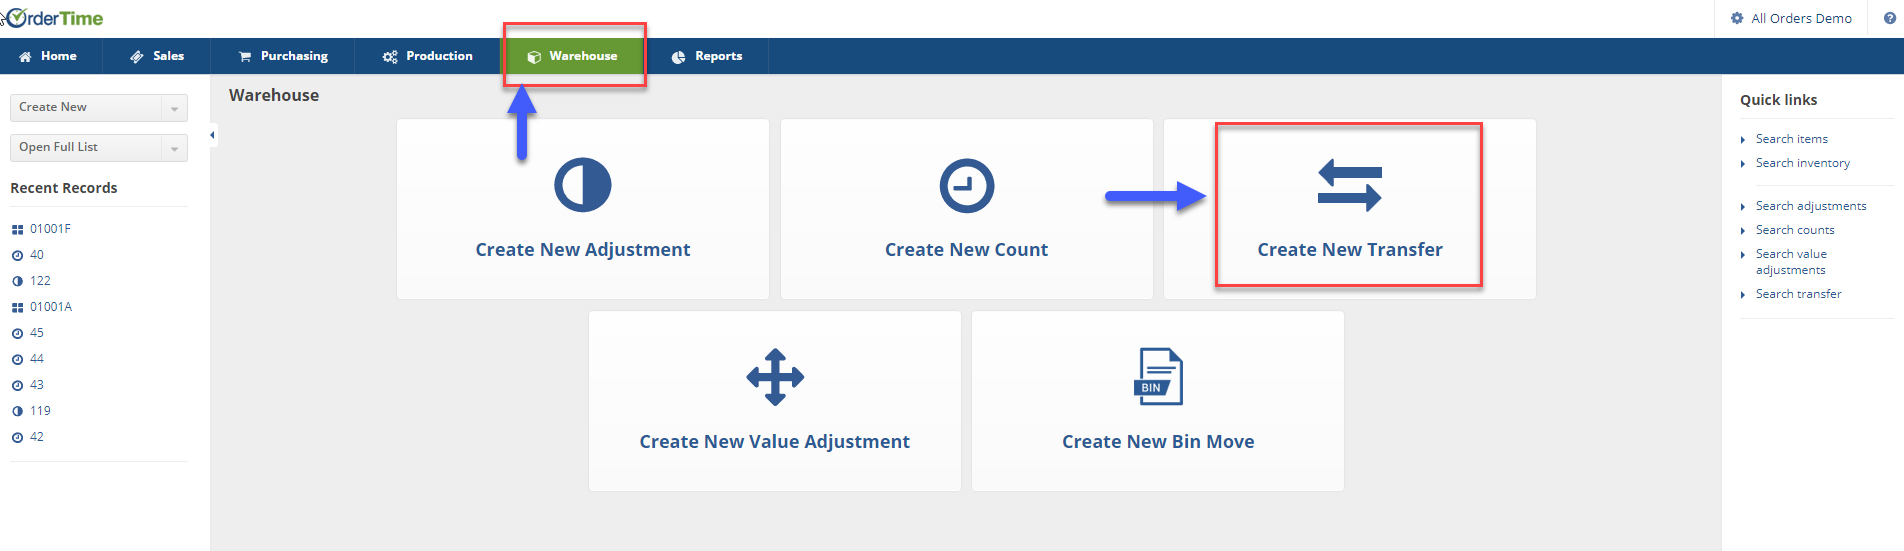
On the OrderTime main page, click on the Warehouse module and select Create New Transfer section.
The Transfer screen will generate the next available adjustment number. On this screen, you will choose the Location (From), Location (to), the date, Ship Methods, Tracking No, Total Weight.
- Use the drop down menu to select locations (From and To)
- The date will be very important. Whatever transfers are completed for the chosen date, it will be marked in your books as of that date
- Under Ship Method select carrier from drop down menu
- Enter a tracking number is needed
- Enter the Total Weight
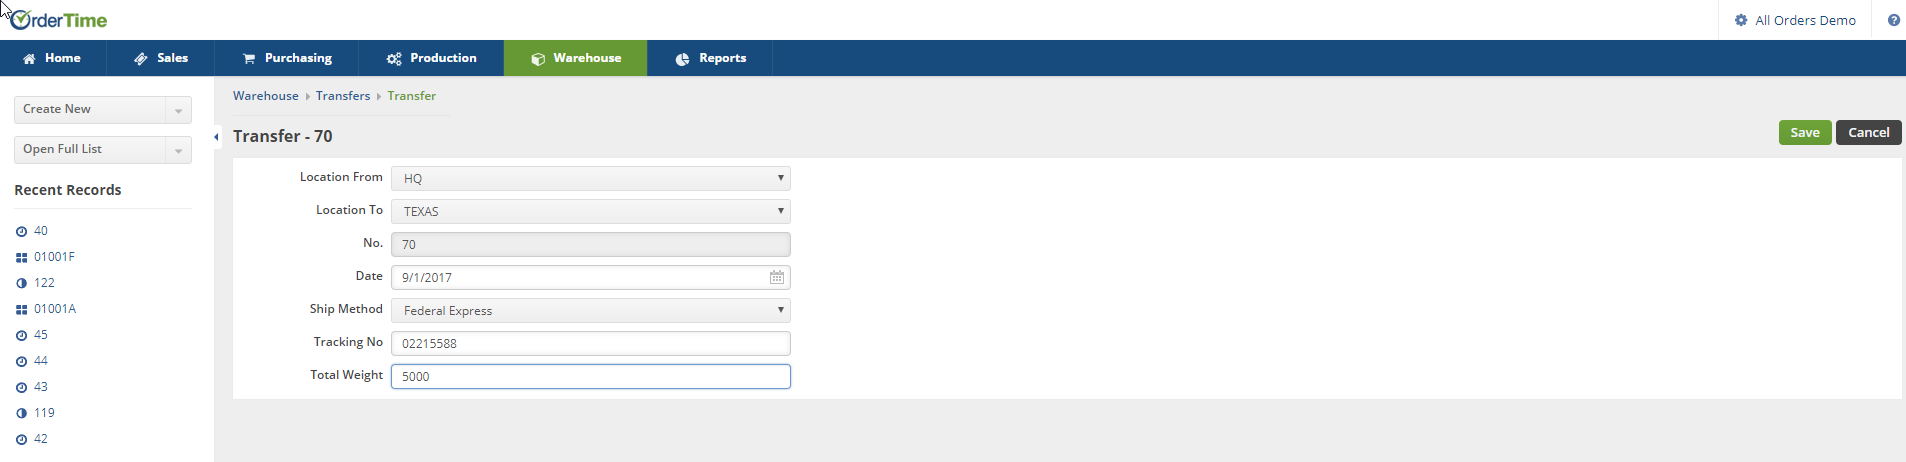
Click on Save when done.
Select the Items to be transferred
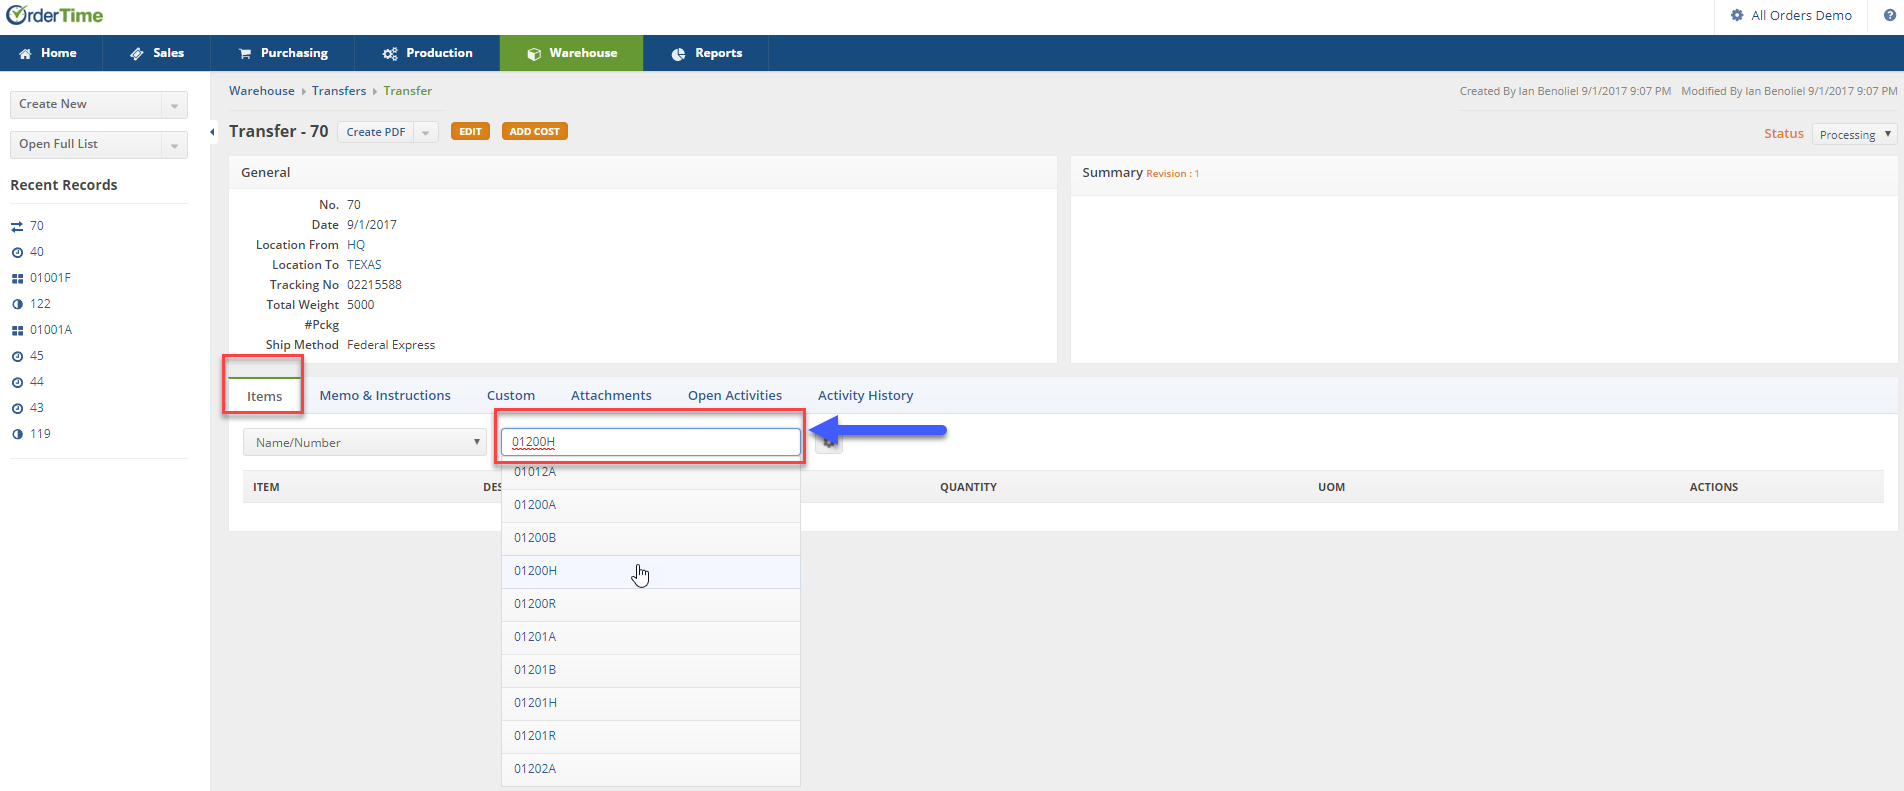
On the transfer screen, under the Items tab enter the item number inside the Search Items box. You also have the option to sort your items by selecting from the drop down menu (i.e. Name/Number, Description, UPC, Manufacturer Part No, Vendor Part No)
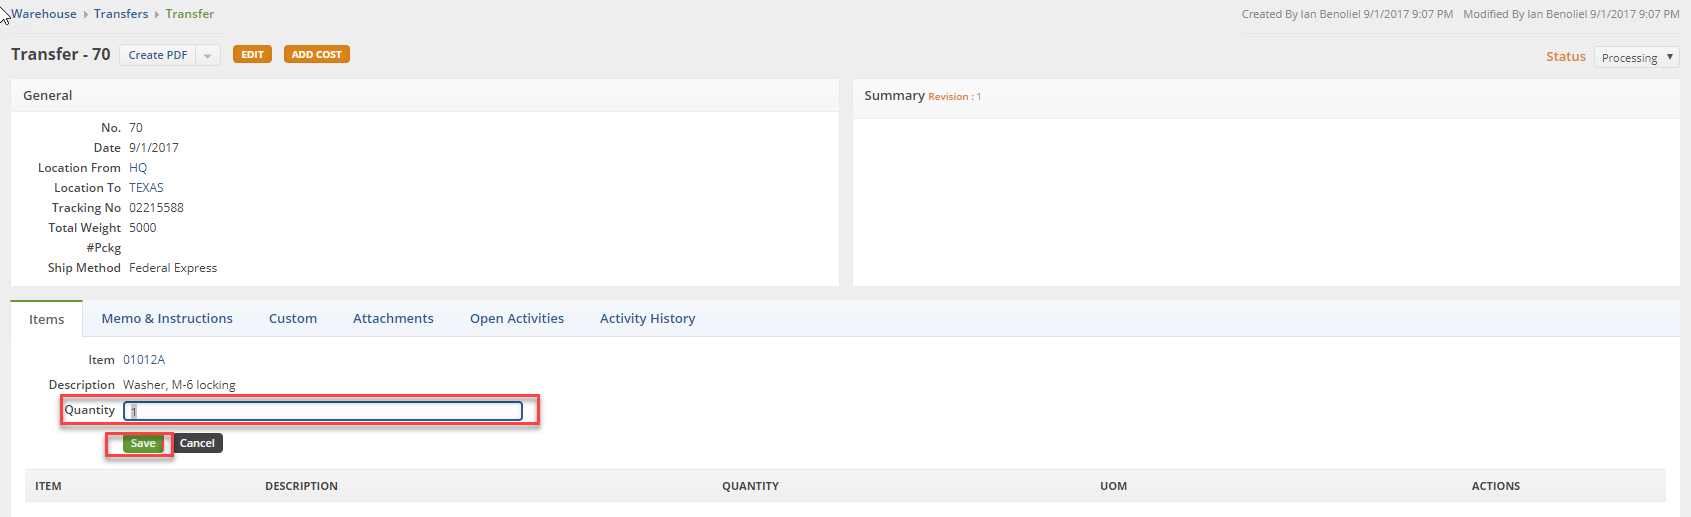
Once the item has been selected, you must enter the quantity to be moved. Click on Save when done.
The next screen will display a listing of all the items to be transferred. If needed click on the Note icon under the ACTIONS column to make changes to the items.
- Under the General Edit screen, you will be able to review the description of the Item and make changes to the quantity.
- Under the From Bins tab, you can change/add the Bin from where the item is being transferred from
- Under the To Bins tab, you can change/add the Bin to where the item will be moved to at the destination location
- Click on Save when done

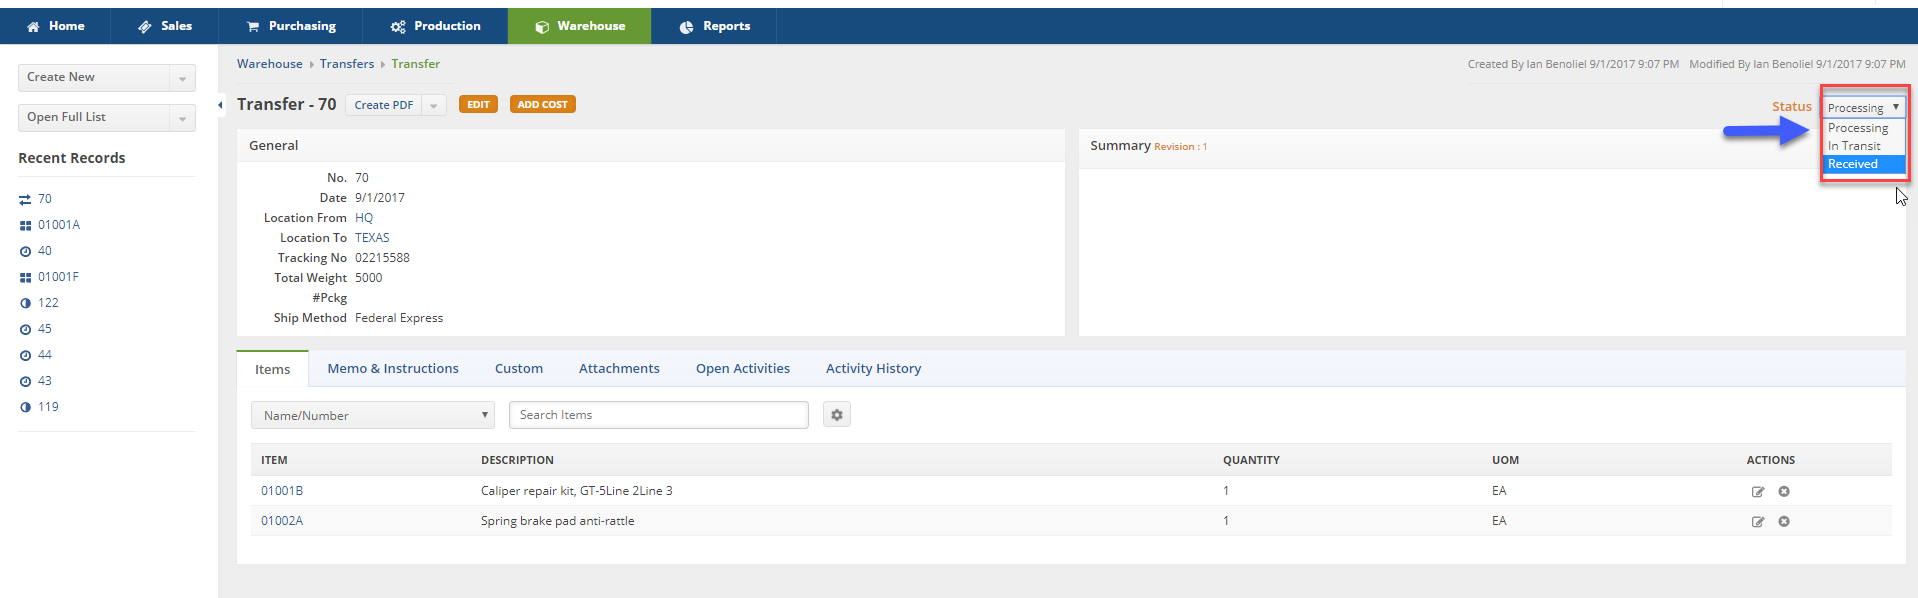
You can change the Transfer Status by clicking on the status drop down menu.
- Processing: Items are being processed prior to completing the transfer
- In Transit: Items are in transit, this can be selected when the items are being shipped
- Received: Items have been received at the receiving location
If you need to add a cost for transferring items between warehouses, you add such cost by clicking on the Add Cost icon next to the transfer number. On the screen you can complete the following:
- Enter an amount
- Select the account to be assigned (i.e. Account Payable, freight, duties, Cost of Goods Sold, etc.)
- Select the Vendor
- Enter a Reference Number
- Allocation Assignment (Cost, Quantity, Volume, Weight)
Click on Save when done.