Overview
A Quote is a document that a seller provides to a buyer that offers goods or services at a stated price, under specified conditions. Quotes are documents that are used to let a potential buyer know how much your goods or services will cost before they commit to the purchase.
Generate a Quote
To create a Quote in OrderTime, click on the Create New drop-down menu and select Quote. The system will allow you to select a customer from your database and service them with a quote. The quote will include pricing, quantity, tax and description for the item(s).
Aesthetically, the Quote is nearly identical to the Sales Order. Functionally, these two forms serve very different purposes:
- The Sales Quote is used when the Customer is merely inquiring about price, inventory, etc., and has not yet committed to purchasing.
- The Sales Order is used when the Customer has actually agreed to the purchase.
Generate a Quote for a Customer
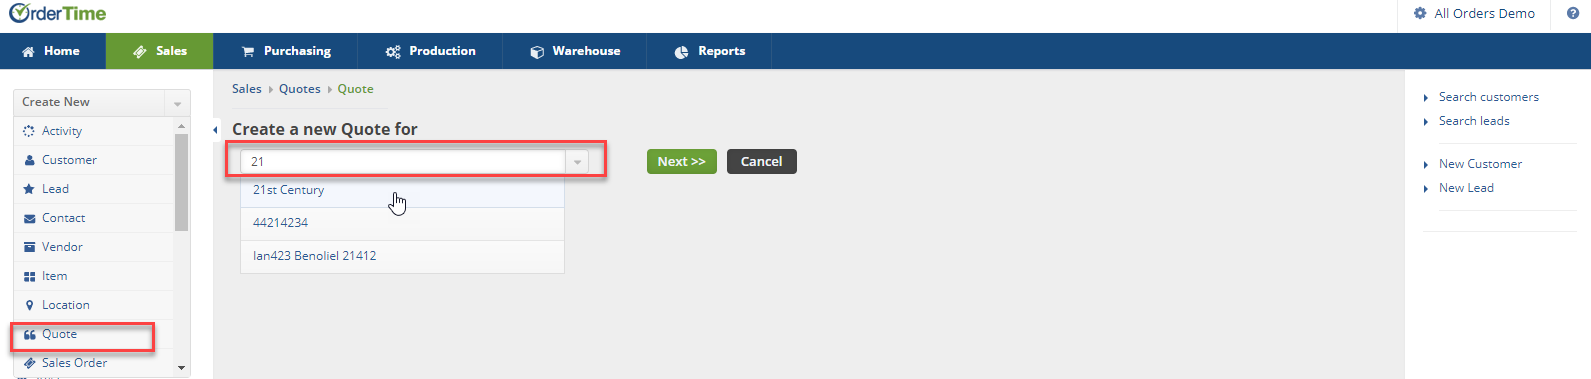
- On the Home landing page, click on the Create New drop-down menu.
- Select Quote
- From the Create a new Quote for drop down menu, select the customer you need to generate a quote for.
- Click the Next>> button.
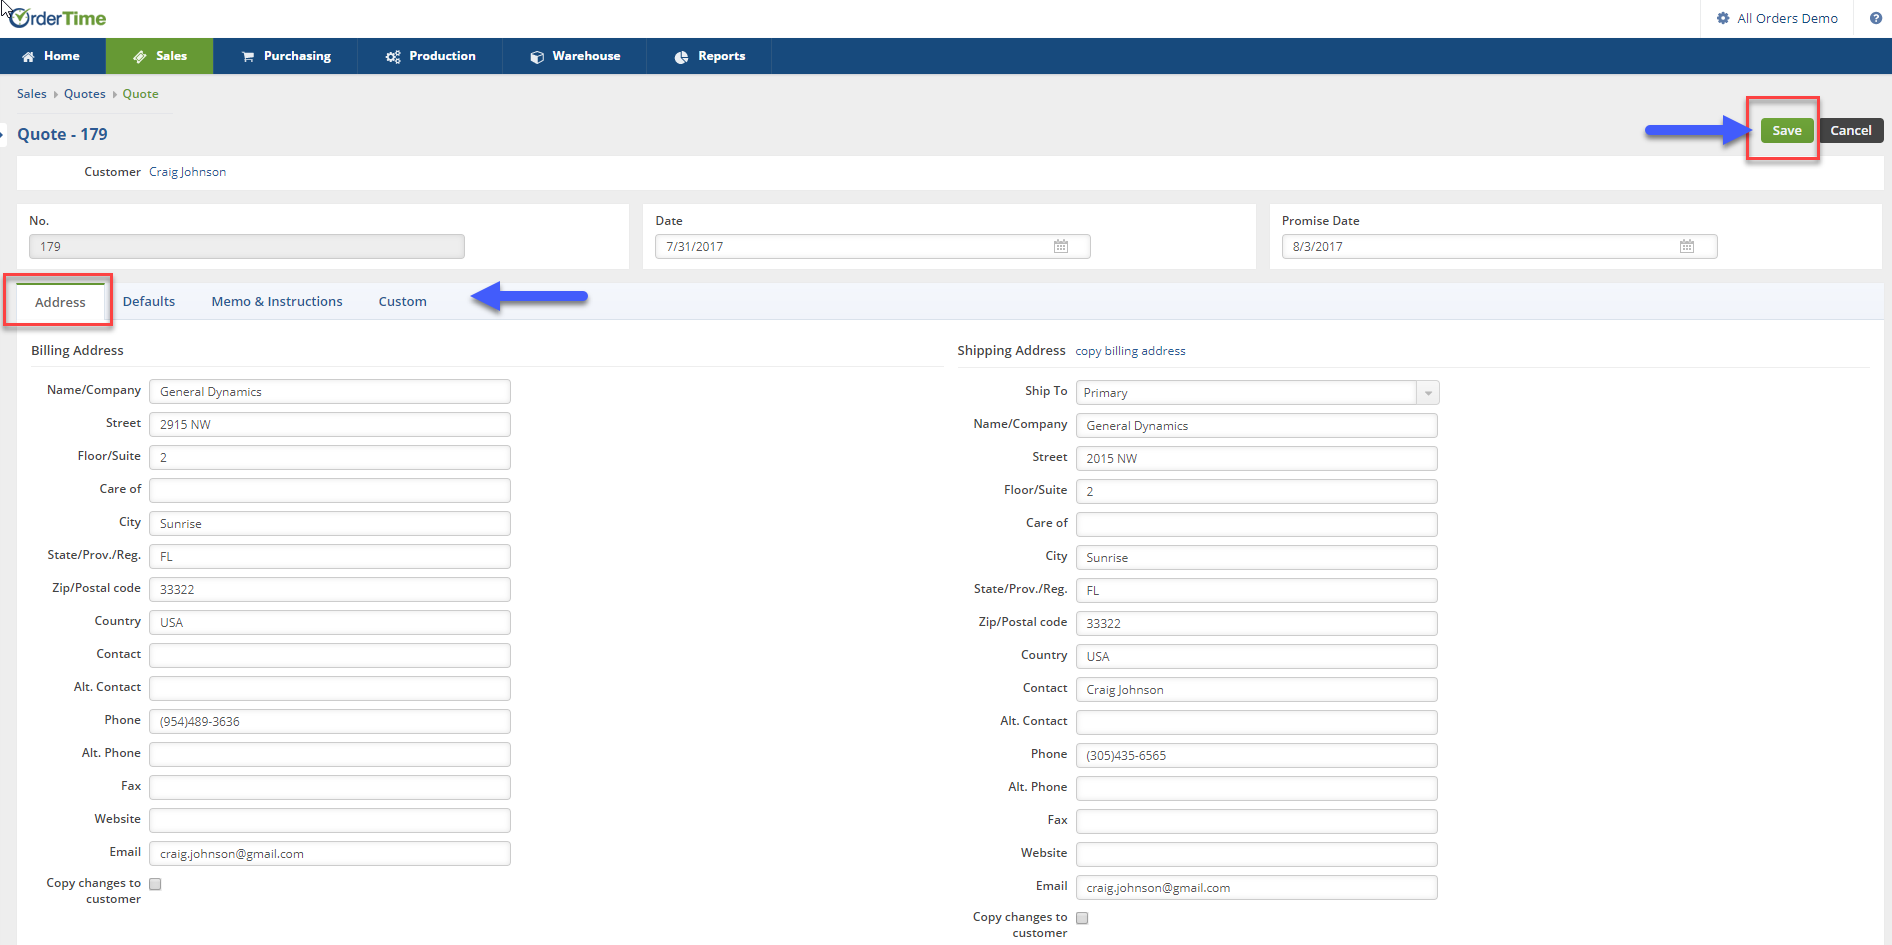
The following screen will display the quote number, date, promise date and customer information.
- The Date will auto-populate with the date the quote was generated. Click on the Calendar on the Date box if you wish to change it.
- Click on the calendar in the Promise Date box and select the desired date.
- Click Save when you are done completing the Customer's information.
The Address tab is used for entering your customer's Billing Address and Shipping Address.
- Pay close attention to the Shipping Address portion for it may be different from the Billing Address
- Ensure that all pertinent information is entered, this information will drive your future Sales Orders and any other sales function.
- If the Billing Address is the same as the Shipping Address, click on the copy billing address and all the information will migrate from Billing Address to Shipping Address.
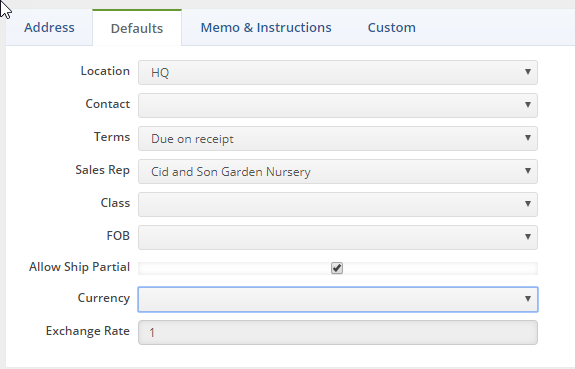
Default Tab
Under the Default tab, you will have the option to select the Location, Contact, Payment Terms, Sales Rep, Class, FOB, Select if Allow to Ship Partial, Currency and Exchange Rate.
Memo & Instructions
Type information that are relevant to the Quote and special instructions. This information will be displayed on the quote or set as an internal memo. Shipping instructions can be entered for Shipping Instructions.
Customs
The customs tab is used to customize your Quotes. (To customize your quote Customs tab log in as the administrator and click on the Gear icon top right-hand corner. Under Settings, click on Custom Fields)
Click Save when you complete entering the customer's information.
Entering Items for your Quote
Once you have entered all the necessary information into your quote, you are ready to enter the Items.
- On the Items tab, use the drop-down menu to select your preferred method for searching for your item.
- Enter the item number, description and UPC. The system will automatically search for similar items within your search scope (A drop-down menu will be displayed. Select the item desired).
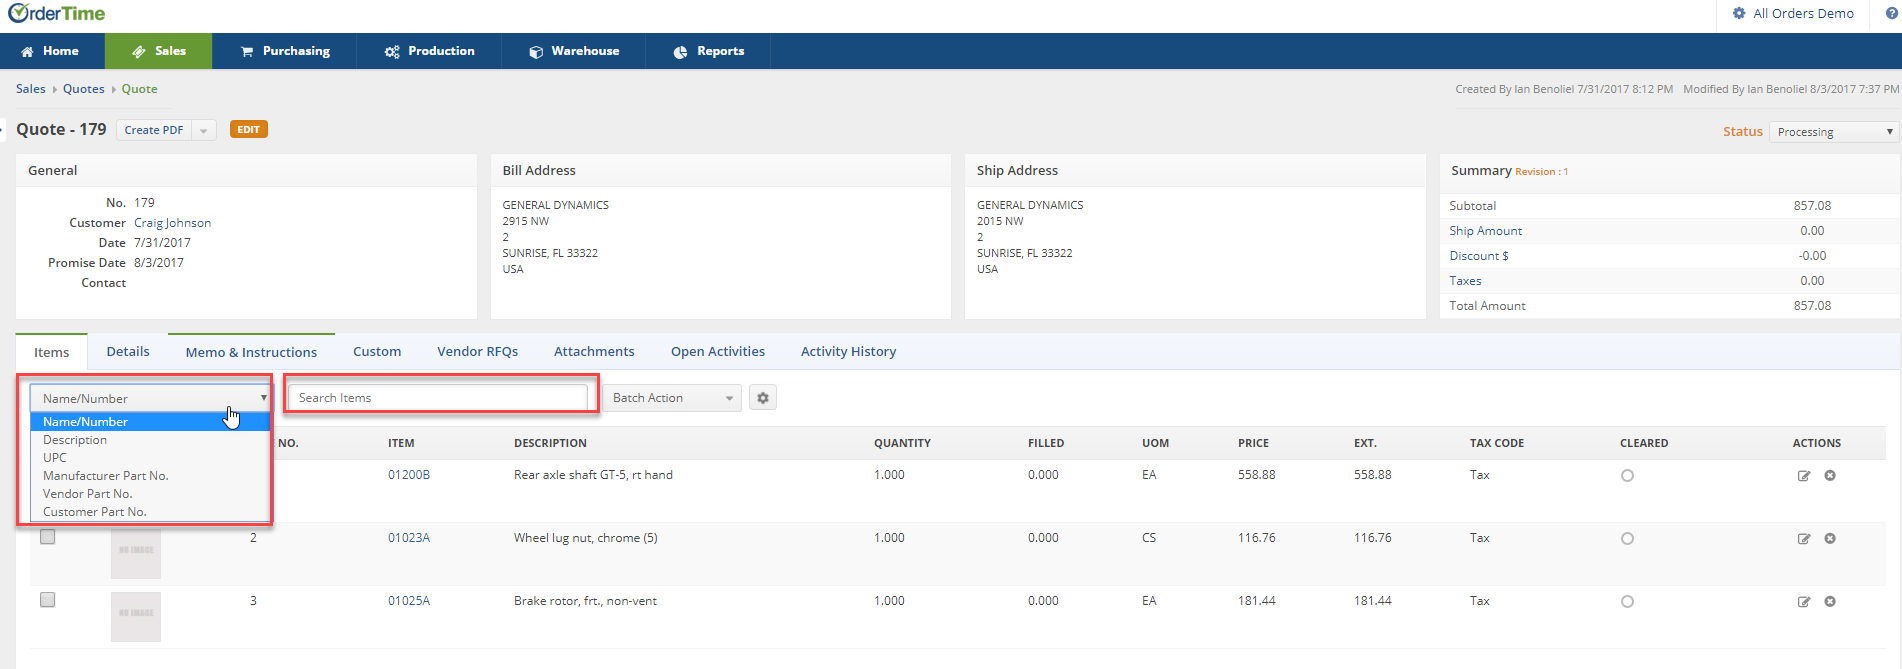
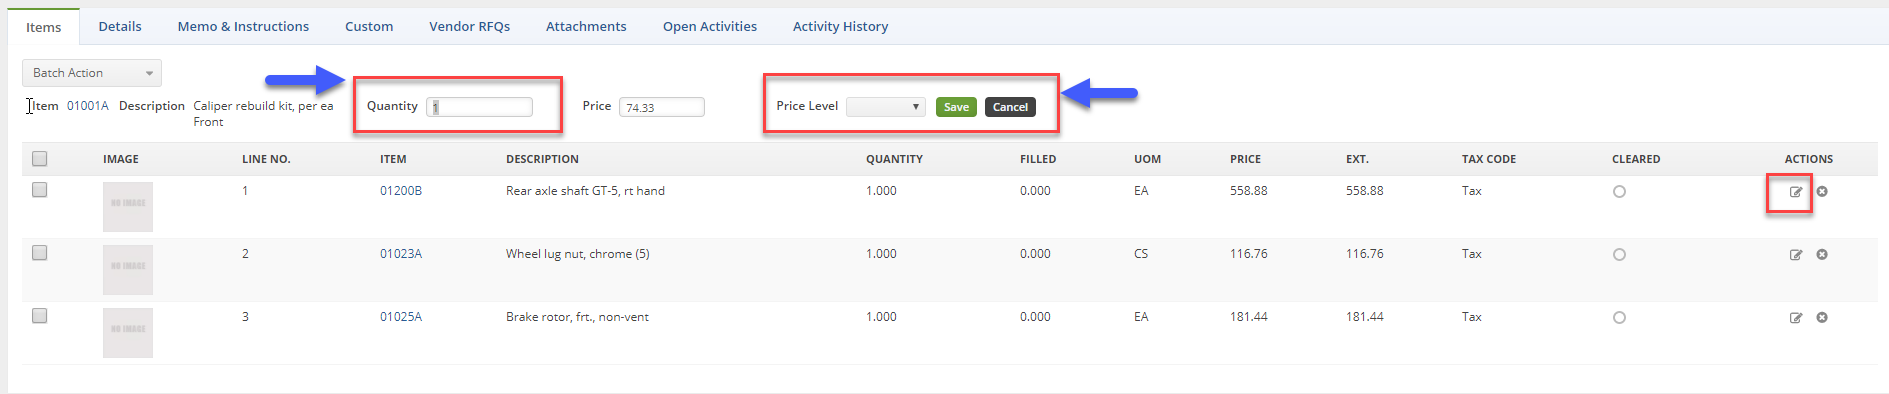
- On the next screen, you will be able to enter the Item quantity, price and Price Level (drop-down menu).
- Once you click on Save, the Item will be displayed on your quote listing with other items you have entered into the quote.
- Items on your quote can be edited by clicking the notepad icone under Actions. You can also delete the Item from the quote by clicking on the delete (X) icon under Actions (a pop-up box will appear to confirm deletion).
- When you edit a line item, you can edit the item description, quantity, price and price level, tax code.
- Under the Custom tab, you can edit the item make, work status (for work orders), serial number, size, expiration date. Select if the item need to be Cleaned, Overhauled or Repaired. You can enter measurement, quantities produced and specific shop instructions.
- To include additional information to your quote, you can click on the tabs adjacent to the item tab.
- Under the Attachments tab, you can include an attachment.
- Under the Open Activity tab, you can add an event to your activity calendar or assign a task to a member of your team.
- Under the Activity History, you can send an email to your customers or specific associates within your group.
- You can add a log to your quote, this log will be displayed on your customer's log.
Submitting the Quote to the Customer
Once the quote is ready to be submitted, select from the Status drop-down menu and select the Presented option.
- If the Quote was lost, then select Closed Lost from the menu.
- If the Quote is Accepted you Convert to Quote to a Sales Order which will automatically set the status as Closed Won.
You cannot select Closed Won status, in order to change the status to Closed Won, convert the quote to a sales order.
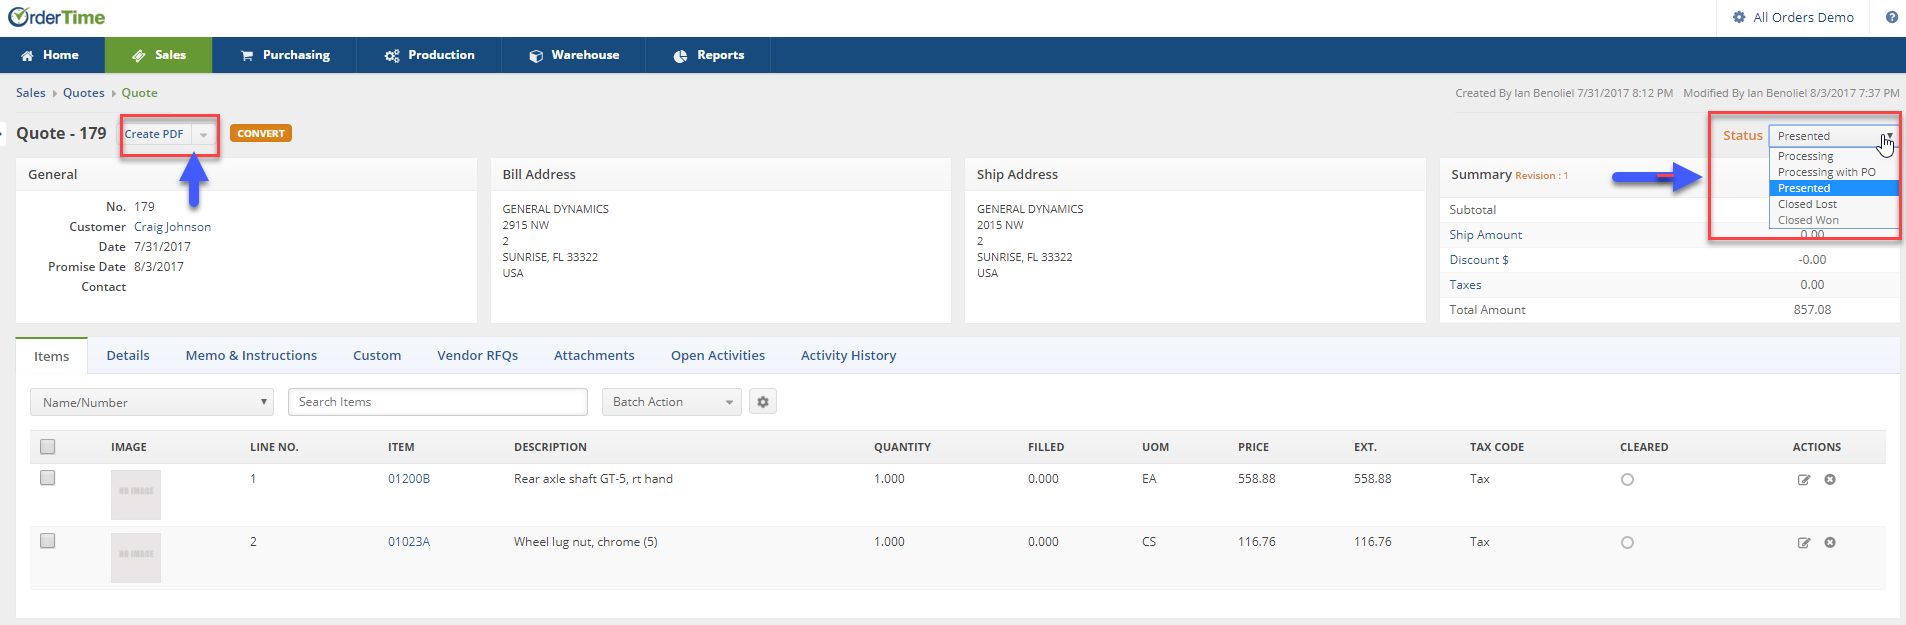
Upon submitting the quote, you can create a PDF and send the quote to your customer.
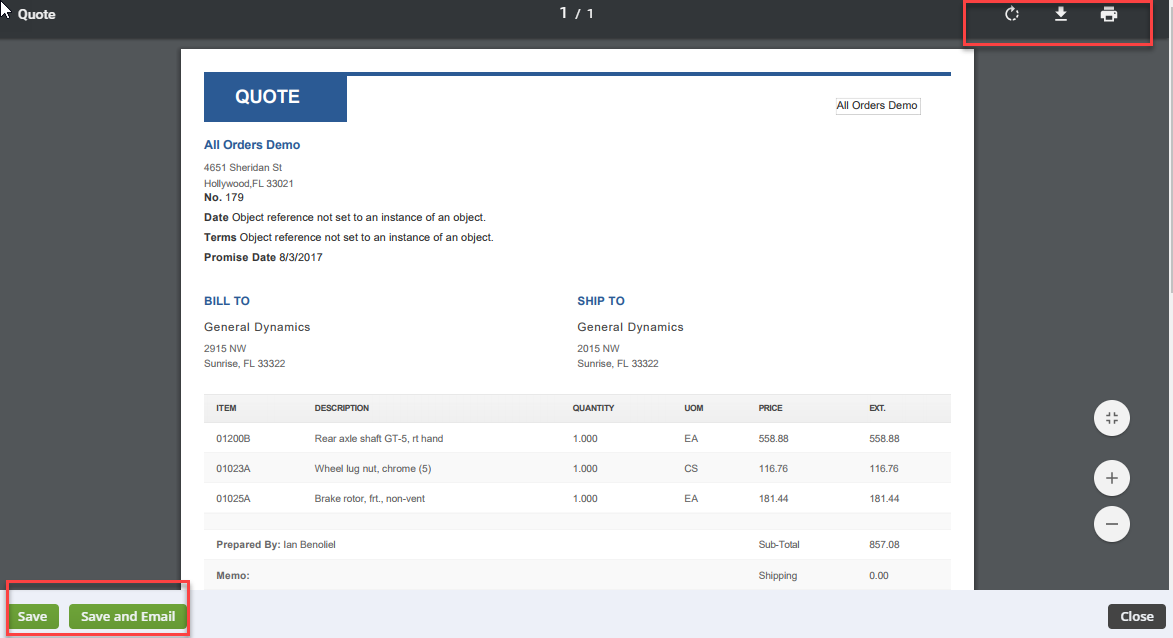
- Click the Create PDF icon on the left-hand corner next to the quote number (A pop-up window will open).
- You will have the option to Save, Save and Email to your customer.
- The print, download, rotate option is available on the top right corner of the pop-up window.
Convert the Quote to a Sales Order
Once you are ready to convert the quote to a Sales Order, click the Convert button next quote number.
- A pop-up window will be displayed "You are about to convert this quote to a Sales Order. Would you like to proceed?" Click OK to proceed.
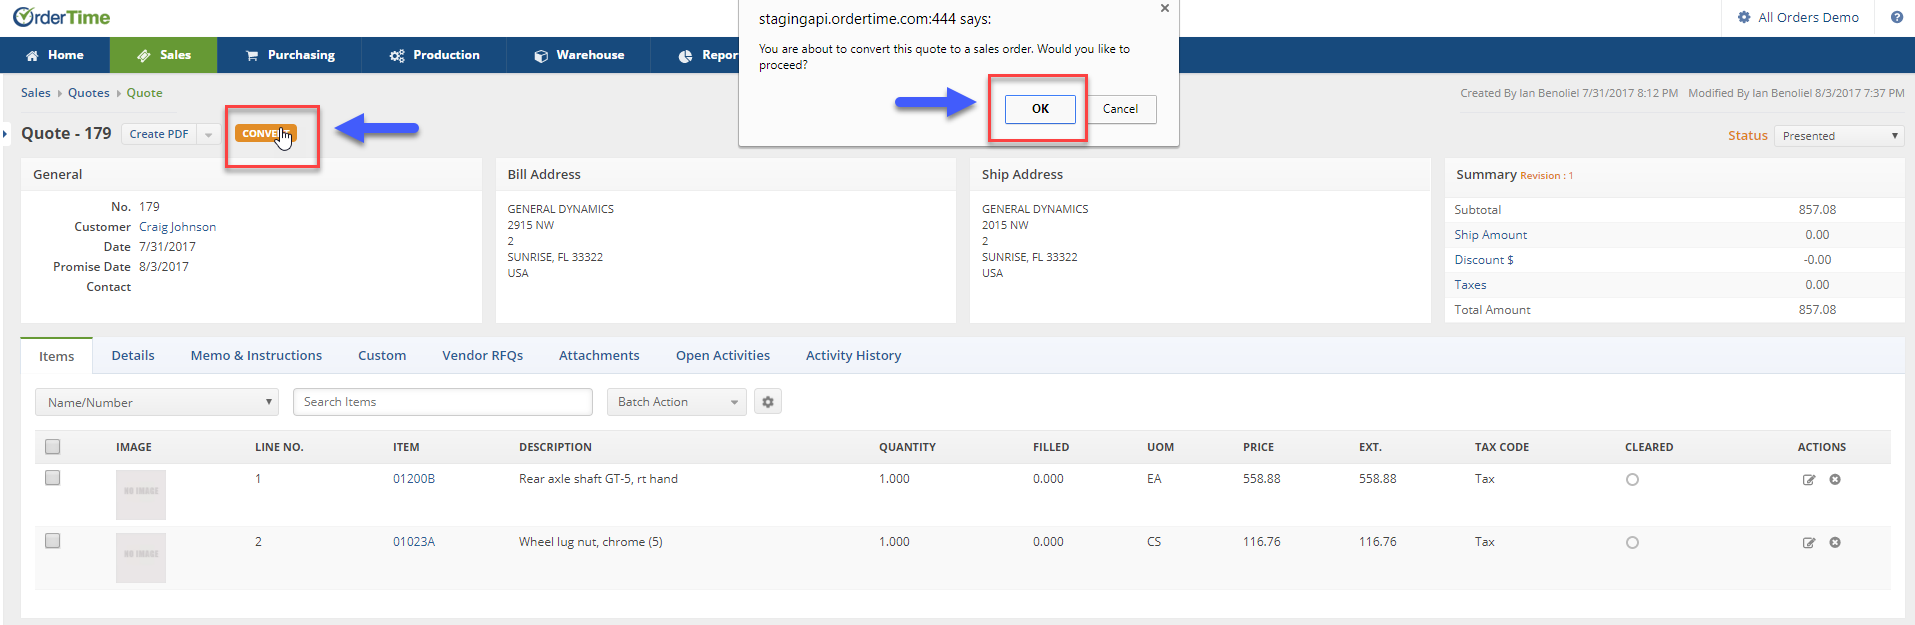
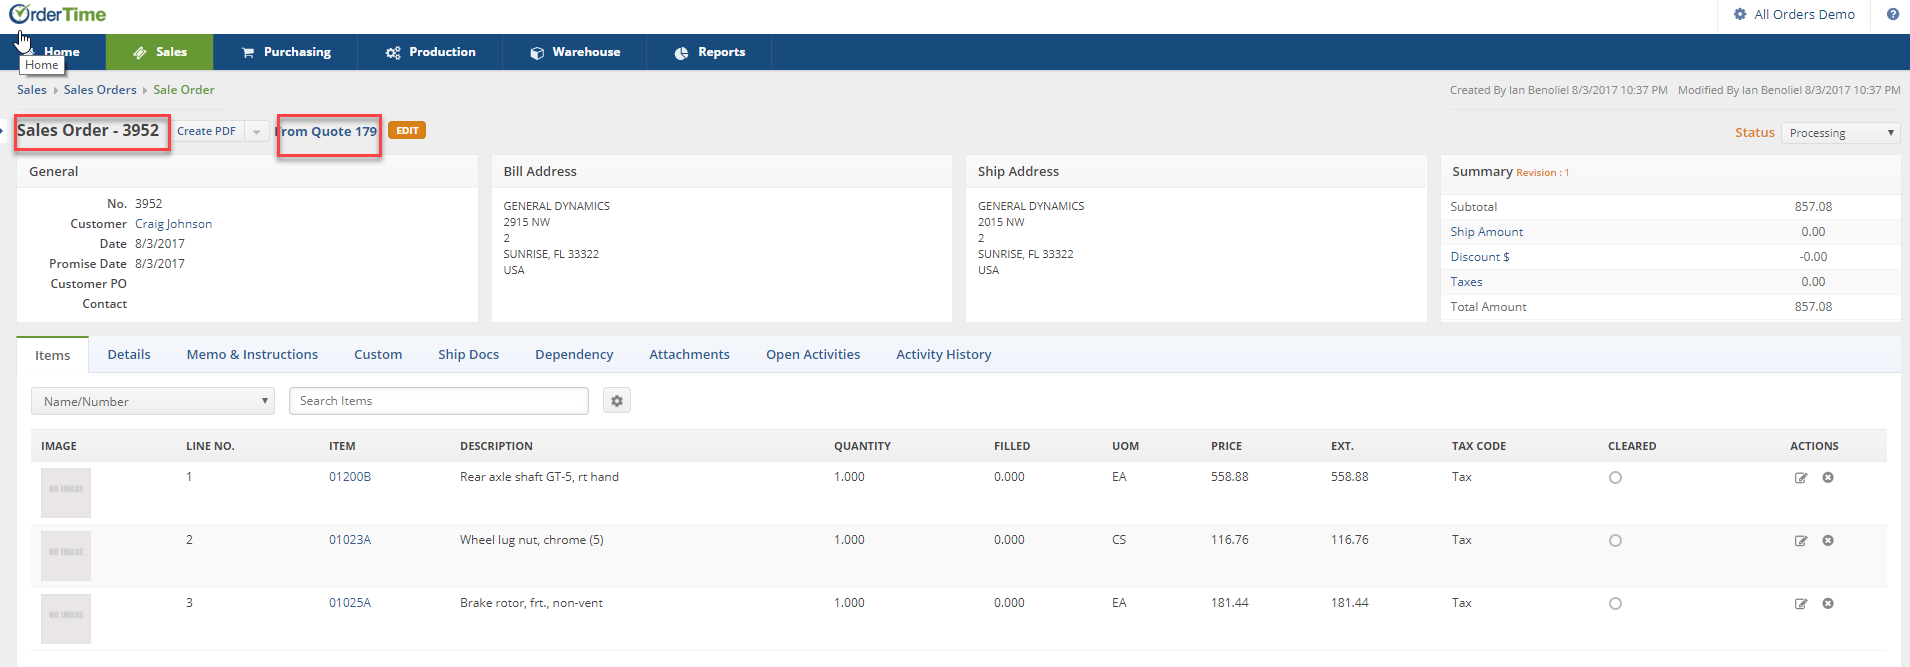
Your quote has been converted to a Sales Order. Your Sales Order will have a different number from your quote. All the information from your quote has been transferred to Sales Order. The Sales Order can be edited while it is on the Processing Status. Refer to Sales Orders more information.
Next: Creating a Sales Order