Overview
Setting your warehouse location and assigning a bin location for your products is an essential function for your business. Adding a warehouse and assigning a bin location for your products is an easy process.
Adding a New Location
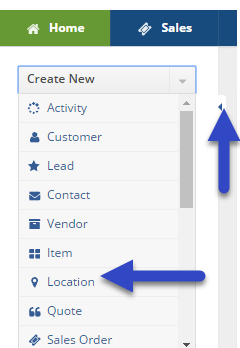
To assign a warehouse location and add a bin location, access the side menu from the Home Page and click on the Create New from Drop-Down menu. Select Location to enter your warehouse information.
You can restrict a user such that they can only see inventory and transactions associated with one or more Locations in Users.
Enter Warehouse Information
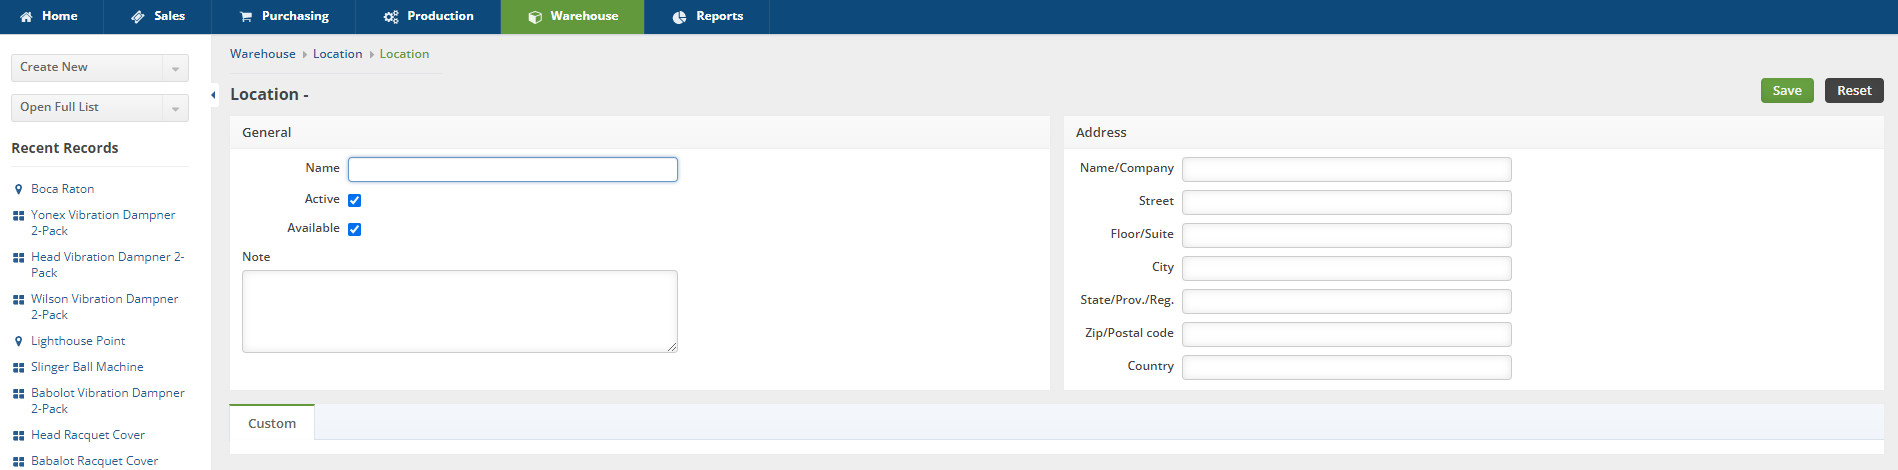
Once you have selected Location from the drop-down menu, the Location information screen will be displayed. Complete the following information on the screen:
- Enter your warehouse's name.
- Complete your location's address information.
- Select if the warehouse is Active and Available.
- When the warehouse is Active and Available, your products stored at that location will be available for picking and production.
- You can enter a Note inside the Note area for references and useful information pertaining to your warehouse.
- Click on Save when the warehouse information has been entered.
The system allows you to establish multiple warehouses and create a unique criteria and location ID for each one of them.
Create a new Bin location
Creating a new Bins location allows you to create a set location at a designated warehouse/location, assigning an accurate location for an Item. This can be valuable for organizations that have large warehouses with miles of aisles. A Bin can be any place of storage, from an actual bin to a shelf, workbench, crate, or even a virtual location.
Once the warehouse information has been entered, a bin location can be created for your items. You can enter a new Bin immediately after creating a location, simply click on the Tab Bins and begin the process as described below:
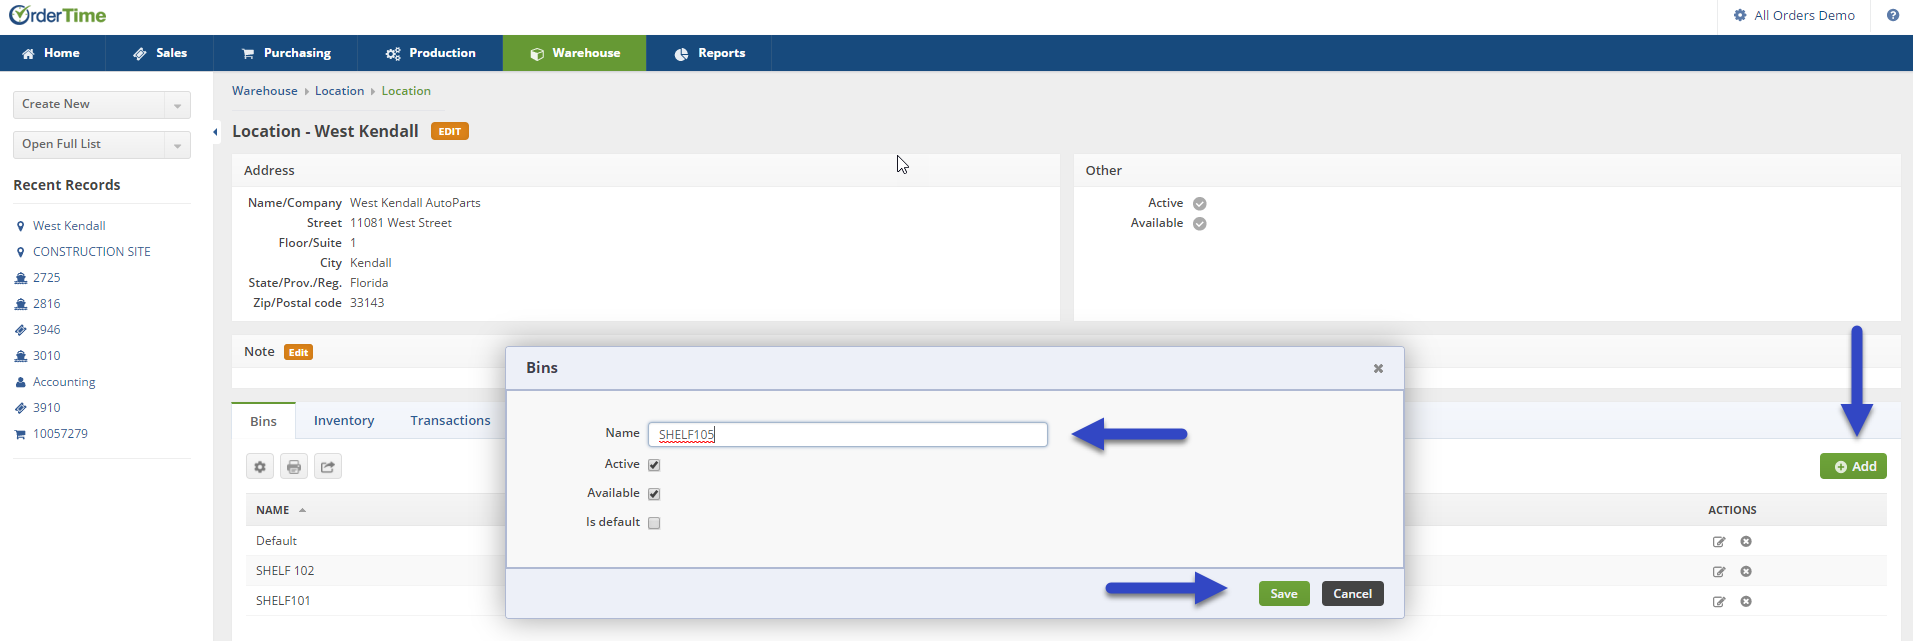
- To add a Bin location, select the Bins tab and click on +Add to the right of the screen.
- A Bins pop-up screen will open, enter the Bin name or number you wish to assign to that location.
- The Active and Available boxes will be checked, click on Save when completed.
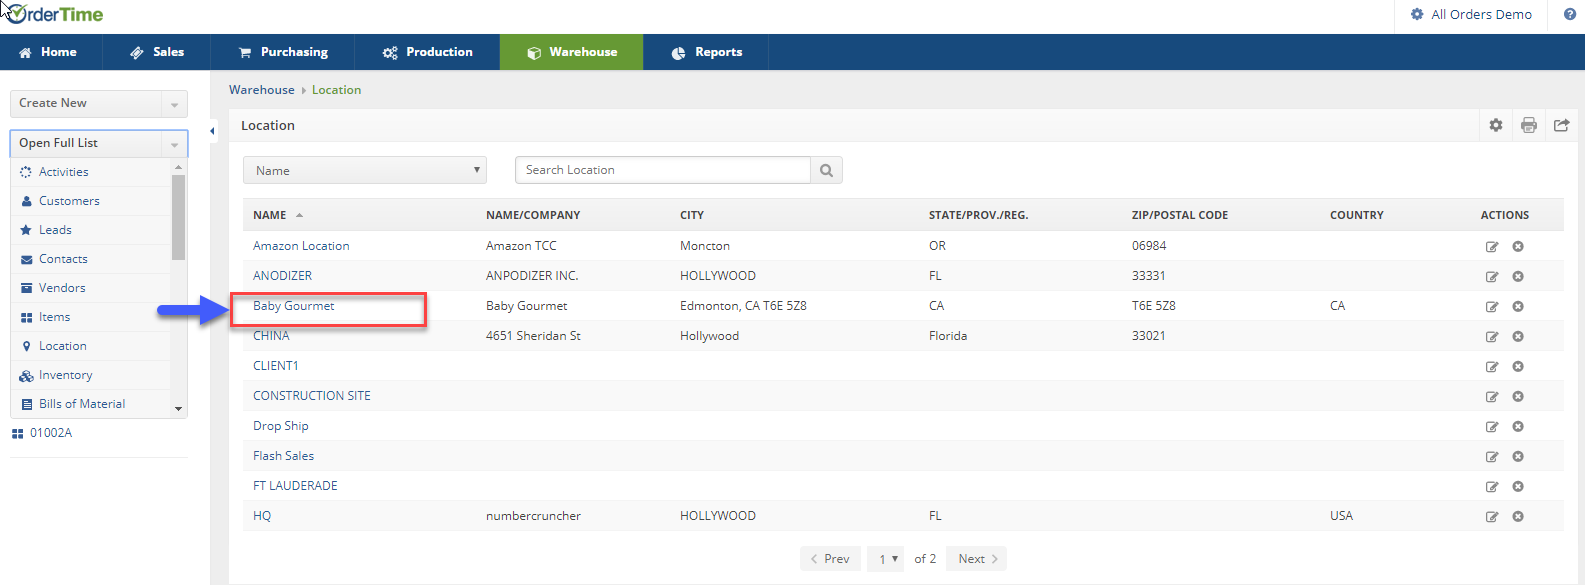
Creating a new Bin location for an existing location
If a warehouse location has been already created and you wish to enter a new bin location for your items, click on the Open Full List from the Main Page and select Location.
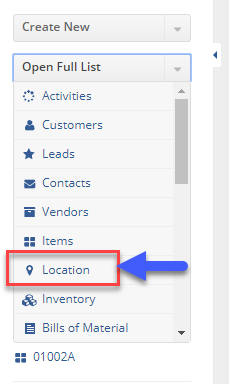
On the Location Screen, under the NAME column, click the location at which you wish to create a new Bin.
Once the warehouse/location has been selected, a bin location can be created for your items. You can enter a new bin by clicking on the Bins Tab and begin the process as described below:
- To add a bin location, select the Bins tab and click on +Add to the right of the screen.
- A Bins pop-up screen will open, enter the name or the bin number you wish to assign to that location.
- The Active and Available boxes will be checked, click on Save when completed.

Once a Bin location is created, it will be displayed under the Bins tab. That location is ready to be used at your warehouse. You can always select if you bin location is Active and Available by clicking on the Note Pad under the ACTIONS column.