Overview
More details can be added to an Item to help complete and round up that Item's record. This article will you walk through the steps of adding more details.
Details
- You can bring up the item and add more information to its record.
- Click on the Open Full List drop-down menu and select Items .
- Click the Name/Number of the item. This will lead you to the Item page.
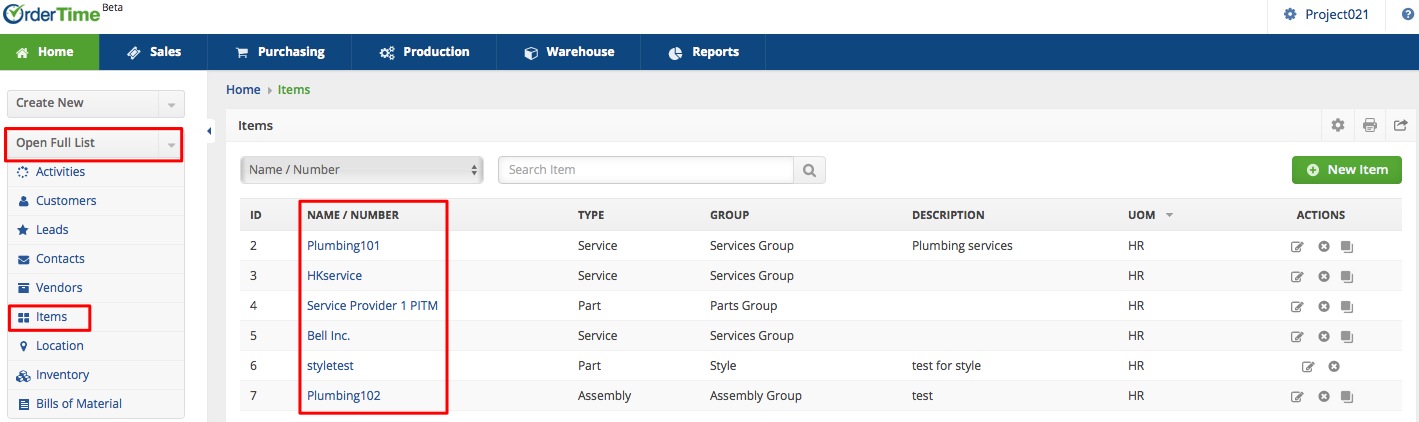
- Click on a tab and click the +Add button bring up the form with fields that need to be populated with that record's information.
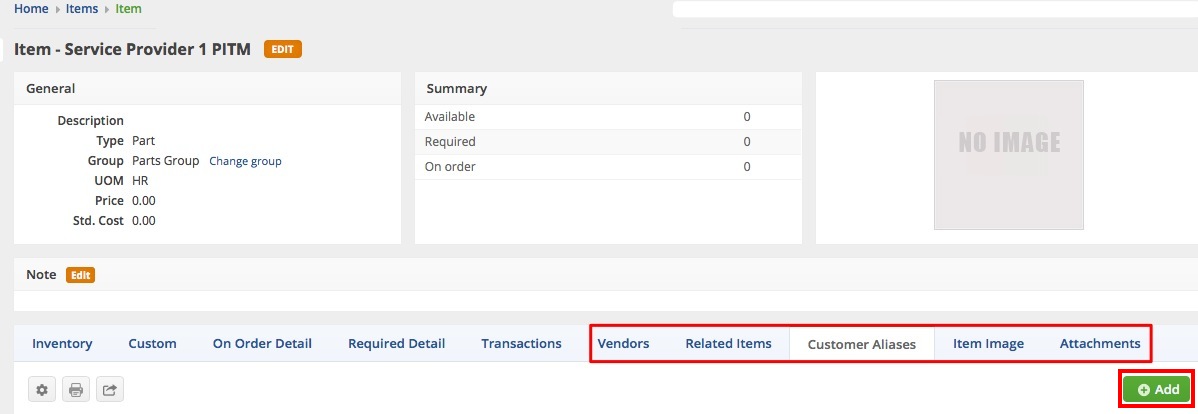


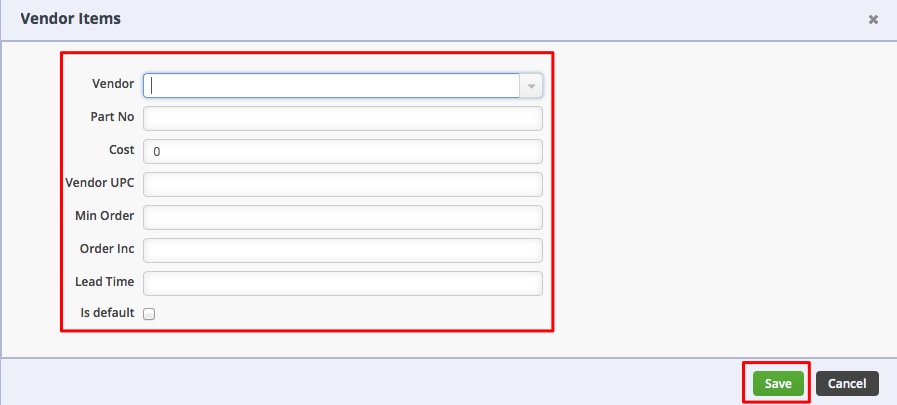
- Vendors
As many businesses purchase products from multiple vendors, Order Time allows you to have multiple vendors per Item. Each vendor has its own part number, cost, lead time and other pertinent information.
- Vendor: Select a vendor from the drop-down list. You can only enter each vendor once per item.
- Part No: This is what your vendor call your 'item'. You can print this on purchase orders to provide better information to your supplier. You can also scan this number into a PO or Receiver and it will automatically bring up your part number.
- Cost: This is the cost used for the item on a purchase order when purchasing from the particular vendor. It is important to note that this cost should be entered in the vendor's currency.
- Vendor UPC: If your vendor has a UPC which differs from the UPC you use, enter it here.
- Min. Order: This is the minimum order amount on purchase orders. Order Time will automatically correct purchase order quantities to conform with the vendor's minimum order requirements.
- Order Inc.: This is the order increment. Order Time will automatically correct purchase order quantities to conform with the vendor's order increment requirements.
- Lead Time: This is the number of days it takes your vendor to deliver from the order date. Order Time uses the lead time in conjunction with the order date to determine the 'due date' when creating purchase orders from the reorder analysis.
- Default: Indicates the default vendor. To change the default vendor, simply click the checkbox of the alternate vendor.
- Click Save.

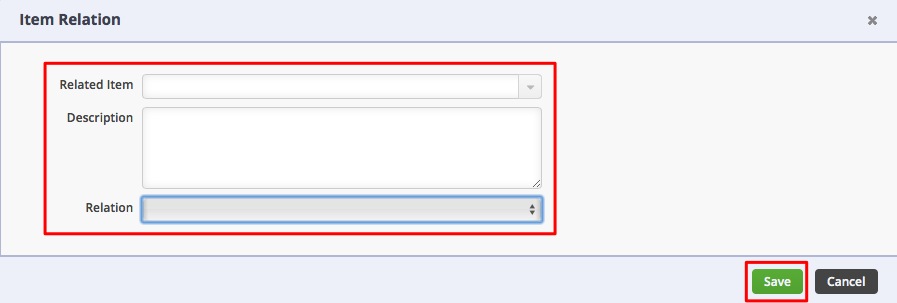
- Related Items/Item Relation
On this tab, you can choose Items in your inventory that are somehow related to the current item.
- Related Item: Select a related item from the drop-down list.
- Description: Enter a concise information about the item relation.
- Relation: Select a relation. There are three types of Relation:
- Replacement - An item can be a Replacement when it can substitute for the current Item or if it is out of stock.
- Up Sell - It is used when the item can be considered as accessories, related services, or any other Item that somehow augments the main Item. This mainly affects the B2B Portal functionality.
- Linked Parts - Parts Linked for common uses such as Assemblies, Kits, or Styles
- Click Save.

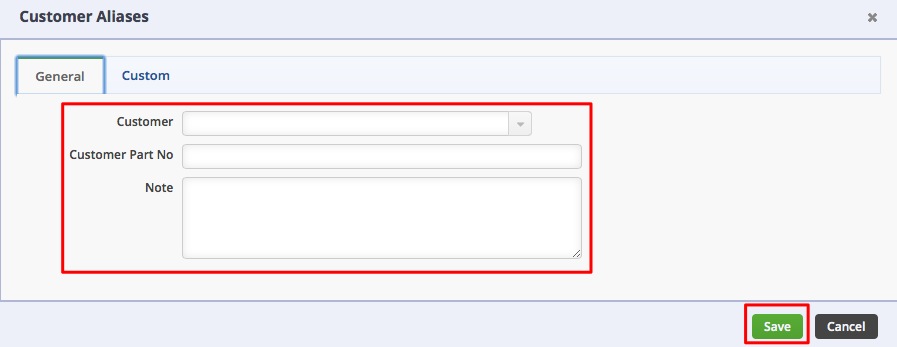
- Customer Aliases
Customer aliases are used to find you part number based using your customer's no. You can also print their part number on all sales documents.
- Customer: Select a customer from the drop-down list. If a certain Customer is required to refer to one of your Items by a particular part number, you can record this information here.
- Customer Part NO.: Enter the customer number. Besides being available for reference purposes and reports, the customer numbers can also be scanned to add the item to a document and you can also limit items that can be sold to customers to require a customer number being on file. You can turn this on under the Sales Order Preferences. Once your customer number is added to the item, a new column on the sales order or ship doc will be added to list the customer number.
- Note: Enter additional information for reference.
- Click Save.
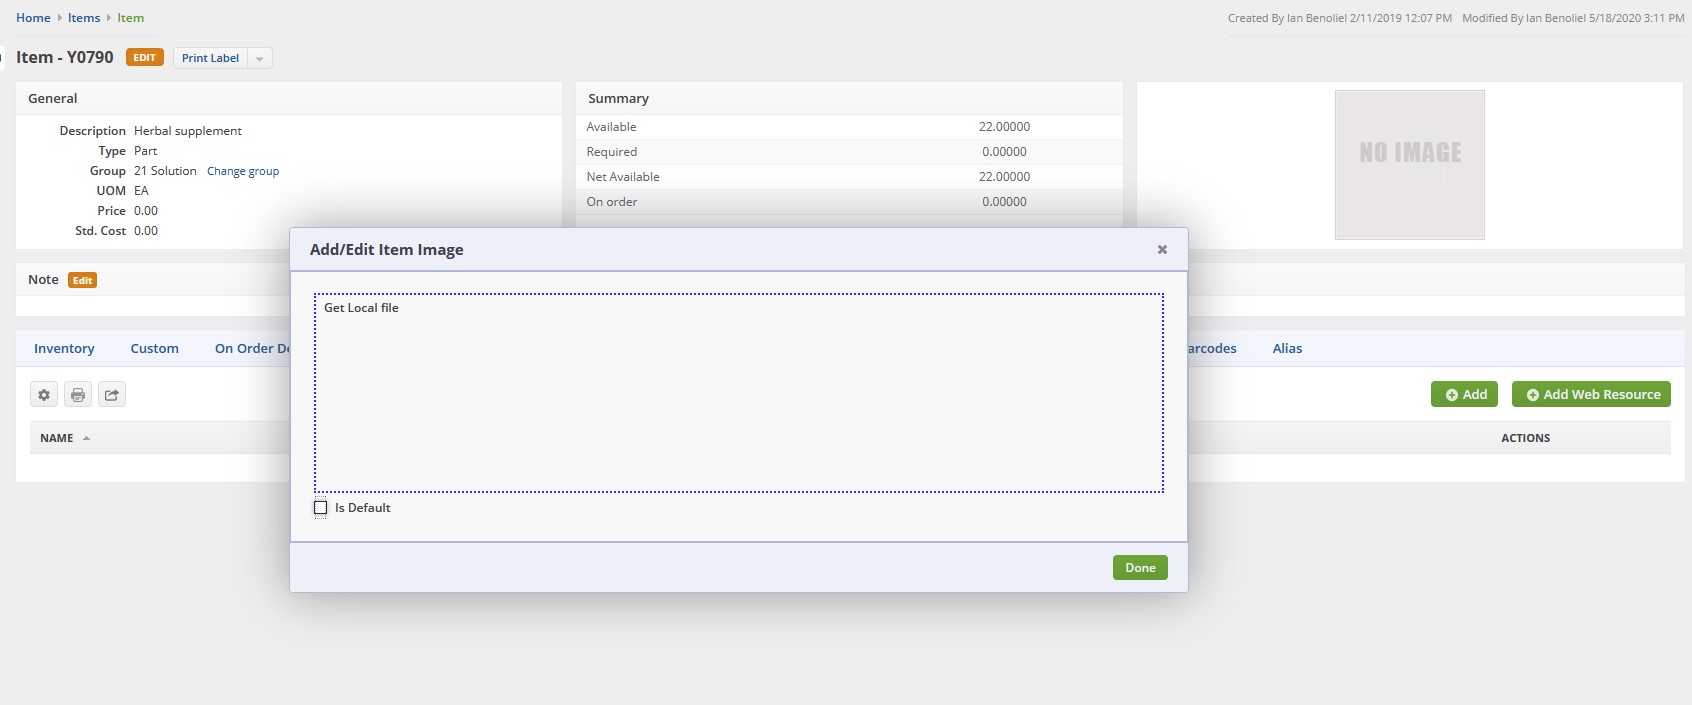
- Item Image

Item images are important as it enhances the item description which provides the needed visual aid. They are also utilized within the B2B Portal add-on for your grid and list views. You will have a slider on the Product Details page that shows all the images for the item.
- Add
- Click the Add Button
- Locate the image file of the item from your computer drive. You can select multiple images at once by Control + Left Clicking or Clicking and Dragging to select them.
- Check the Is Default box if you want the file to be the default item image. Note: The first image that you added will automatically become the default image even without checking the Default box.
- Click Done.

- Add Web Resources
- Click the button Add Web Resource.
- Enter the link to your image in the field provided.
- Check the Is Default box if you want the entry to be the default item image. Note: The first image/entry that you added will automatically become the default image even without checking the Default box.
- Click Done.
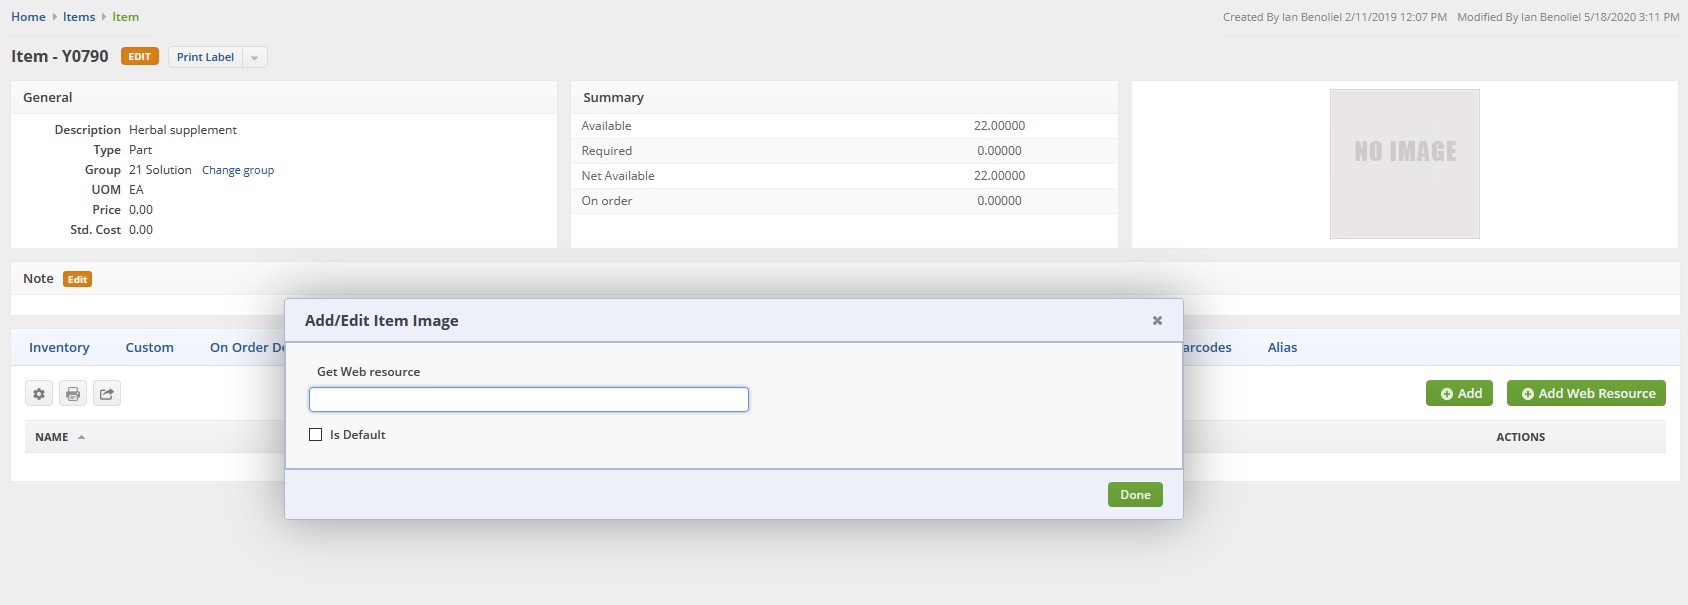

You may also Import Item Images using web resources.
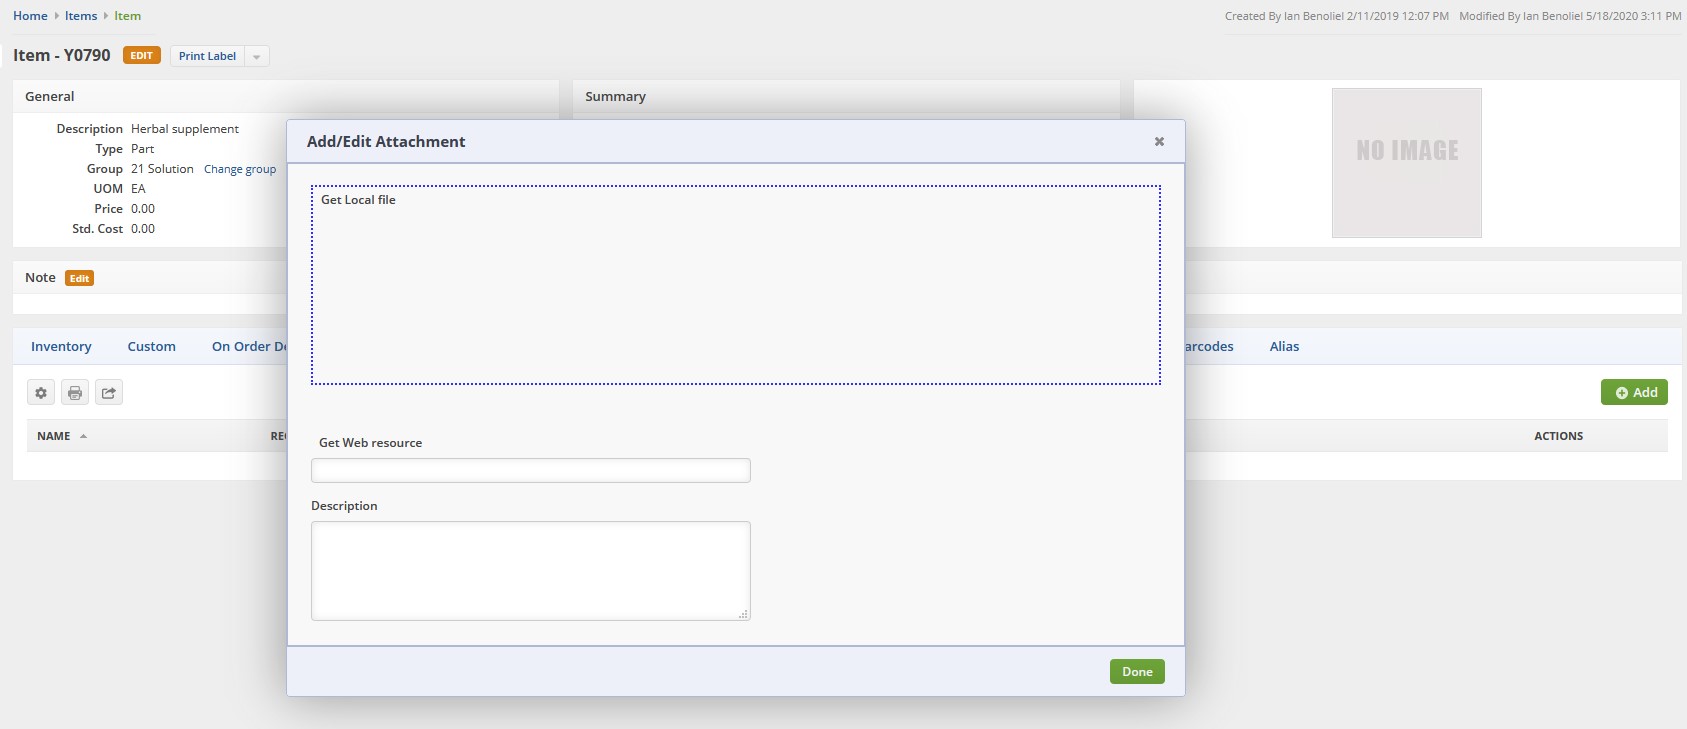
- Attachments
Attachments serve as supplemental information associated with your item. Contracts, special documents for certification, etc.
- Get Local file: Select this option to upload an attachment file from your local drive.
- Click in the Get Local file section.
- Locate the attachment file of the item from your computer drive. You can select multiple attachments at once by Control + Left Clicking or Clicking and Dragging to select them.
- Provide a brief description about the attachment.
- Click Done.
- Get Web resource: Select this field to add your website or any web source link that will lead to the attachment.
- Enter the link in the field provided.
- Provide a brief description about the attachment.
- Click Done.

- Editing and Deleting Records
If you want to edit or delete a record from any of the tabs, click the appropriate icon under the Actions column. Click the Edit icon of the record that you want to make changes to. Click the Delete icon to remove a record.

