Overview
A sales order is an order issued by a business or sole trader to a customer. A sales order may be for products and/or services. The Sales Order is a confirmation document sent to the customers before delivering the goods or services. Sales Order (SO) can be created once the quote is accepted by your prospective customer (potential) and the Purchase Order (PO) is sent by the customer for further processing.
A sales order can be originated in various ways:
- A lead can be turned into a potential Sales Order and generated in the system.
- A Sales Order can be generated from a Quote. A Quote is accepted by the customer then it is converted through the system into a Sales Order.
- A Sales Order can be generated directly when a customer is entered into the system. When a call is received by a customer who wishes to purchase your product, then a Sales Order is generated to complete your customer's order.
Generating a Sales Order
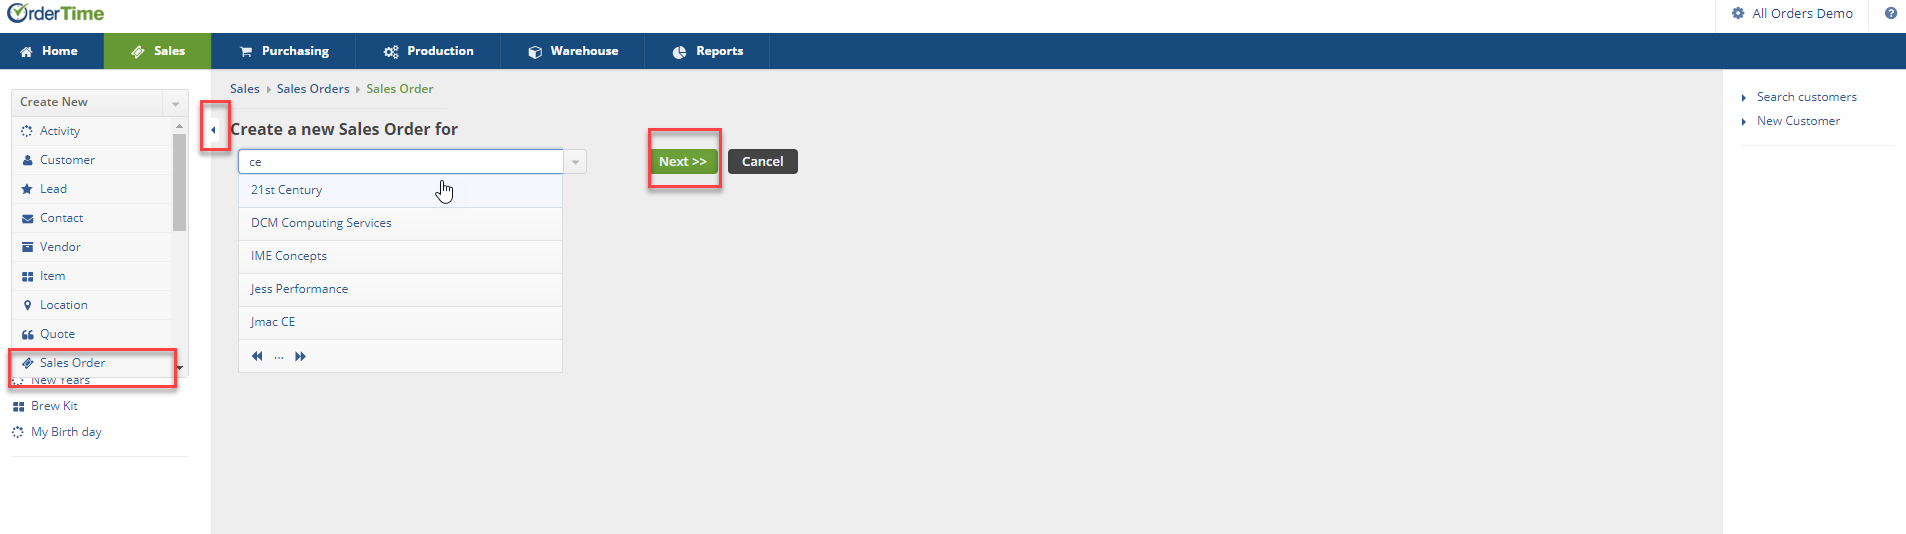
To generate a new Sales Order:
- Open the side menu and click on Create New drop-down menu.
- Select Sales Order.
- Enter your customer's name on the Create a New Sales Order box. A drop-down menu will provide you with a list of customers that are already in your database. Select the appropriate customer.
- Click on Next>> to proceed to the next screen.
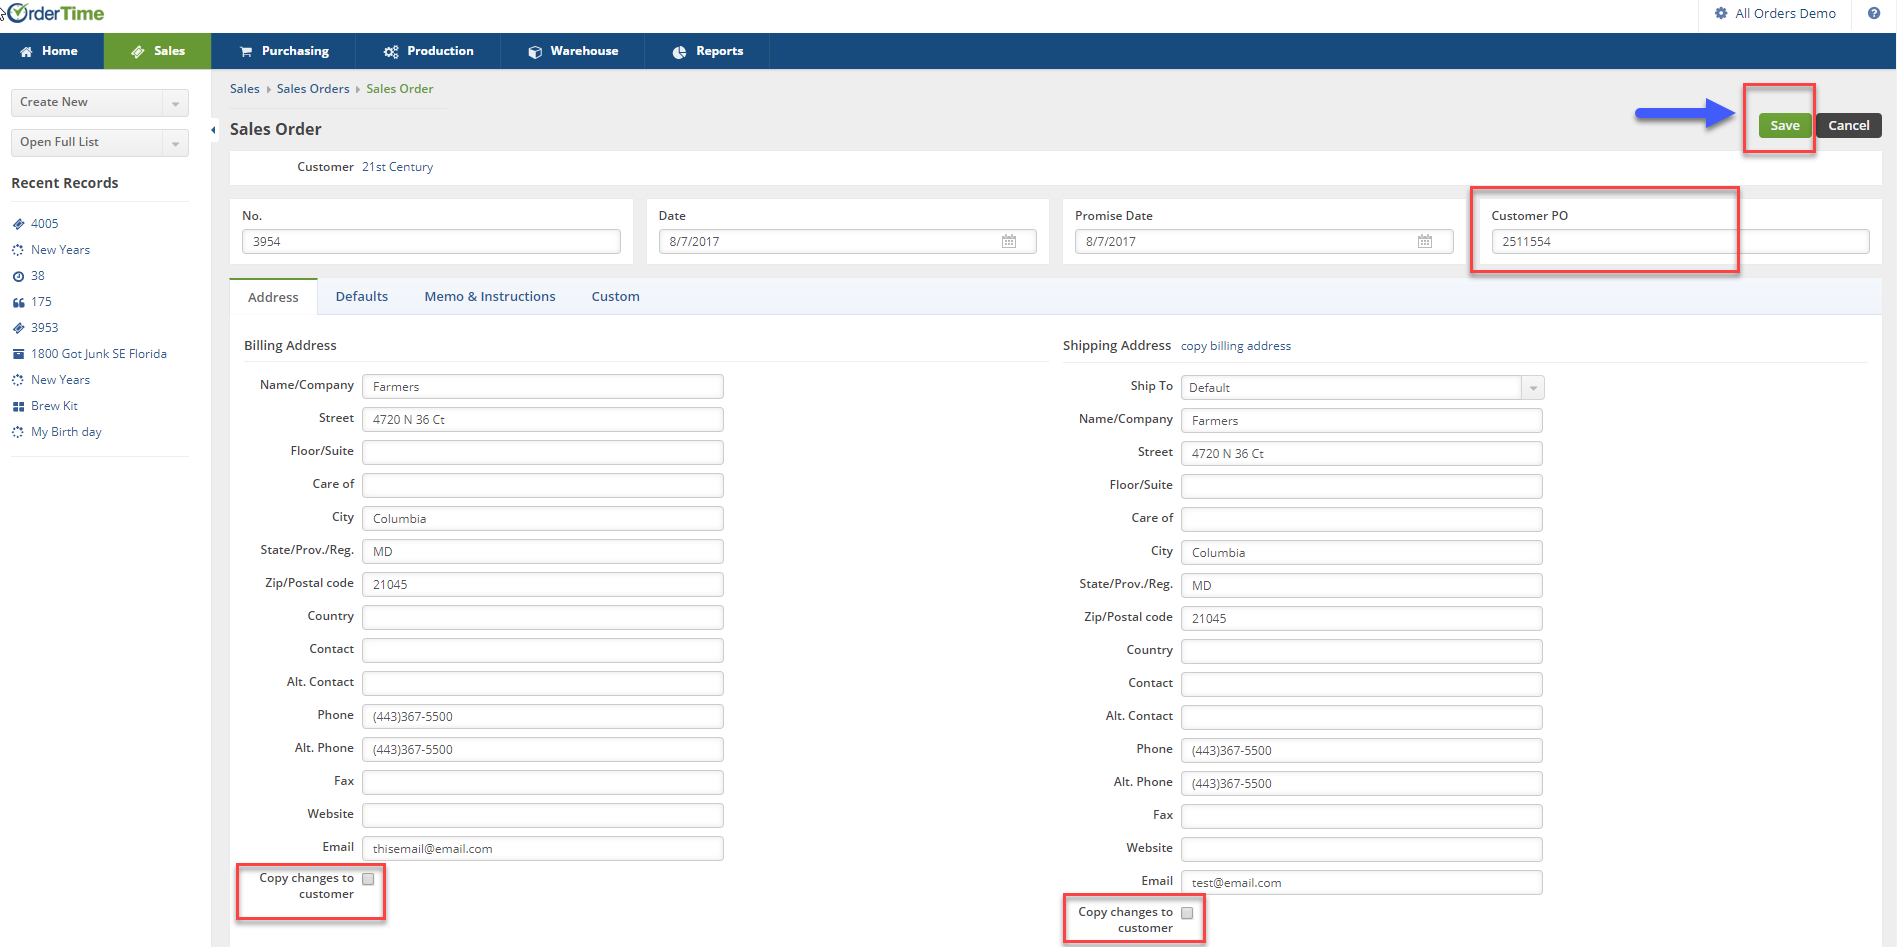
Review Customer Information
On the Customer Information Screen review customer's Billing Address and Shipping Address. If they are different, make changes as needed to insure the Sales Order has the correct billing address and shipping address.
- Select the Date if it is different from the day of origination. (Date is auto-filled)
- On the Promised Date box, click on the calendar and select the desired date.
- Enter Customer's Purchase Order (PO) number if a PO was received from your customer.
- If there are changes to the customer's billing address, you have the option to copy changes to the Customer. This function will transfer all the updates made to the customer's database.
- In the Shipping Address, you can enter a different address from the billing address.
- Provide more details by completing the other tabs: Default, Memo & Instructions and Custom.
If the Billing Address will be used for shipping, copy the Billing Address by clicking on the "copy billing address" next to the Shipping Address header. If you desired to copy these changes to the customer's database, select on the "Copy changes to customer" at the bottom of the shipping address section.
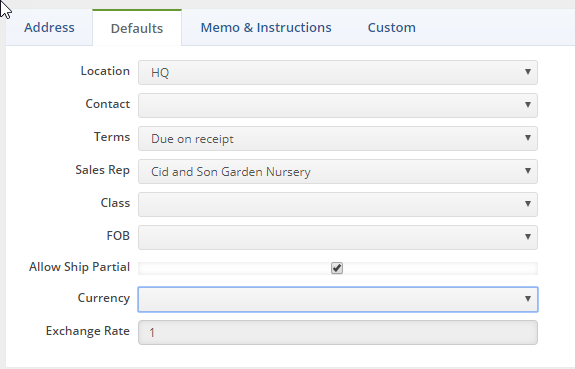
- Default Tab
Under the Default tab, you will have the option to select the Location, Contact, Payment Terms, Sales Rep, Class, FOB, Partial shipping (Select if Allow to Ship Partial), Currency and Exchange Rate.
- Memo & Instructions Tab
Type information that are relevant to the Sales Order and special instructions. This information will be displayed on the Sales Order or set as an internal memo. Shipping instructions can be entered for Shipping Instructions. Instruction can also be used as a way filtering your Sales Orders.
- Custom
The customs tab is used to customize your Sales Order. With customization, you have the option to include shipping information send a copy of the Sales Order to the warehouse, Order Status, Order Type (i.e. Sales, Repair), Instructions to warehouse or shop, estimated time of arrival, etc. (To customize your quote Customs tab, log in as the administrator and click on the Gear icon on the top right hand corner of the screen. Under Settings. click on Custom Fields.)
7. Click on Save to proceed to the Sales Order Screen.
Add your Item to the Sales Order
The Sales Order Screen displays the customer information, billing and shipping address and a total of your items.
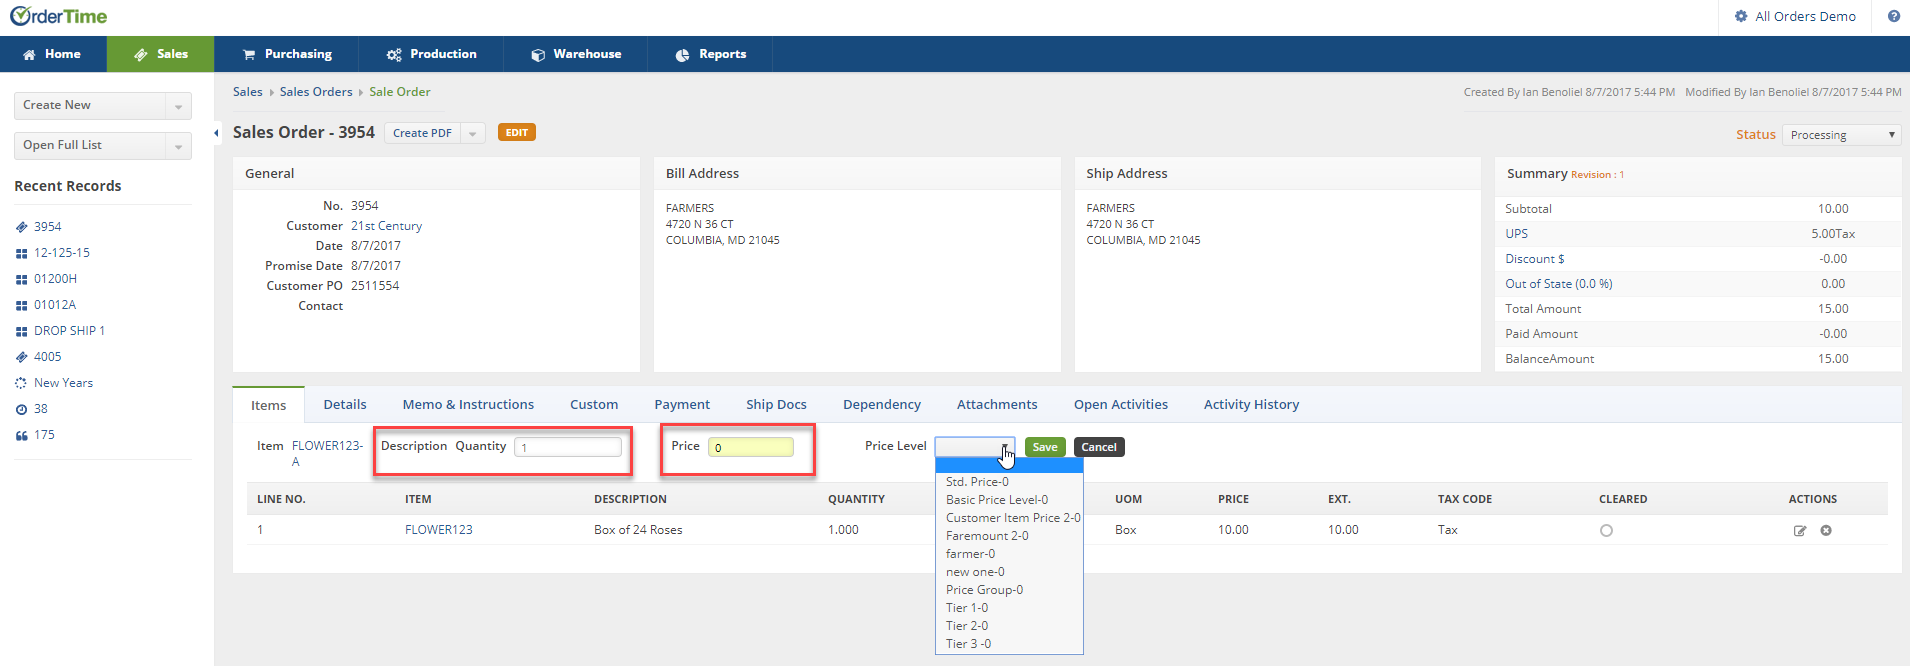
Name/Number drop down menu provides you with a catalog of items (catalog will be determined with your initial set up). Under the Items tab, you can enter the item number, name, UPC, Manufacturer Part No, Vendor Part No., or Customer Part No.
- Items: Enter the item and the system will provide you with a drop-down menu of similar items related to your selection. Select the required item.
- The system will require Quantity, Price and Price Level (e.g. Quantity 1, Price 12.00, Standard Price).
- On the Price Level drop-down menu, you will be able to select your pricing strategy for that item.
- Click on Save when complete. The item will be listed below with a line Item number, Item, Description, Quantity, UOM, Price, Ext, Tax Code, Cleared and Actions.
To view inventory levels for your Item, hover your mouse over the item. A pop-up screen will display the availability and image.
You can directly change the field values by clicking on the line item (item row). Field boxes will appear, and you can add details or edit the information accordingly.
- Once the items are entered in the Sales Order, you can edit the line item number if needed.
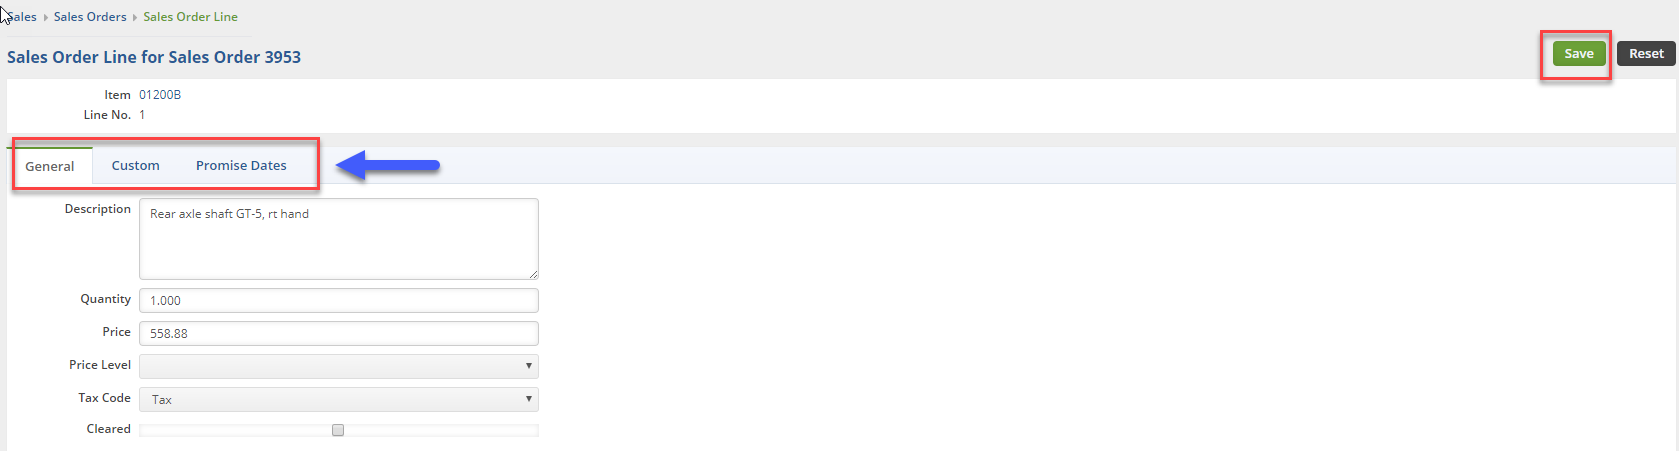
- To modify information on a line item, click on the notepad icon under the Action column. (You must have a Sales Order's edit capability permission to make changes to a Sales Order).
- The General tab will display with the description of the item, quantity, price, price level, tax code. You will be able to make the necessary changes.
- The Custom tab provides the opportunity to make changes to the production flow. This is used for items that need fabrication, work status and shop instructions. You can also specify if the item has an expiration date, serial number, measurement, and quantity produced.
- Change the promised dates if needed. Click on Add when completed.
- Click on Save when you have completed your changes.

- Details: This tab shows information that you provided in the Default tab when you were setting up a new Sales Order.
- Memo & Instructions: This tab allows you to modify your Memo, Shipping Instructions and Internal Notes by clicking the Edit button. Click Save when you are done.

- Custom: This tab contains the customization you have set when you were generating the Sales Order.
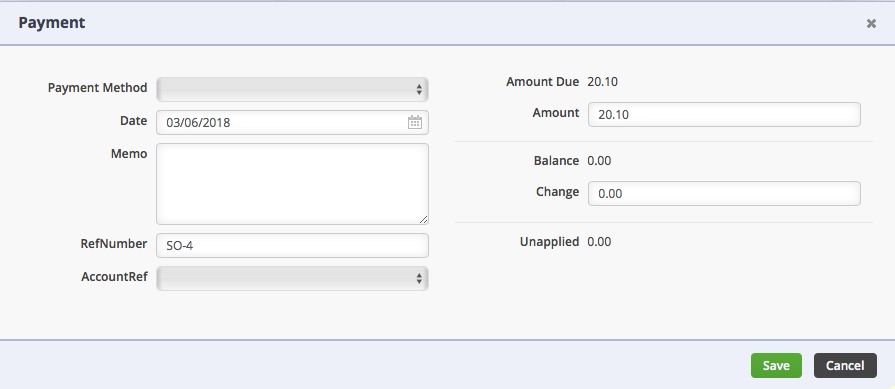
- Payment: Enter the payment details, including the method and amount.
By default, the Payment tab is not visible in Sales Order. In order for the Payment tab to be available, the value of the Payment Type in Terms should not be Accounts Receivable (No Cash Payments). Proceed to editing the Sales Order to specify the value for Terms through the Defaults tab. After doing so, the Payment tab will be available.
- Select the Payment tab and click on the +Add icon.
- Select from the drop down menu the preferred method of payment for your Sales Order. Depending on the selected payment method, the fields will change and prompt you to enter the appropriate details.
- Click Save.
- Ship Docs: Refer to Ship Docs article for more details.
- Dependency: Under the dependency tab, you can view if the PO is tied to Sales Orders. Refer to Special Orders and Purchase Orders for more details.
- Attachments: Attachments serve as supplemental information associated with your item. This tab allows you to upload an attachment file from your local drive and/or add your website or any web source link that will lead to the image by clicking the +Add button. Click Save when you are done.
- Open Activities: An event or task can be added to your Sales Order.
- Select the Open Activity tab and click on the Add Event or Add Task buttons.
- Add an event by entering your information.
- Click Save. The event will display in your Home page under the activity schedule or open tasks.
- Activity History: The Activity History tab can be a helpful communication tool for your business and vendor.
- Under the Activity History tab you can send an email to your employees or vendor by clicking the +Send Email button; and conversations can be recorded for tracking purposes by clicking the +Add Log button.


Changing the Sales Order Status
Once all the necessary information has been entered into your Sales Order, you are ready to proceed to change the status of the Sales Order. On the top right side of the screen next to Status, use the drop down menu to change the status of your Sales Order. The following status options will be available for your Sales Order:
- Processing: Sales Order processing means you are in the process of recording Sales Inquiries. Generating those inquiries into “firm orders” will require the completion of necessary documents to permit customer orders to be fulfilled and invoiced.
- Waiting: Sales Order is in waiting for further information for final resolution.
- Credit Hold: Sales Order will be on hold until the merchant clears the transaction.
- Payment Pending: Sales Order is on hold until payment has been received.
- Approved: Sales Order has been approved and the Ship Doc will be created.
- Voided: Sales Order has been voided by either the merchant or the customer.
- Closed: Sales Order is closed.
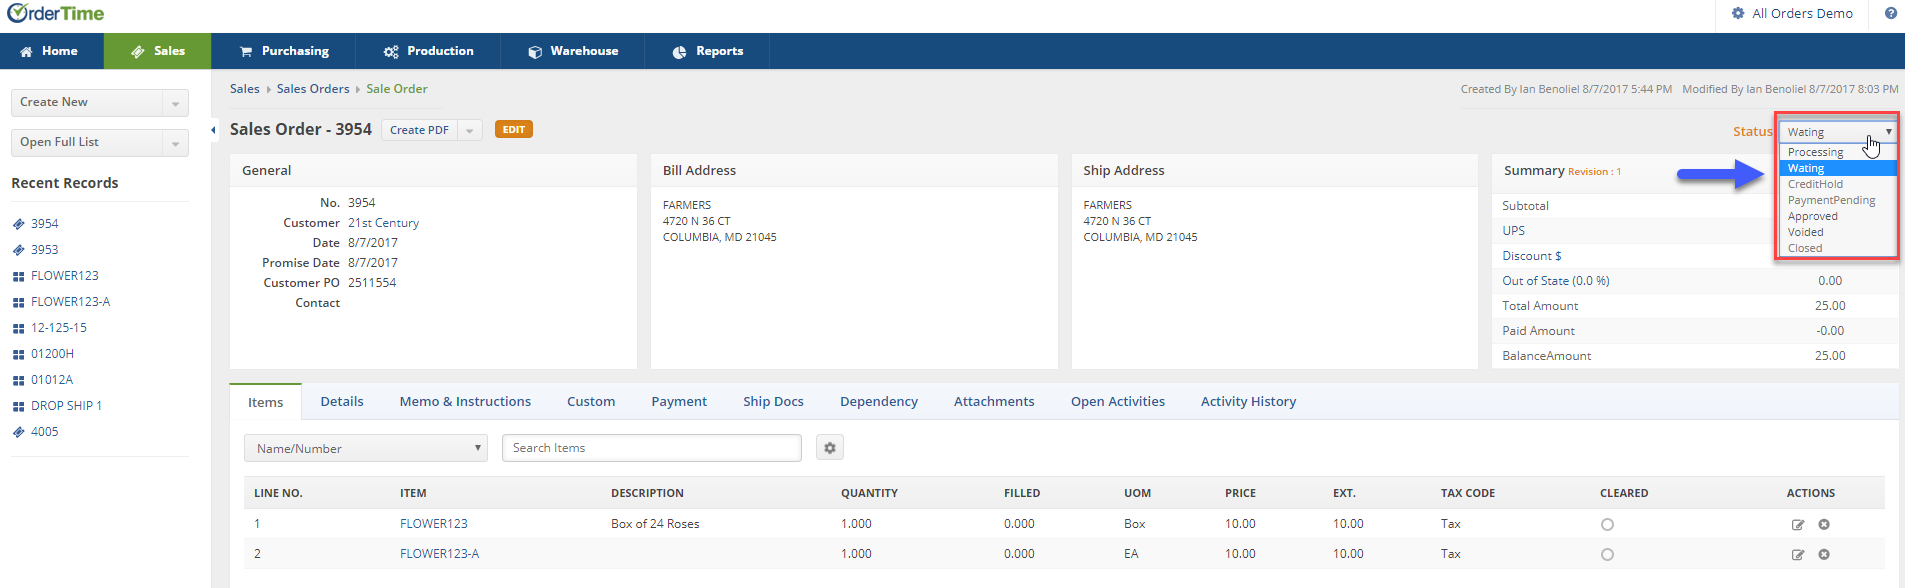
When you are ready to process the Sales Order, select Approved from the status drop down menu .
The approval process will depend on your company's Sales Order approval setting.- Manager's approval might be required for Approving the Sales Order.
- The manager will receive a notice to approve. Once approval is provided, you can proceed to create a Ship Doc.
- Based on your approval settings, a Sales Representative can approve Sales Order. (See User Roles process for steps.)
- Manager's approval might be required for Approving the Sales Order.

Once the status of Sales Order is set to Approved, it becomes ‘read only’ i.e. the record cannot be edited anymore.
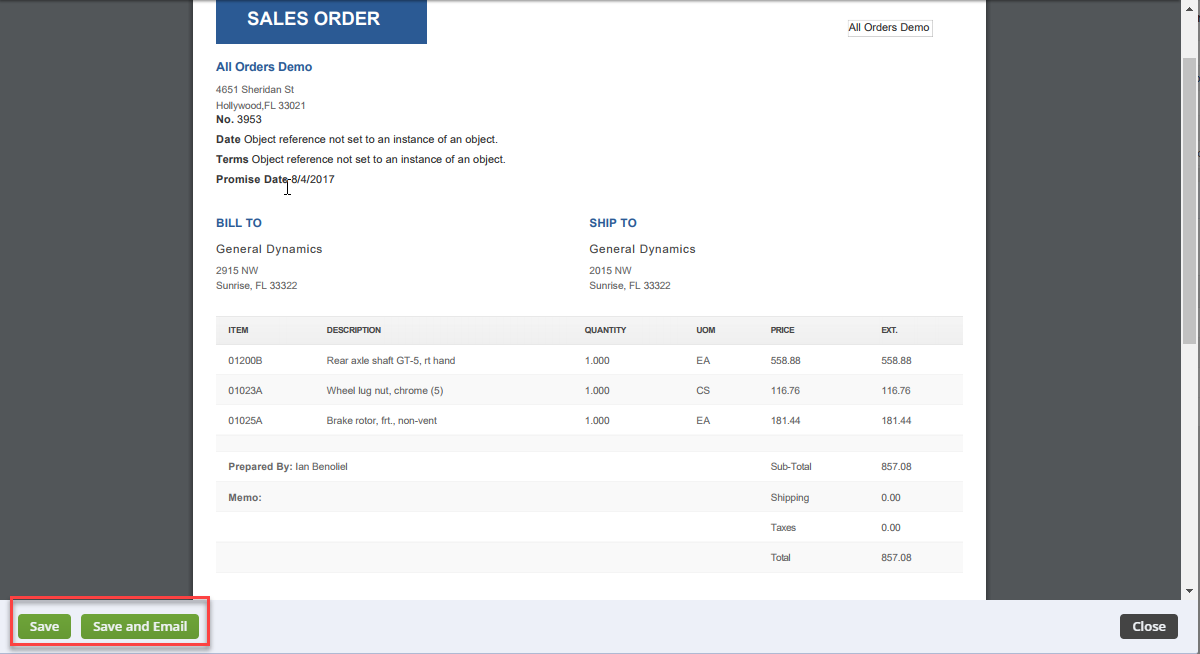
Creating a PDF for your Sales Order
A Sales Order can be printed and emailed to your customer.
- Click the Create PDF icon next to the Sales Order number.
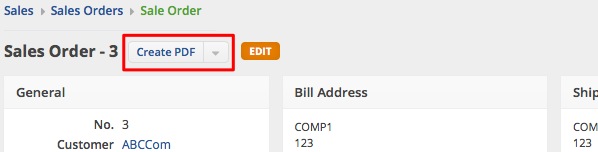
- The PDF version of the Sales Order will open.
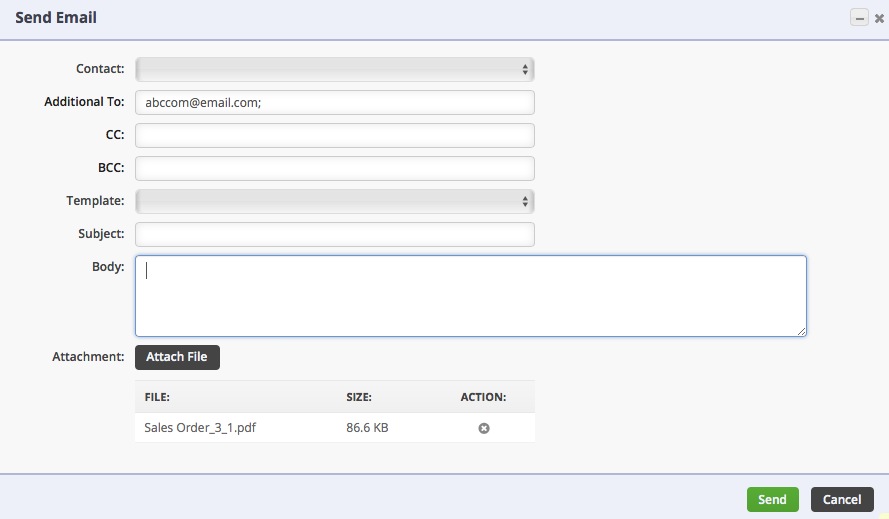
- Click the Save and Email button to send out the PDF file. Alternatively, you can Save (only) the PDF file by clicking the Save button.
- The Send Email screen will pop up. Fill out the fields. You will have the option to attach additional information, carbon copy individual in your company.
- An email template is provided, select the appropriate template from the Template drop down box.
- Click Send.


Once the Sales Order has been approved, you can proceed to generating a Ship Doc. A Ship Doc is the final step to completing a sales transaction; the document will display the fulfillment stage (i.e. Committed, Picked, Shipped, Voided etc.)
Next: Ship Docs