Overview
Users are assigned a Role that defines their access level to your account. The number of Active users you can add is defined by your subscription.
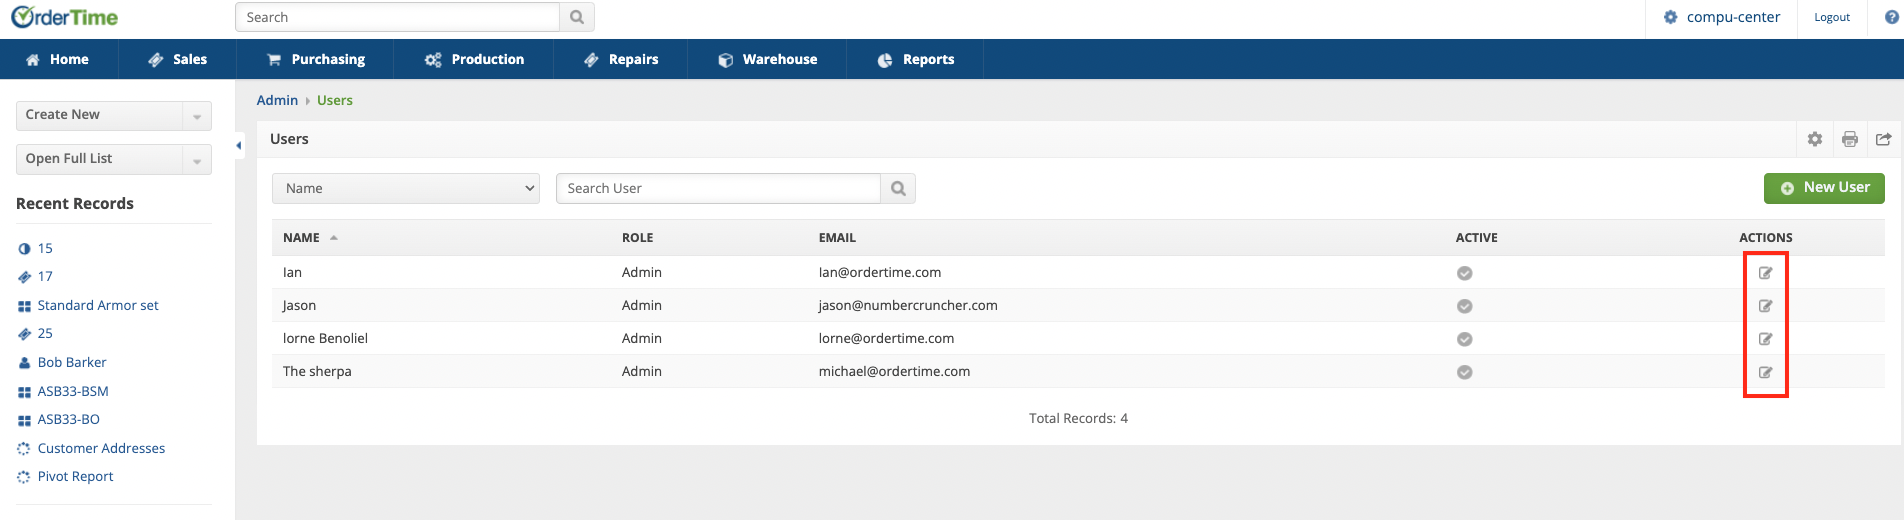
Users
This feature allows administrators to add and remove users from their account, in real time.
To add a new user, click on the Gear icon on the top right side of the screen. Under the User & Roles category select Users.

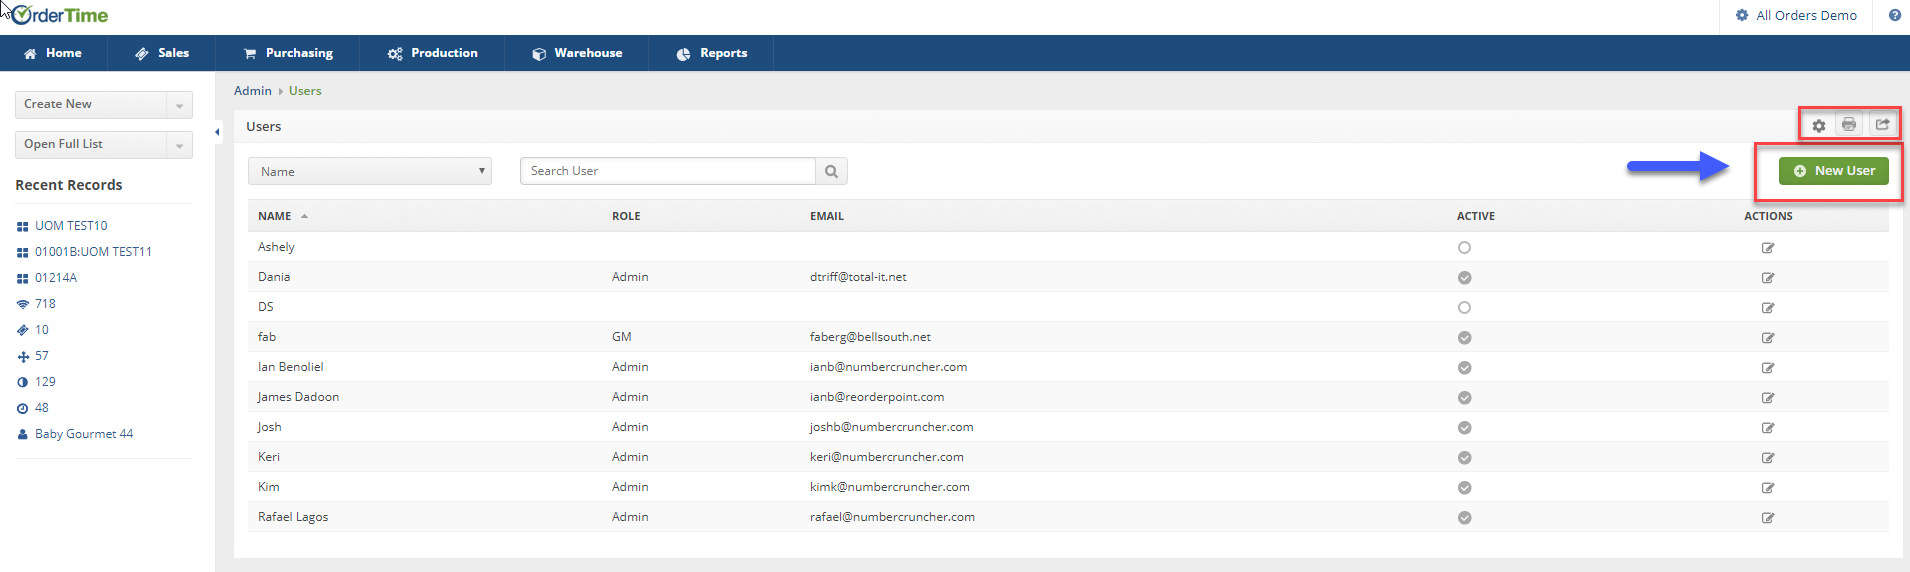
The User List shows you all users in the system and allows you to search for a specific user, using a number of different search terms by selecting the Search Field from the drop-down located at the top of your screen and then typing in the specific term in the search bar to the right.
- If you want to filter the content, change what columns are shown (the way data is organized on screen) or edit how many records are shown on the page/default search; click on the Gear icon located on the right side of the screen.
- If you want to Print your User list, click on the Printer icon
- To Export your User list to Excel via CSV file, click on the Export icon
To create a new User, click on the + Create User icon, located on the right side of the screen.
Creating a User
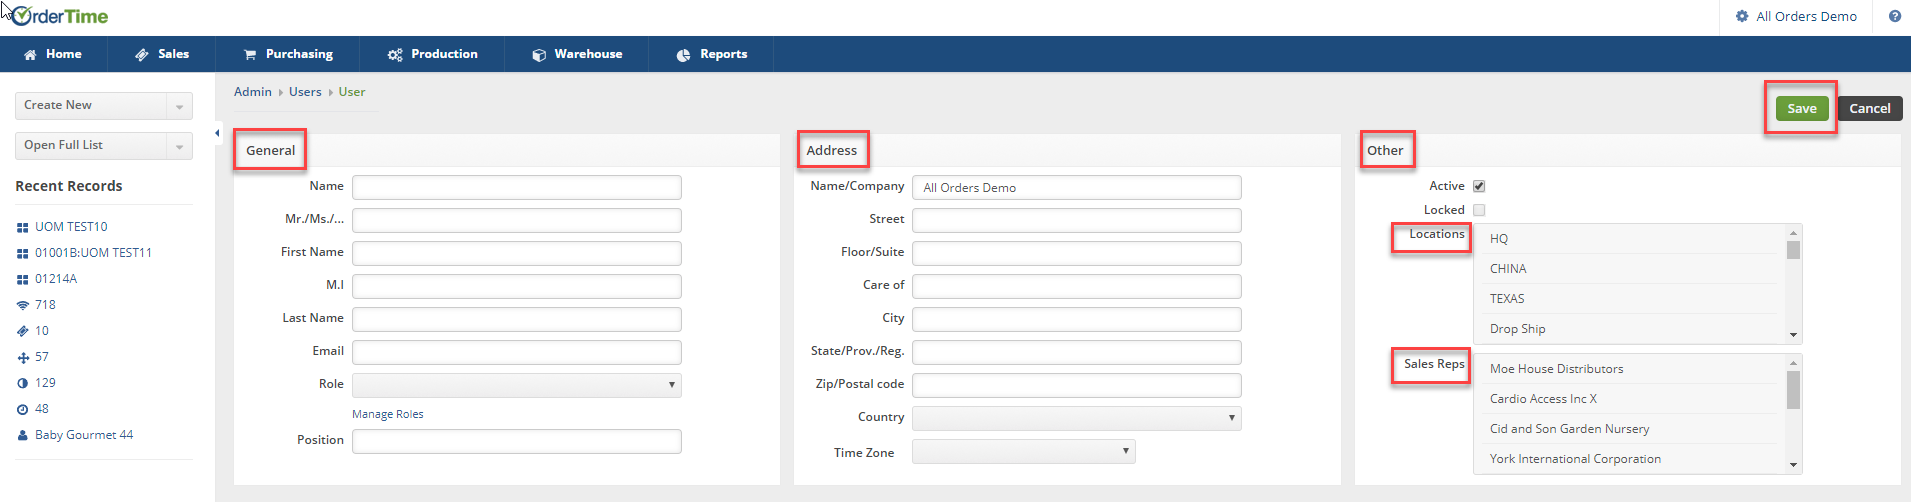
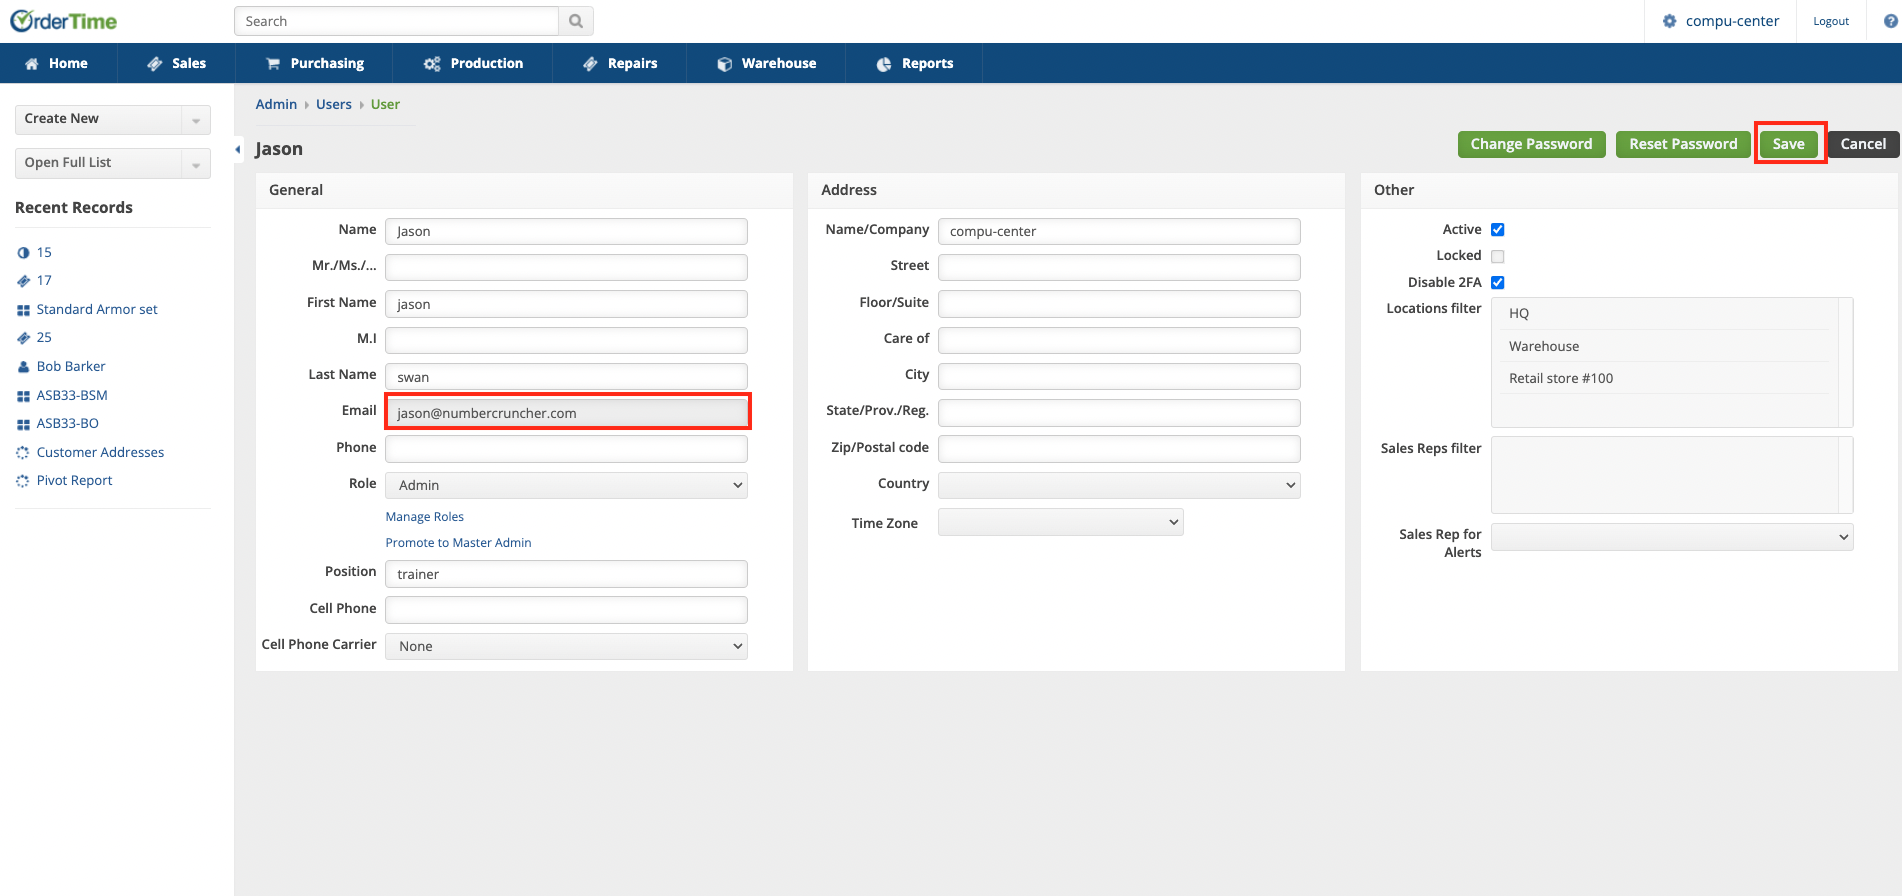
The New User Screen is divided into 3 categories: General, Address and Other.
- The General area of creating a new user allows you to enter the user's Name, Email, and the User's Role.
- Name: Name is required and it must be unique
- Email: This is a required field.
- To Edit a Role, click on Manage Roles
- The Address area allows you to enter the location of the new user.
- Select the Country.
- Select Time Zone.
- If the user's location is the same as the company, do not use the Time Zone setting.
- Special attention must be given to this setting, if your user does not work at the same location and time as your company, you must set the user's location and time parameters. Setting modifies, per user, the company's established time zone to the user's time zone.
- Inside the Other area of the New User setting, Admins can:
- Select if the User is Active
- Select if the User is Locked
- What Location the new User works at
- If the user will be using several locations, use the control key (Ctrl) to select other locations
- The user will have visibility to the selected locations only
- What Sales Rep is associated with the New User.
- If the User is a Sales Rep you can assign them to the customer from the Sales Reps listing.
- You can select multiple customer/vendors, use the control key (Ctrl) to select more than one.
- The Sales Rep will have visibility to all sales order transactions (i.e. Sales Orders, ShipDocs etc)
- The Sales Rep will be able to view the Sales Order transactions to those customers selected from the listing.
To replace a user, first make the replaced user inactive then add the new user. To make the user inactive, see that section of the article below.
Passwords
After a new user gets created, click the Reset Password button to send the user an email with a reset password link. Clicking the link will prompt the user to create their own secure password, for future access.
If the user forgets their password, the following options are available to reset a password:
- Users can request to reset their password from the main login screen, by clicking on forgot password, which will send the user a system generated email with a password reset link.
- Contact the company's system administrator. The administrator will have access to the user's roles and password administration.
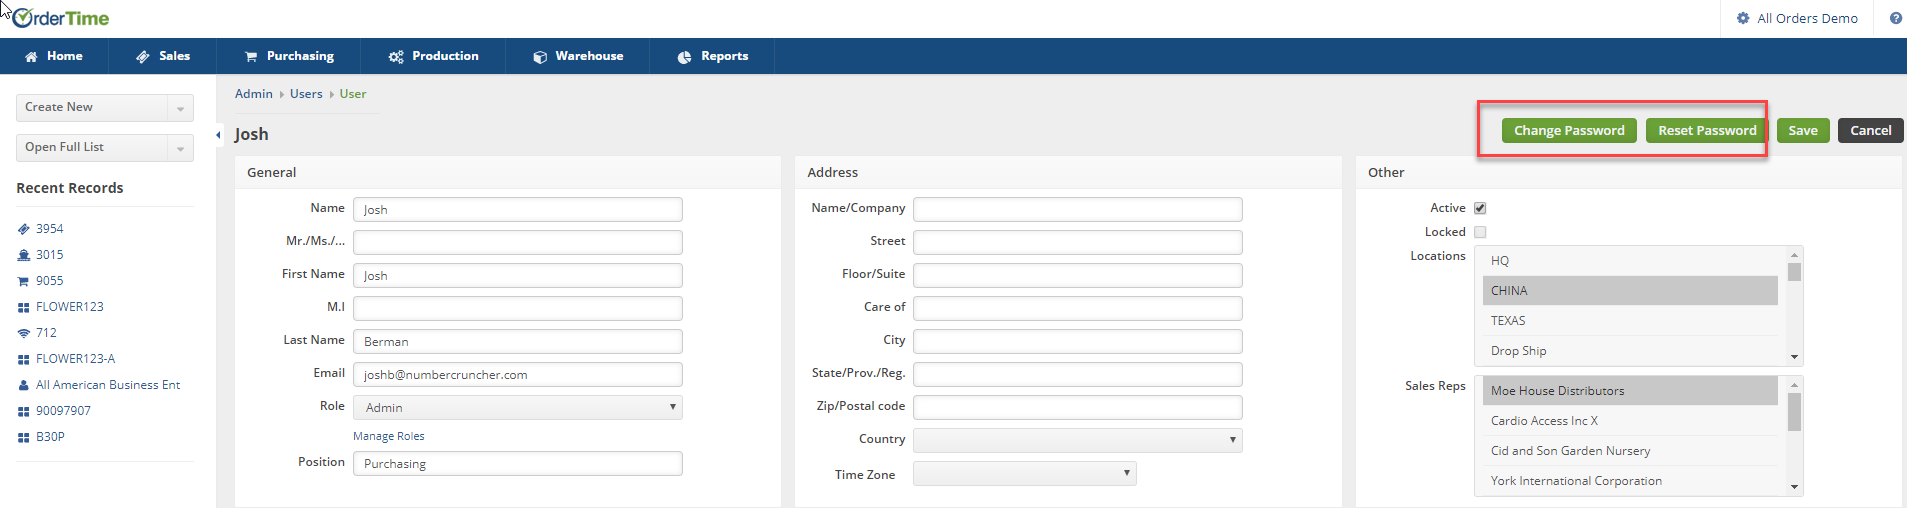
- To Change Password or Reset Password, click on the Gear icon on the top right corner of the screen.
- Under User & Roles, click on Users. Type the user's name in the Search User box. Press enter.
- Under Actions, click on the edit notepad icon. The user's information screen will be displayed.
- Click on Change Password. Type a password, and confirm the password in the Confirm password.
- Click Save when done.
Changing a User’s Email Address
The first step in changing a user's email is to head towards the admin page by clicking your company name at the top right of the window, then entering the user menu.
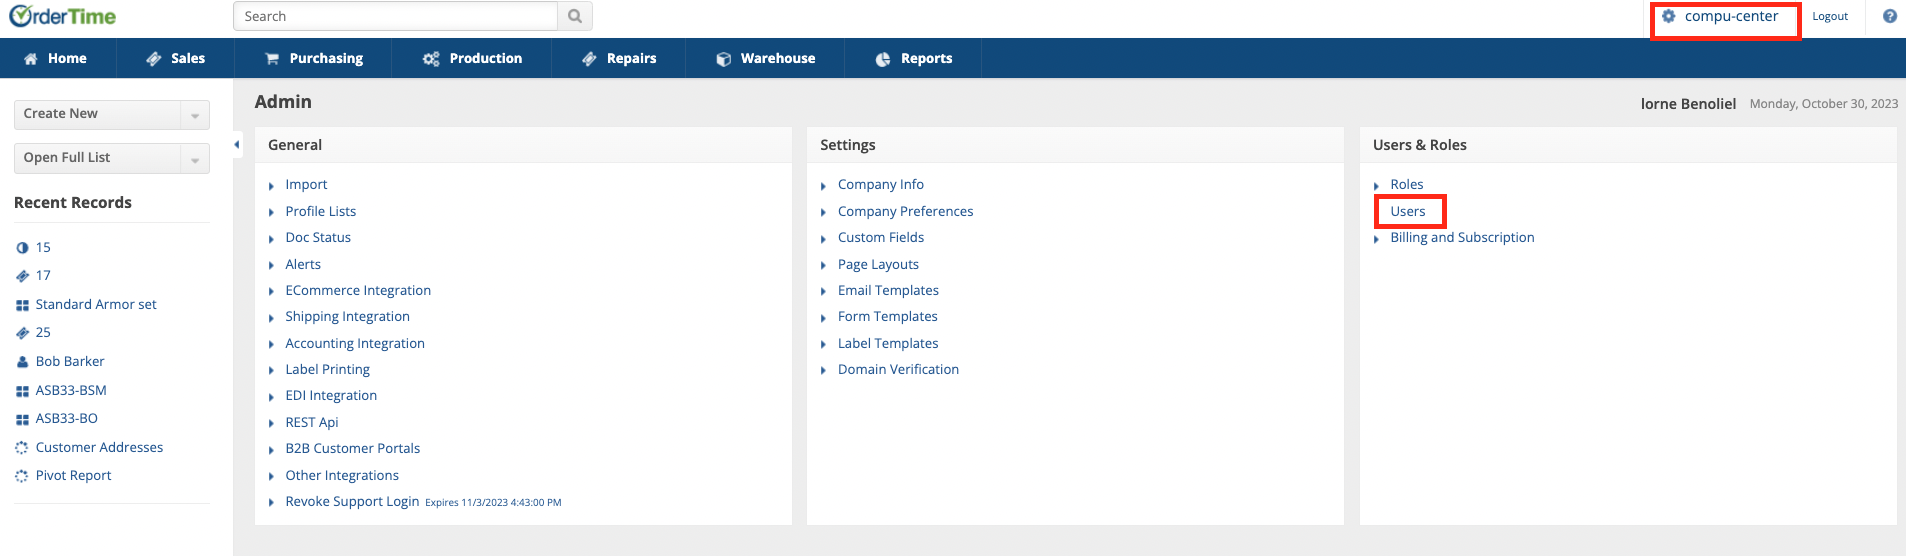
Once on the user menu page click the edit icon next to the user you would like to change.
In the user editing page you are free to change the email. Once done remember to hit save in the top right.
You can change any email address from the User’s Edit Page unless that user is the Master Admin. You will need to switch the master admin to a different user first and then you can change the email of that user. Or you can create a new user with the email you want to use for the Master Admin and then switch the Master Admin Role to that new user. We don’t allow the direct modification of the Master Admin email address for security purposes, and to protect your account from being compromised.
If your email address is associated with multiple Order Time accounts you will not be able to change your email address in the Users section. This is to protect every single one of your accounts from being compromised in the case of a phishing attack. If you need to change your email address and it is locked to multiple company files, please contact support and we will assist you.
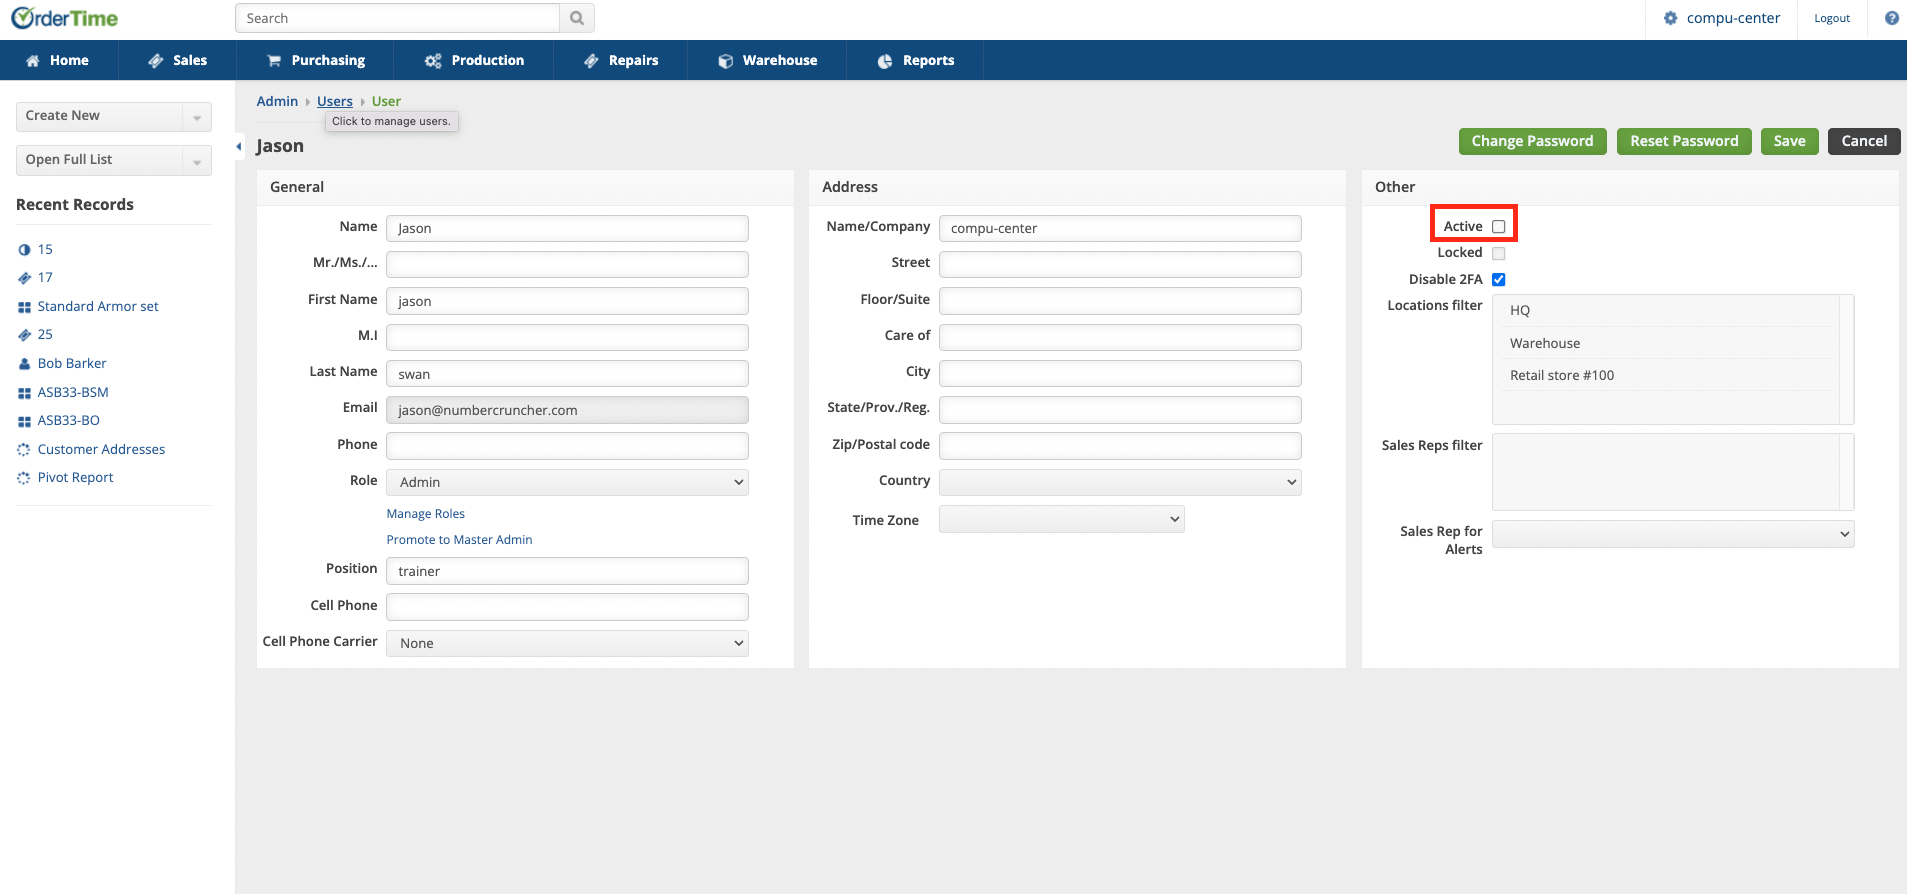
Making a user inactive
Making a user inactive is very similar to the previous section on changing a user's email address, with the only real difference being that you uncheck the box called active instead of changing an email address. You still have to click save once you uncheck the box.
You can now make a new user and set it to Active, if you create more users than licenses that you own you will be asked to Add Users to your Subscription.