Overview
The ability for Order Time users to save custom list columns and filters on record screens for future use and to share or not share with other users.
Solution
Order Time has added a Save As button to the List Options screen to allow users to save custom list columns and filters. This tutorial was created using the Sales Order record screen. However, this feature is available on all Open Full List record screens.
Note: Even if creator only is not checked, only the person that created it, can admin and modify it!
To do this
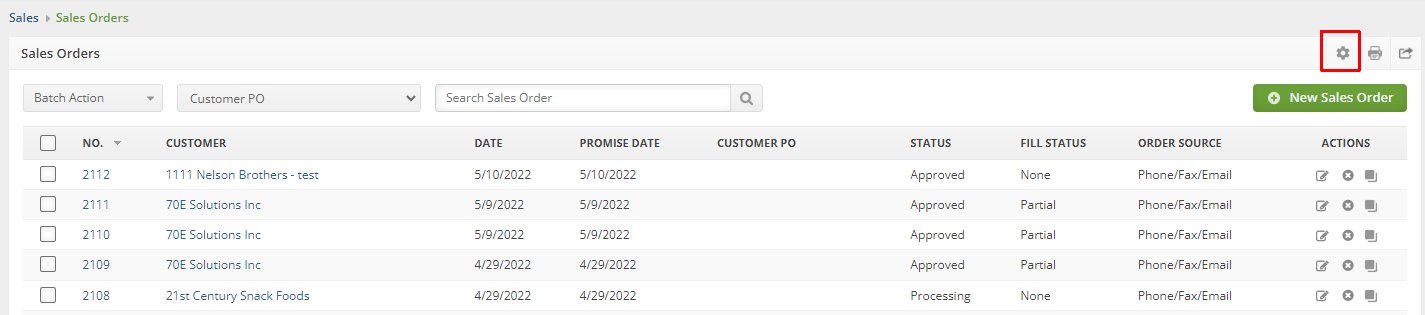
- Go to Open Full List and select Sales Orders
- On the Sales Order screen click the Settings/Gear icon shown in the red square
- On the List Options screen
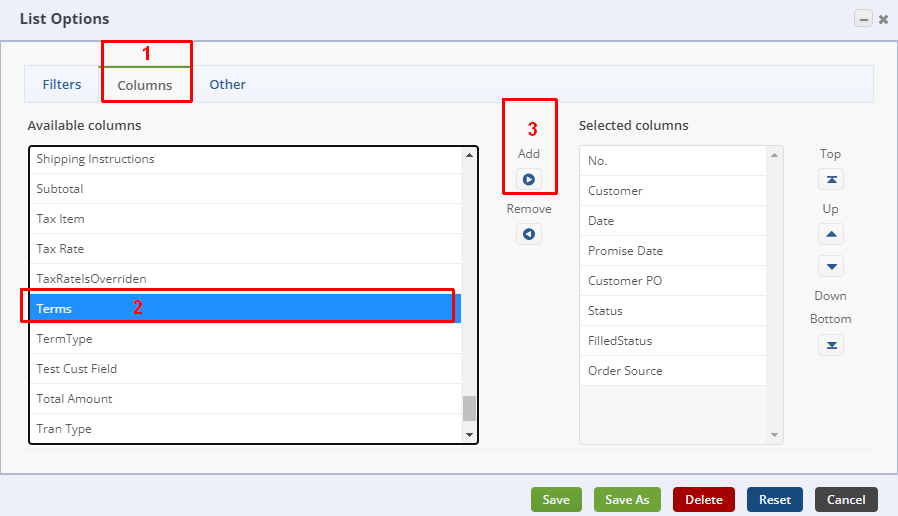
- Click Columns
- Find and click your selected field, in this example I selected Terms
- Click the Add button
- To follow my example, repeat steps 1 - 3 to select and add Paid Amount
- Now click the Filters tab and
- Select your chosen field to filter the view, in my example I have chosen Paid Amount
- Change the Operator to what you need, I am using not equal
- Type the Criteria you want to filter by into the Criteria field
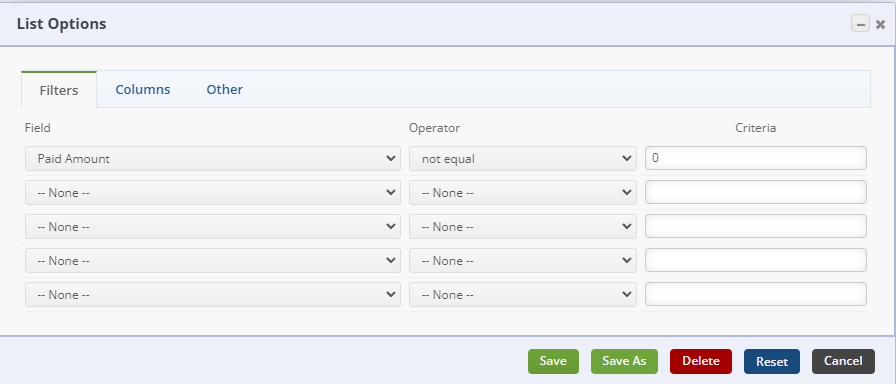
- Now you are ready to click Save As at the bottom of the List Options screen

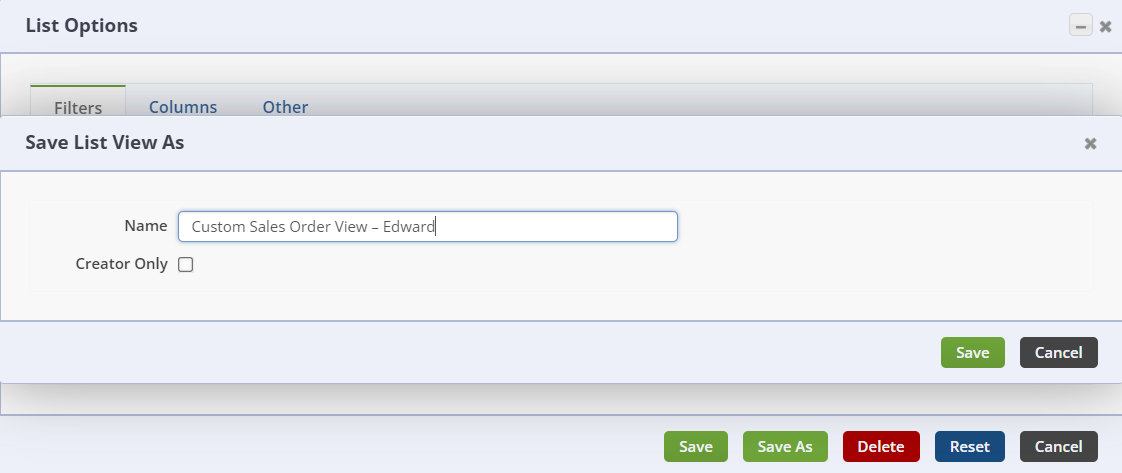
- On the Save List View As screen
- Type a name for the List View. For example if the view is for a specific user you could name it similar to Custom Sales Order View – Edward
- You can click the checkbox for Creator Only if you want to restrict use of this List View to only the user that created it. If left unchecked all Order Time users will be able to use this List View.
Now you have created a custom List View and you can access it by going to Open Full List and Sales Orders. Then click the List View drop down to find and open your custom List View

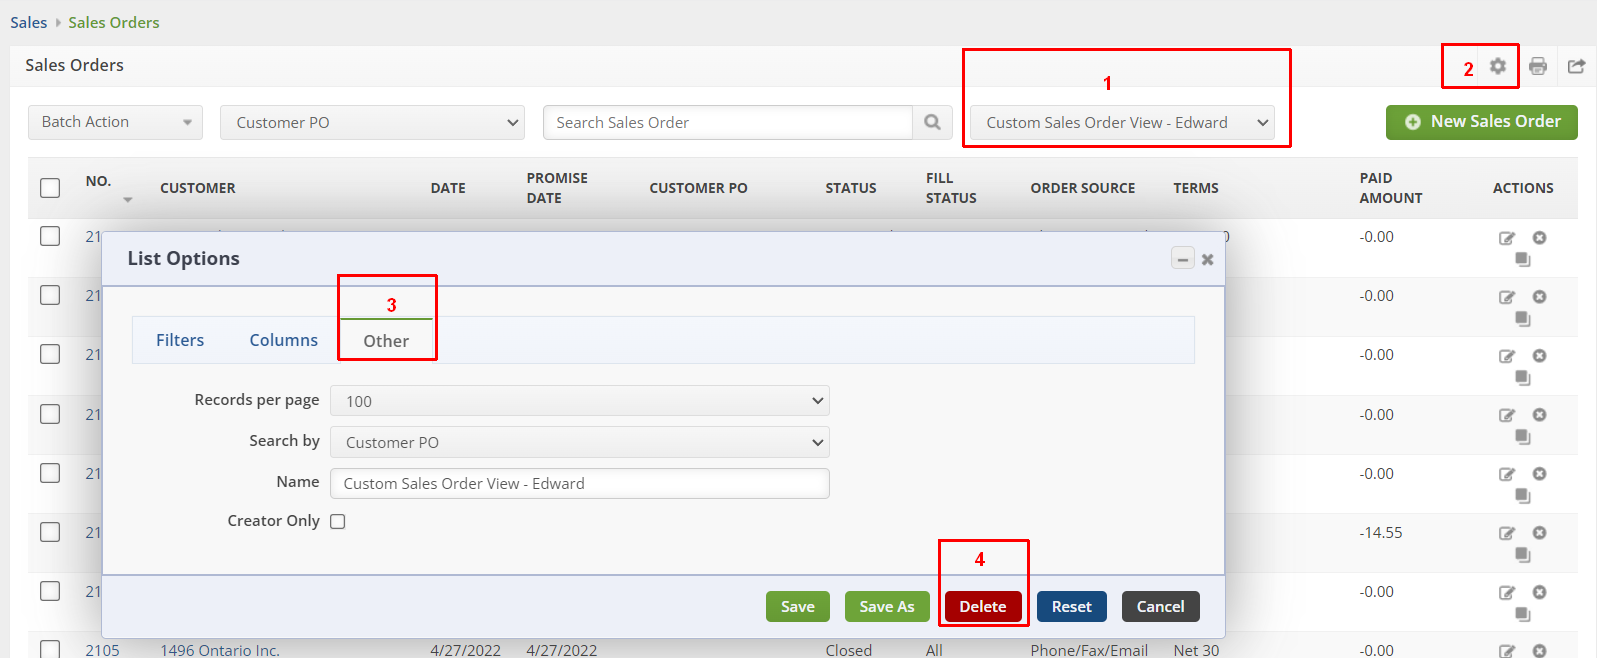
Deleting a custom List View
- If you ever need to delete a custom List View
- Select the List View from the drop-down menu
- Click the gear icon on the top right
- On the List Options window click the Other tab to verify you are deleting the correct List View
- Click Delete