Overview
Understanding the different types of price levels will aid you in your pricing initiatives. The Price Level profile list will allow you to set up the following price level strategies:
- Set up volume discounts so that customers can get a price break by buying in greater quantity.
- Give a special discount to a particular Customer Type.
- Temporarily adjust pricing in response to market conditions (e.g. a brief markup due to product scarcity).
- Do special time-intensive promotions on products or groups of products.
- Set prices for a specific currency.
- Set add-on prices, allowing your customers to purchase accessories or related items for a discount as part of a kit.
Adding a Price Level
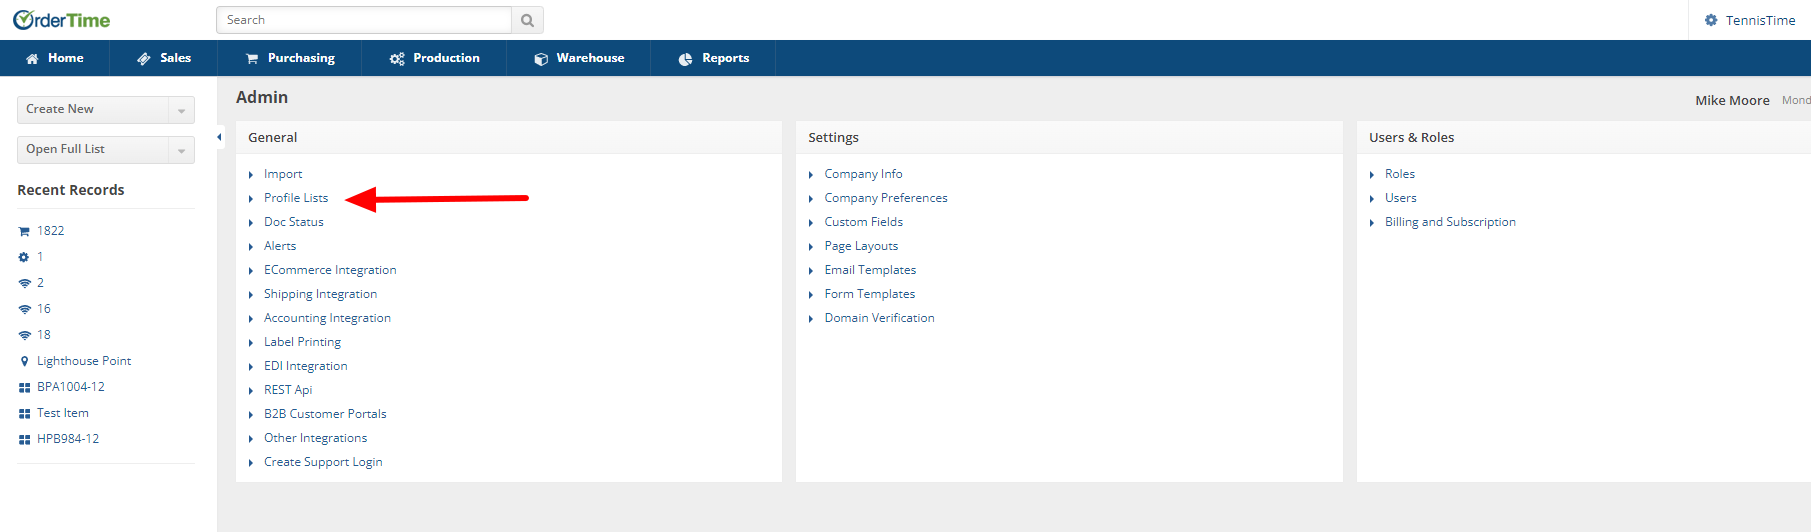
- To access the Price Level screen click on the Gear icon to the top right of the home screen.
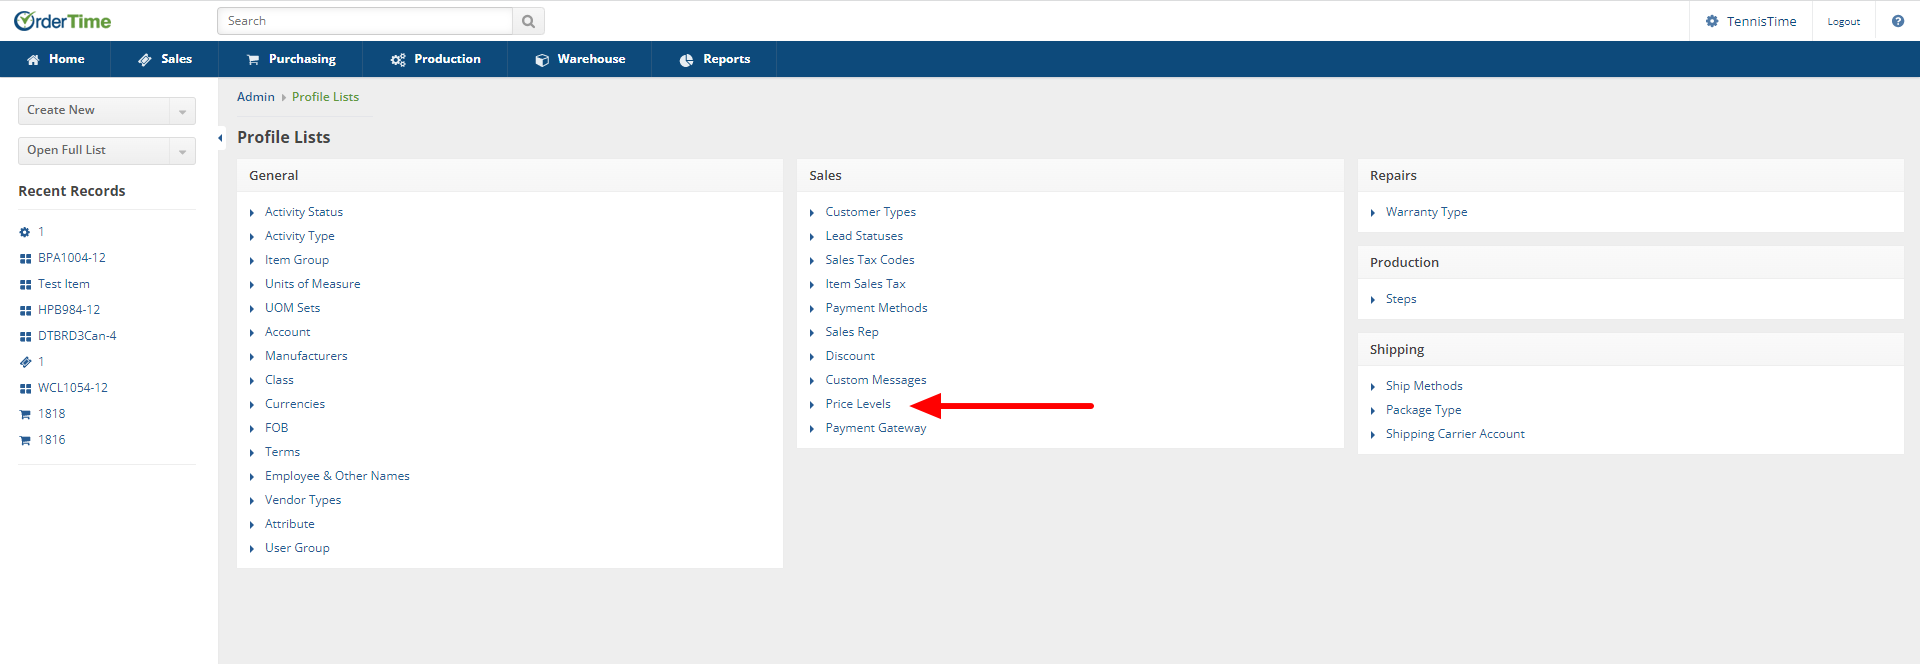
- Select Profile List under General. In the Sales section, select Price Levels.
- In the Sales section, select Price Levels.
- The Price Level screen will present on the left hand side of the screen the Status of Price Level records. These can be Active, Inactive or Both dependent upon the button checked.
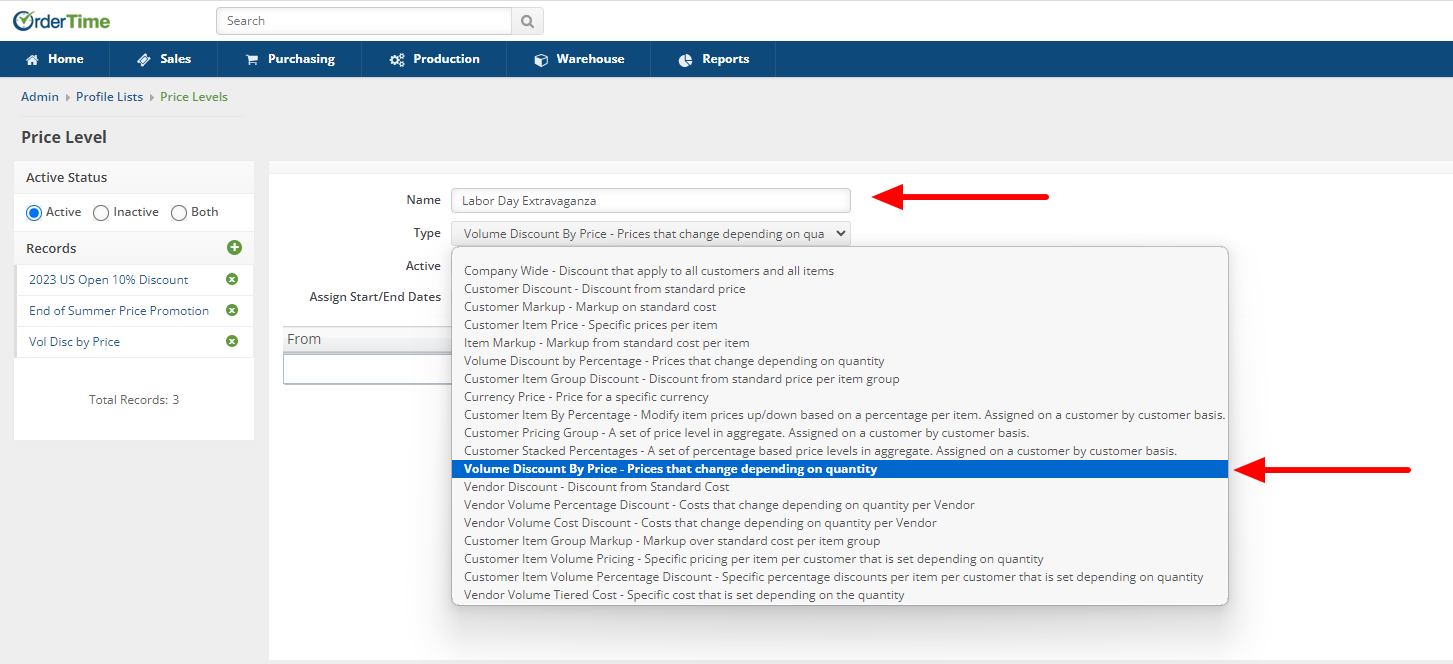
- On the Price Level screen create and input the Name for your pricing strategy.
- Select the Type from the drop-down list.
- Dependent upon the Type chosen, you may need to set up timing (beginning/end for your pricing strategy), select items affected, adjust standard price or cost, add a new price.
- Dependent upon the Type chosen, you may need to:
- Set up timing (beginning/end for your pricing strategy)
- Select items affected
- Adjust standard price or cost
- Add a new price.
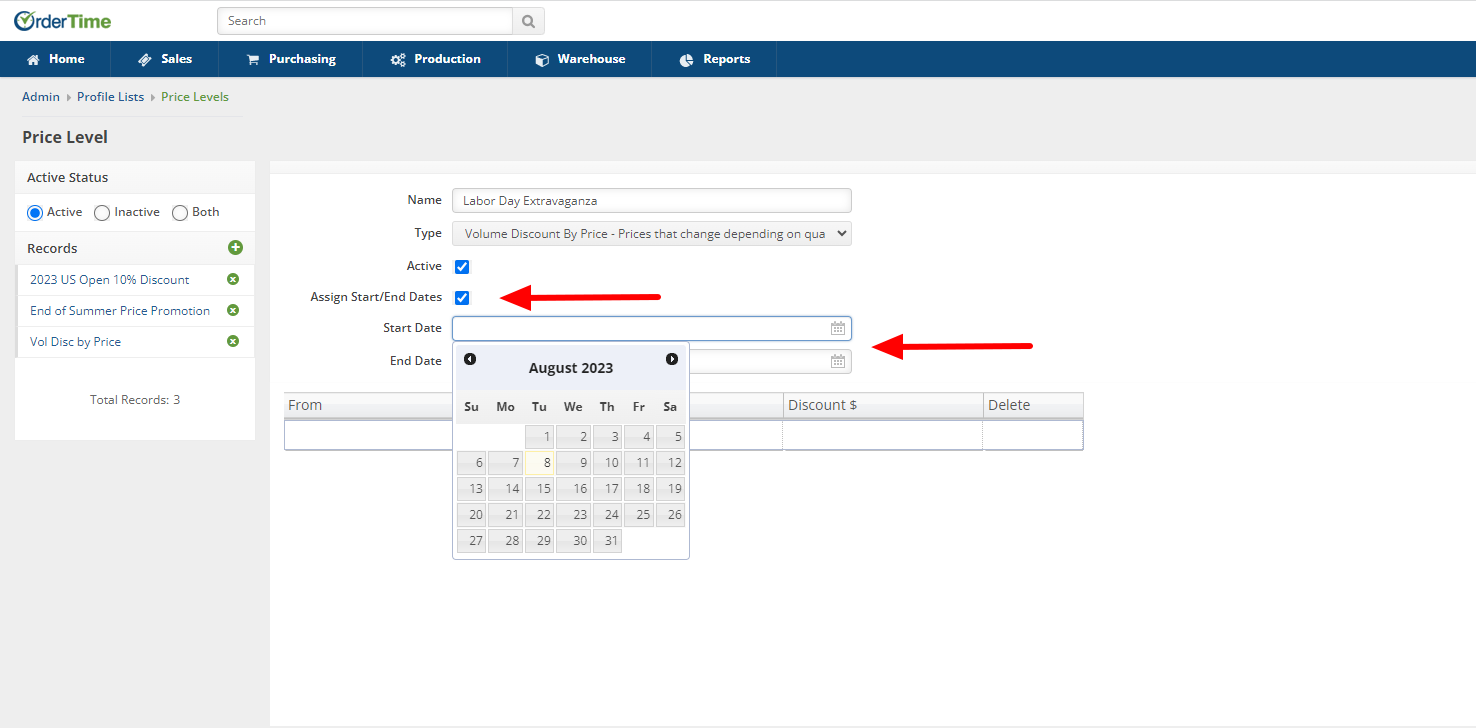
- To set up timing (the start/end dates for your pricing strategy) check the Assign Start/End Dates box and select the Calendar icon within the Start Date/End Date fields.
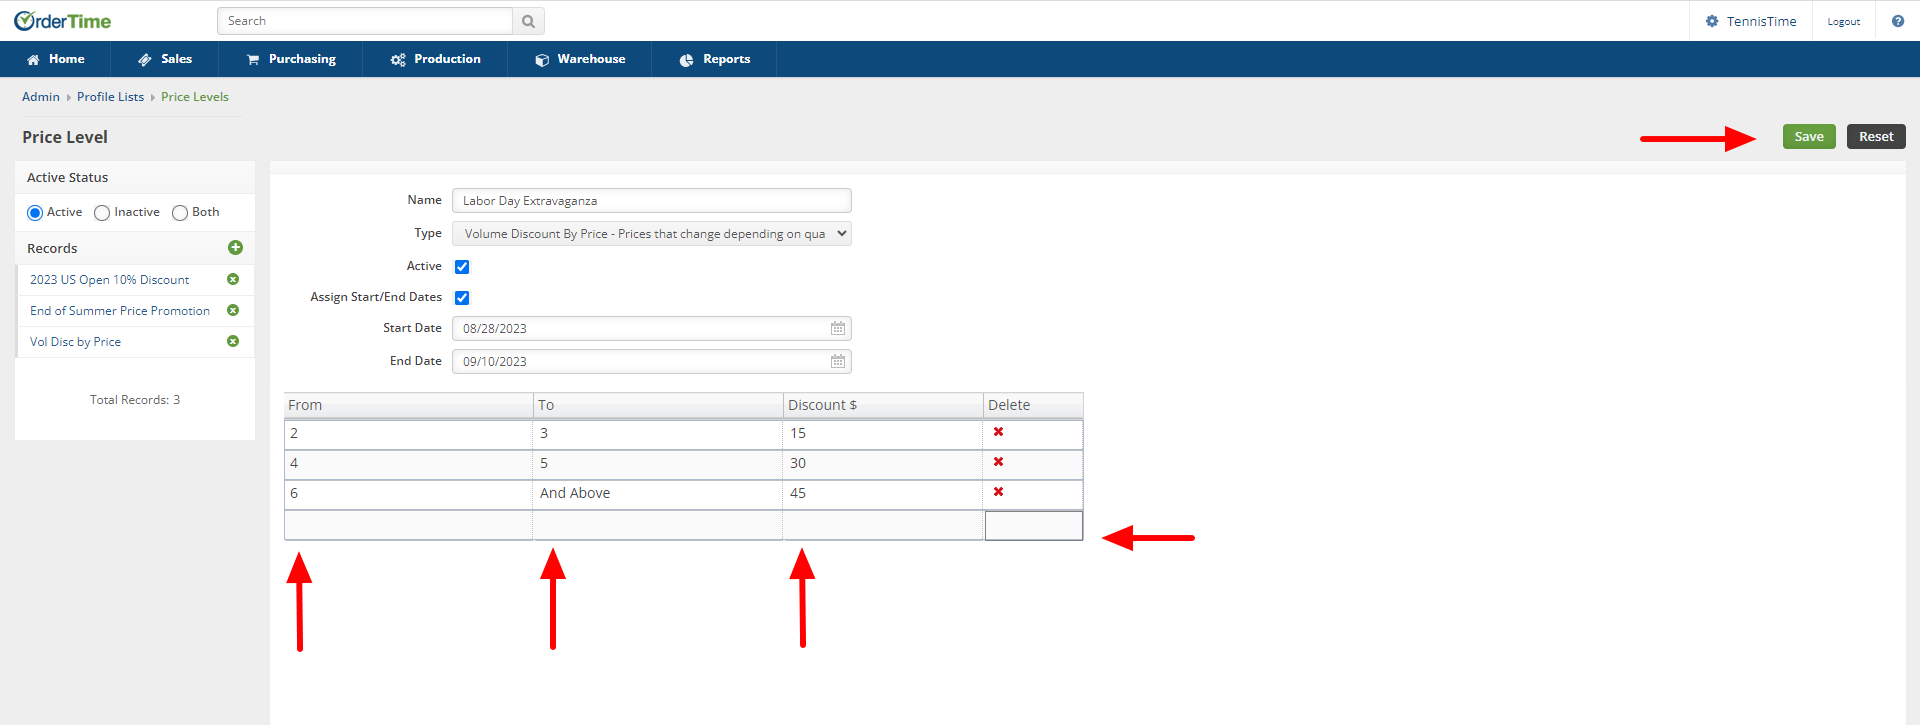
- In this example using the "Volume Discount By Price" Type you must:
- Enter the number of items From where the discount by volume begins
- The To field will default to "And Above" but update as you add Items to the discount
- The Discount $ field is the amount of discount
- The system requires you to click into the empty box in the Delete column and then select the Save button in the upper right hand corner of the screen.
- Once Saved the Price, Level screen will update reflecting the ability to apply the discount to Items, and view the items to which the discount is applied, by selecting the appropriate green button.

- Selecting the Apply to Items button will open the Apply Volume Discount window where you can select the items involved with the discount. Checking the box next to the items involved in the discount, and then clicking the Apply button, will link the discount to the items selected.

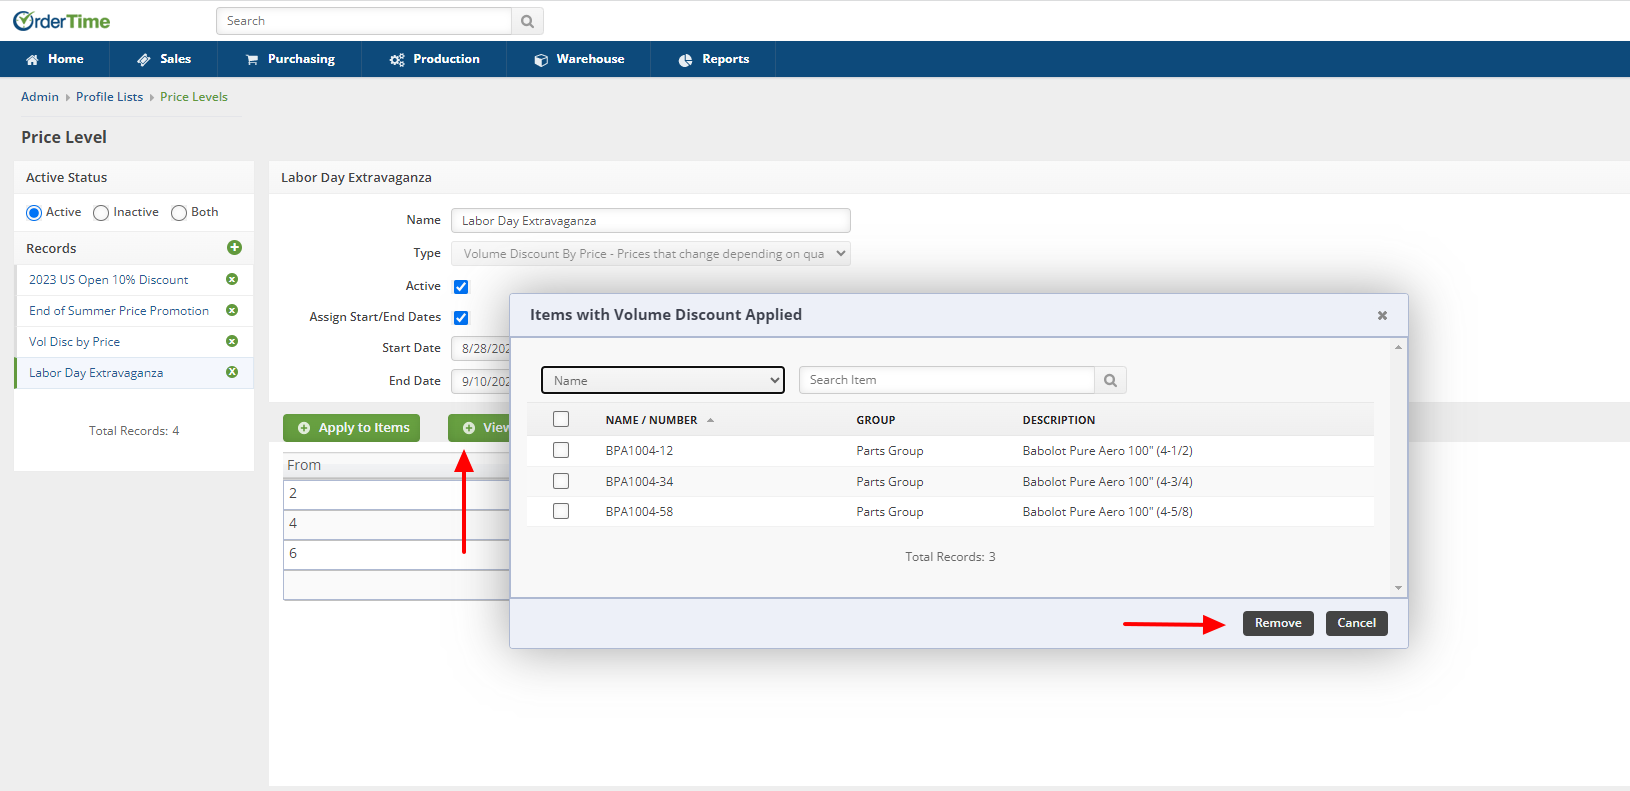
- You can view the items where the discount is applied by selecting the View Items Applied button. The Items with Volume Discount Applied window will open and reflect all items associated with the discount. This is also where you can remove items no longer associated with the discount.