Creating Styles and Importing them into Shopify
Creating Styles
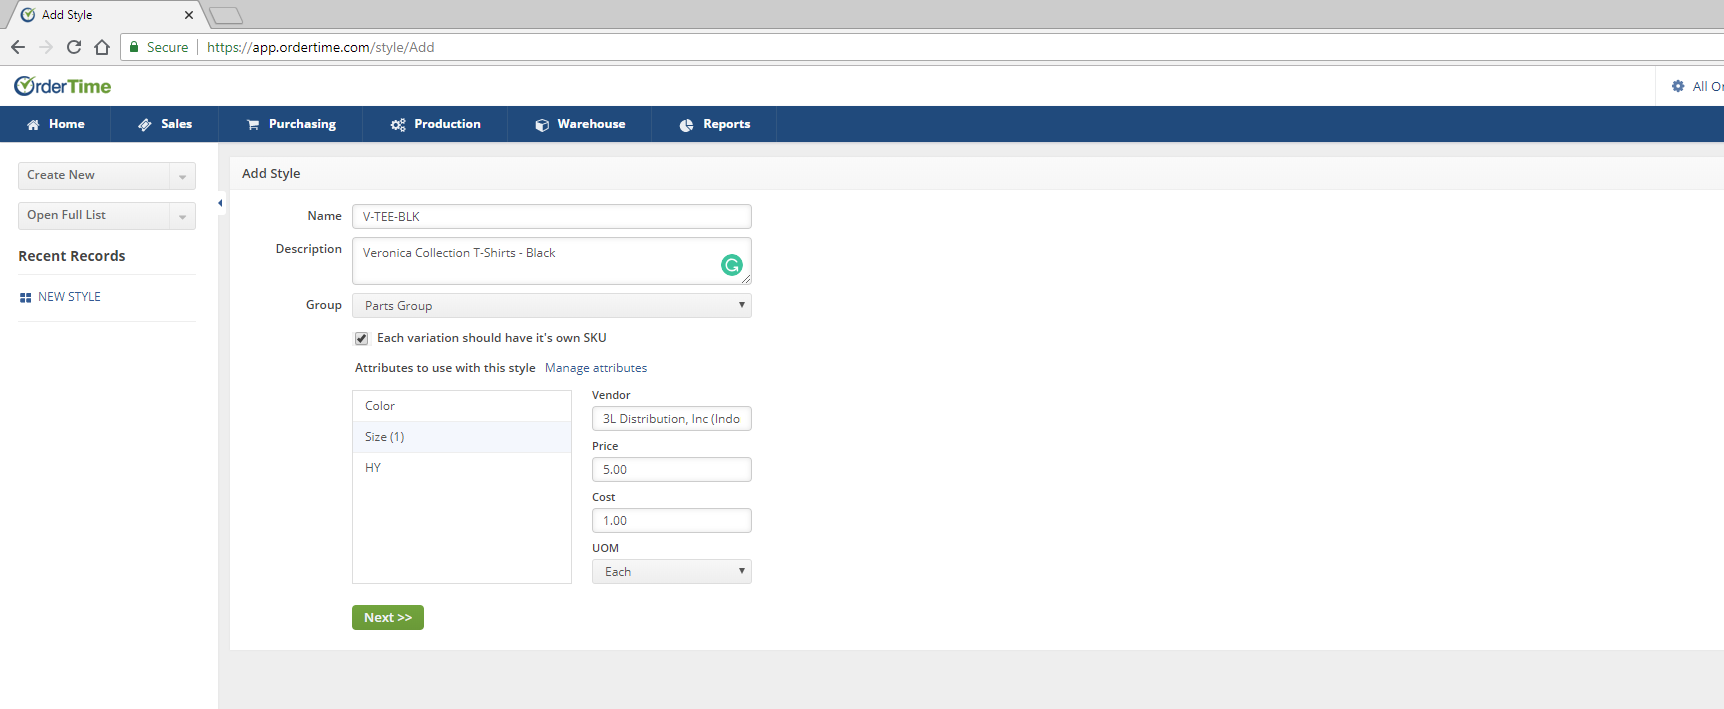
To begin this process, we will need to create our styles first.
Before you start creating styles, you will need to create one or more attributes as wells as the selections within the attributes. Not every style needs to have all of the attributes created.
In this example, we will create a style of shirt using only the attributes that apply to it. Notice that when creating the Style, only the Size Attribute for this style have been selected.
We have also selected for each variation to have its own SKU. This is very important to select if you wish to track the inventory for each variation.
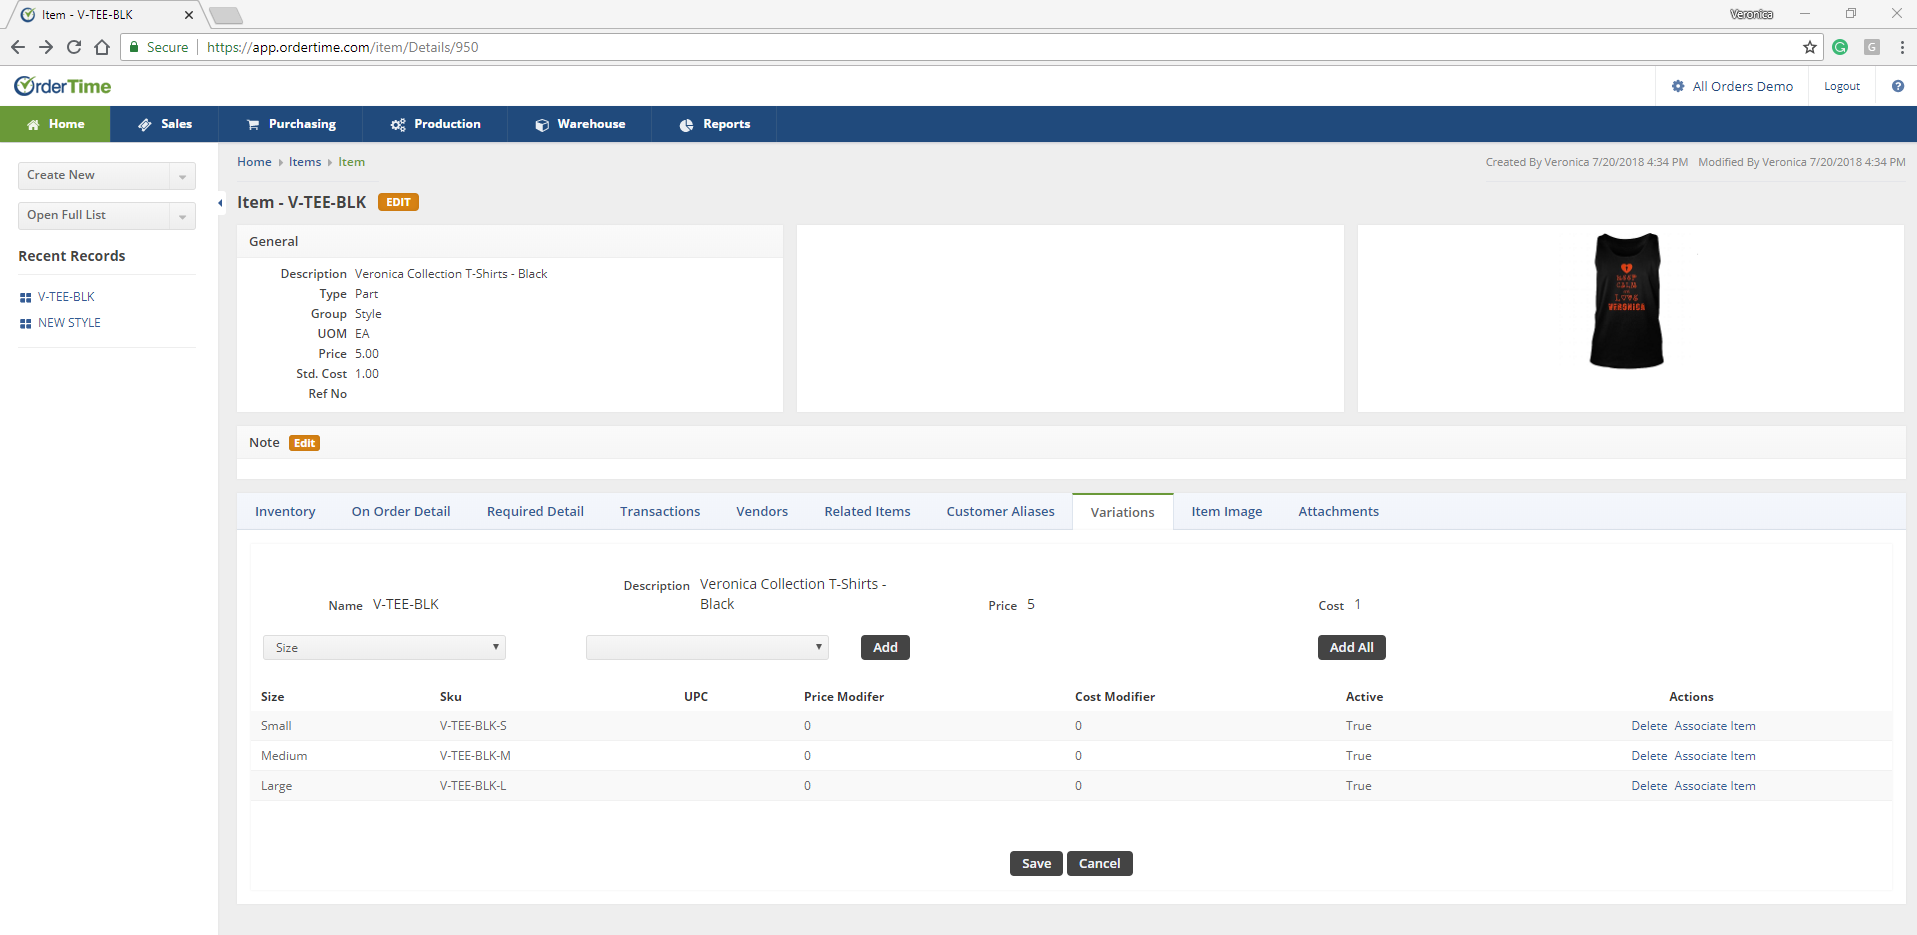
After setting up the Style, you will be able to add and Item Image and the Variations that the Style comes in.
You will notice that for each Variation a unique SKU is created.
Now that my Styles have been created, you can export them using an Item Report.
Preparing Information for Export
Create your product CSV file
Product with variants
If you are uploading a product that has variants, then enter all the fields (as described above) for the product on the first line along with the URL for the first image. On the following lines, enter the handle. Then, skip the Title, Body (HTML), Vendor, and Tags columns. Fill out the rest of the variants' details and each image URL.
Your product CSV can't exceed 15MB. If you get an error when trying to upload a new CSV file, then check to make sure it doesn't exceed the size limit.
Explanation of Product CSV Files
https://help.shopify.com/en/manual/products/import-export/using-csv#product-csv-file-format
https://help.shopify.com/en/manual/products/import-export#product-csv-file-format
https://help.shopify.com/en/manual/products/import-export/import-products
