Overview
Order Time is integrated with Gmail, Google Calendar, Outlook365 Mail and Outlook Calendar. Using this integration you can have the system record responses to emails that were sent from Order Time. It will append the response directly to the original activity in the Activity Tab. You can also have responses generate a new Activity. You can have any email sent to an Order Time contact through the integration create a new Activity under that Contact. Responses from Contacts that include an attachment will Attach it to the Activity as well.
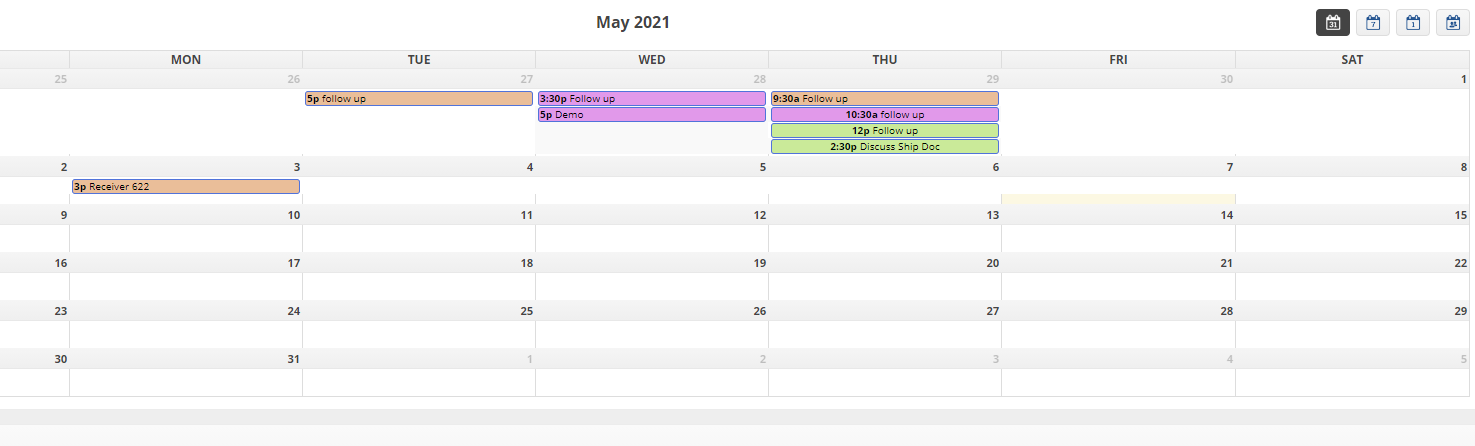
Events added in Order Time will appear in your connected Calendar in either service. When you edit, delete or move the Event in Order Time or in your Calendar app, it will sync the change with both.
Activate the Mail and Calendar Integration in Order Time
The first step is to activate the integration. You must be the Master Admin to do this. The Master Admin is the user which Registered for Order Time.
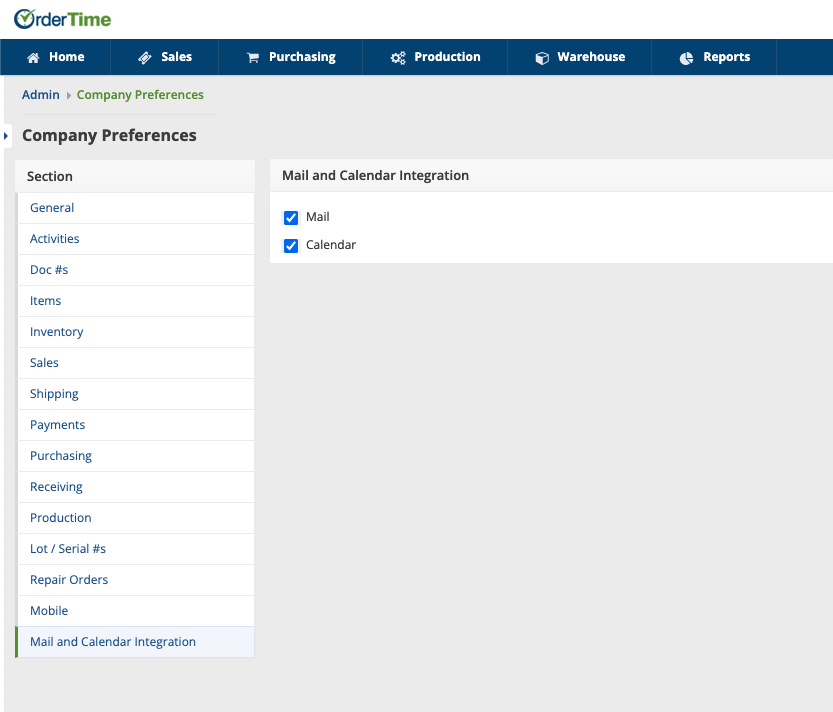
Navigate to settings by clicking on the gear next to your company name on the top-right portion of your screen. Then click Company Preferences under the Settings column.
Click on Mail and Calendar Integration under the Company Preferences and check the boxes for Mail and Calendar:
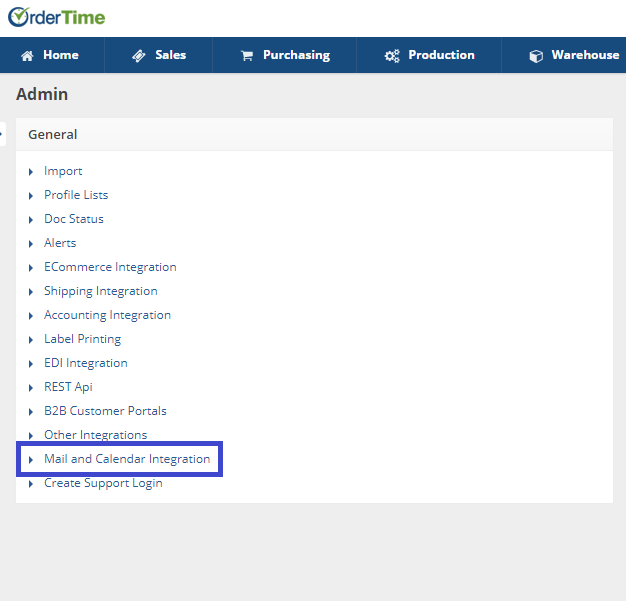
Navigate back to settings by clicking on the gear next to your company name on the top-right portion of your screen. Then click Mail and Calendar Integration under the General column.
Each user can now connect their Email and Calendar with Order Time after the integration has been activated.
This is a User by User integration and must be connected individually from that User's settings.
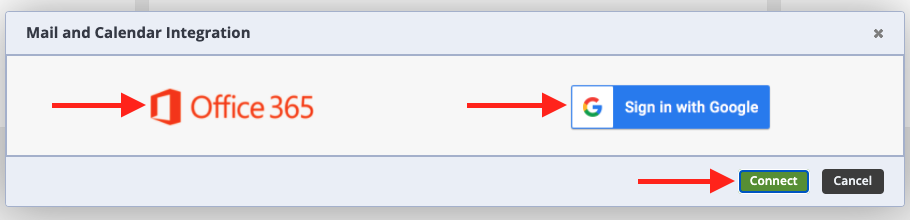
You will see the screen above, click on the service you wish to connect and click the Connect button at the bottom-right. From here you will be taken to an authentication screen. Give permissions to Order Time and authorize the integration by logging into your chosen email & calendar account.
When logging into Office 365 for the First Time, we recommend logging in as an Outlook Admin
You will see a screen similar to this during the authentication process:

Make sure to check Consent on behalf of your organization and click on Accept.
Now the Order Time application will be saved with consent and the rest of your users can log into Order Time and repeat this process by logging in as themselves when connecting the mail integration.
Utilizing the Mail and Calendar Integration
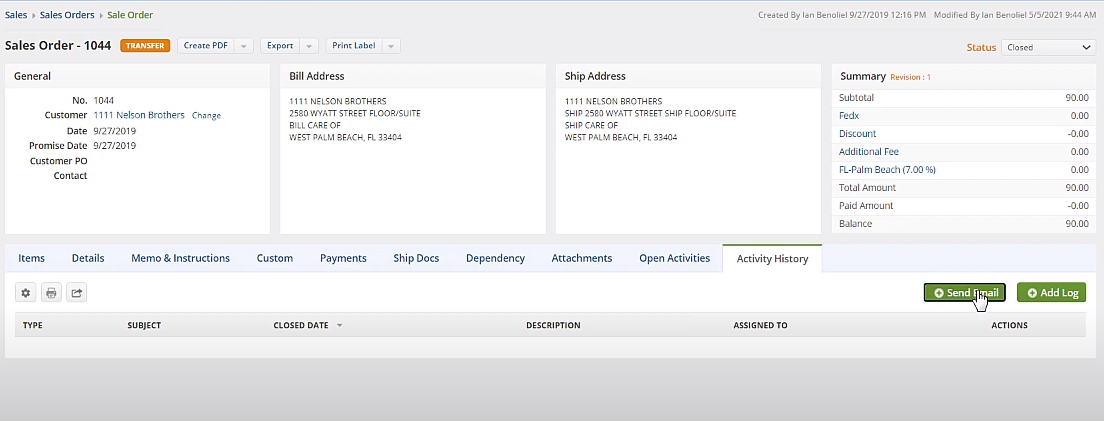
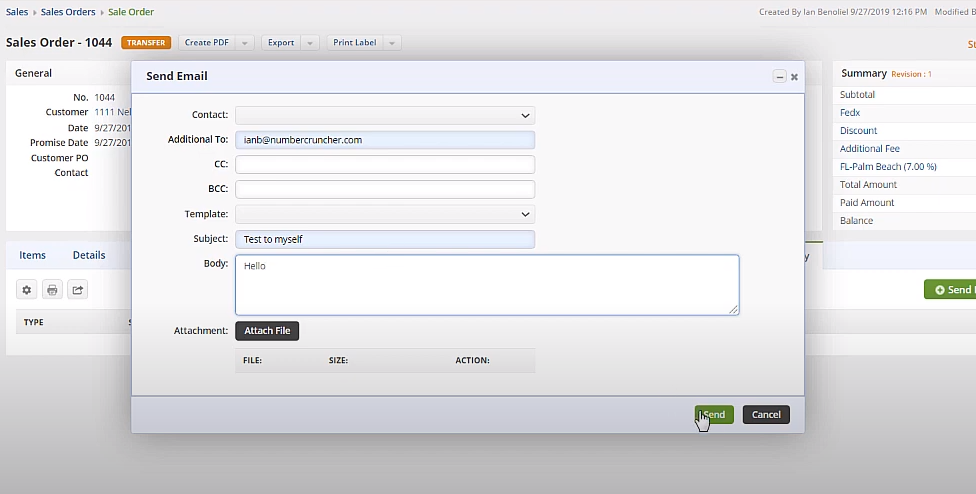
To send an Email from a transaction like the Sales Order, head to your individual order, click on the Activity History tab and click on Send Email as seen below.
You fill out the email, utilize a template if you've set some up, attach a file if need be and click Send.
The Email will appear in your inbox now on Gmail or Outlook365 Mail. It also appears under the Activity History Tab.

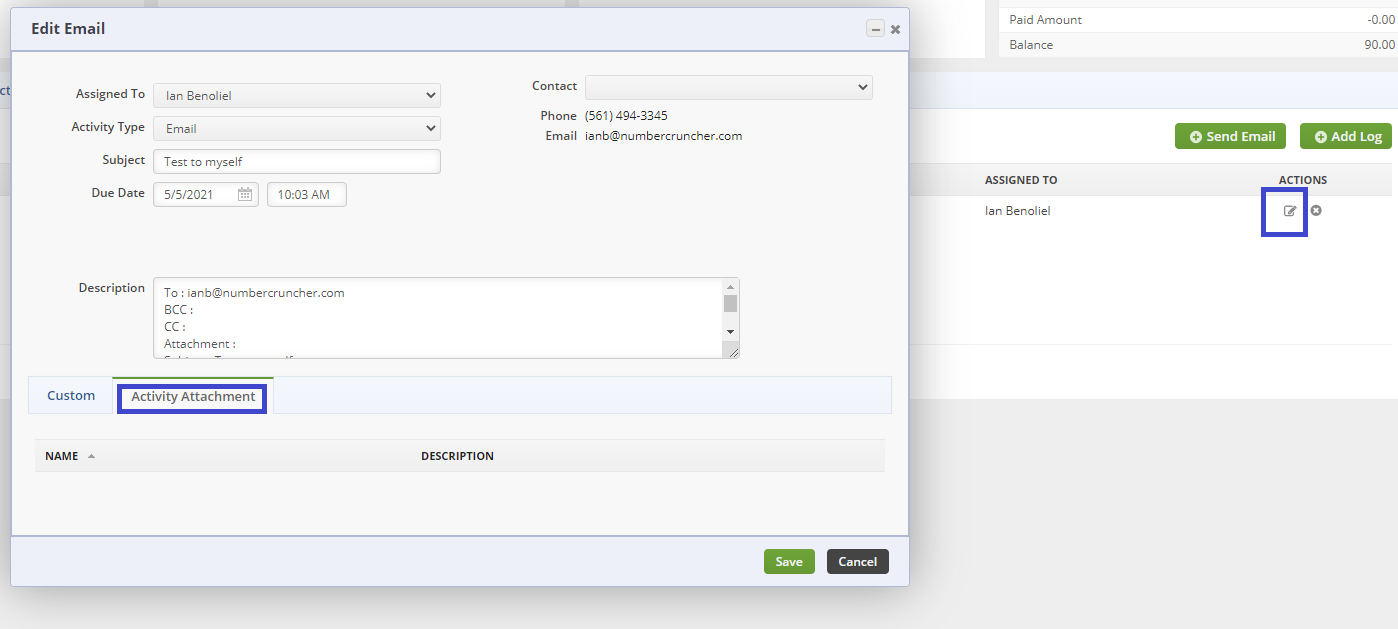
If the response includes an attachment, the attachment can be seen by clicking on the Edit icon to the right of the Activity and then clicking the Activity Attachment Tab to view them.
To create an Event on a transaction, head to the transaction like this Sales Order and click on the Open Activities tab.
Click on the Add Event Button to get started.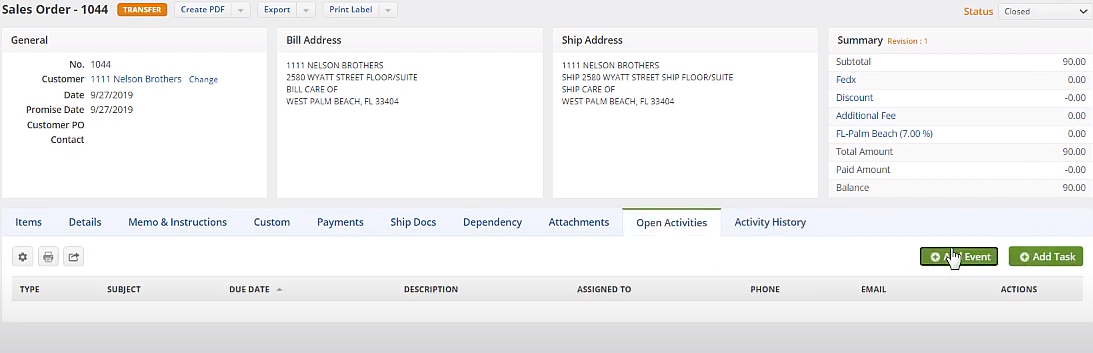
Set up your event as a new meeting, choose the dates, add a description if necessary and hit Save.
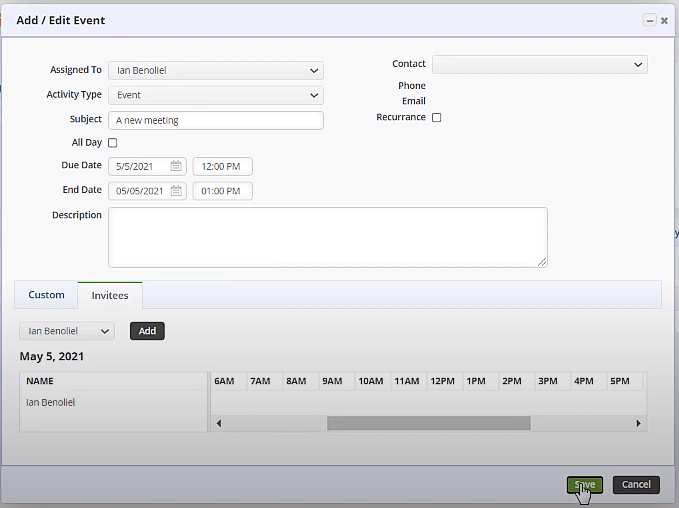
This event will now show up under Open Activities in the Transaction / Sales Order. It also shows on the Calendar on the Home page of Order Time as well as on your connected Calendar via the integration!
How Do Events in Order Time and My Calendar of Choice Sync?
- You must add the Event in Order Time, it can not be added in your Calendar App
- This will automatically add the Event to you Calendar App of choice
- When you Edit / Move / Delete an event in either Order Time OR your Calendar App it will sync!
Disconnecting the Mail and Calendar Integration
To disconnect your Email account and Calendar from Order Time, simply head to the settings by clicking on the gear next to your company name on the top-right portion of your screen. Then click Mail and Calendar Integration under the General column.
Click on the service you would like to disconnect ie. Google Suite or Outlook 365 and then click on the green Disconnect button.
