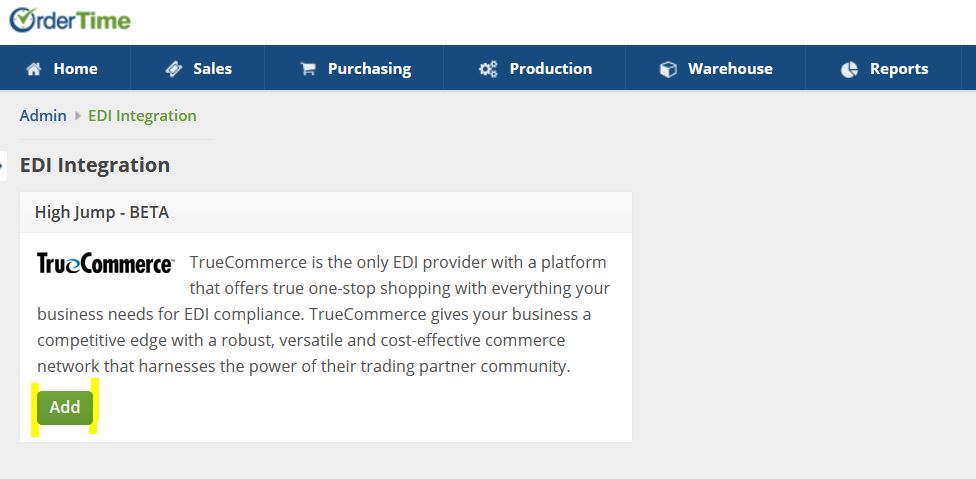
TrueCommerce is a market leading electronic data interchange (EDI) solution provider for SMBs.
By combining inventory and order management with a complete, end-to-end EDI solution, Order Time users can save money, increase productivity and automate key supply chain processes—to move orders faster and serve customers better.
When integrated with Order Time, the TrueCommerce EDI imports EDI purchase orders directly into Order Time as EDI sales orders. When the Sales Order is shipped and you generate an ship doc, the solution automatically generates an Advance Ship Notice (ASN). This saves you from having to key the sales order, invoice or ASN data into your EDI solution, saving time, money and errors in your order management process.
To find out more about TrueCommerce EDI and the benefits of integrating EDI with your Order Time solution, contact an EDI specialist today.
The EDI Integration is used to import and export EDI documents to and from the TrueCommerce Transaction Manager. The following EDI Documents are supported.
- 850 - Purchase Order
- The EDI 850 transaction set provides the same information as a paper purchase order document. These include:
- PO Number
- Order date
- Requested shipping and/or delivery date
- Vendor details such as name, address and/or contact details
- Buyer details such as name and delivery address
- Buyer billing information
- Item identifiers, such as product SKUs or UPC’s
- Quantity and unit of measure of items ordered
- Price per unit, as well as the total price for the order
- Shipping terms, such as the shipping method, preferred carrier, and desired delivery date
- Proposed payment terms
- Allowances and charges
- The EDI 850 transaction set provides the same information as a paper purchase order document. These include:
- 856 - Advance Shipping Notice (ASN)
- An ASN needs to contain important information about the order itself, as well as the details of the shipment. Key elements of EDI 856 include:
- Shipment Number
- Shipping Date
- Expected delivery date
- Ship from/to addresses and information
- Purchase order number
- Item details and quantities
- Shipment tracking details (ex. BOL Number, PRO Number, Tracking Number)
- Item tracking details where applicable (i.e. Serial number or lot numbers)
- Packaging detail (ex. Which items are in a specific carton, which cartons on each pallet, etc.)
- Multiple Package/Pallet
- UCC128/GS1 Number
- An ASN needs to contain important information about the order itself, as well as the details of the shipment. Key elements of EDI 856 include:
The cost is $30 a month per document. Please note the price is exclusive of setup and transactional fees charged by TrueCommerce.
Before connecting the integration you must set up your account with TrueCommerce. They will walk you through setting up your trading partners.
Setup


Add 1 for each Doc Type. So if you're using the 850 and 856, that would be 2
Type in your payment method, and click Save at the top-right. Now that you've added EDI to your plan you can head back.
Settings -> EDI Integration
Now you should see TrueCommerce here with links below it. There you can edit your preferences.
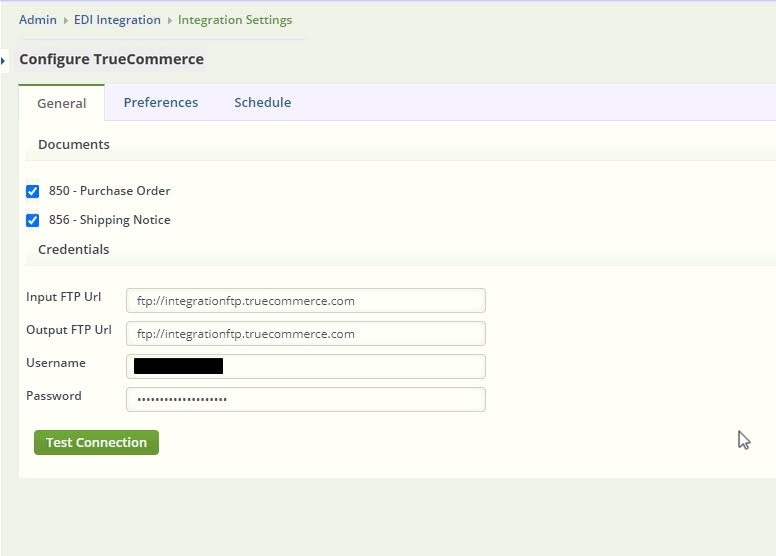
 Check the boxes for the types of documents you'll be using.
If True Commerce provides you with both an Export and Import FTP path for files to be dropped off and picked up, when setting up the configuration for your True Commerce connection in Order Time be sure to enter the Export path in the Order Time Input FTP Url (We are importing what True Commerce is Exporting) and the Import path in the Order Time Output FTP Url.
Input and Output may or may not be the same folders depending on how TrueCommerce has it set up.
Fill in your TrueCommerce FTP URL along with your TC Username & Password
(This is the FTP site login and password you get from TrueCommerce)
Click Test Connection to make sure it's working properly.

Here you can choose your Item Identifier, either UPC, Name or Full Name

Choose your auto-scheduling options by setting it to Daily or Hourly and picking your custom interval.
