Overview
There are 2 types of Repair Order, Internal & External.
- Internal
- Repair
- Taking broken item in my inventory and repairing it to keep it in stock.
- Repair
- External
- Return & Repair for Customer
- Customer sends in a broken unit, you fix it and return it to the Customer
- Return & Repair for Stock
- Customer sends in a broken unit, you fix it and return the Repaired Item to Stock
- Return & Replace
- Customer sends in a broken unit and you Replace the Item, sending them a Replacement immediately after inspecting the unit.
- Return & Repair for Customer
Enabling Repair Orders and Setting Repair Preferences
Learn More About Internal Repair Orders
First Create Your Repair Item
You want to start off by creating your Repair Item. The Repair Item can be used just like a Service Item in Order Time. In this example I'm going to call it Warranty Repair.
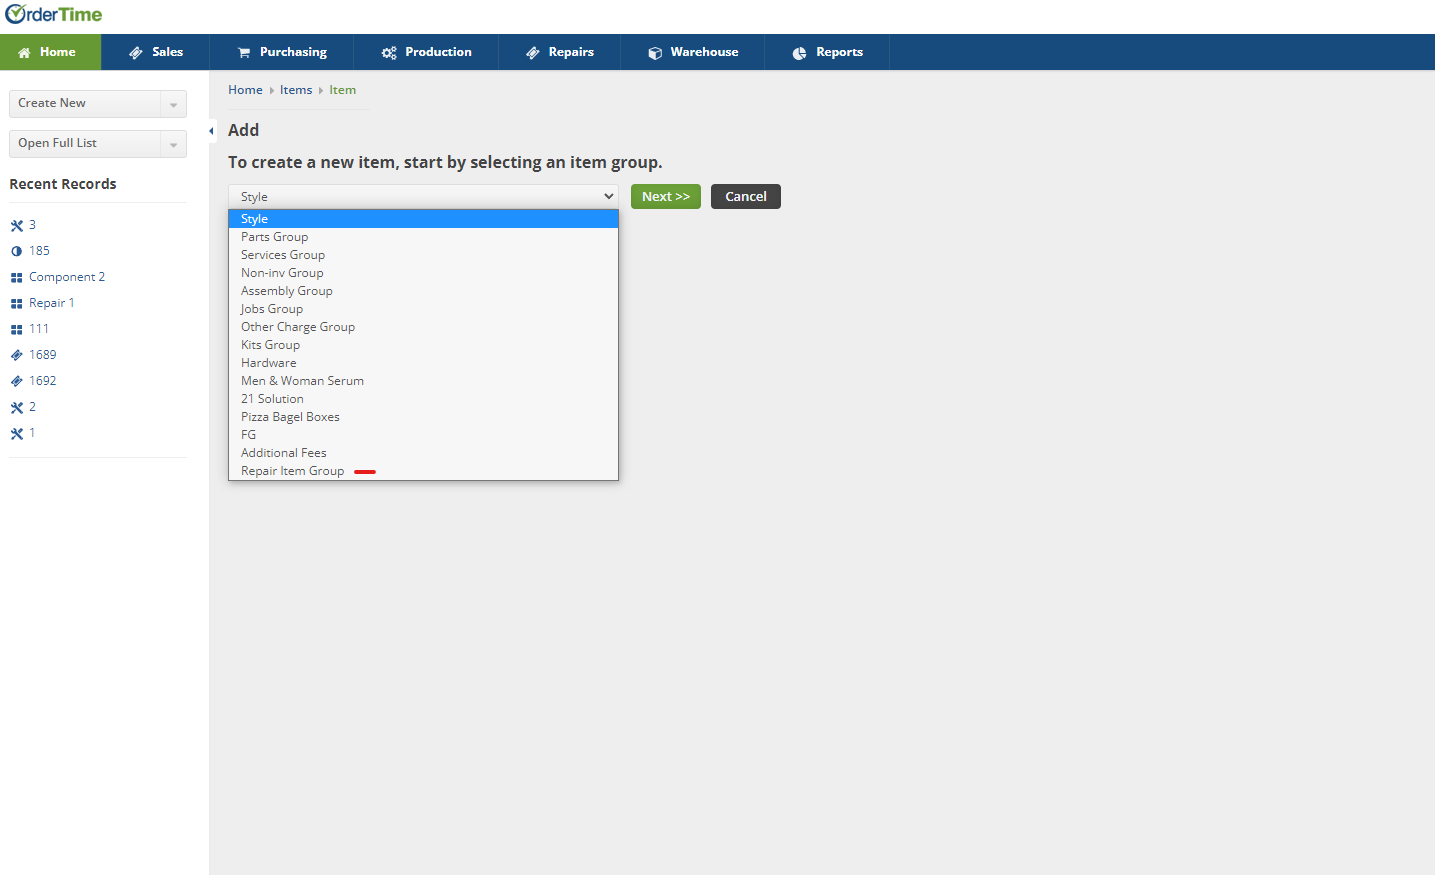
- Head to the Create New drop-down
- Click on Item
- Choose the Repair Item Group from the Item drop-down and click Next
- Make sure to change the Name, I changed it to Warranty Repair, left out the price, and selected the Expense Accounts & Income Accounts.
- Then click Save
Next Add the Column for Sales Order Type to your List
As long as you followed the instructions here, Enabling Repair Orders and Setting Repair Preferences, you should have a custom field called Sales Order Type. We want to add that to the Sales Order List so that we can distinguish regular Sales Orders from Sales Orders with an attached Repair.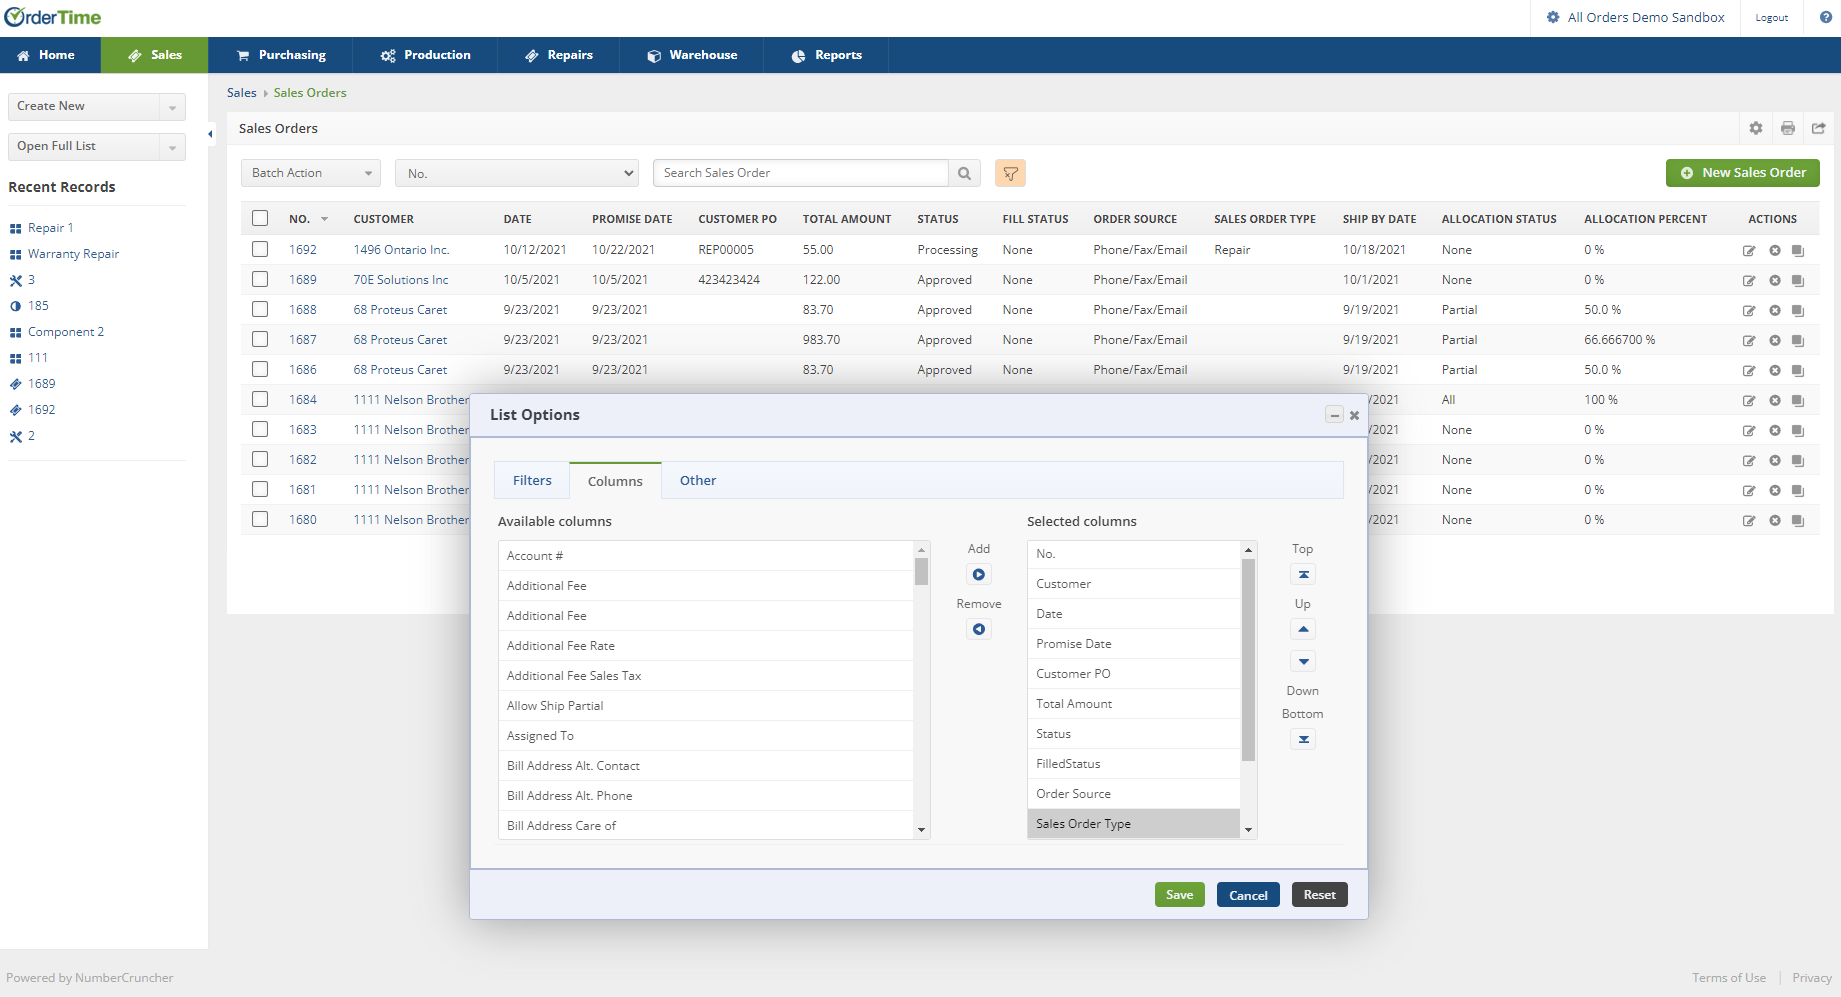
- Click on the Open Full List drop-down and select Sales Orders
- Click on the cog in the top-right of the list and select the Columns tab
- Add the Sales Order Type custom field, order it how you like and click Save
Create an External Repair Order
Your External Repair Orders will always begin with a Sales Order. You create a Sales Order, add the Repair Item, enter the Repair Order Wizard, finish off the Repair Order and fill out a Ship Doc to ship the item back if necessary.
- Click on Create New and choose Sales Order
- Optionally click on Open Full List, Sales Orders, and click on Create New Sales Order in the top-right
- Begin your Sales Order like normal, select your Customer that you're doing the repair for and fill out all the necessary info
- Make sure to click the Custom tab and change the Sales Order Type to Repair.
- This allows you to filter your Sales Order List by Sales or Repairs
- It also helps for filtering in your Reports
- Once your Sales Order is created you will add the Repair Item to the list on the Sales Order
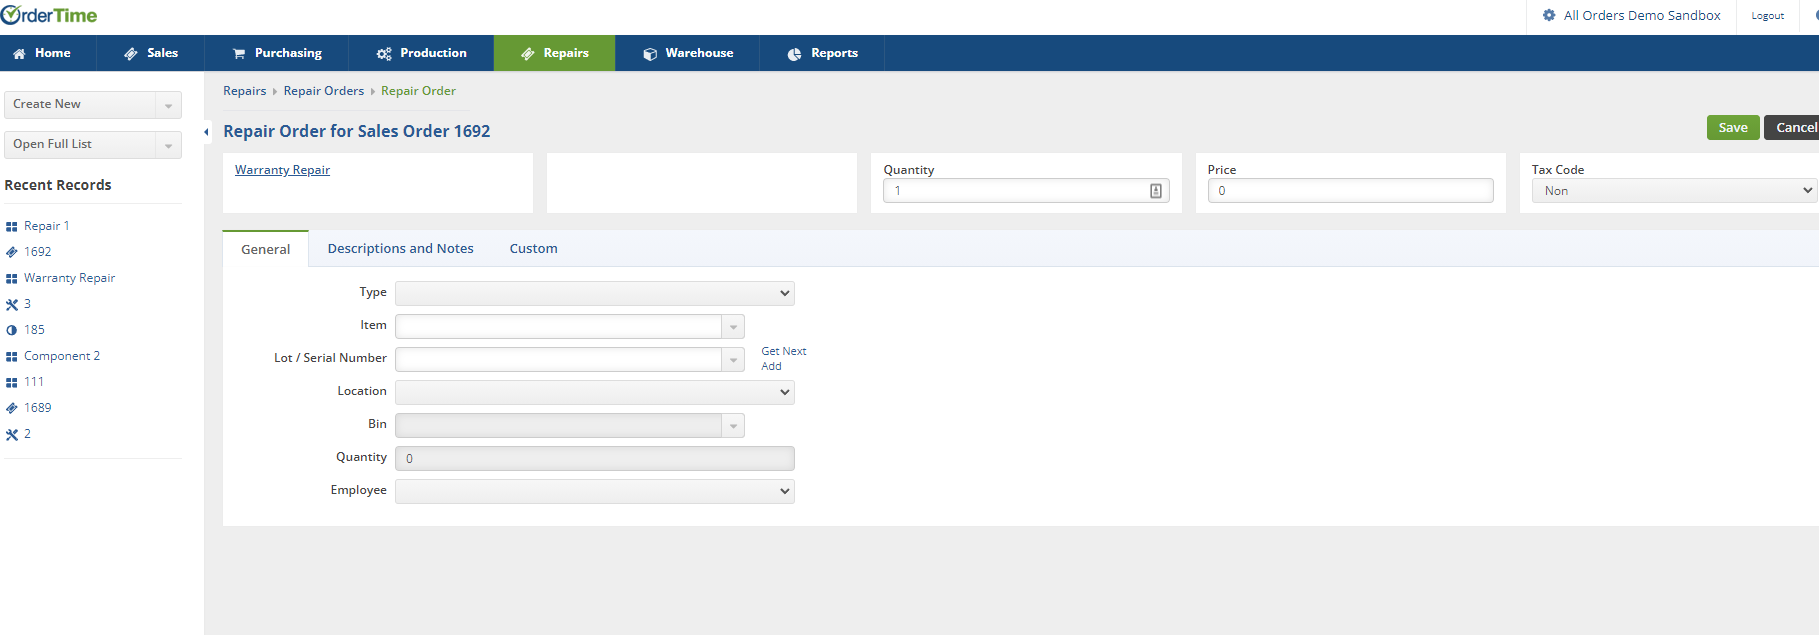
- Doing so will jump you into the Repair Wizard
- It is identical to the first screen when creating an Internal Repair Order
- Select the Quantity, Price, Tax Code
- Select the Type:
- Return & Repair for Customer
- Customer sends in a broken unit, you fix it and return it to the Customer
- Return & Repair for Stock
- Customer sends in a broken unit, you fix it and return the Repaired Item to Stock
- Would you like the Cost on this Repair Order to be Capitalized? Yes = Value adjustment and close Repair Order -- No = Close Repair and no Value adjustment
- Return & Replace
- Customer sends in a broken unit and you Replace the Item, sending them a Replacement immediately after inspecting the unit.
- Return & Repair for Customer
- Choose the Item & Serial or Lot Number
- Choose the Location and Bin and the Employee handling the repair
- Then click Save
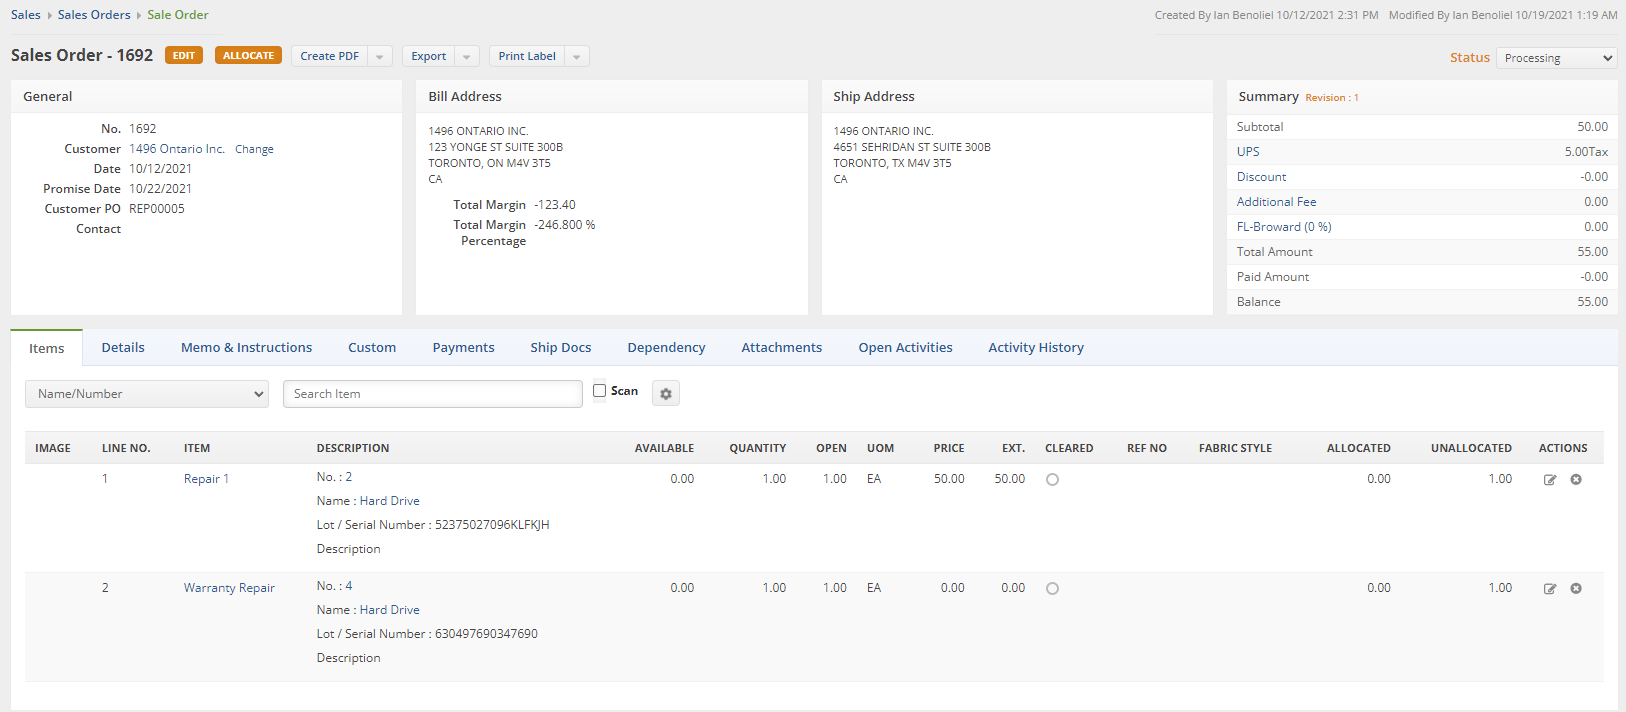
- Once the Repair Item has been added you can see that in the Description there is some information:
- The Repair No
- Name of the Item being Repaired
- Lot / Serial of the Item
- Description of the Item
- Click on the number displayed to enter the Repair Order itself
- Once you enter the Repair Order, you will notice that it is stuck in Waiting for Approval
- External Repair Orders cannot be Approved until the base Sales Order has been Approved
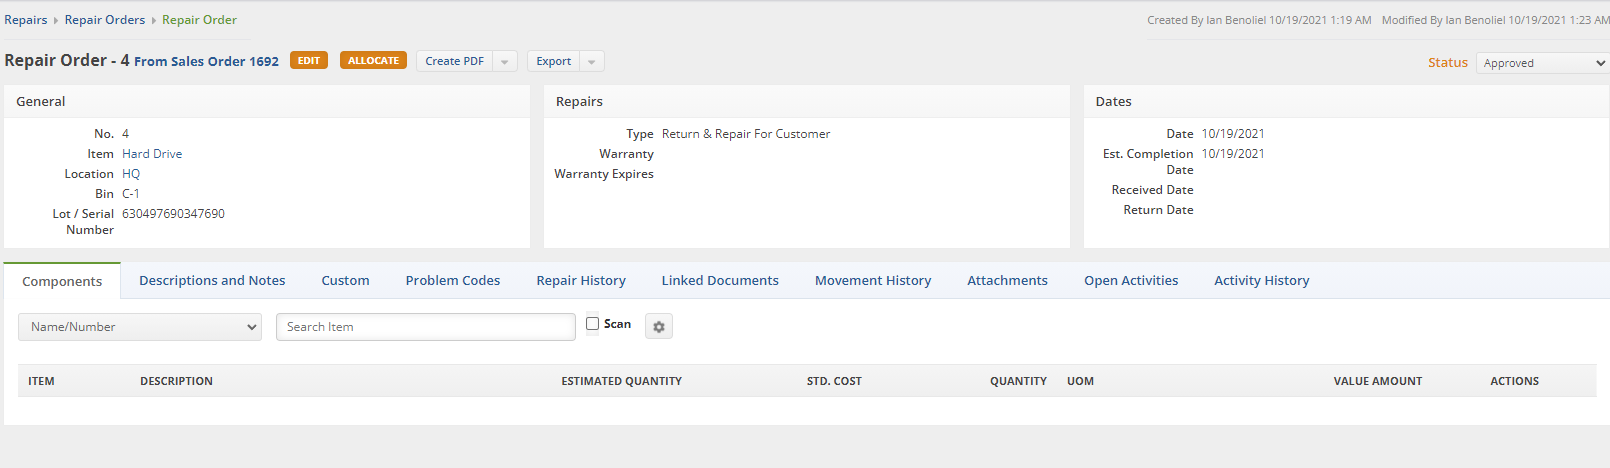
- Add Components that are necessary for the repair, very similar to a Work Order
- The Estimated Quantity is what you think you'll need, when you click the Allocate button it will Allocate all
- The Quantity column is the true amount that was used.
- You can enter a Std. Cost and a Value Amount
- Click on the Problem Codes column
- Add Problem Codes to show the recurring issues that are happening to the Item
- Repair History, Linked Documents, Movement History, Attachments, Open Activities, Activity History
- All these columns are similar to Work Orders and other Documents
- Click on Allocate and set the Status to Approved
- Set the Repair Order to the status of Closed when finished
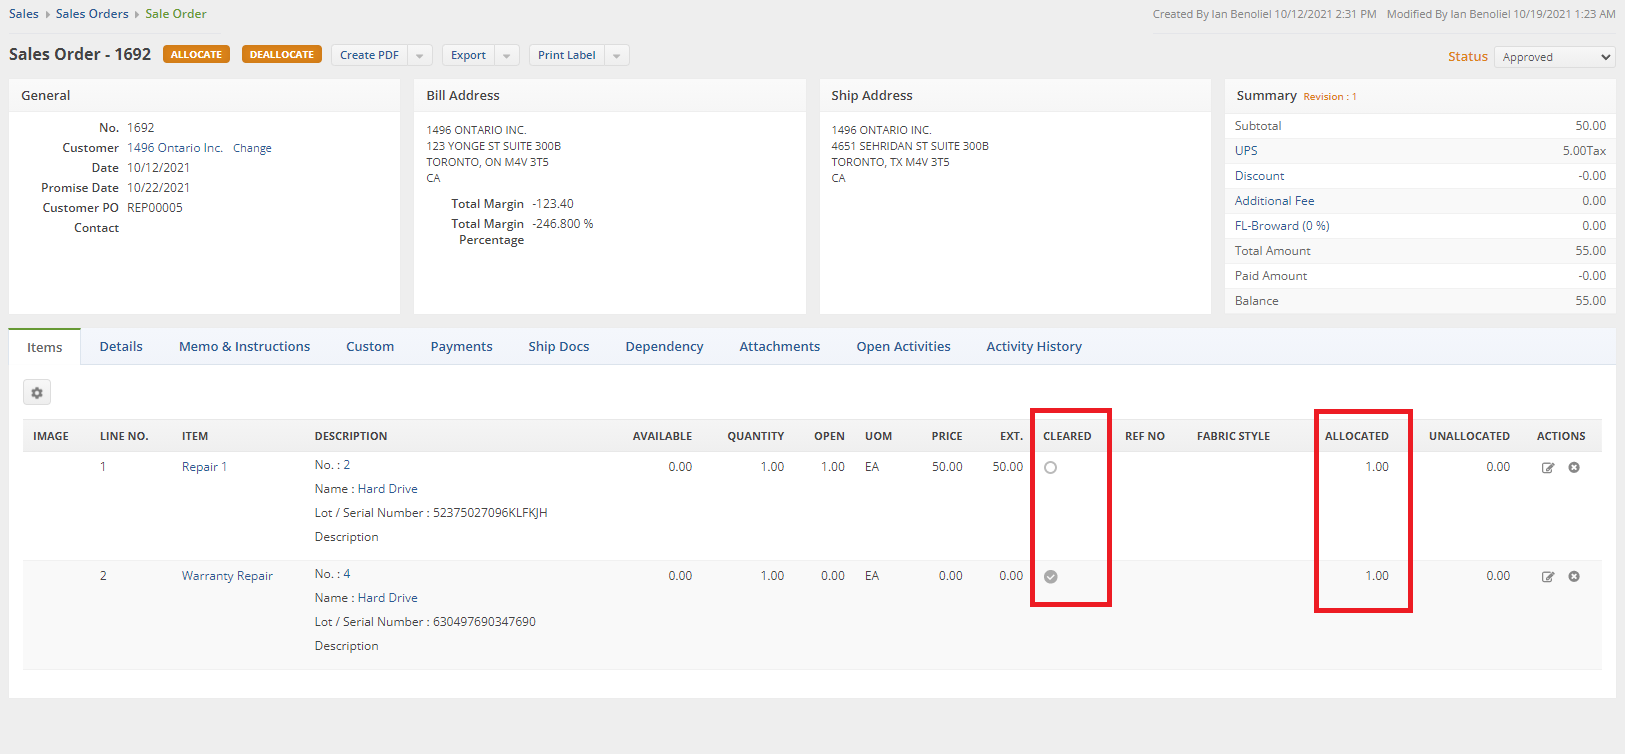
- Head back to the Sales Order and Allocate
- Make sure that the Cleared column shows a checkmark for each Repair Item. You want to have both of them finished with Components that are in stock for the Repair
- Now you can move on to closing the Sales Order which will create a new Ship Doc
- The Ship Doc shows the description of the Repair Item and what is being sent back to the Customer
- From there you will be ready to return the Repaired Item to the Customer following your regular Ship Doc procedures.
