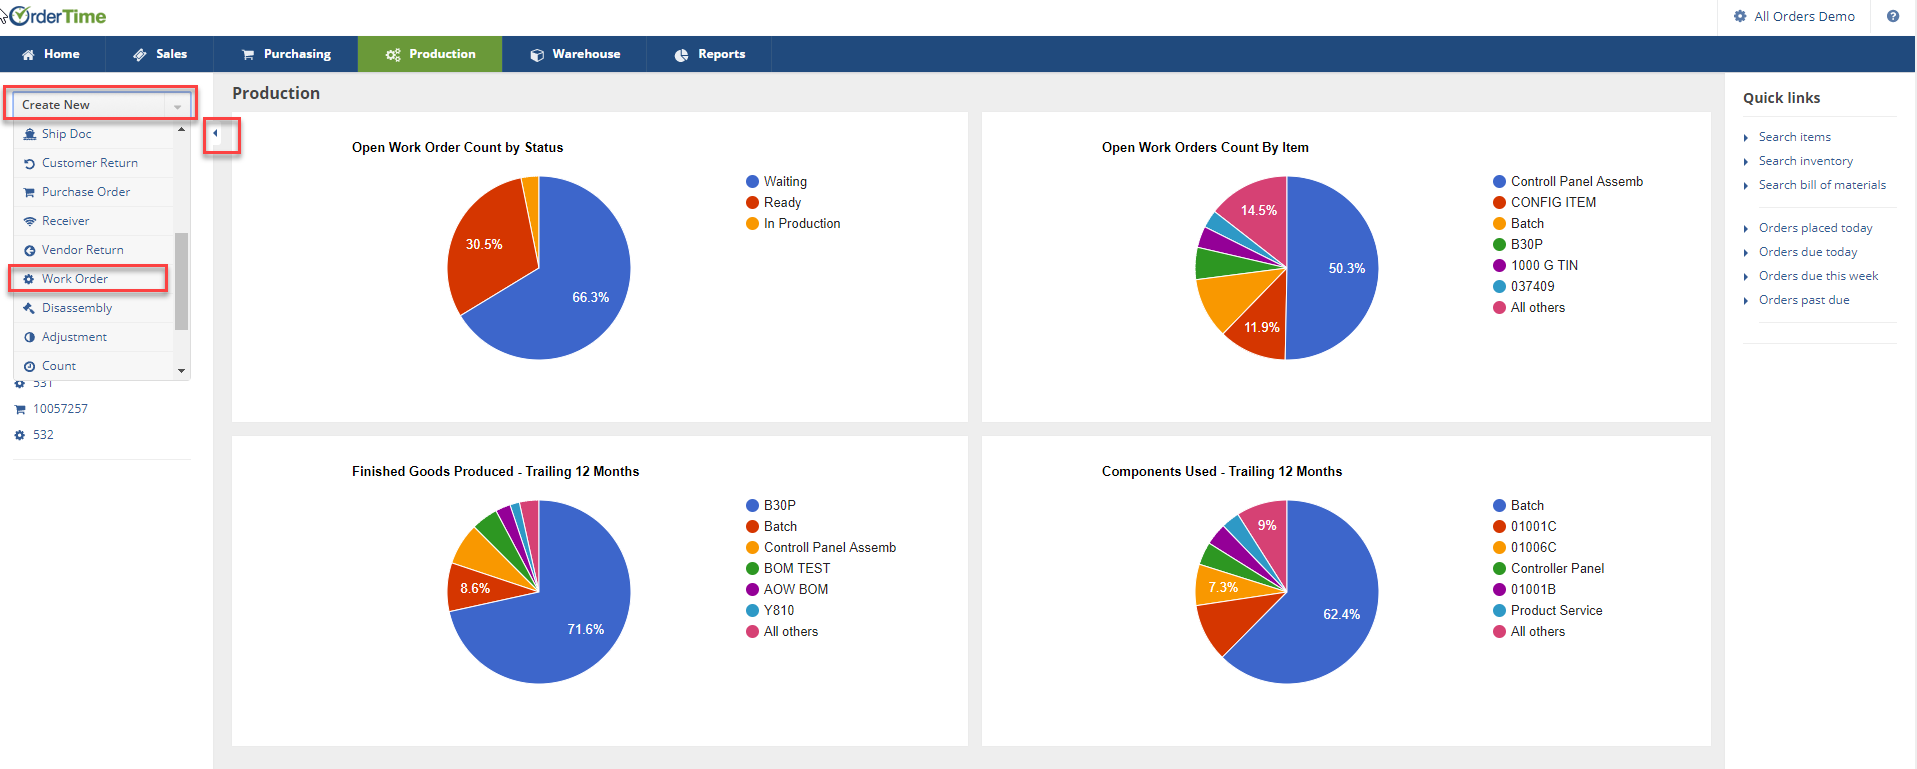
Overview
A Work Order is a task or a job for a customer, that can be scheduled or assigned to someone. Such an order may be from a customer request or created internally within the organization. A Work Order may be for products or services.
Generating a Work Order
Every Work Order (WO) consists of a number of Steps /Operations. This describes the labor and manufacturing involved with producing the Item in question. All Steps are drawn from the Profile List > Steps.
Each Step can contain one or more Components. These are the Items that go into producing the final product.
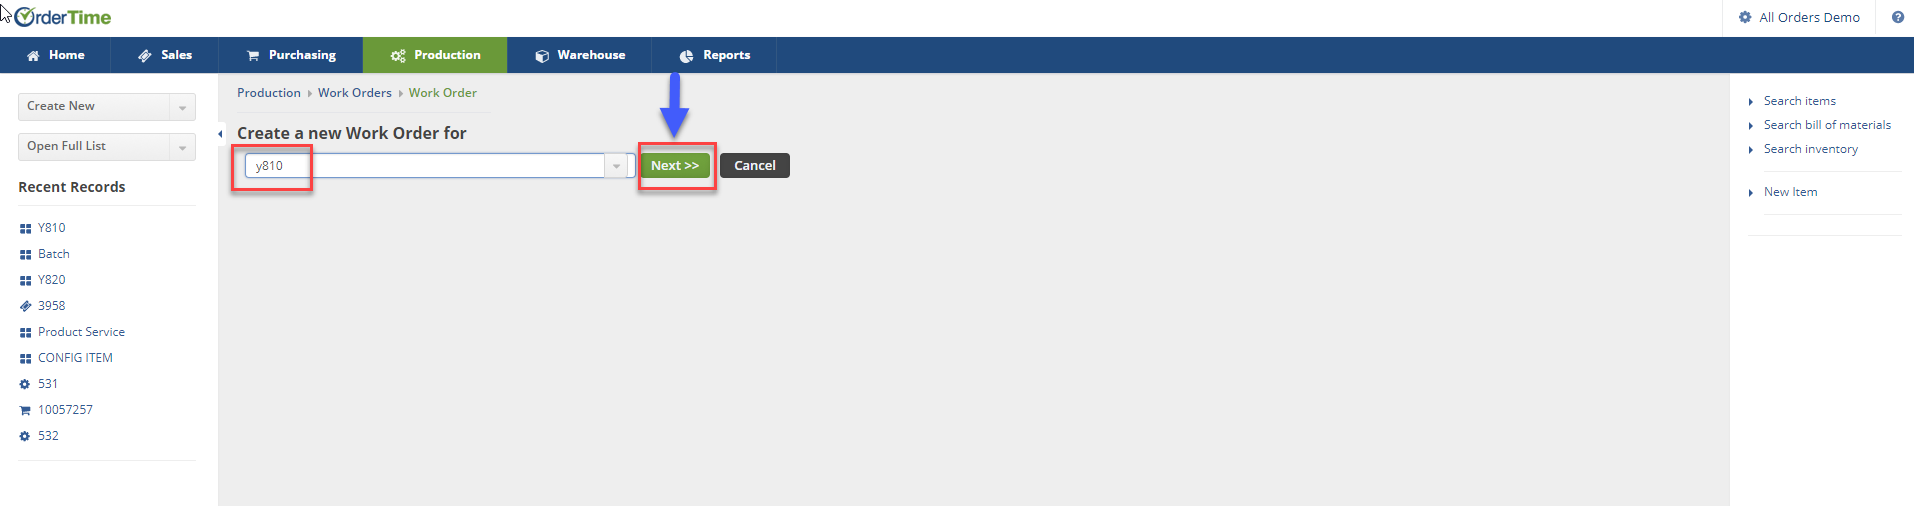
To process a Work Order follow the steps below:
- Open the Side menu and click on Create New.
- From the drop-down menu, select Work Order.
3. On the following screen, enter the Bill of Material number to be used to assemble this product. You can use any Bill of Material number you have established in the system. Click the Next>> button.
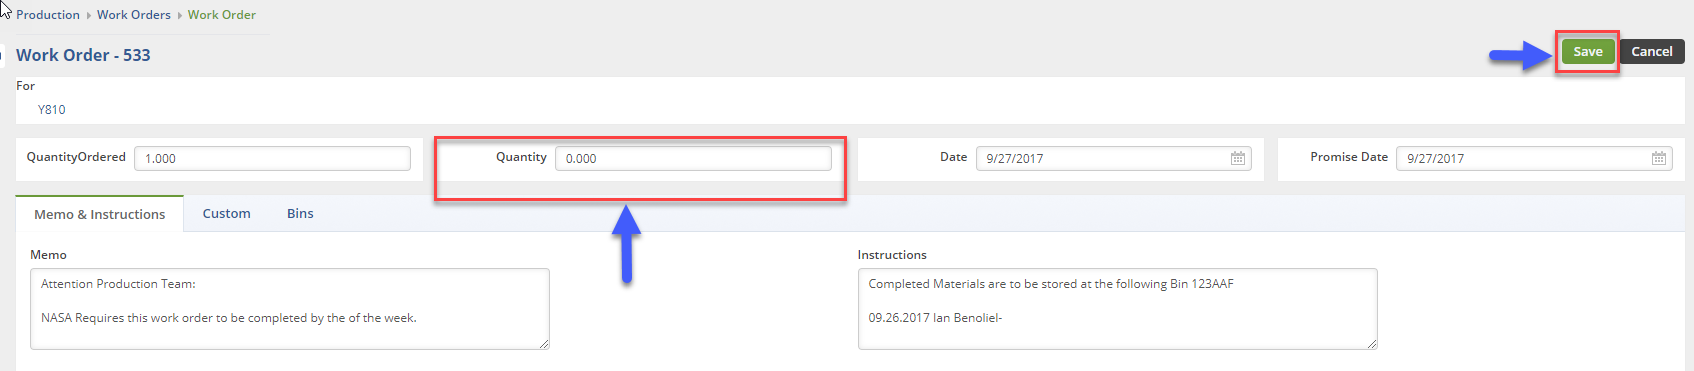
4. Set the Quantity Ordered, Quantity and Date parameters. You can add Memo and Instruction for your production team.
- Enter the Quantity Ordered to be produced.
- For the Quantity field, enter the actual amount that was produced for this Work Order.
- You will need to come back to this screen when your items have been produced and work order completed.
- The date will auto fill. If there is a need to change it, click on the calendar and select your date.
- In the Promise Date field , click on the calendar and select the desired date.
- Under the Memo & Instructions, type in the information required for this work order completion.
If you have entered instructions under the Bill of Materials, these instructions will carry over to the Work Order document.
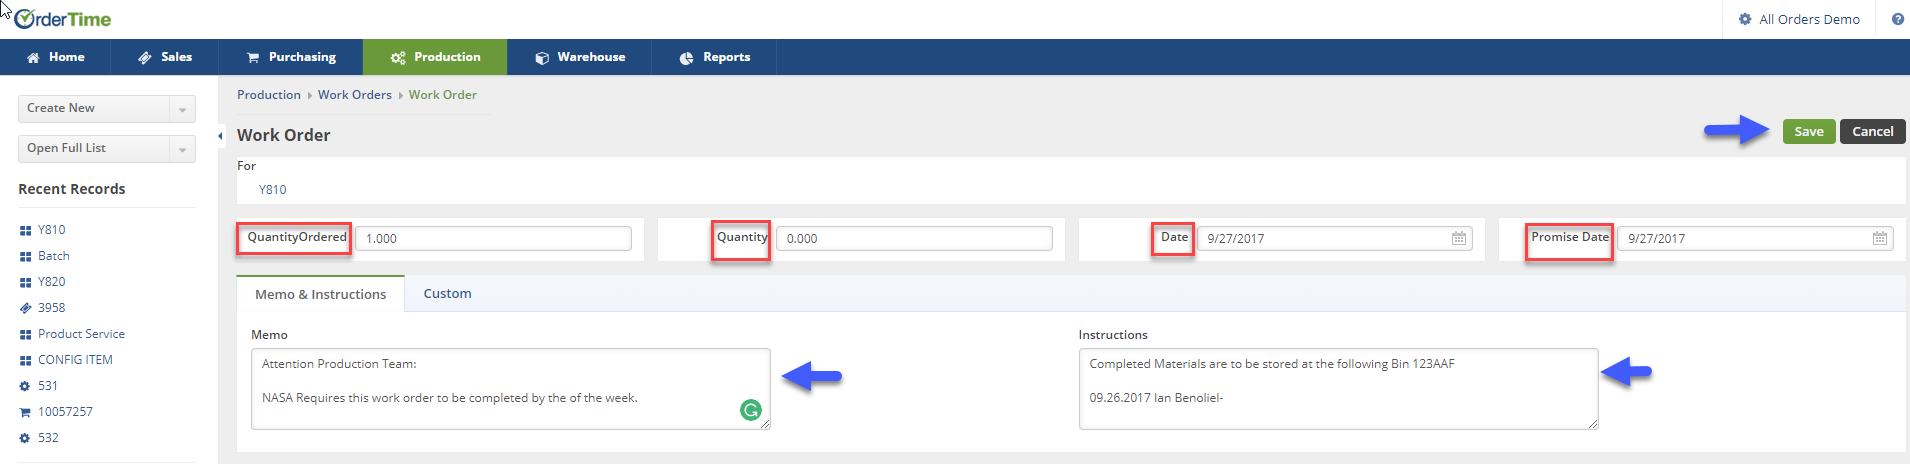
5. Click on Save to continue to the Work Order Screen.
The following screen will display the Work Order which includes the Steps and Items needed to complete the order.
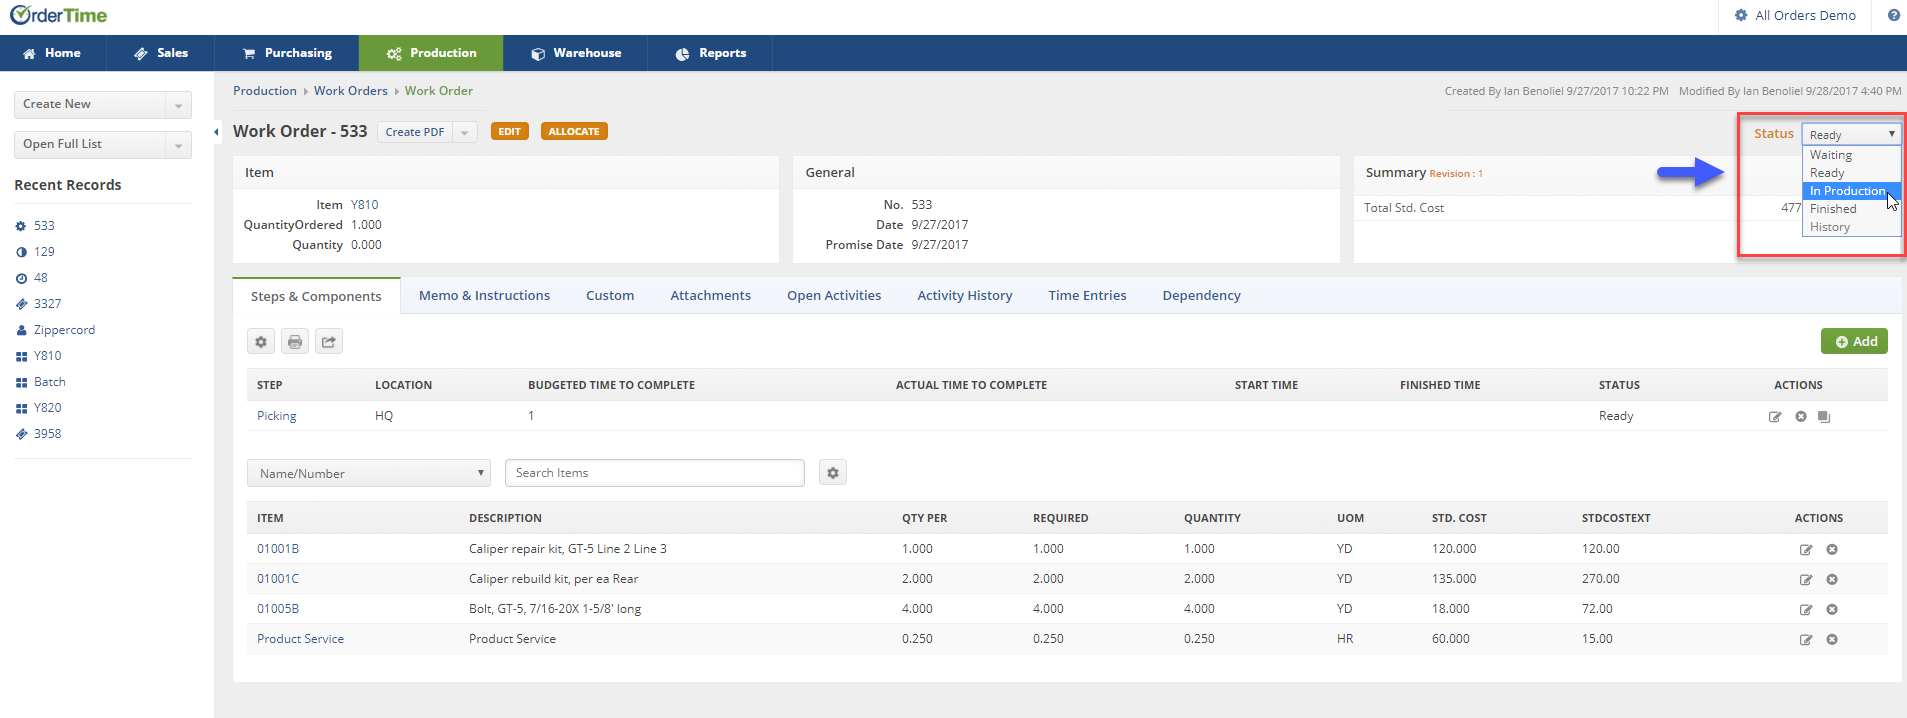
- The Work Order will remain in a Waiting status until it is allocated to the production team.
- By clicking on the Edit icon, you can review or add additional information to the Work Order.
- Under the Item section, the Item #/Name, Quantity Ordered, and Quantity will be displayed.
- Under General, the Work Order #, Date, and Due Date will be displayed.
- Under the Summary section, the Total Std. Const will be displayed.
Under the Steps and Components tab you can complete the following:
- You have the ability to +Add addition steps to your production.
- Under the ACTIONS you can click the Note icon to make changes or edits to your Steps and Items.
- Enter additional Items to your Work Order.

Under the Memo and Instruction tab, the system allows you to Edit and add information needed for the Work Order.
The Attachment tab enables the user to enter an attachment to the Work Order (i.e. Pictures, Diagrams, Plans, etc.)
Under the Open Activities tab, you can add an Event and Add Task to the individual(s) in the Production Team. This in term can keep track of current assignments and parties notify when the Work Order has been completed.
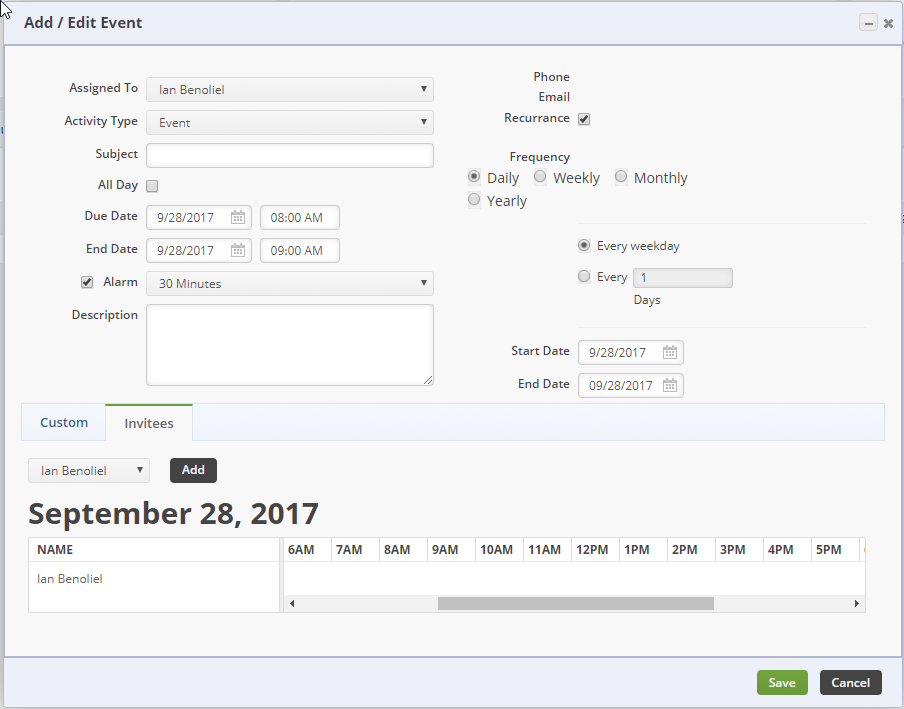
When the +Add Event icon is selected, complete the following:
- Assign to a member of your team.
- Select the type of activity.
- Select a beginning and end date for the event.
- Enter a Subject (include the Work Order number)
- Set an alarm/and time.
- Type in a Description.
- Under the Invitees tab, you can select additional personnel to invite. Click on Add to include other invitees.
- The Phone and email boxes will be displayed only when it relates to a Contact, Customer or Vendor.
- Click on the Save icon when completed.
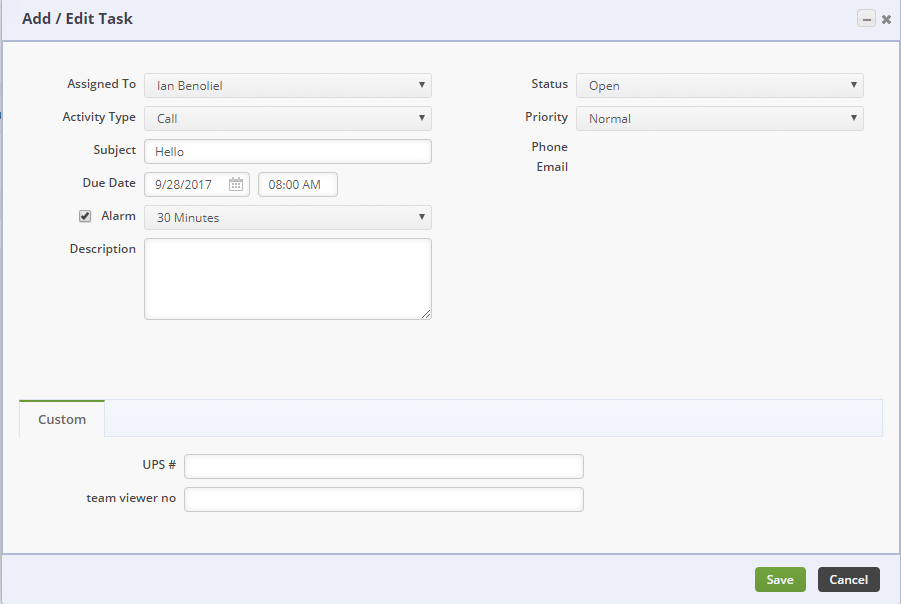
When the Add/ Edit Task icon is selected, complete the following:
- Assign to a member of your team.
- Select the type of activity.
- Enter a Subject (include the Work Order number).
- Select a beginning and end date for the event.
- Set an alarm/and time.
- Type in a Description.
- Select from the Status drop-down menu.
- Select a Priority level.
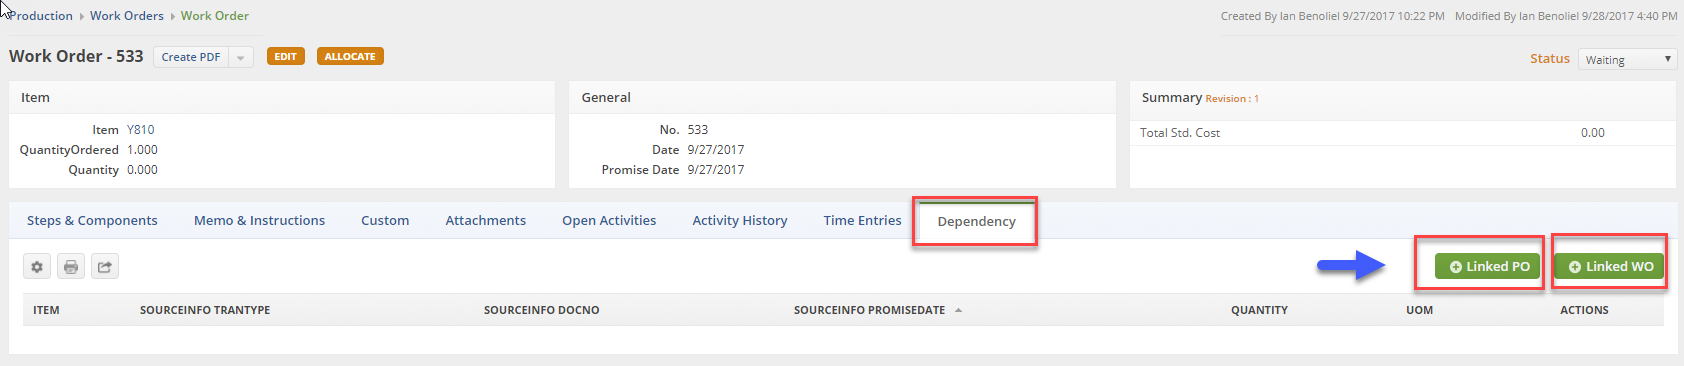
Under the Dependency, a Purchase Order can be created if there is a need for additional inventory. The option to add another Work Order is available when the +Linked WO icon is used.
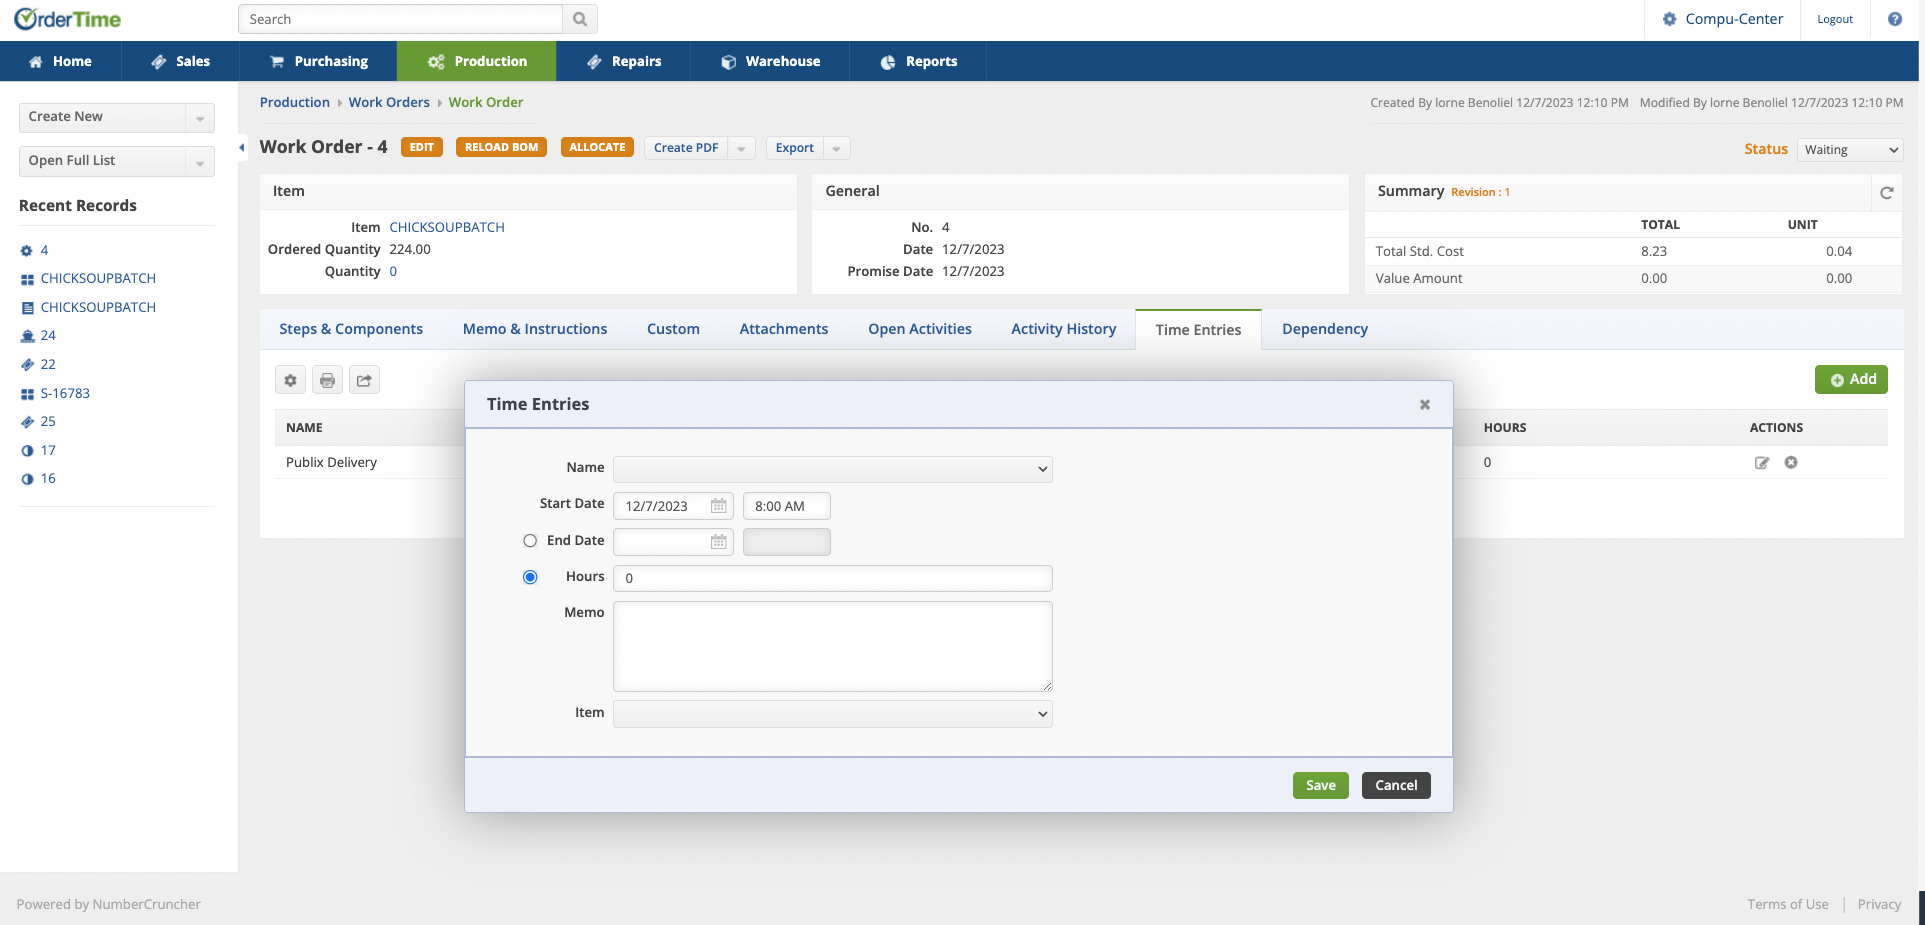
Under the "Time Entries" tab, you have the ability to input various time frames associated with each step, process, or task during the completion of the work order. This information is broken down by the name of the individual responsible for each task, the start and end dates, the hours taken to complete, and any associated parts used.
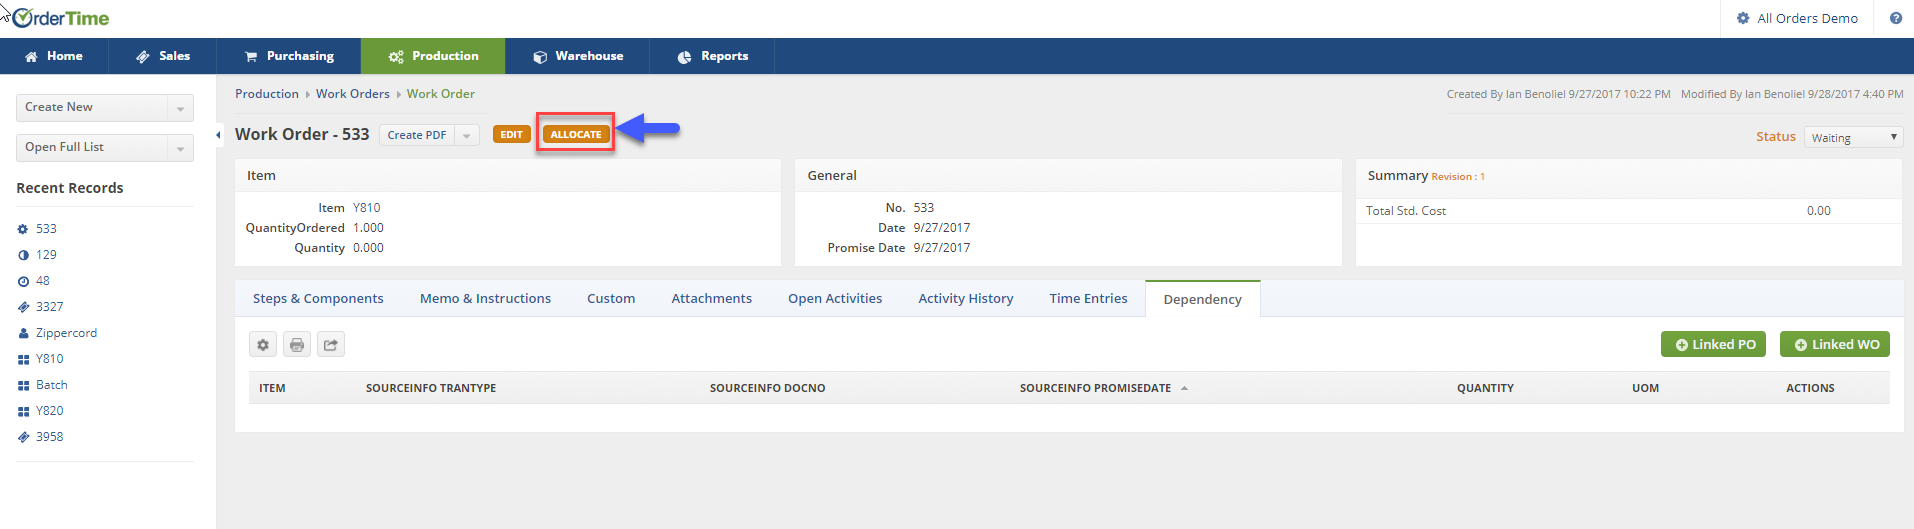
Once all the information is completed and you are ready to ALLOCATE the Work Order, click on the ALLOCATE icon.
- The Option to print the Work Order is available when Create PDF icon is selected.
Once the Order has been ALLOCATED, the WO Status will be changed to "Ready". The Status of the order can be changed according to the Stage in which the order is at. Communication with your team is essential to keep the correct status on the WO.
Upon completing your Work Order, click on the EDIT icon on the Work Order main screen. Under the Edit screen, enter a number of items Completed in the Quantity box. Click on Save when done. When Work Order screen is displayed, change the Status to Finished.
Once you have changed the Status to complete, the Work Order will be marked as completed and the Inventory will be allocated to your warehouse under the Item created for Bill of Materials.