Overview
Once you select if you want to 'Edit' or 'Clone' a Form Template, you will have 3 Tabs to work with to design the Form Template.
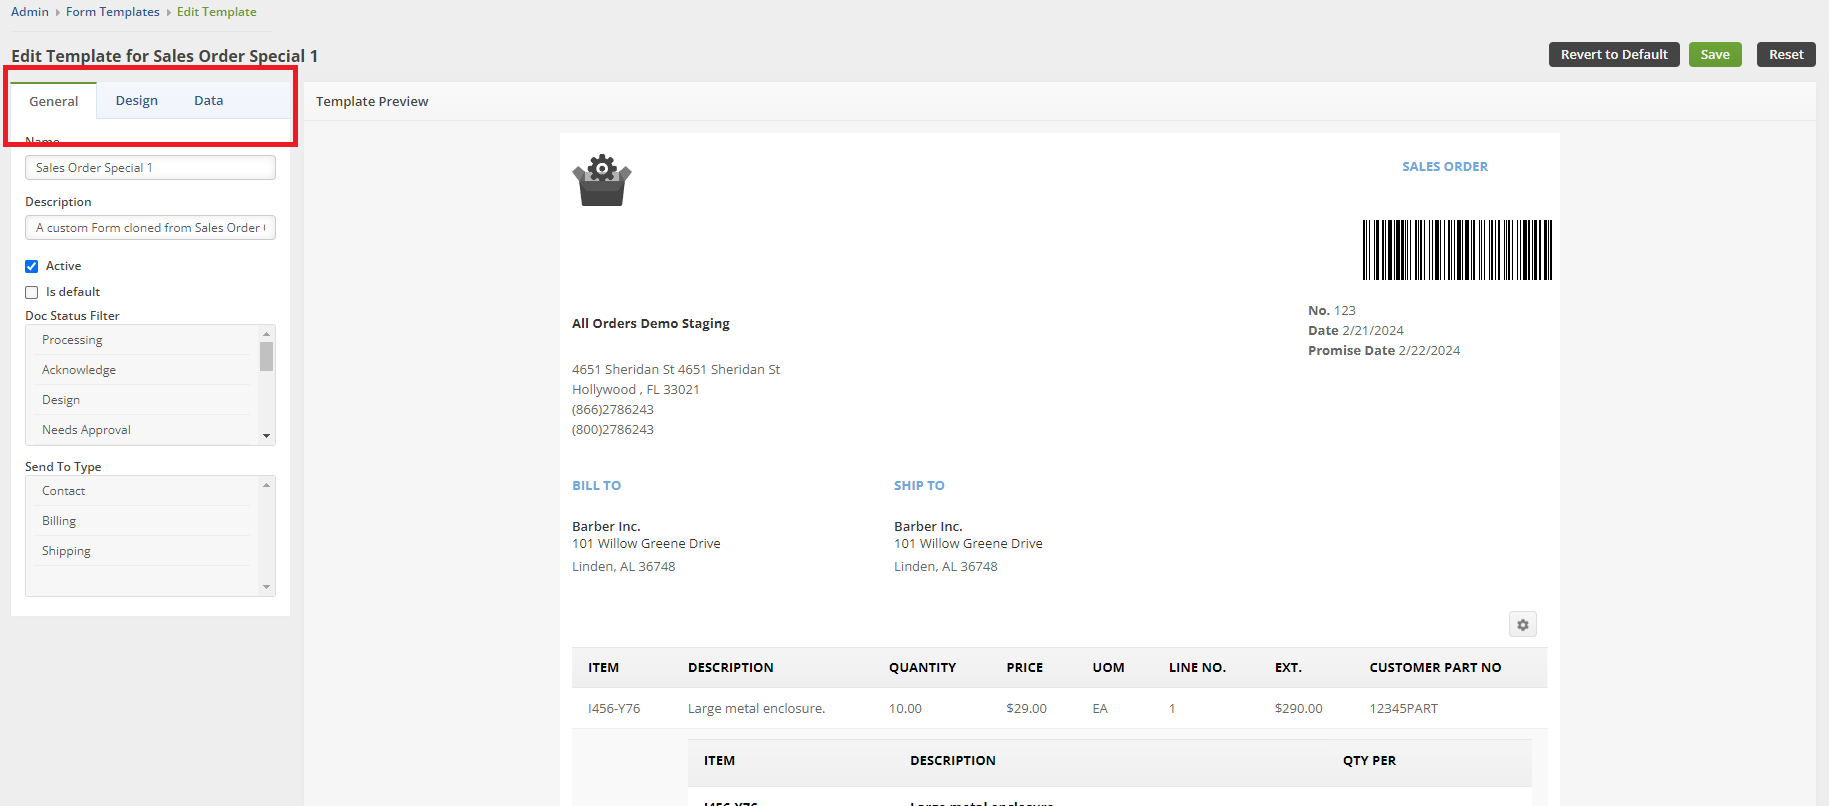
General
Under the General Tab you will be able to Rename your Form Template, give a brief description, and select the options to make active and default. You can also set the Doc Status Filter and Send To type.
The Name you give your Report will be the name that will show up on your drop down list when selecting Form Templates.
If the 'Default' Report is un-selected then it will auto assign itself to another Form Template of its same type.

Doc Status Filter
You can hold ctrl on your keyboard and select multiple Doc Statuses. You can also hold shift on your keyboard and select a whole line of them or click and drag to select multiple. The document, in this example a Sales Order, would need to be in that Status for you to utilize the Form Template.
Send To Type
Just like the info above for Doc Status filter, you can select the Send To type for your Form Templates.
Send To Type is used for automated and batch emails (e.g. Alerts, B2B Portal Messaging, Batching Emails) . The purpose is to select which type of contact said email is sent to. E.g. the Invoice Template is sent only to Billing address’s contact email.
Billing - Billing Address contact email
Shipping - Shipping Address contact email
Contact - Is the Contact’s email for the Customer
Design
Under the Design Tab you will be able to make cosmetic modifications to the Form Template.
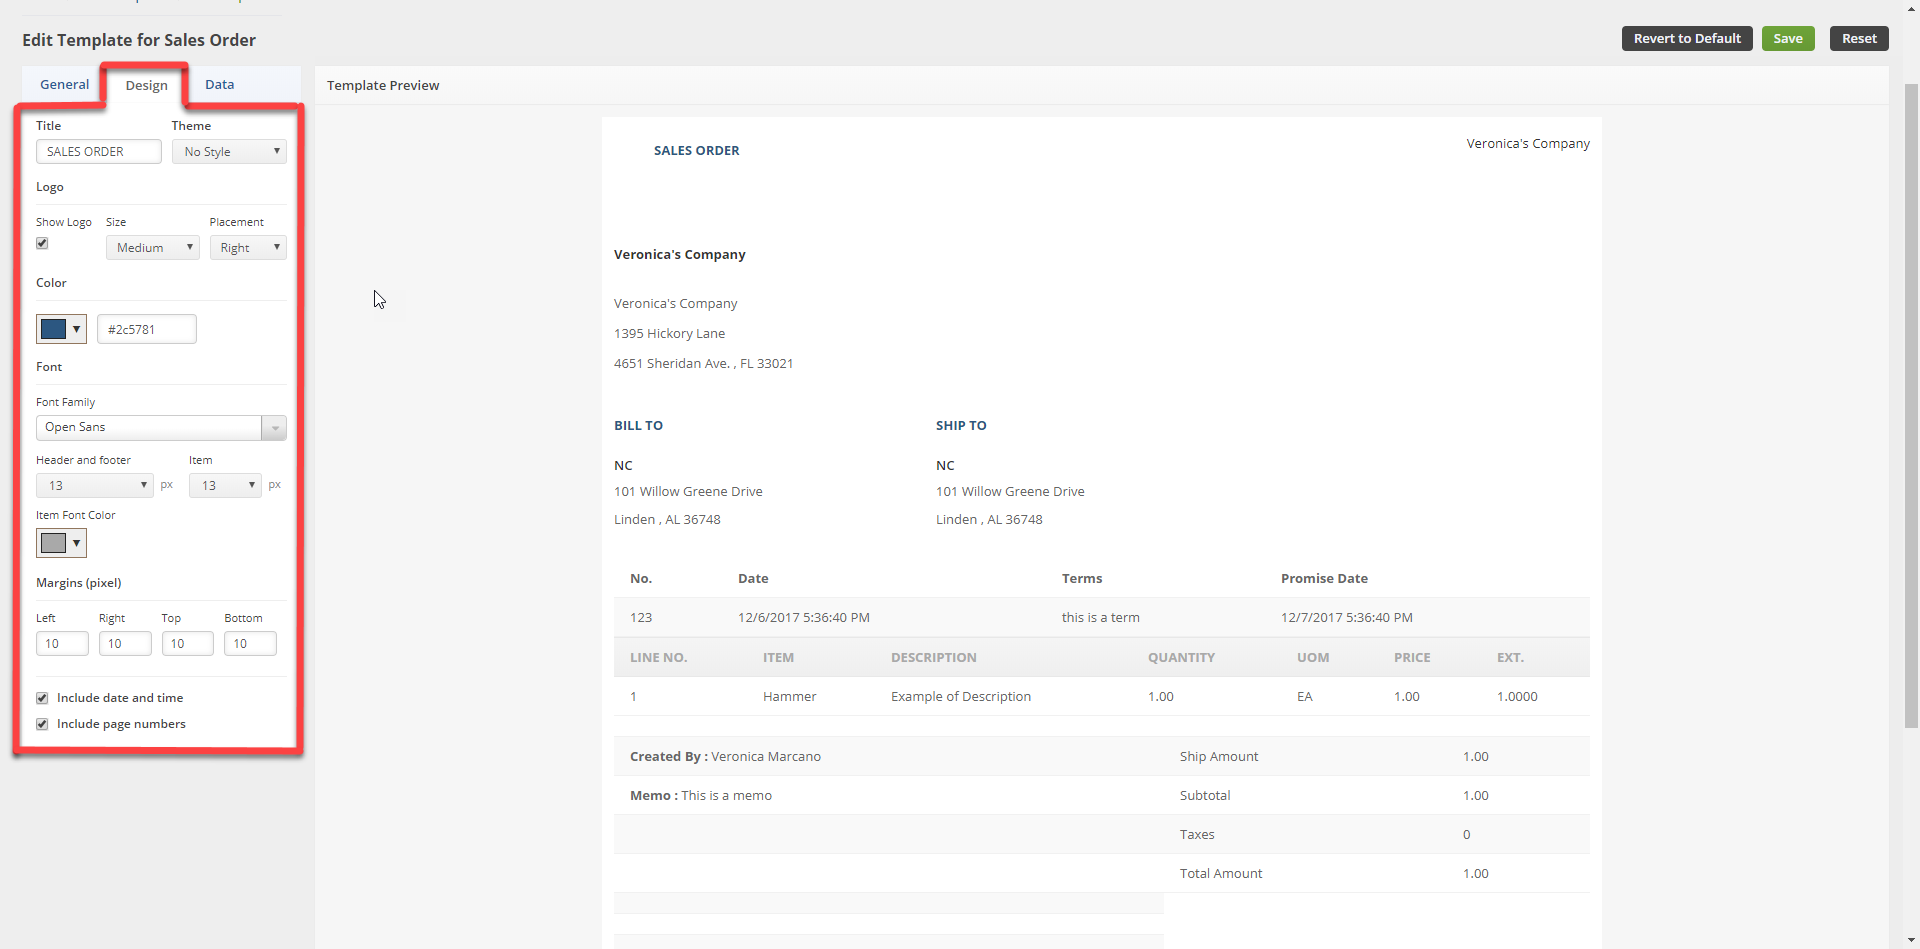
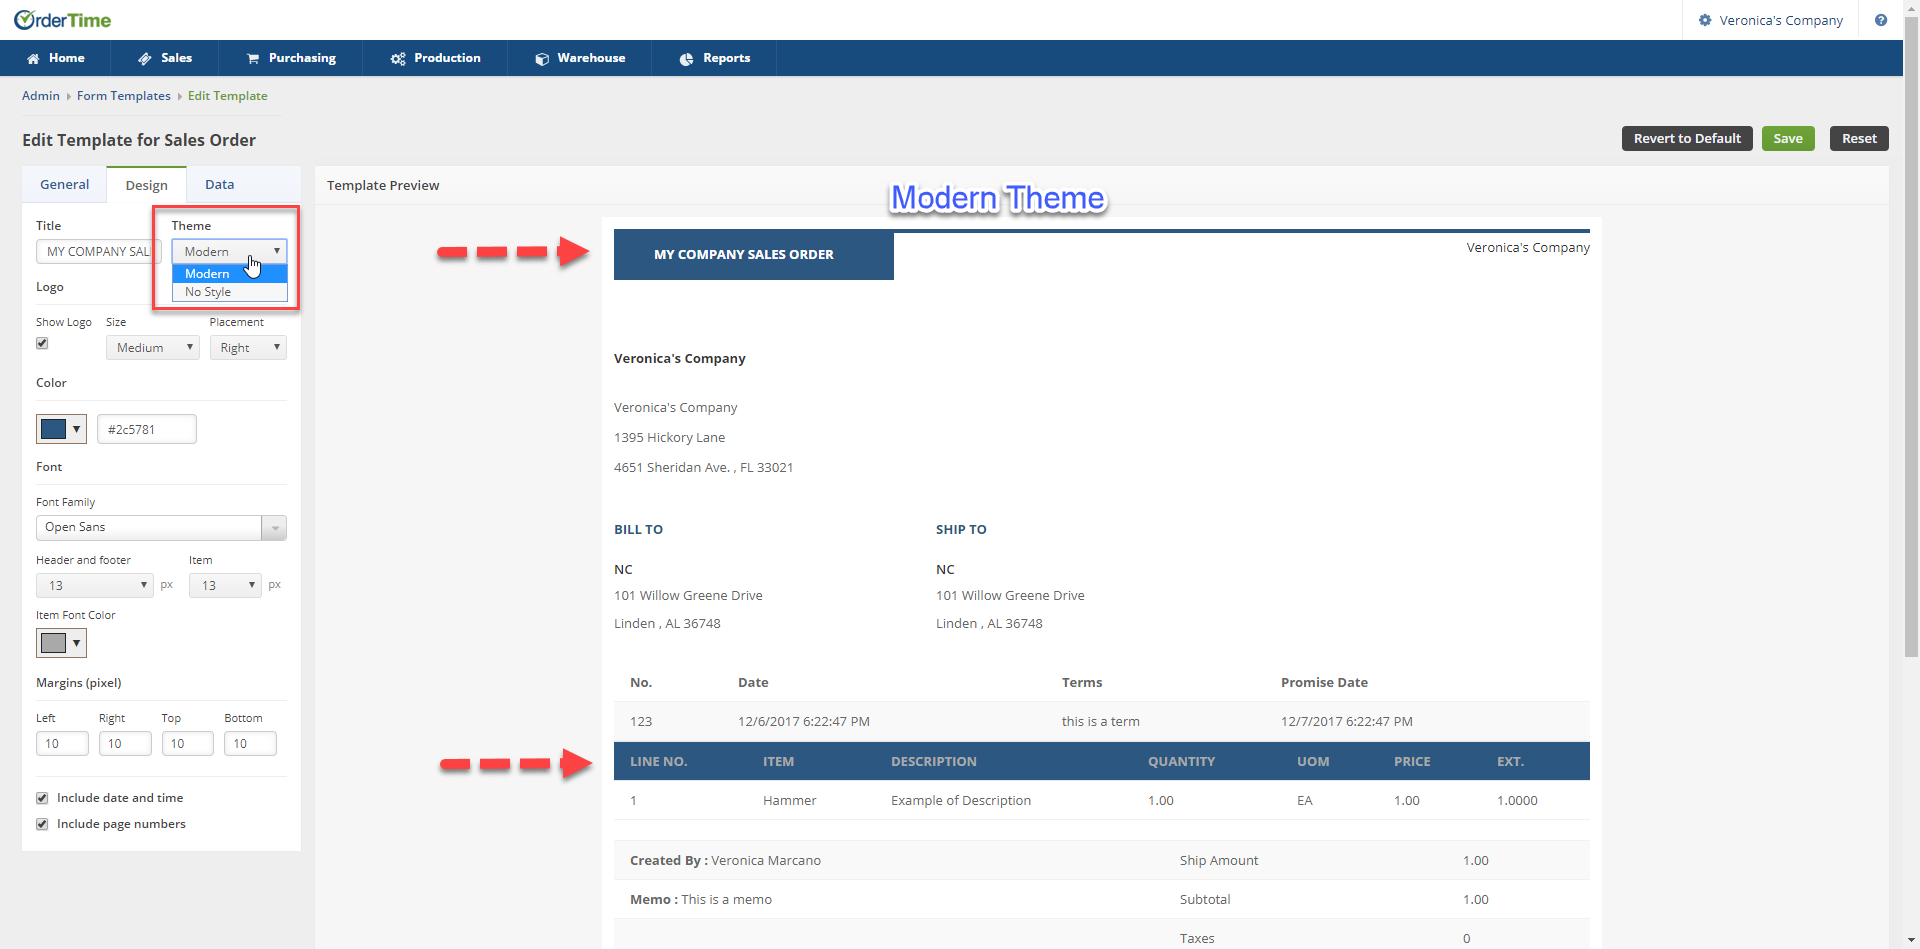
Theme - Here you will have the option to chose between a 'No Style' Theme or a 'Modern' Theme for the Template.
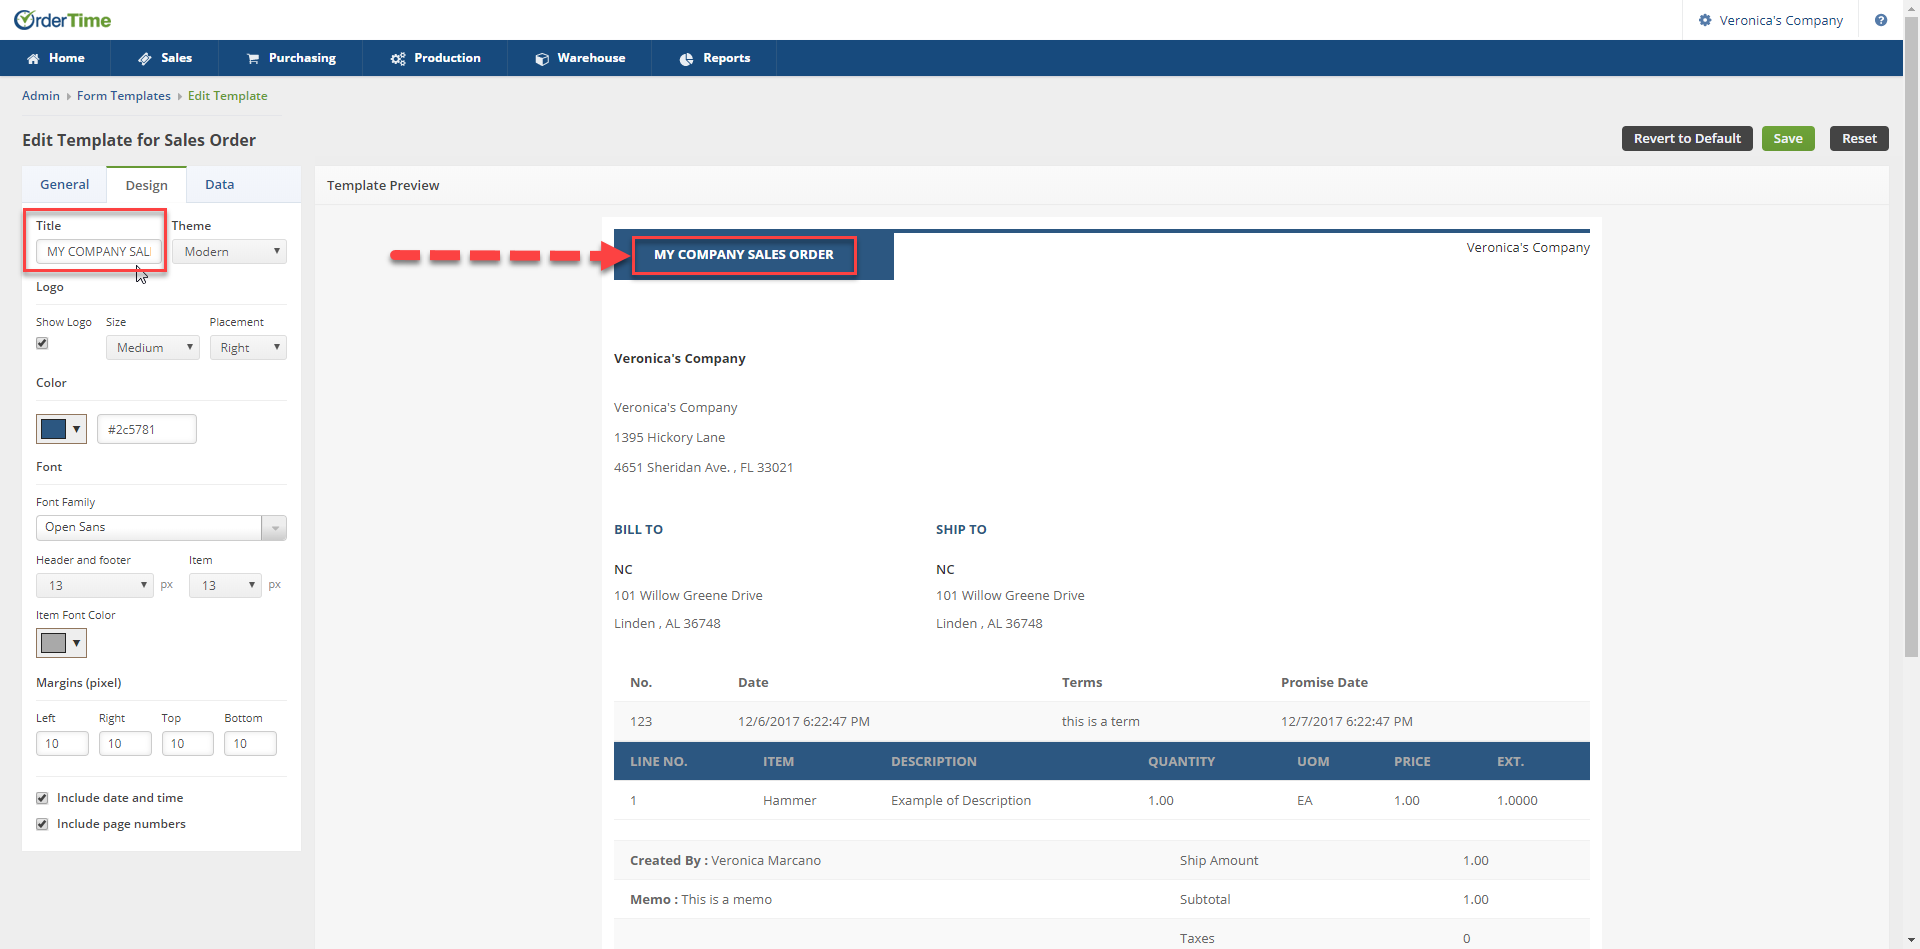
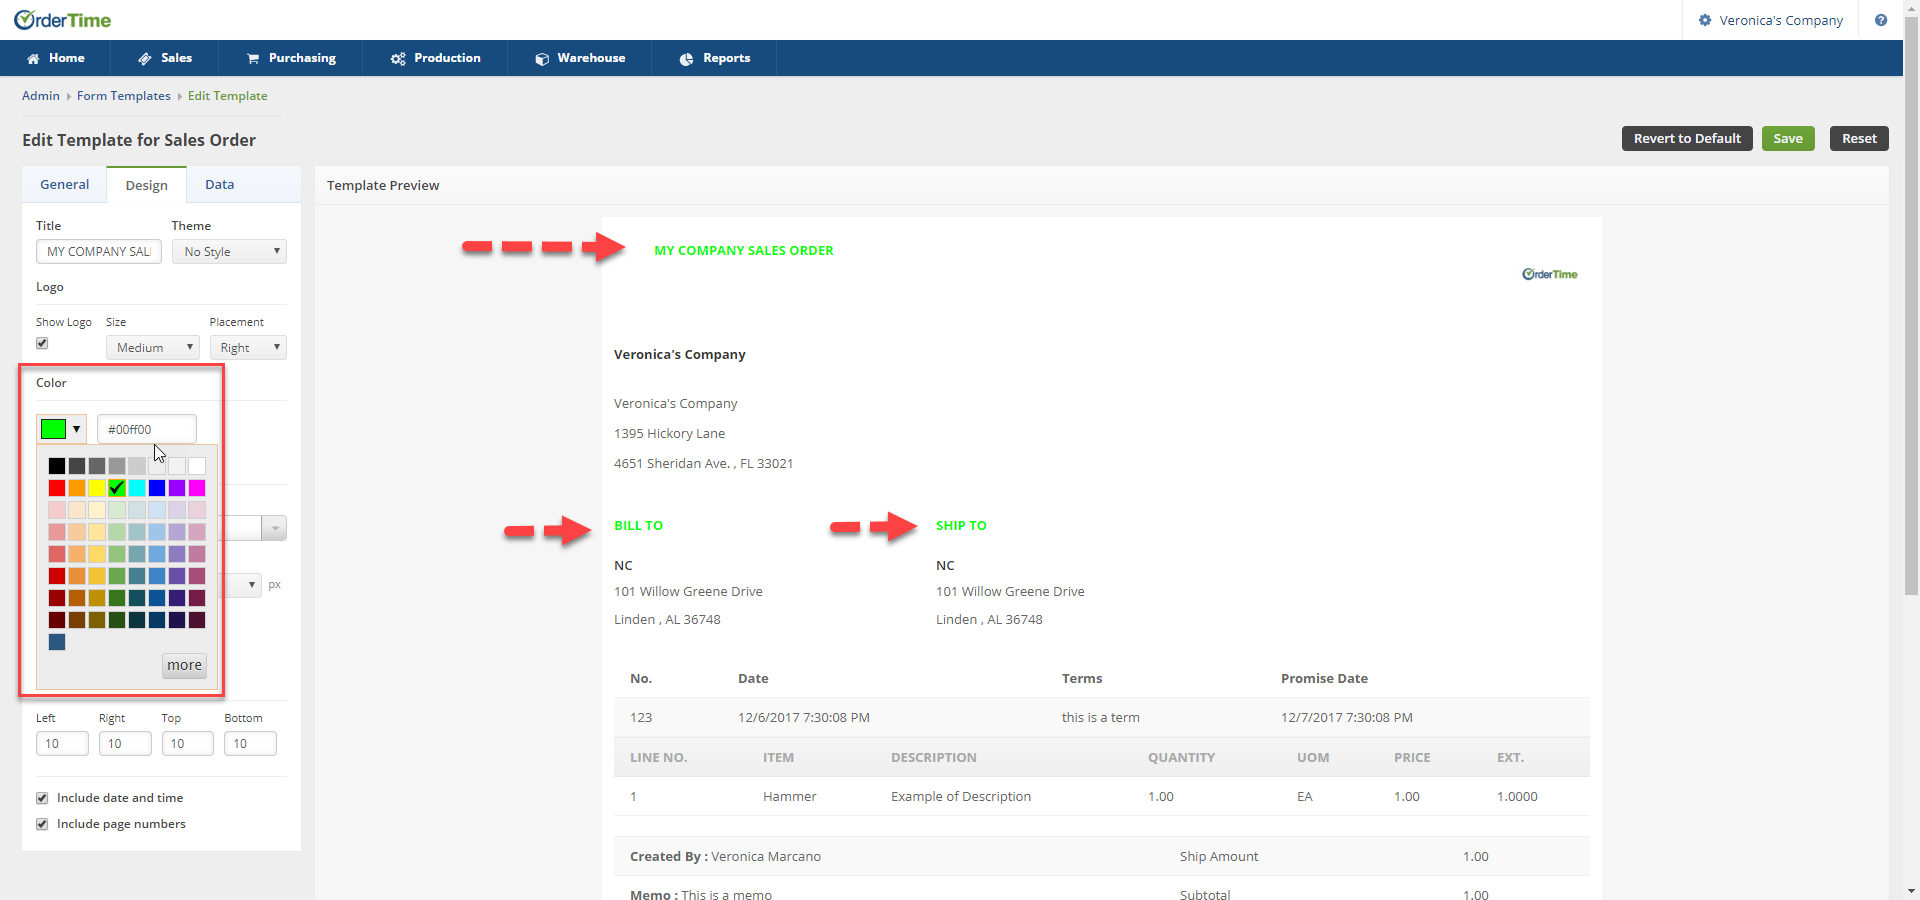
Title - The 'Title" of the Form will show in all Caps on the Template and it can be modified to the Title you want to show on the Form Template.
The "Title" of the Form Template is the one visible in the design. Not to be mistaken with the actual given name of the Form Template.
Logo - The Logo that you setup under the Company Info can be visible on the Form Template by selecting the 'Show Logo' and you can select which size and the placement of where you want the logo on Form.

Color - Select the color from the drop down or enter in the HTML Color Code manually that you would like to use on header sections of the Form Template. You can also select the "More" Button to select your color option from the color palette.
Font - In this section you can select the 'Font Family' you want to use for the Header and Footer sections of the Form Template and the size of the Font for the Header and Footer.
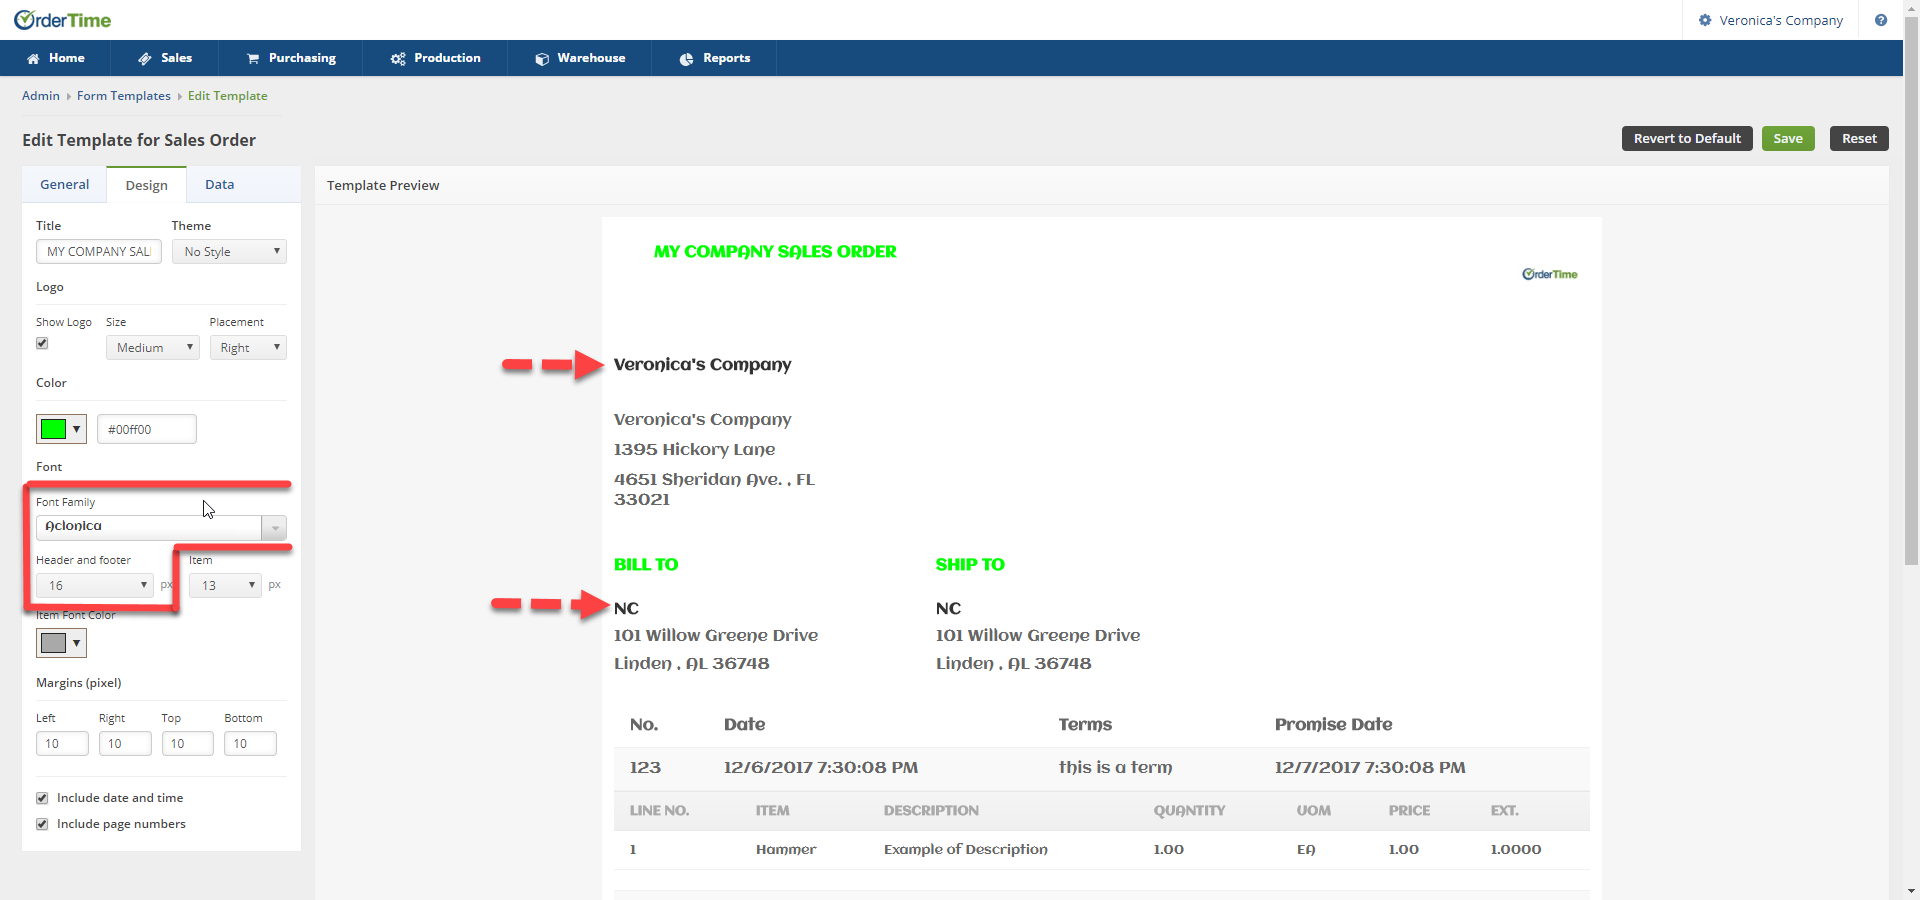
You will also be able to select the size font and color use under the Header of the Items section of the Form Template under the 'Item' drop down.

Margins -The Margins section can be used to setup the amount of space/area between the main content in the Form Template and edges. This will help you define where a line of text begins and ends.
The Margins are setup in Pixels, not inches.
Data
The Data Tab will have a list of datafields based on the Transaction Type. You can check the boxes for the datafields that you wish to add into the different sections of your Form Template .
The data fields can only be added once onto the Form Template. The sections will start to auto resize themselves as you add the data fields to make everything fit on the Form Template.
