Overview
Document Status helps you control the movement of transactions through your work flow and they are available on all Transactions. The system comes prepackaged with a set of Statuses for each document Type, however, you can add and assign new ones as needed. These prepackaged Statuses will auto apply to your documents based on certain rules.
Adding a Document Status
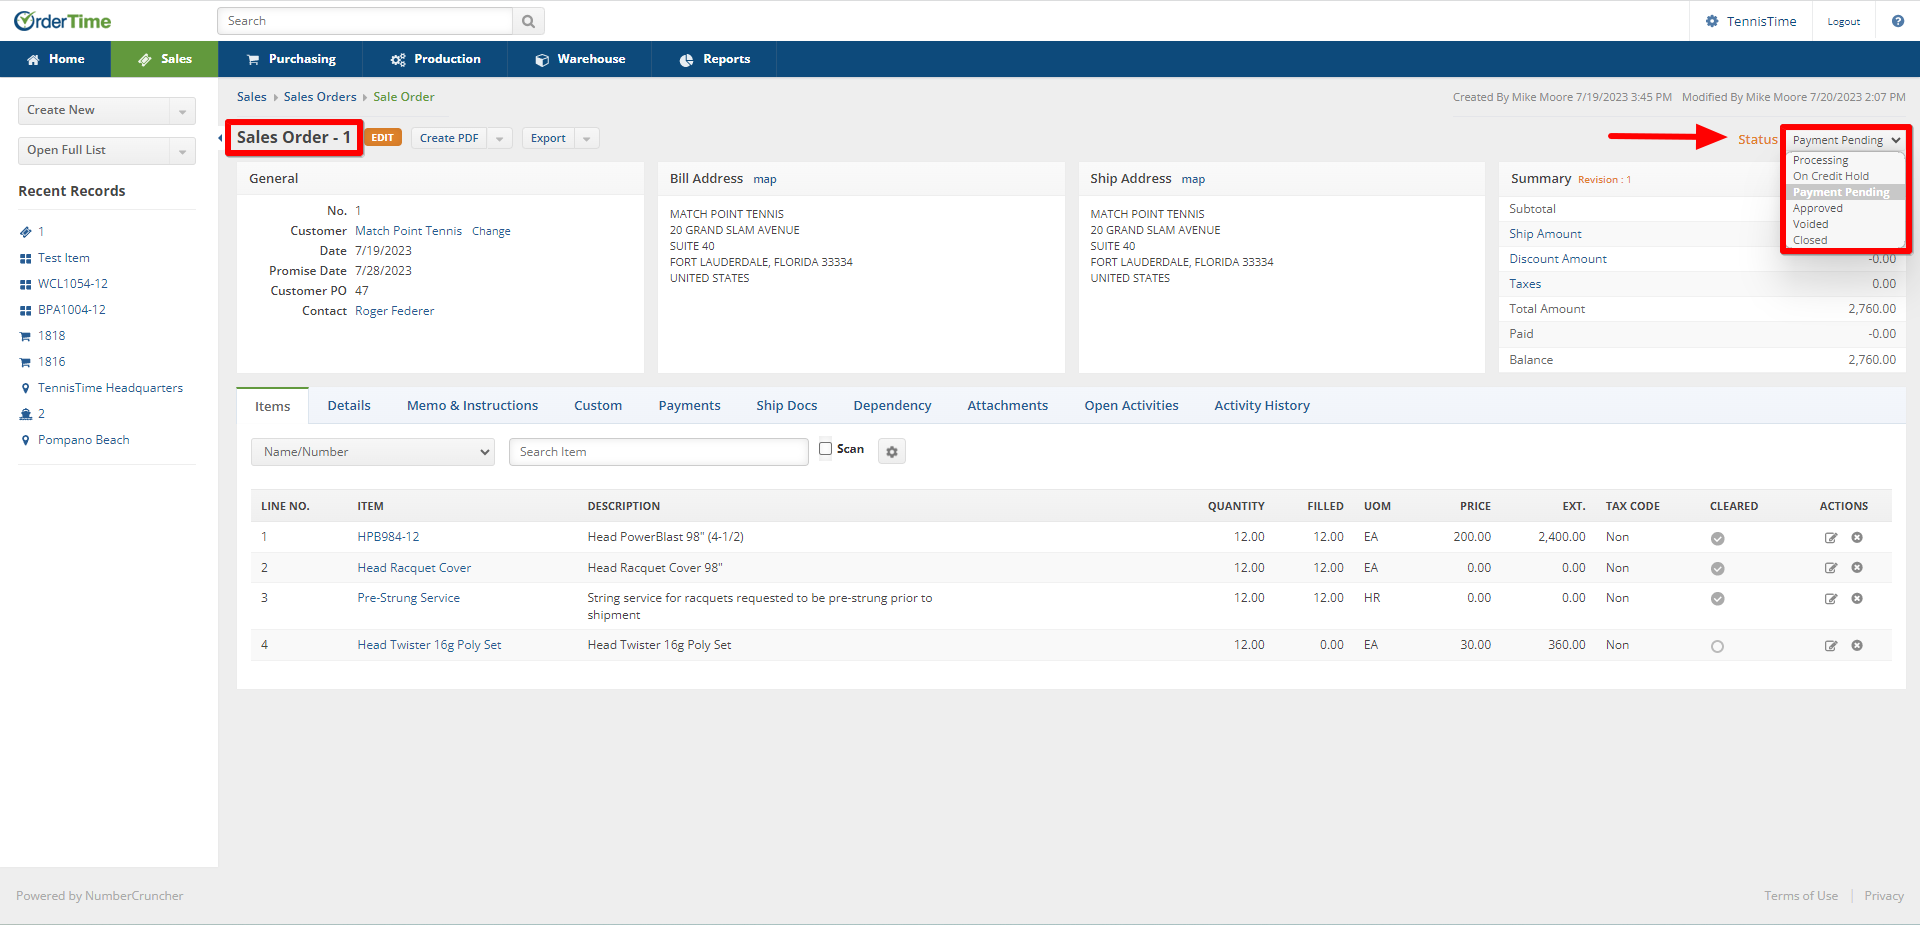
For instance, on a Sales Order, a Status can be created that states an Item requires a payment. This would cause the document to change the Status to Payment Pending. Once the Payment is received, and all lines of the Sales Order are Shipped, the document will auto set itself to Closed.
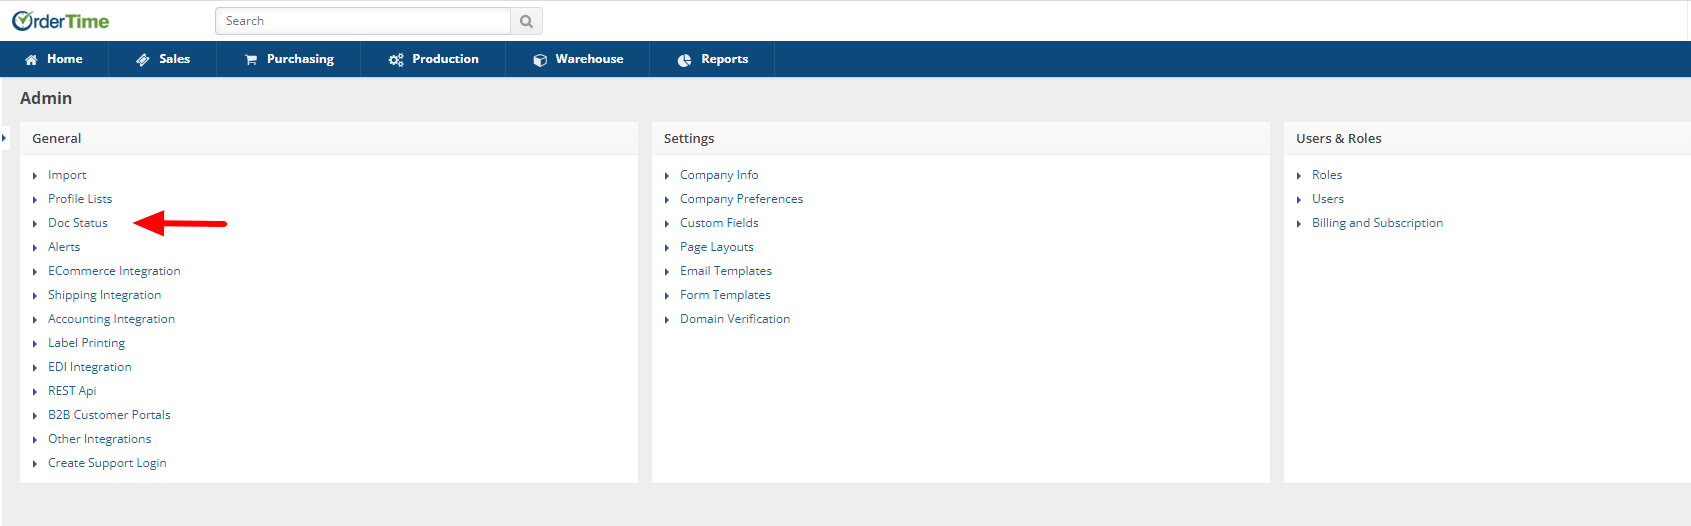
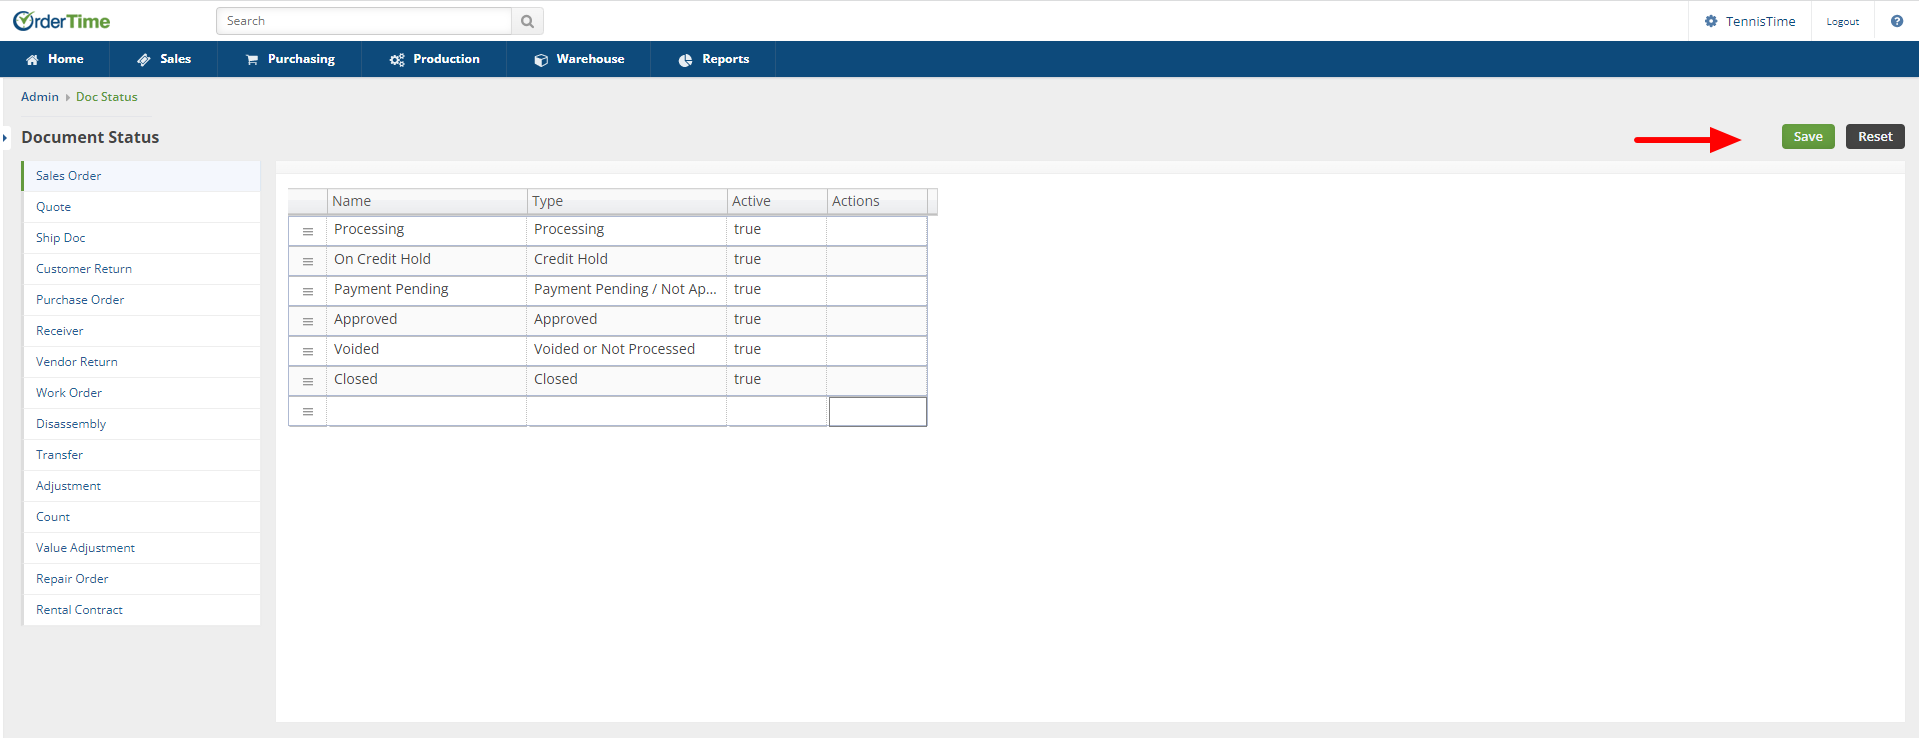
To edit your Document Statuses go to Admin and select Doc Status within the General section towards the left hand side of the screen.
Select the Document you want to update from the list beneath Document Status on the left side of your screen. After selecting the Document to update, you can create a new Status by clicking in the empty field at the bottom of the Name column.
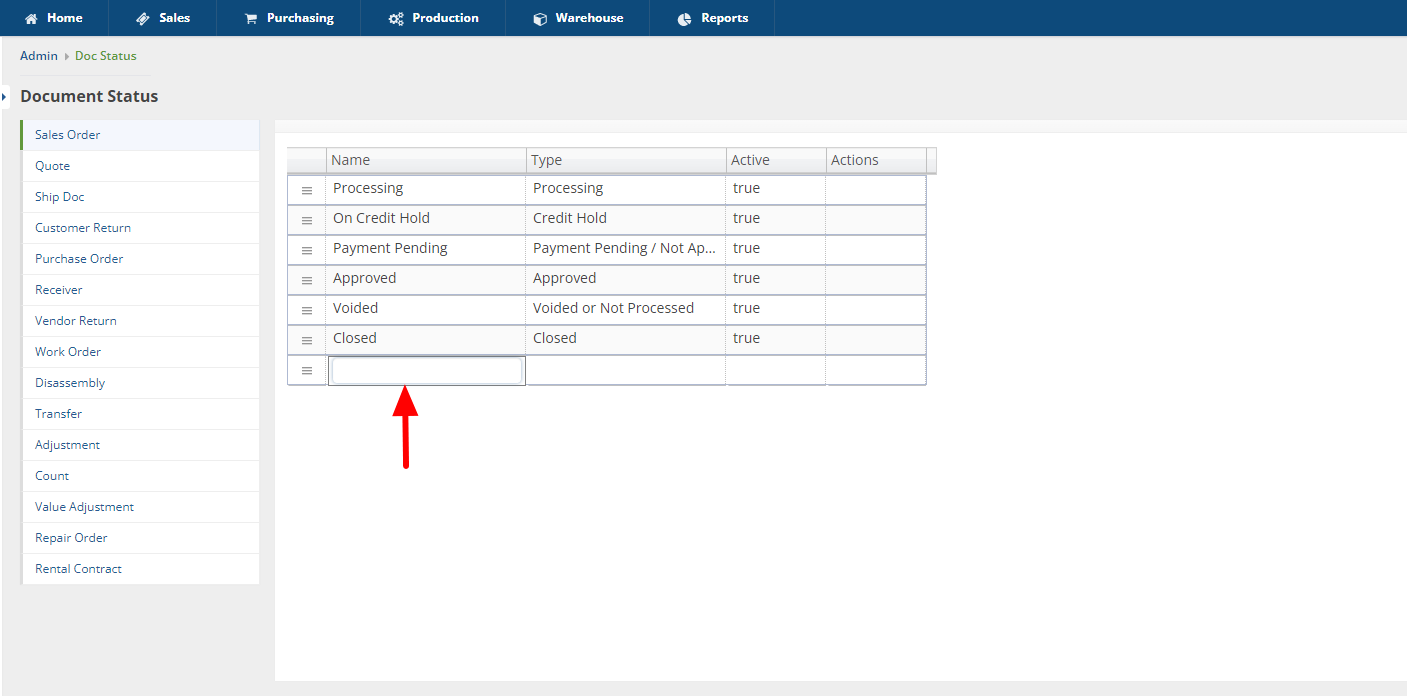
Input into the field the Name of the new Status and then click the field to the right under the Type column. This will provide a drop down window presenting the Type of Status you are creating.

Once the Type has been selected you can click on the field in the bottom right hand corner under the Actions column. This will update the Status you created and place it in the Type column beneath the similar existing Types.

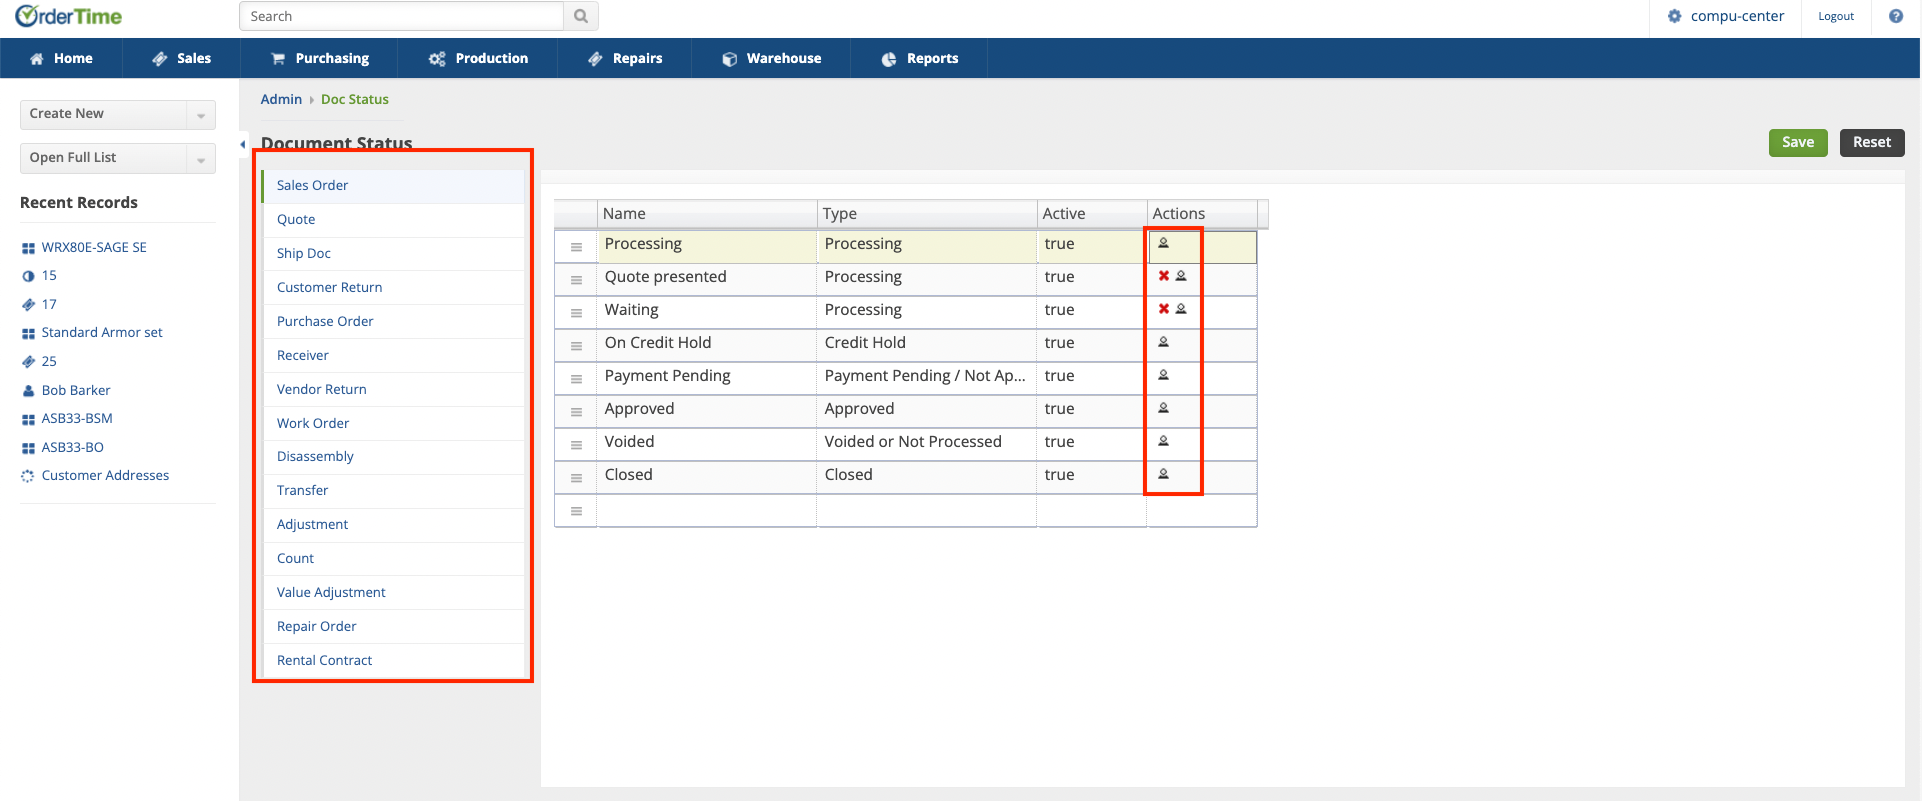
If you create multiple Types of Statuses you can arrange the Statuses within the Type to suit business needs such as alphabetical or process direction. To do this, select the Status within the specific Type you choose to move and click on the 3 horizontal lines for the Status. Drag the Status to the position within the Type that you choose. You can update by clicking in the empty box in the bottom right hand corner in the Actions column. In the example below, you can see that "Waiting" was moved above "Processing" in comparison to the prior screen presented.

Certain status types cannot be replicated because they are used by the system. For example, the Closed status of a Sales Order is a system status; there can only be one and therefore, cannot be replicated.
Clicking the red X in the Actions column will Delete the manually created Status. Users cannot Delete System required Statuses. Users can only Delete the Statuses they created.

Once satisfied with changes or updates, select Save in the upper right hand corner of the screen.
Restricting Doc Statuses by Role
Please note that, for the time being, this feature is a hidden preference and must be enabled on the backend by an Order Time staff member.
If you are looking to restrict entire sections of the system on a role-by-role basis, please refer to "Setting Up User Roles"
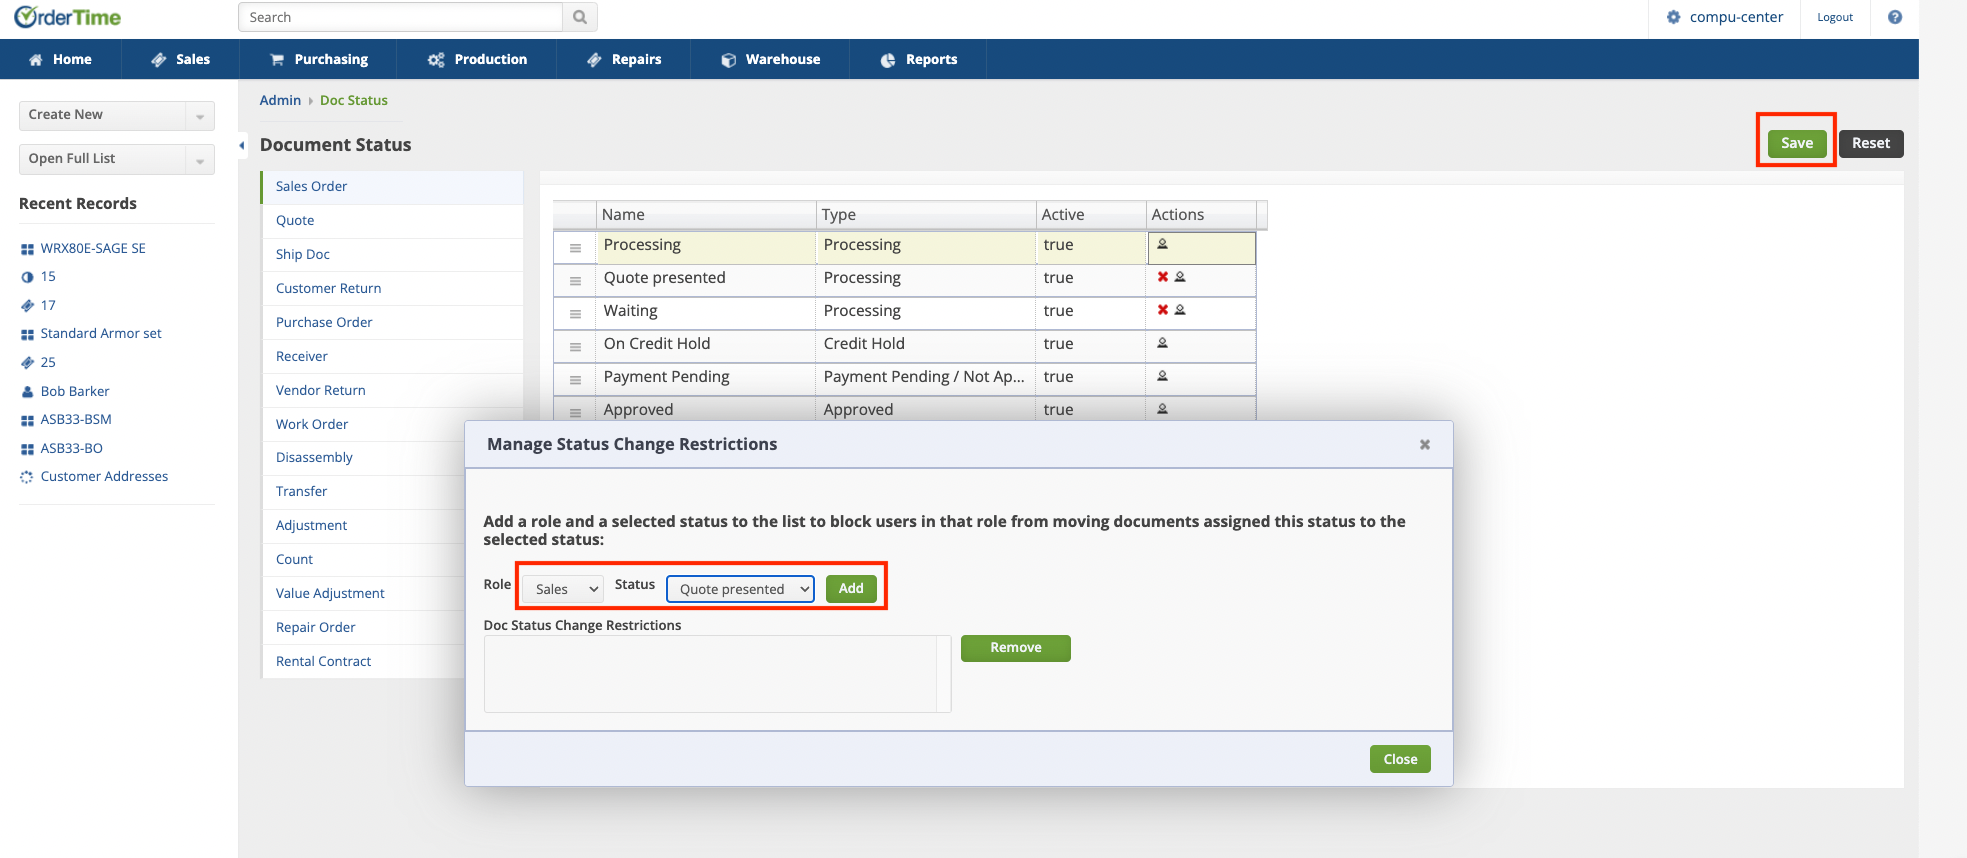
If you aim to further refine the restrictions to specific statuses based on roles, you can do so. You can do this by navigating to the doc status menu in the admin, then select a document and then clicking this small icon next to the status you would like to add the restriction to .
After reaching that point, the "Manage Status Change Restrictions" window should appear. Utilize the dropdown menu to select the role and status that you wish to revoke access from, and then click the "Add" button. Don't forget to click "Save" in the top right corner once you have made all the desired changes.