Overview
A Style Editor is used to manage variations where an item has various attributes; however, you do not want to create an item number for each individual attribute. For example, a clothing manufacturer produces a t-shirt in 4 different colors and 5 sizes, furniture (couch) that has various 10 colors and 15 patterns. Using Styles will also facilitate order entry. In this article we will discuss:
- Creating A Style
- Adding Style Variations
- Add a style to an order.
Before you start creating styles, you will need to create one or more attributes as wells as the selections within the attributes. An attribute is something like 'Color' or 'Size'. Blue, green and red are selections within the Color attribute. Small, medium and large are selections within the Size attribute.
Creating a Style
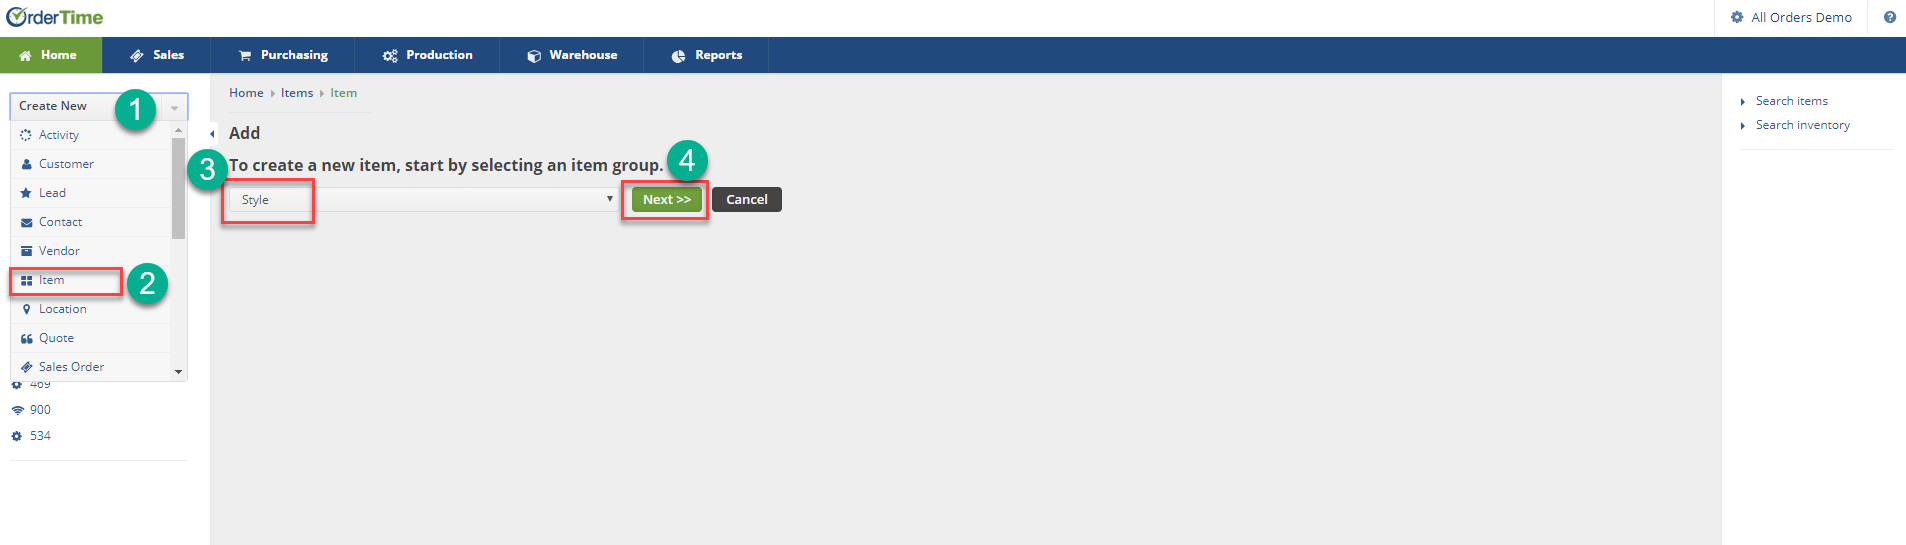
- To create an Item with Style variation, click on the side menu and select Create New.
- From the drop-down menu, select Item.
- On the Add Item screen, click on the drop-down menu and select Style.
- Click the Next >> button.
You will then see the Add Style Screen which will be completed as follows:

- Enter a new name or number for your Item (i.e. La Bella T-Shirts).
- Enter a description for your new item (i.e. Summer Collection).
- In the Group section, select the group this item will be associated with. The list of groups can be Parts Group, Service Group, Non-inv Group or Assembly Group.
- The group selected will provide its properties to your item. Any changes to the group will be reflected on the item.
- Select if you wish for Each variation to have its own SKU. (This function is critical if you wish to track an inventory for each variation in the system).
- If you do not want to track an inventory of these variations, leave this selection unchecked.
- Append attributes to descriptions
- SKU Separator (Dropdown)
- Blank
- Space
- Dash (Default)
- Period
- You will always need the Item to have at least one Attribute. The system will generate a pop-up warning indicating "Please select at least one attribute".
- The order in which you select the attribute will determine how they will be represented on the style matrix.
- For example, if you select "Color" to be your first pick (1), then color will be the first description on the style matrix, followed by the second choice.
- Enter a Primary Vendor used for replenishment.
- Type in Basic Price.
- Type in Basic Cost.
- Select the Unit of Measure or Unit of Measure Set. This function will determine how the units are sold, purchased and used as.
- Click the Next >> button when done.
- A single item style uses the same item over and over again, there is no separate item ID in the database for each variation. It makes it unsuitable to track each independent color, size, or style variation.
- If the user wants to track an inventory of the sales of each individual style variation separately, check on the box "Each variation should have it's own SKU"
- If you do prefer to be detailed about your individual sales, and if you want to report the style as a whole, leave the "Each variation should have it's own SKU" box unchecked.
- In company preferences under Items you can:
- Allow style variants to be edited individually
- Allow style variants to be added to orders individually
- Note: Currently, there is no way to disassociate an Item. The only option is to restore a backup prior to when it was created. Backups are kept for 7 days.
Adding Style Variations
Once the item has been created, you will need to enter the variations available. On this screen, you can use the tabs to enter additional information for your item.
The Variation tab will determine what will be available for sale for your item. You will have two choices: one complete variation at a time or click Add All.
- Selecting one variation at a time will enable you to pick and choose your desired styles.
- When you choose to manually enter your variations, the first choice for your matrix will use the attribute in the first drop-down box to guide you on what selections to use the from second drop-down box.
- Select your choice from the second drop-down box.
- Click on the Add icon.
- After selecting your first variation, the first drop-down box will change to the second selection from your attribute table. Use the second drop-down box and select another choice. Click Add.
- The Add All button will provide you with a listing of all possible variations for the attributes selected (e.g. If there are 6 colors for your color attribute and 4 sizes, it will generate all possible combinations 32 combinations.).

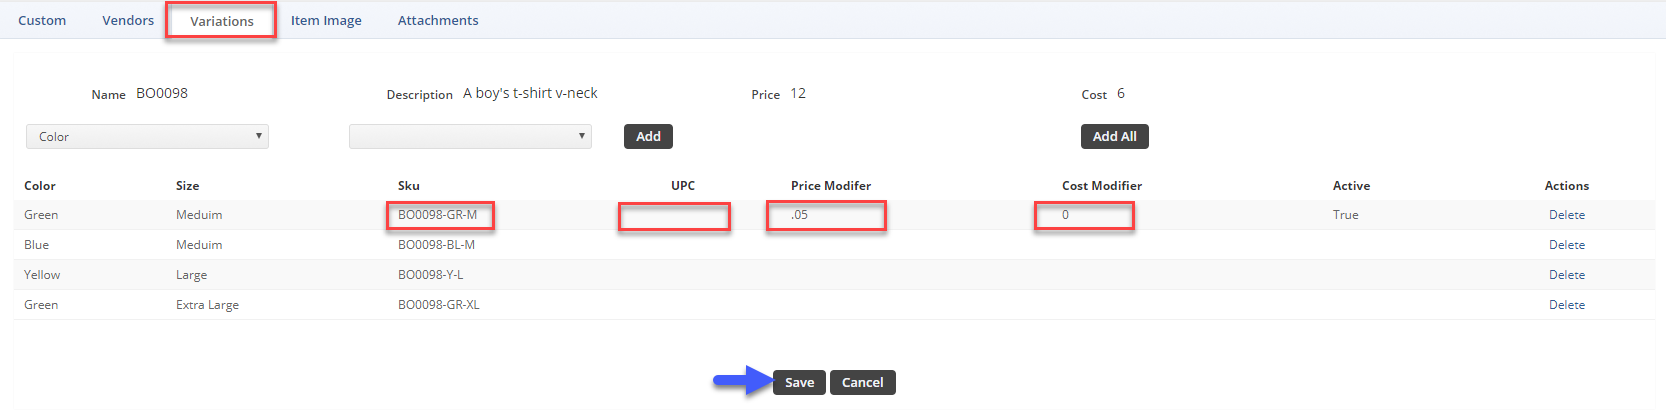
When you have a list for your desired styles, you can customize each line to suit your item's need.
- Click on the SKU for each of the style to change it, as needed.
- Enter a UPC for tracking purposes and QA (used by retailers to further identify items and create a bar code)
- Under the Price Modifier, you have the ability to Add to the Basic Price and Basic Cost. These functions are used to modify (e.g. If a large t-shirt costs more to produce, you can add .50 cents to that size or if it costs more to buy, add an amount to the cost).
- This will affect how the 'large size' will sell for more.
- When a PO is created, the cost will be higher.
- Click Save when done.
Add a Style to an Order
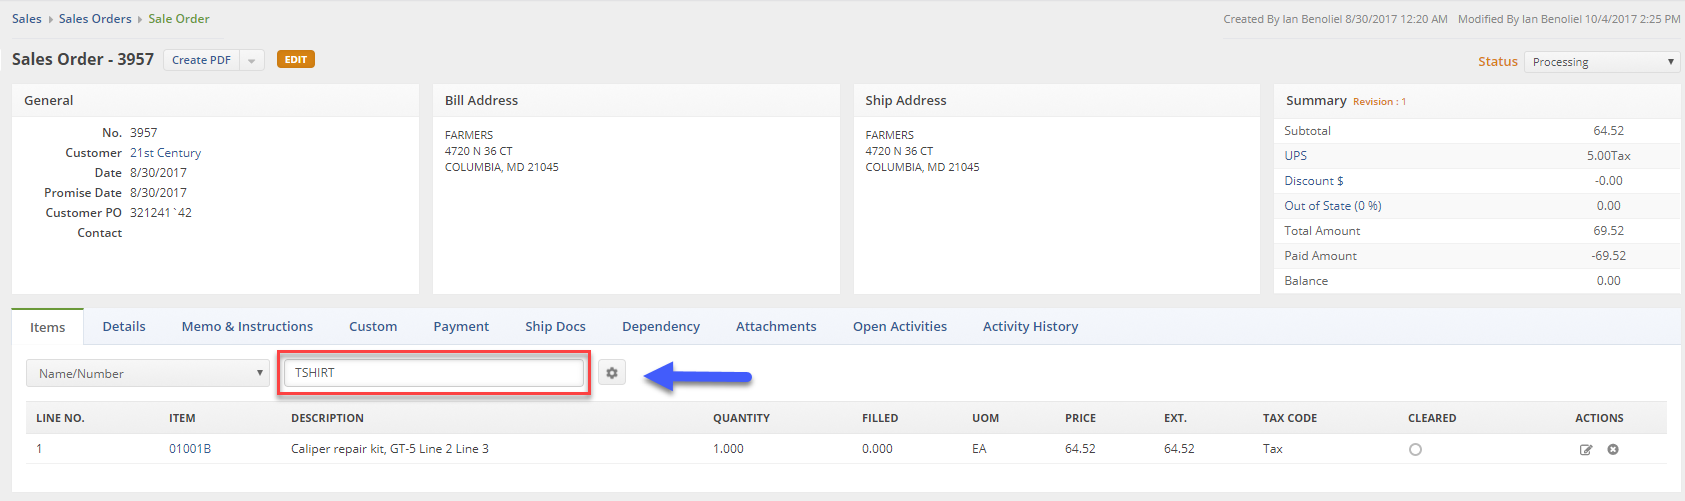
Now that you created a style for your item, it is ready to be used in the system. Let us use a Sales Order as an example.
- On the Sales Order below, you have entered an Item that was created with the Style Editor.
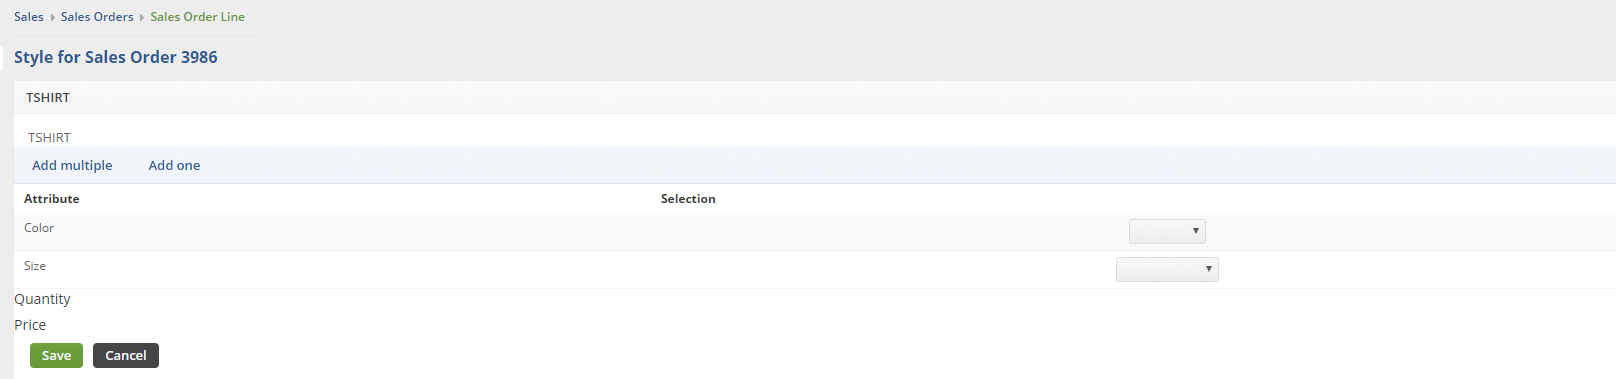
Once the Style has been entered into your Sales Order, the following screen will display all the attributes assigned to the Item.
- Enter a number of orders needed for each style.
- Enter the number per style as needed. The matrix will provide you with an open grid to enter the amount needed for this transaction.
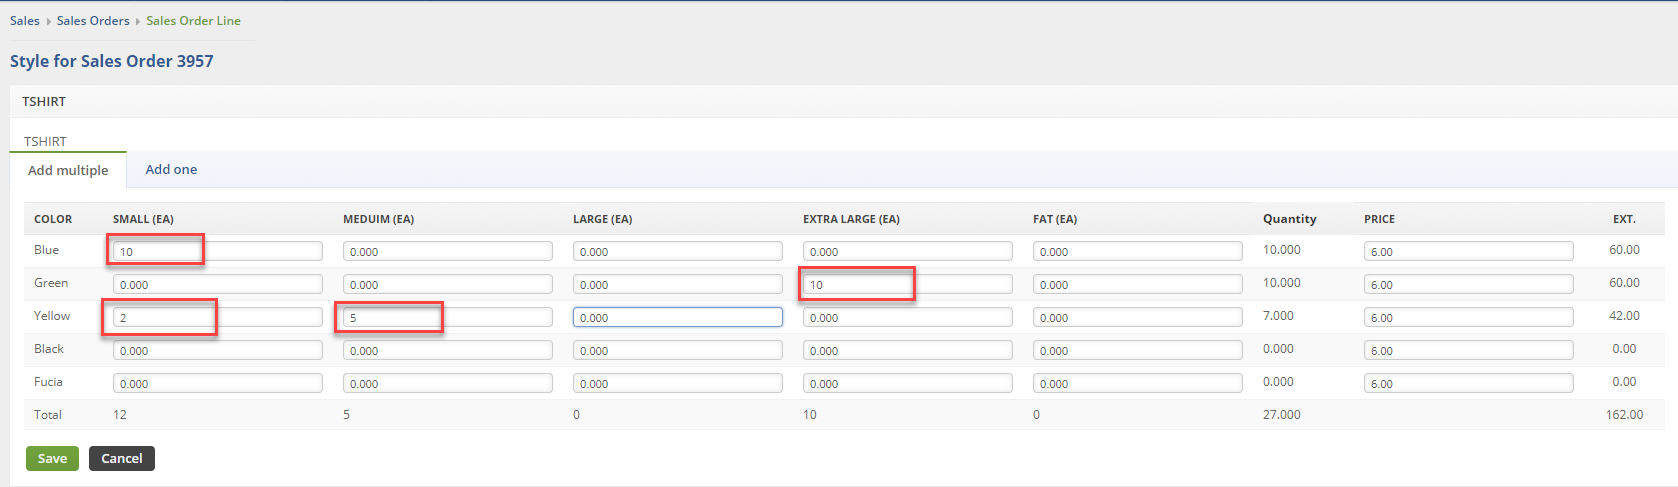
Select an additional style by clicking the Add One tab. This will add an attribute that was not used during the initial item style set up.
- In the Attribute section, select your additional attribute from the drop-down list .
- Click Save when done.
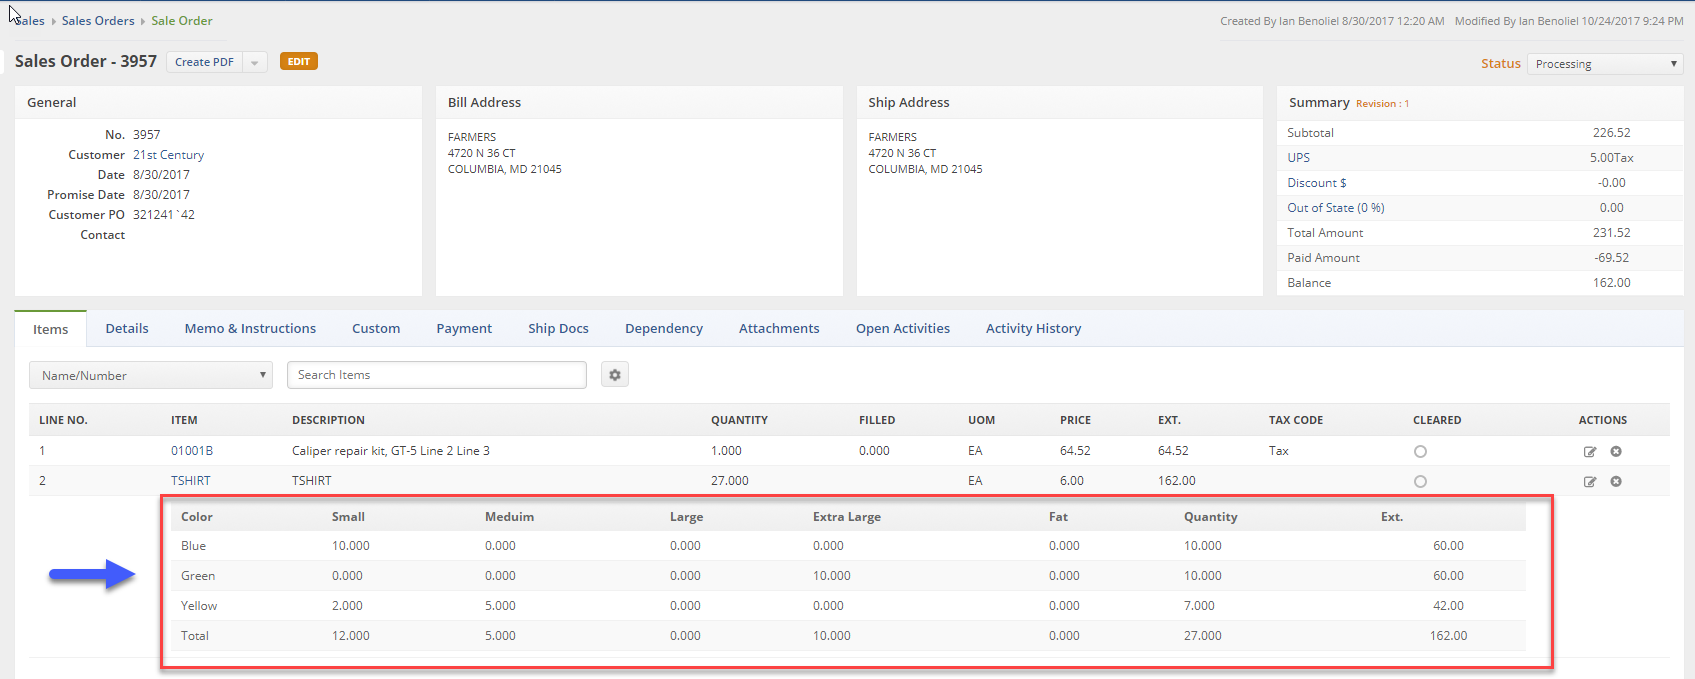
Once you have saved the chosen styles, your Sales Order will reflect your selection. It will itemize each of the selections made and categorized them depending on the style given.
Complete Sales Order as any other order. Changes the status as needed.
New Sales Order Line View
We've added a different viewing option for Styles in the Sales Order. Some customers prefer the default Matrix view which shows a small table of all the style variants and looks like this:
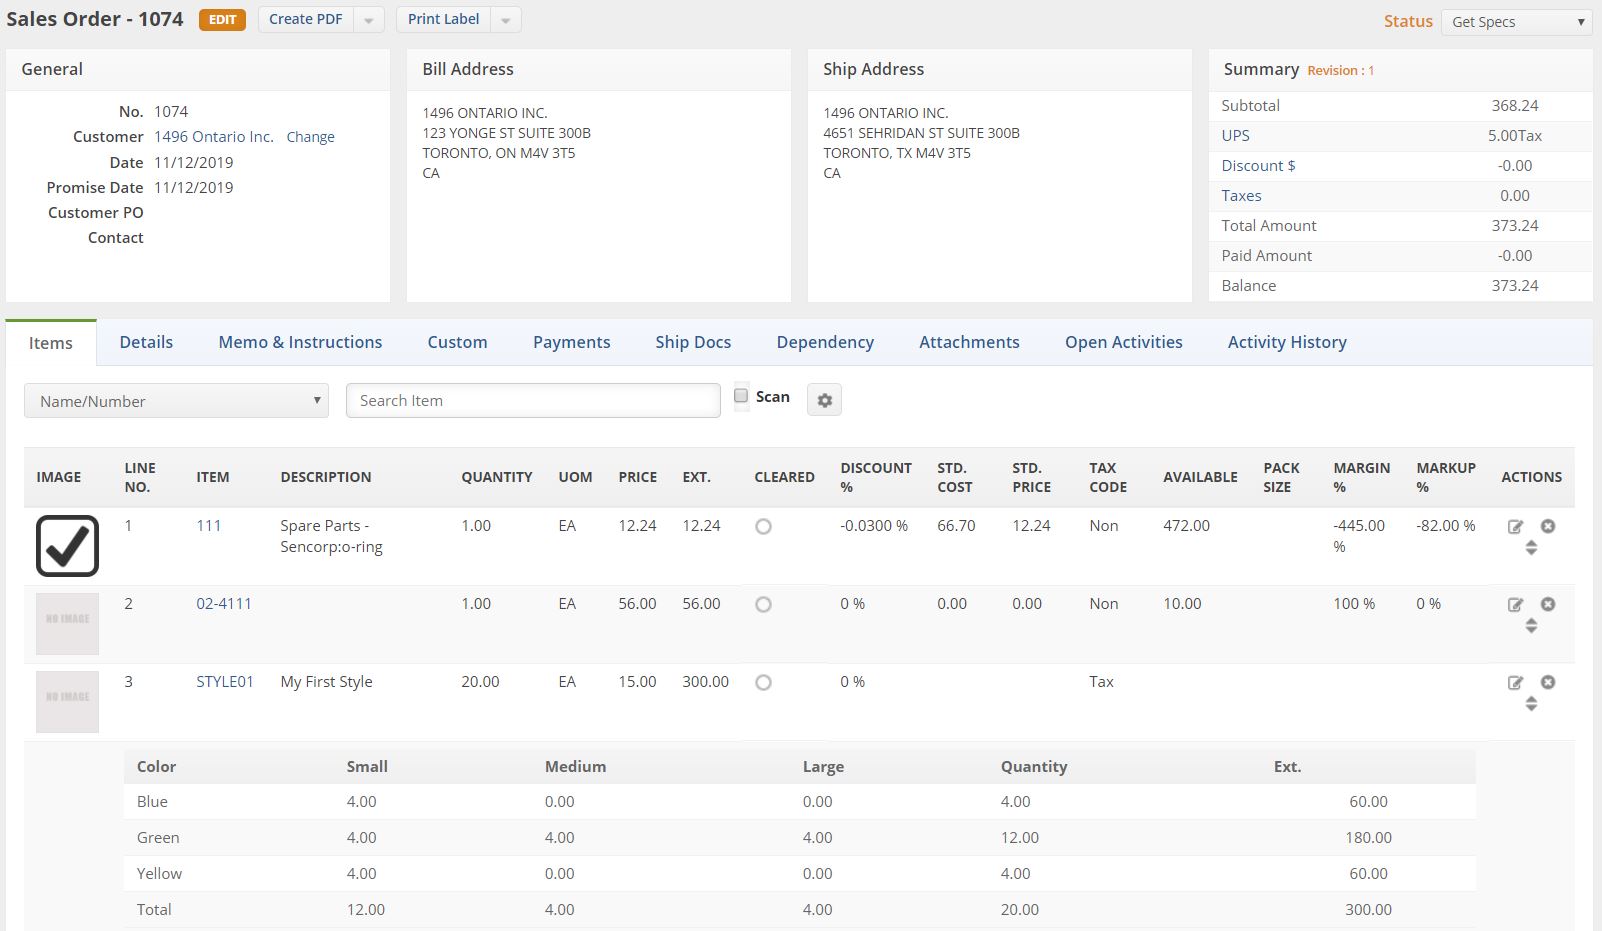 Style in a Sales Order, Matrix View
Here is how to turn on Line View:
 Style in a Sales Order, How to Activate Line View
It splits each style variant into it's own line item:

Configuring Bill of Materials for Style
If an item is a Style and for instance, within the Assembly group, then it is considered as a bill of materials. Note: Typically an assembly item will have a bill of materials.
As there are several variations involved in Style, configuring bill of materials is needed to instruct Order Time which components are required to make a finished product. This enables Order Time to understand and process how much of each component is needed and displays the quantity available for each component.
Below are the steps to configure a bill of materials for Style:
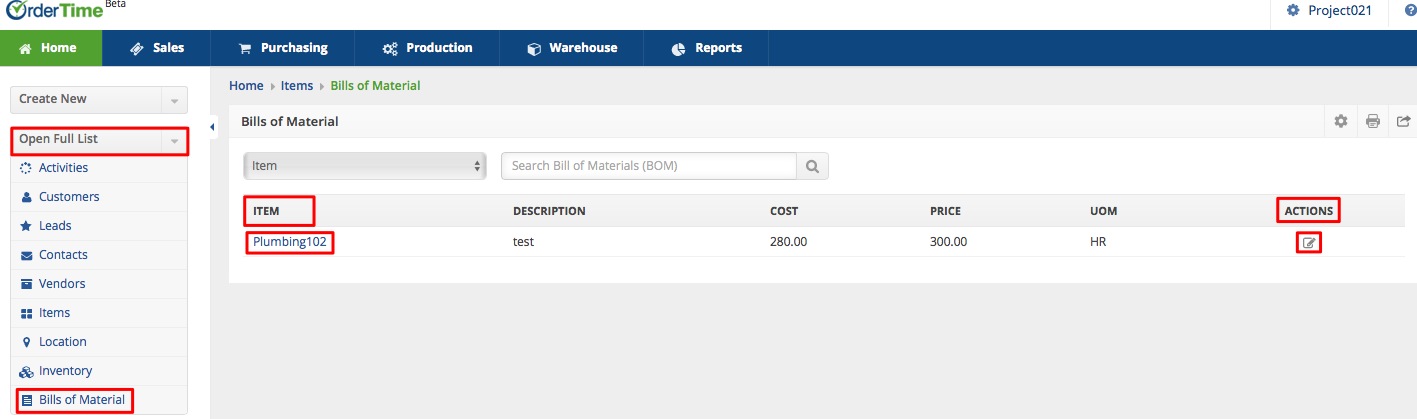
- Click Open Full List and select Bill of Materials.
- Under the Actions column, click the Edit icon of the item that you want to configure the bill of materials.
 Alternatively, you can click the Item and click the Edit Bill of Materials button.
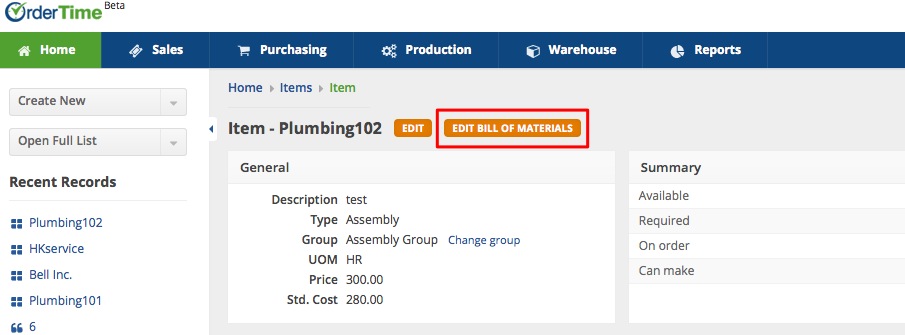
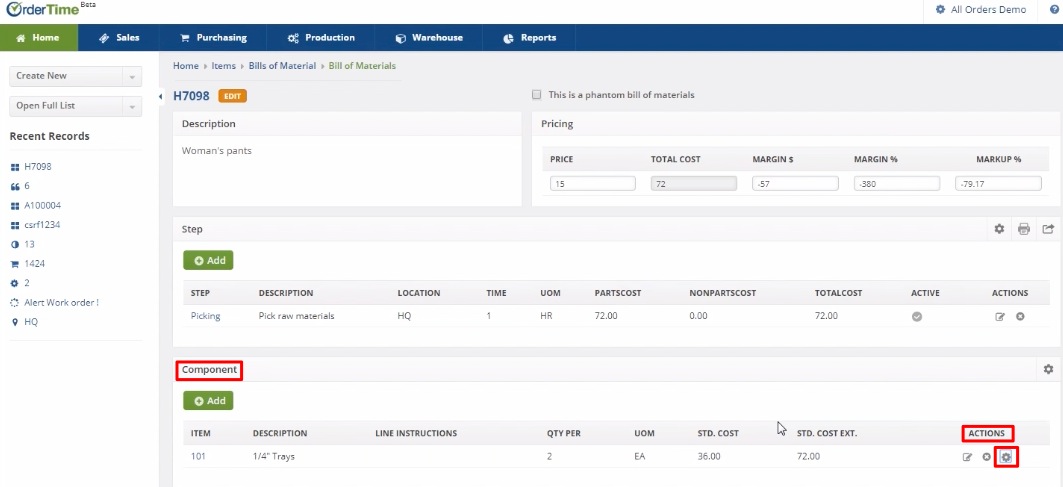
- Under the Components section, click the Configure (gear) icon of the record that you want to update.
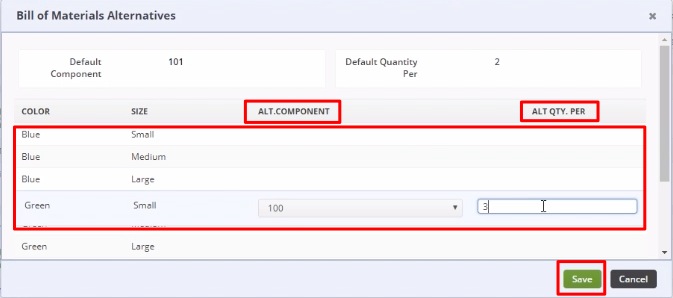
- In the Bill of Materials Alternatives pop-up window, click on the row of the variation that you want to change.
- Enter the values for Alternative Component (Alt. Component) and Alternative Quantity Per (ALT. Qty. Per).
- Click Save.
 Alternatively, you can click the Item and click the Edit Bill of Materials button.

