Overview
Your import file has columns that are specific to the List that you are going to use. To ensure that the import file will contain the correct set of columns, you need to export the list into your CSV viewer/editor.
The steps for preparing the import file are applicable to:
- Creating an import file from scratch - The exported CSV file will serve as the template for your import file.
- Updating and/or inserting new records to the list - If you are changing existing items (update) and/or adding new records to an existing list (insert), you have to start with exporting the list in to a CSV file. Make the necessary changes in the exported CSV file and then, import the file.
Preparing the Import File
From the Lists page, you can download a "template" or export the list (to a CSV file) for your import file by using the Export List to CSV function.
- Click the Open Full List drop-down menu on the left side of your screen.
- Depending on your required Import type, select the corresponding List (e.g. Customers, Vendors, Location). Note: Move the scrollbar down for more options.
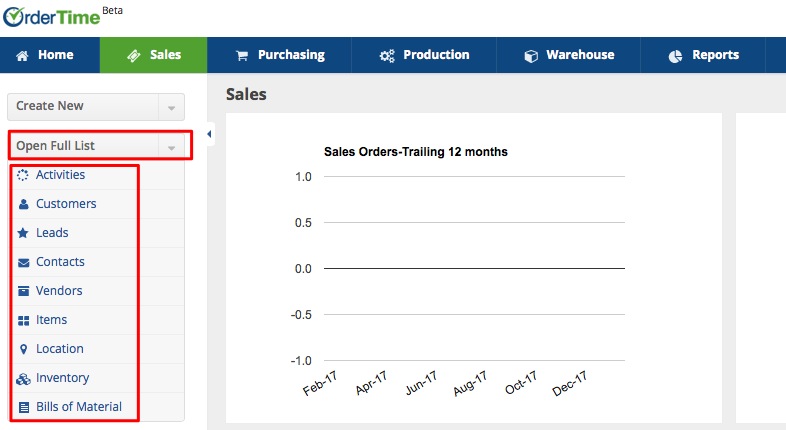
- Once you select your List, the List screen will be displayed. Check the column headings on the current screen.
 You can customize the column headings of your import file by modifying the columns:
- Click the Gear icon.

- Once you click on the Gear icon, the List Options screen will be displayed.
- Click the Columns tab.
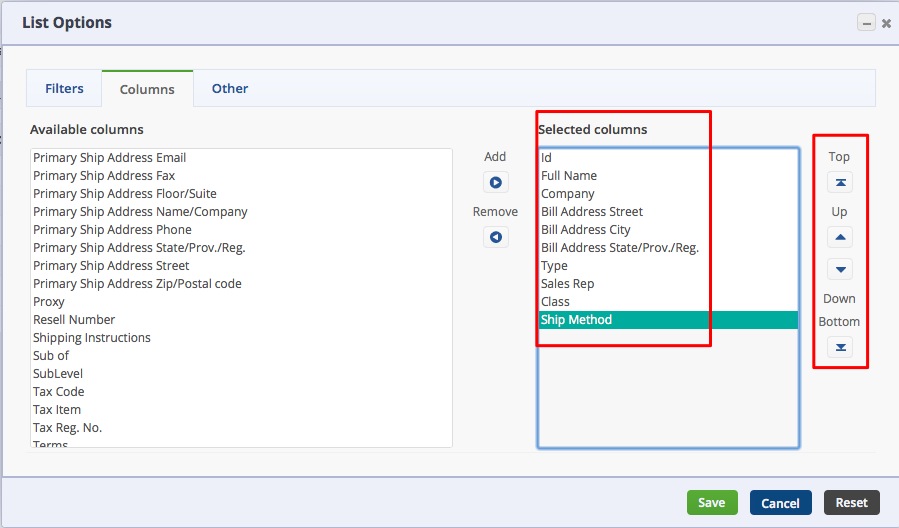
- Adding Columns: Select the column name under the Available Columns section and click the > icon to bring it to the Selected Columns section (Example: Adding the Ship Method column). Note: If you already have an existing list, it is recommended to have the “Id” column added. This will give you the option to live out a required field blank (e.g. Name) when you do the mapping during import.
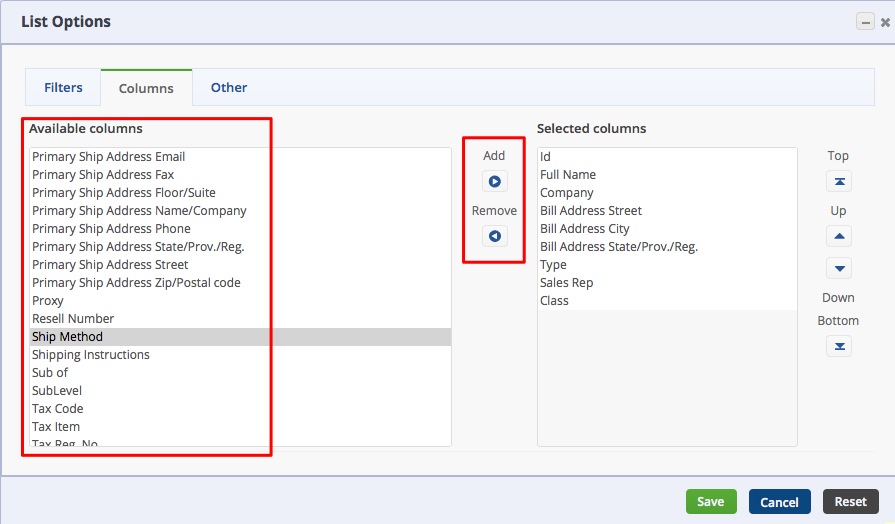
- Removing Columns: Select the column name from the Selected Columns Section and click < icon.
- Changing Column Order: Select the column name from the Selected Columns Section and press ⊼ to bring it to the top, ^ to move it up one spot, v icon to move it down one spot or ⊻ to bring it all the way to the bottom.
- Adding Columns: Select the column name under the Available Columns section and click the > icon to bring it to the Selected Columns section (Example: Adding the Ship Method column). Note: If you already have an existing list, it is recommended to have the “Id” column added. This will give you the option to live out a required field blank (e.g. Name) when you do the mapping during import.
- Click Save.
- Click the Gear icon.
- Once you finalize your column headings, click the Export List to CSV icon.

- Save the file in CSV format.
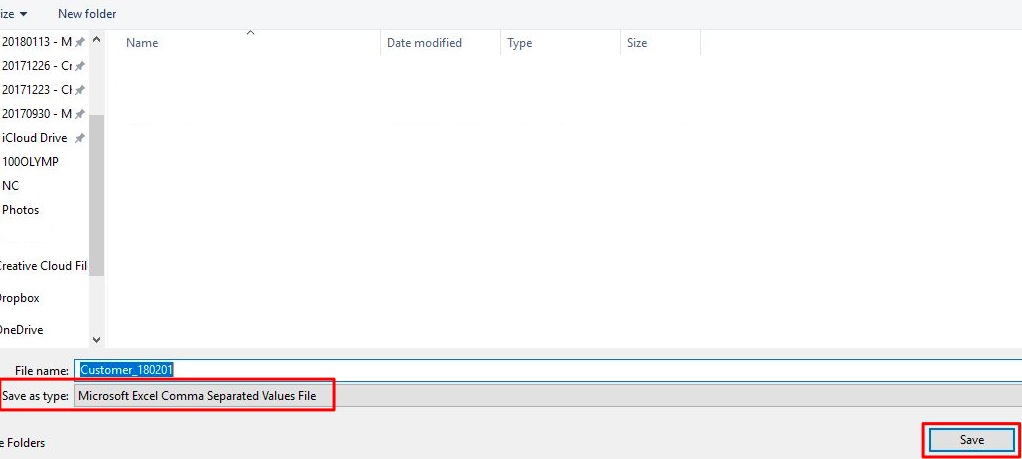
- Locate the file from your computer. Open the file in a spreadsheet editor (e.g. Excel, Numbers, OpenOffice) and start preparing your import file by editing it and populating the fields accordingly.

- Save the file in CSV format.

 You can customize the column headings of your import file by modifying the columns:


NEXT: Importing
>> Importing Video Guide
>> Preparing the Import File
>> Importing
>> Sample Import Templates (ZIP)
◘ Count Item Import CSV
◘ Customer Import CSV
◘ Item Import CSV
◘ Item Vendor Import CSV
◘ Vendor Import CSV
