While we support both the Android and iOS versions we recommend choosing the Apple iOS Version
Apple iOS Version |

Android Version |

➡️ Check out the latest Release Notes for Order Time Mobile ⬅️
Purchase New Hardware
Utilize our hardware partner, ShopPOSPortal

➡️ Order Time Mobile - Compatible Hardware List ⬅️
Wi-Fi strength may differ based on the warehouse size, materials, and other factors. If you run into any issues with your Wi-Fi connection as you walk through your warehouse, our suggestion is to place Wi-Fi Extenders at key points to bridge the gap in service.
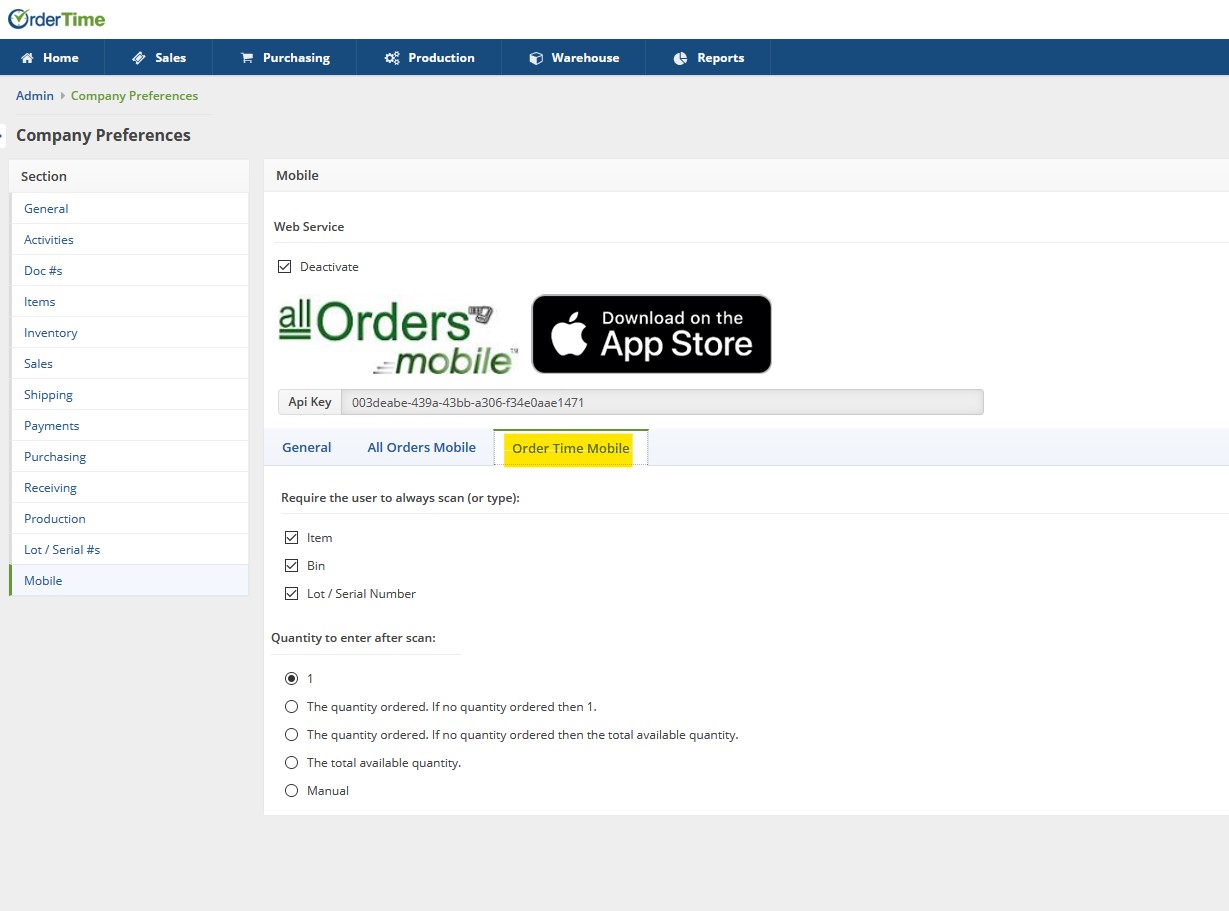
Activating the Mobile App in Order Time
Head to the Settings within Order Time by clicking the cog in the top-right.
Then click on Company Preferences.

Navigate to the section called Mobile and check the box that says Activate.

Now you'll have access to the download link for the App by clicking on the button that says Download on the App Store.
You can also modify the settings under the Order Time Mobile tab and click Save.
Logging In
After you install and open the app, you will then see a login screen. Use the same email and password that you normally use with Order Time. If you have multiple companies, you will be prompted to select a company. Once logged in you will see the main menu.
The Basic Workflow
Order Time mobile works with one location at a time. By default that location is set to HQ. To change the location, click settings, then User setting and change the location. You will not be able to work with any records that are not in your location.
We plan to add much more functionality like receiving purchase orders, but RIGHT NOW we can only Ship Orders.
The basic flow is —
1) You download and check-out approved orders from your location.
2) Once the orders are downloaded to the device you go ahead and fill the orders.
3) Once the orders are filled, you would upload the orders which would create the ship doc in Order Time. You need an internet connection to download and upload orders either through WIFI or cellular data service.
The Process We Used During the Demo
The first screen you will see is the Download screen. On the bottom you will see a sub-menu for quick navigation. The list you see are approved sales orders from your location, you can scroll up and down the list. There are three ways you can download an order onto the device. The first is using the list with a right swipe. The second is typing in the sales order number into the box provided and clicking the return button. The third is to scan the sales order number. Order Time’s form templates have a bar code for the sales order number already. Once a sales order is checked out, it cannot be checked out by another user nor changed in Order Time.
Using the bottom menu, I am going to open the List of sales orders downloaded. I can remove a sales order from the list by swiping right. Click into the sales orders to view the line item. Click into a line item to see the pick details.
From the bottom menu, I am going to click the scan icon to start picking the order. You again see the camera scanner, followed by buttons for Bin, Item and if applicable LSN which stands for Lot Or Serial Number. Notice Item is highlighted which means the device is expecting you to scan an item. Once you scan an item, Bin will be highlighted. Item is first because of my user preferences but I can also scan bin first. When Item is first the ‘pick order’ is sorted by Item and when Bin is first, the pick order is sorted by Bin. The admin can turn off bin scanning altogether.
In this order there are 2 items. I can swipe left or right to scroll through the items. Below the item, you will see how much you need to Pick followed by the Quantity On Hand. Below that are the bin details and if applicable the Lot or Serial numbers. I can scroll through the available bins or LSN using the arrow.
I am going to go ahead and scan the first item. Notice that the bin is now highlighted so I am going to scan the bin. By default each scan increments by 1, but that too can be changed in Settings. After I have completed the first, a subsequent item will be shown. Let's assume that item 112 does not have a bar code. I can simply use the keyboard icon to type in the item number.
Let's go back to the list and you will see that order 1089 is completed. Click into the order to see the line items. Click into the item to see the pick details. You can delete the pick by swiping right thus allowing you to re-enter a correct bin or quantity so lets do that now.
Going back to the order for a final check, I can upload the order from the List or from within the order using the upload icon on the top right. After a few seconds you will receive a message that the ship doc was created.
Feedback and Comments
We welcome your feedback and comments. Send them to support@ordertime.com
