Overview
Receiving Docs are transactions that show what Items have been shipped by the Vendor and actually received at your location.
There are three (3) ways to complete Receiving:
- Receiving without Purchase Orders
Receiving Docs usually correspond to Purchase Orders to show how much of the PO still needs to be filled. However, Receiving Docs can be created without Purchase Orders.
You can create a new Receiving Doc from the Side Menu.
A Receiving Doc must be generated first in order to receive a Purchase Order.
You can also create a Receiving Doc for a vendor with multiple purchase orders.
Creating a New Receiving Doc
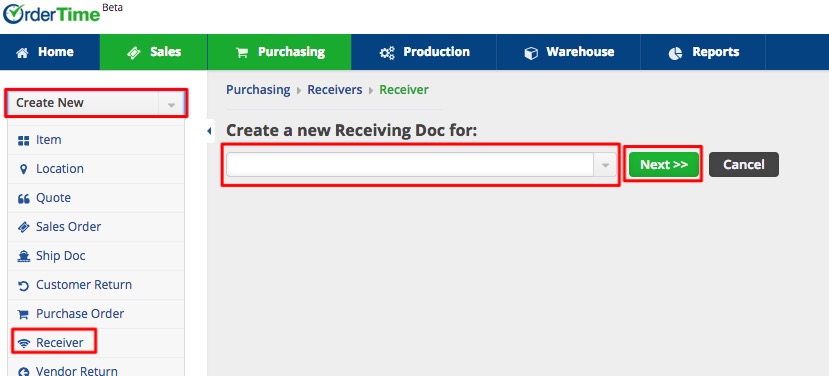
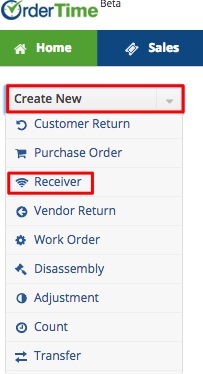
To generate a new Receiving Doc from the Side Menu > Create New > Receiver, follow the steps below.
- Open the side menu and click on the Create New drop-down menu.
- Select Receiver from the menu.
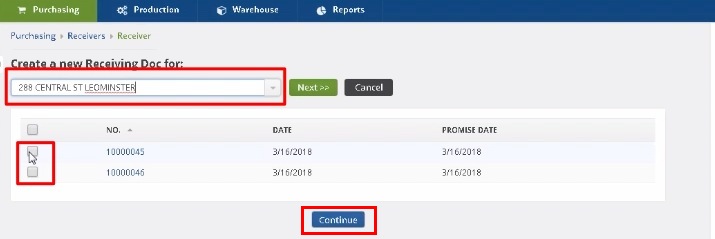
- On the screen, type the Vendor's name. When the Vendor's name has been enter or selected from the drop-down menu, click Next>>.
- Once you click on Next>>, the next screen will prompt you to enter the information below:

- Select Date from the date box.
- Enter the Expected Date.
- Under the Default tab select the following from each drop down menu:
- Location
- Bill Address
- Class
- Terms
- Ship Method
- Total Packages
- Total Weight
- Tracking No.
- Invoice No.
5. Enter information relevant to the PO under the Memo & Internal Notes:
- Notes on the memo will be displayed on the PO
- Internal Notes will only be view by reviewing the PO
6. Under the Custom tab, you can provide specifications based on your preferences.
7. Click Save when done. 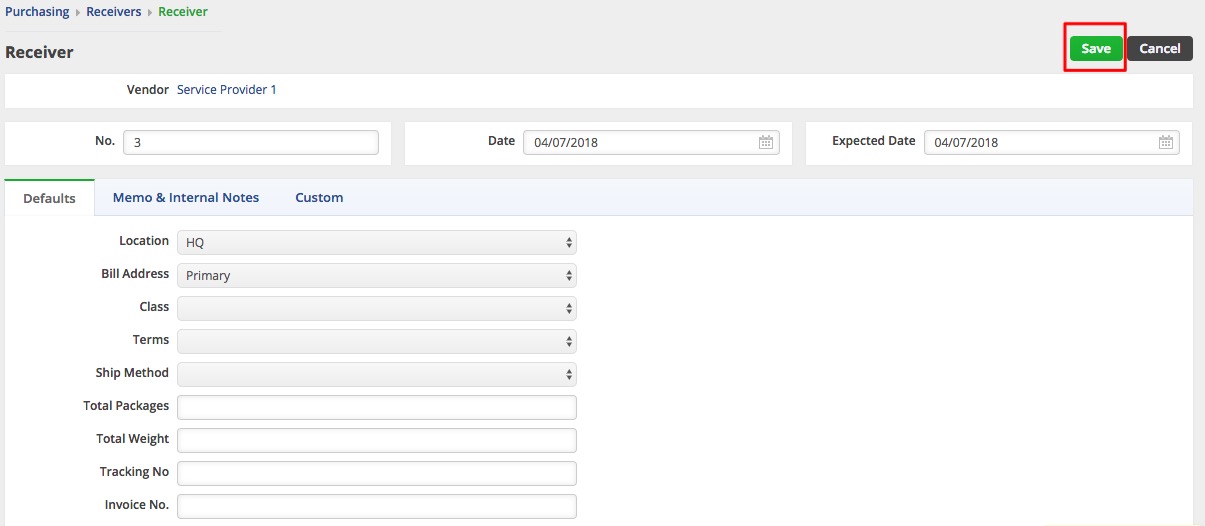
Processing a Receiver
To receive a Purchase Order, a Receiving Doc must be generated. A Receiving Doc is created once a PO status has been changed from Processing to Approve or Sent and a Receiving Doc is generated under Receivers tab. This process is usually completed by the employee generating the PO.
Purchase Order must be Approved before they can be received.
When a Receiving Doc has been generated, complete the following steps to receive a Purchase Order:
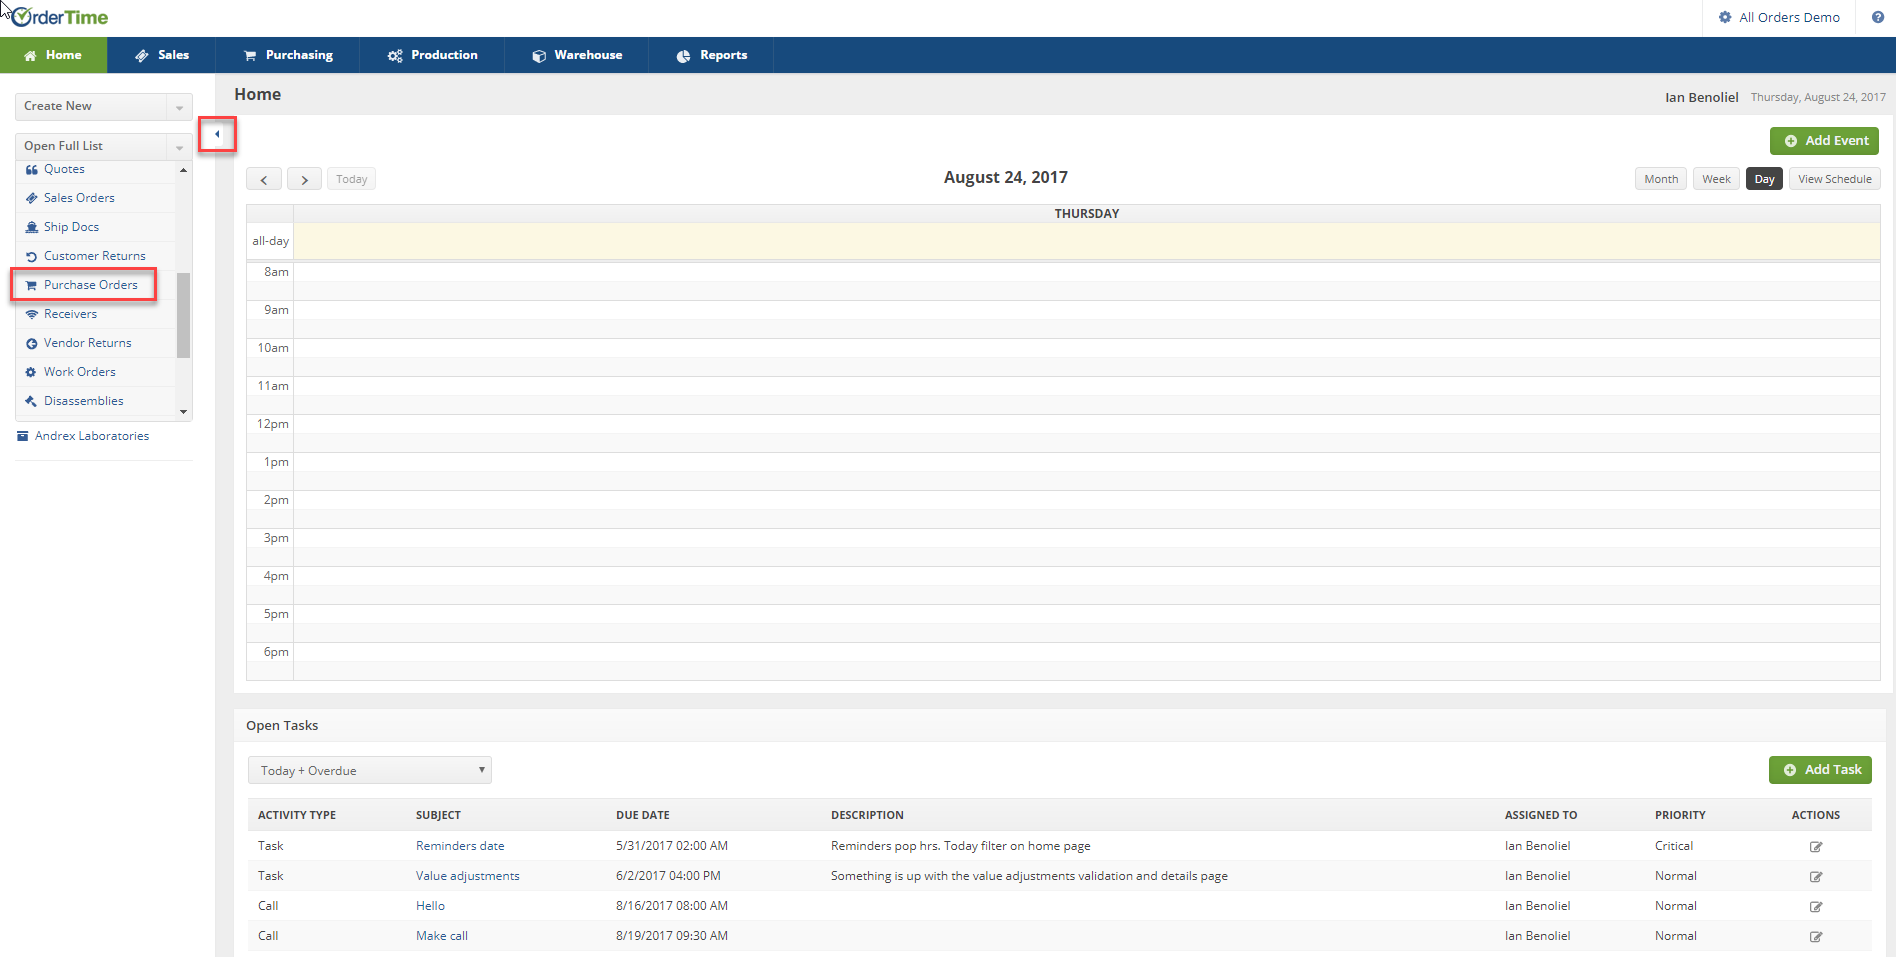
- Open the side menu and click on Open Full List.
- Select Purchase Orders.
3. On the Purchase Order screen, enter the Purchase Order number. You also have the option to sort your POs by selecting from the drop-down menu (i.e. Location, Memo, Bill Address Email, Bill Address Fax, Phone Number, Company Name, Zip code, etc.).
- Enter the PO number, then press Enter.

4. Select the Purchase Order number from the Listing.

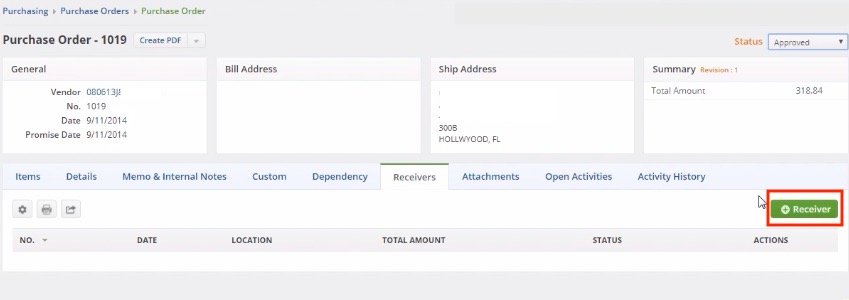
5. The Purchase Order screen will open. Select the Receivers tab and click the Receiving Doc line item under the NO column.
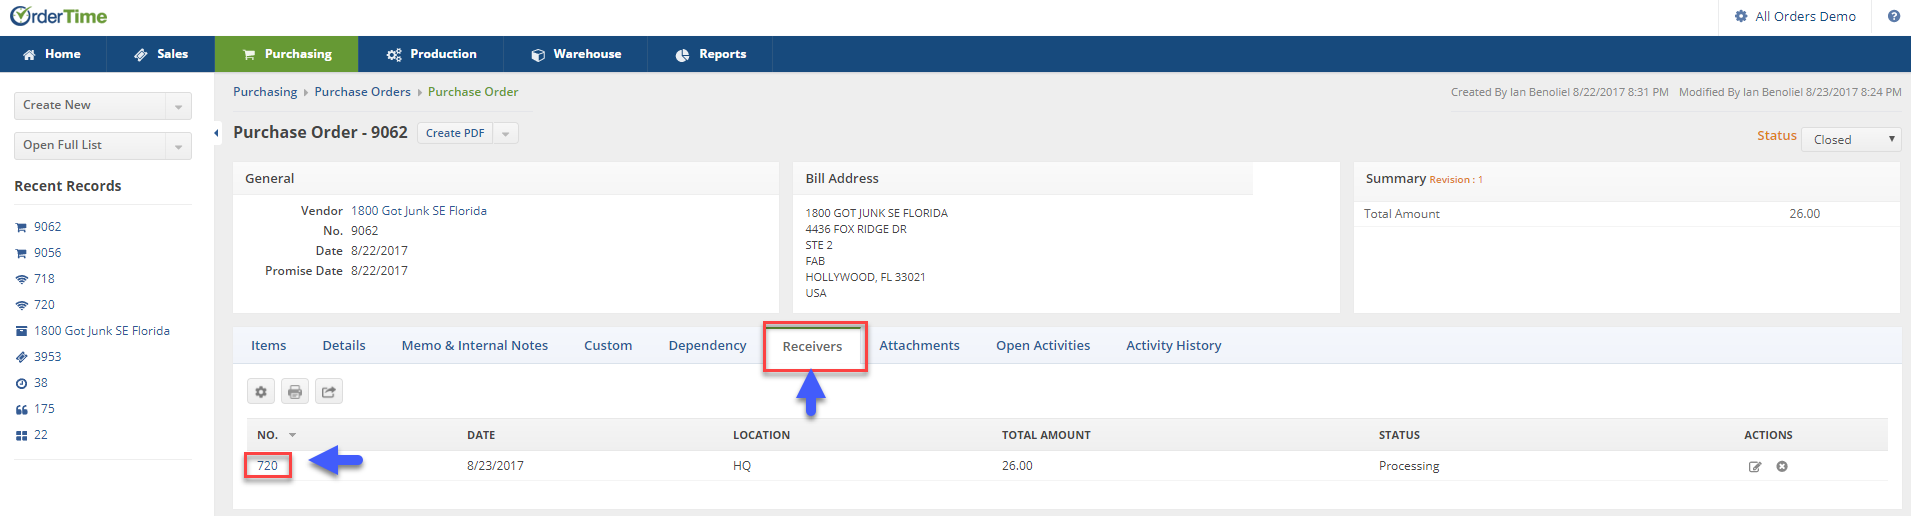
If there is no Receiving Doc on the listing, the PO has not generated a Receiving Doc. TO CREATE a Receiving Doc, select the Receivers tab and click on the +Receiver icon. Once this function is completed, a Receiving Doc will be displayed in the listing under the Receivers tab. Click on the Receiving Doc line item under the NO column.
Once you have opened your Receiving Doc, you can begin the process of receiving your items.
- On the Receiving Doc screen, click on the Items tab and inspect your items.
- If there is a need to change the Item quantity, click on the Note icon under the ACTIONS column.
- Under the Edit icon, you can make order changes.
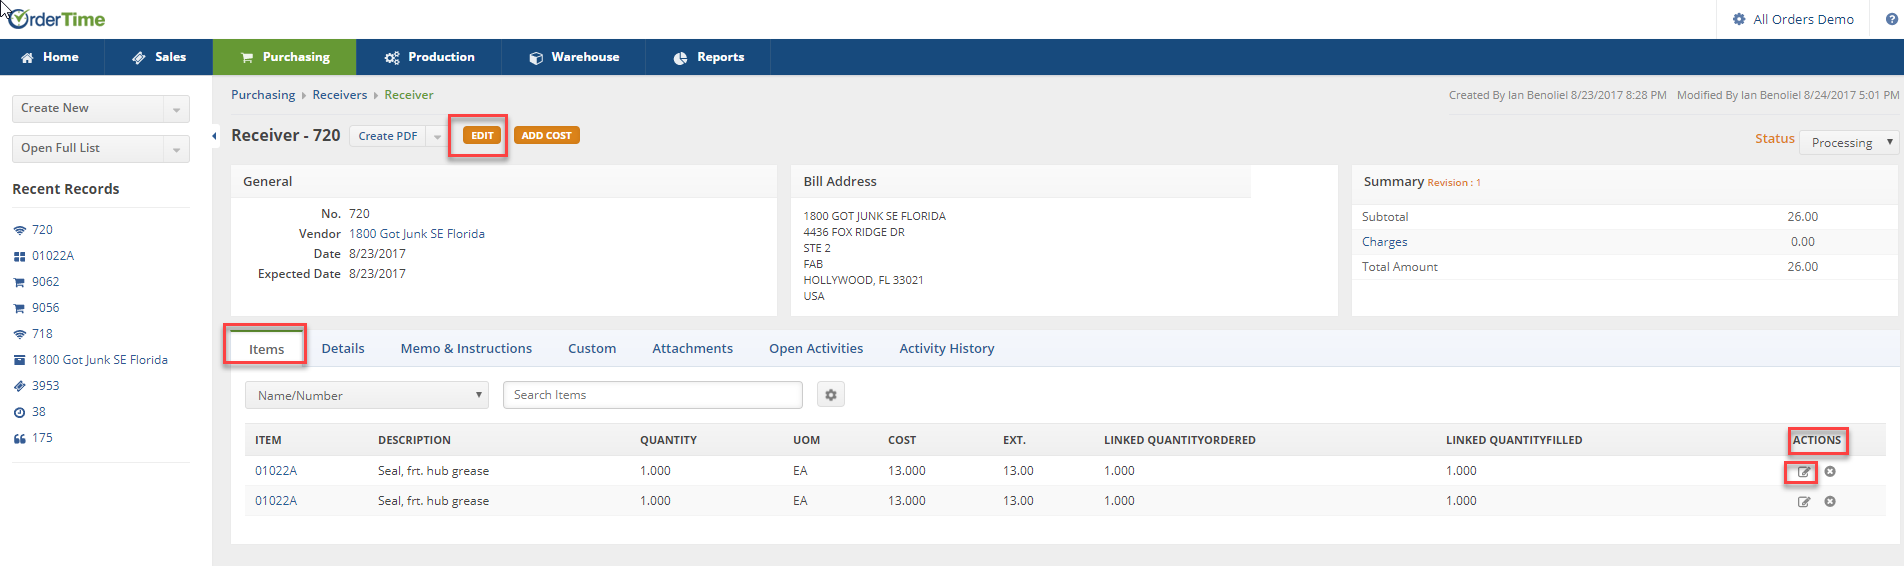
You can directly change the field values by clicking on the line item (item row). Field boxes will appear, and you can add details or edit the information accordingly.
When you click on the Edit icon, the following options are available:
Under the General tab, you have the option to change the item quantity received under the Purchase Order. Click on Save when your changes are completed.
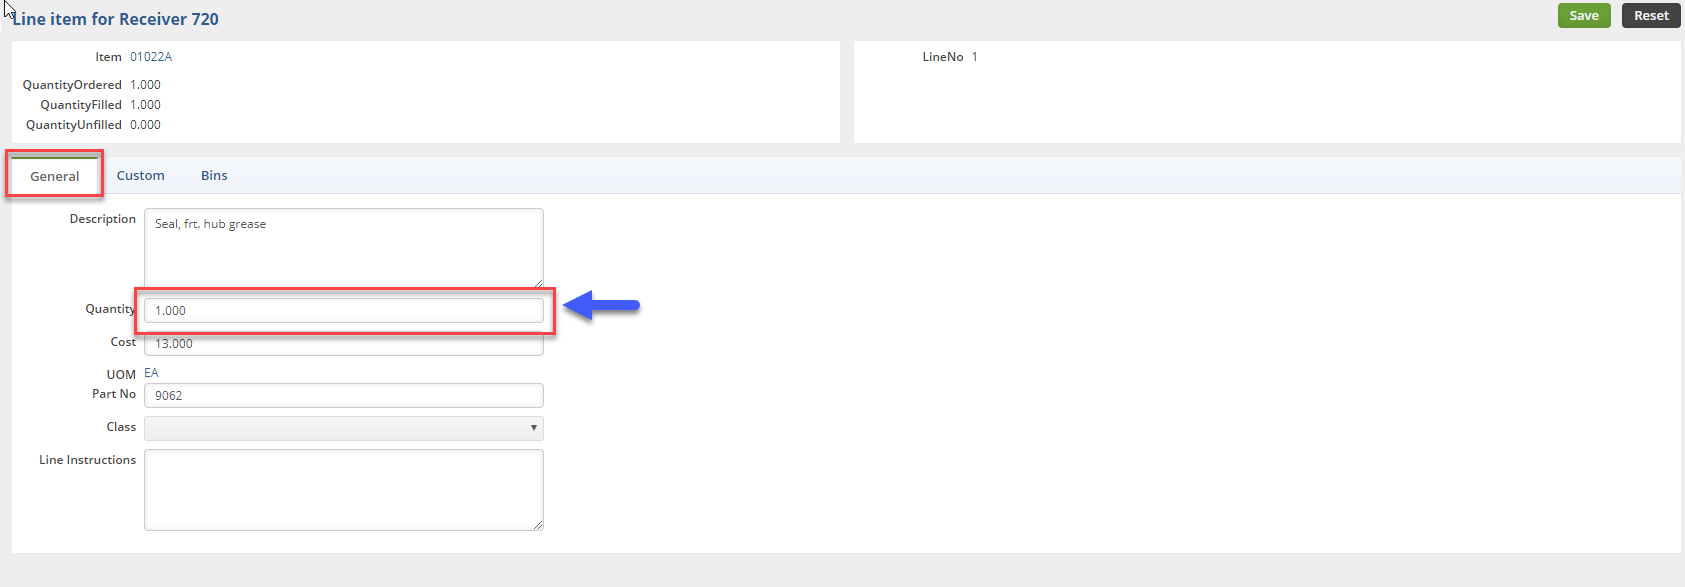
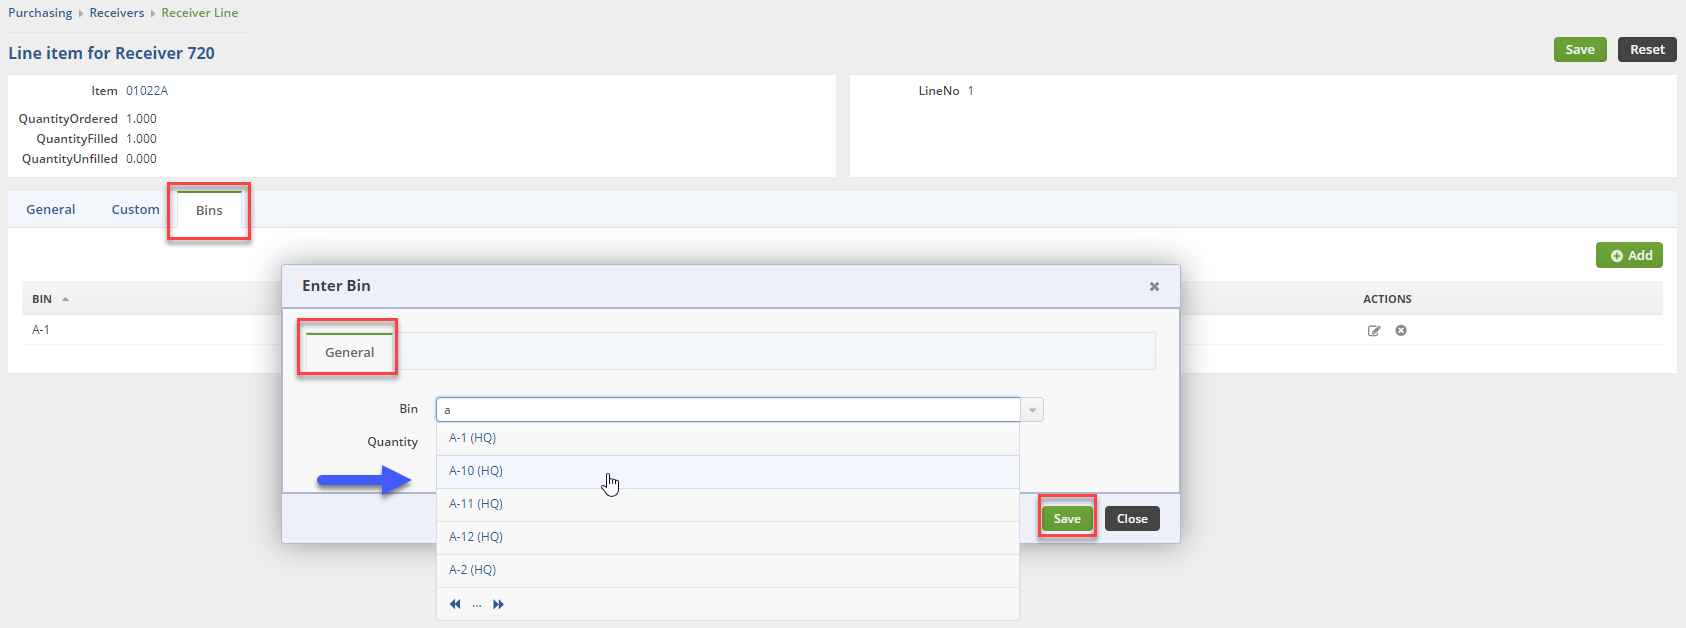
Under the Bins tab, you can move your Items to a new Bin Location at your warehouse.
- Based on you Bin assignments, you can select a new location from the list in the drop down menu.
- Enter the item quantity for this location.
- Click on Save when done.
Receiving Multiple Purchase Orders
You can receive multiple POs at the same time by following these steps:
- Click Create New.
- Select Receiver.
- Enter the Vendor name. Once the vendor’s name is entered, a list of POs will be displayed.
- Select the POs that you want to receive by clicking on the corresponding boxes.
- Click Continue.


Receiving Status Menu
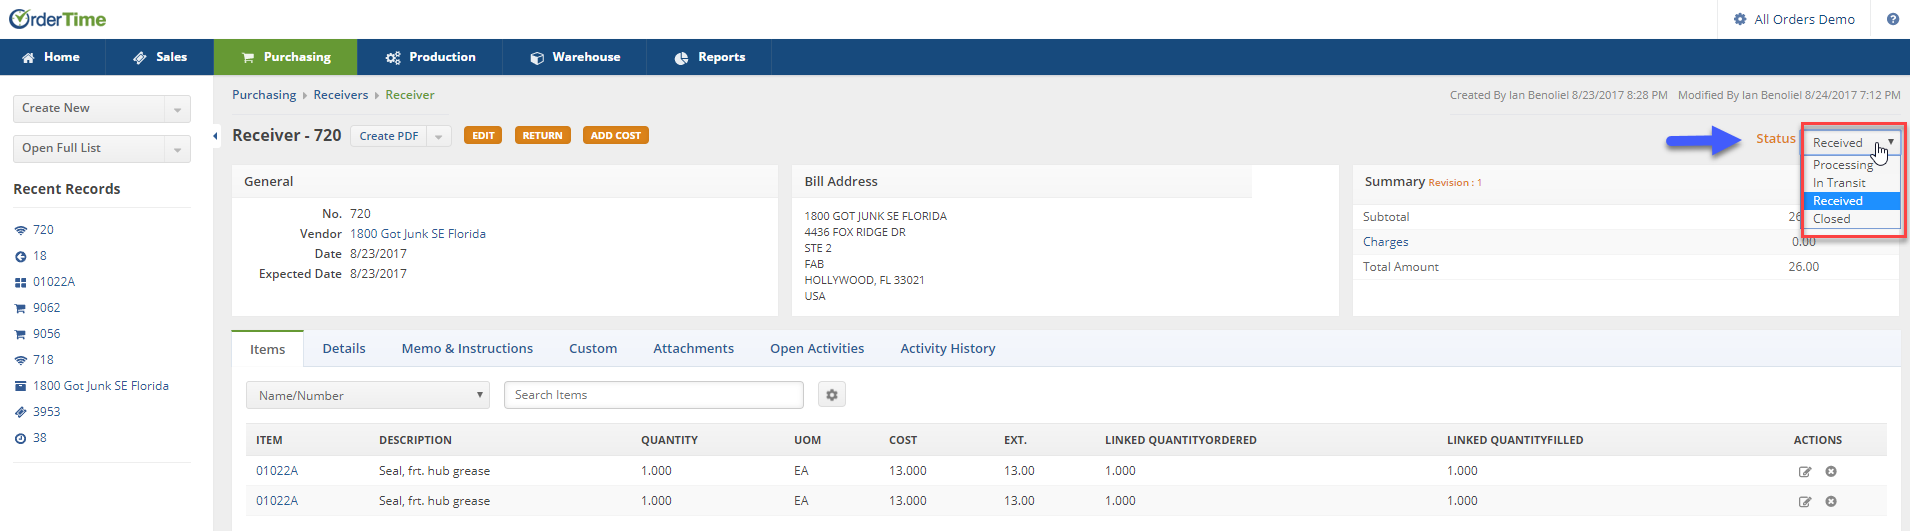
Once all the necessary information has been entered into your Receiving Doc, you are ready to proceed to change the status of the Receiving Doc. On the top right side of the screen next to Status, use the drop-down menu to change the status of your Receiving Doc. The following status options will be available for your Receiving Doc:
- Processing: Processing means you are in the process of recording the Receiving Doc information.
- In Transit: Items for this Receiving Doc are currently in transit, this is usually used for Drop Ship deliveries.
- Received: Items for the Receiving Doc have been received and processed at the warehouse.
- Closed: The Receiving Doc is closed.
When you do a Receiver the items that are in inventory are listed as In Transit until the status is changed to Received, then it becomes Available for sale.
When you are ready to receive the Items on your Receiving Doc, select Received from the Status drop-down menu.
When it is marked as Received or Closed, it goes in to synchronization to update the Accounts Payable.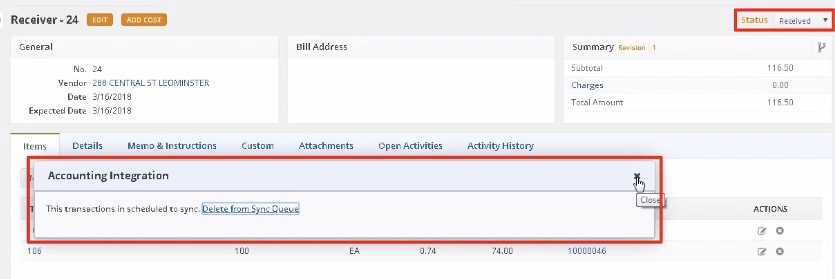
Printing your Receiving Doc
A Receiving Doc can be printed and emailed to your Vendor.
- Click on the Create PDF icon next to the Purchase Order number.
- A pop-up window will open and you can select Save and Email icon.
- The Send Email screen will pop up, enter the information requested. You will have the option to attach additional information or carbon copy individuals in your company. Select the appropriate template from the Template drop-down box.