Overview
Kits are used to sell a group of items together. A kit is different than an assembly in that the Kit itself is not an item, whereas the assembly is an item. In other words, when you ship a kit, you are actually shipping the individual items within the kit, whereas when you ship an assembly, you DO NOT ship the individual components but rather the assembly. An assembly (or job) can be configured which has some similar characteristics of a Kit as we will discuss later.
Kits
The purpose of creating a kit is to offer the customer choices of what is included in the kit at the order time.
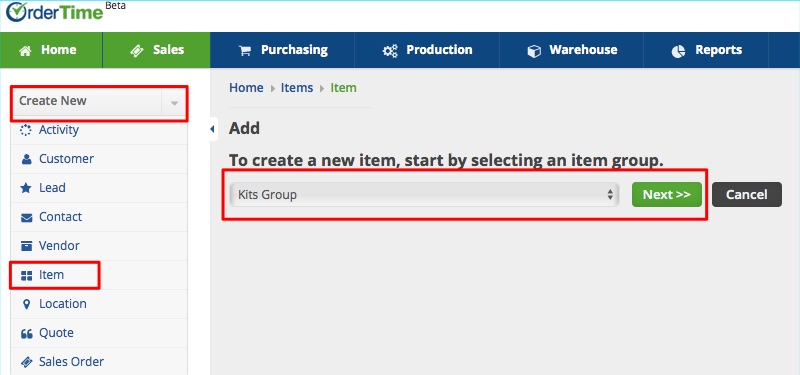
- To create a Kit, click on the Create New drop-down menu and select Item. This will lead you to the Add Item page.
- Select Kits Group from the Item Group drop-down.
- Click the Next>> button.

- Alternatively, you can click on the Open Full List drop-down menu and select Items . Click the +New Items button from the Item List page. This will also lead you to the Add Item page.
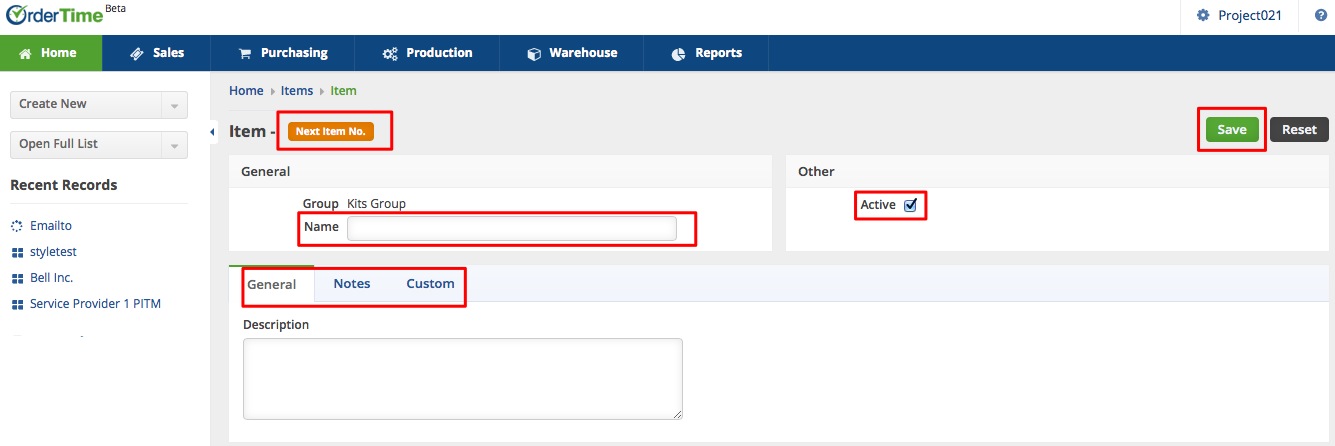
- In the New Kit Item screen, you have the ability to either manually enter a name for your kit, or automatically generate one by pressing Next Item No.
- Select the Unit Of Measure that corresponds to the kit.
- If the Kit is Active, click the box to check it.
- You also have the option of entering a Description and Notes about the Kit.
- Finally, you can enter specifics about the Kit by clicking on the Custom Tab.
- Click Save.

Add Components and Selections
After the Kit is created, you can select the Kit from the Item menu and then Add Components and Selections.
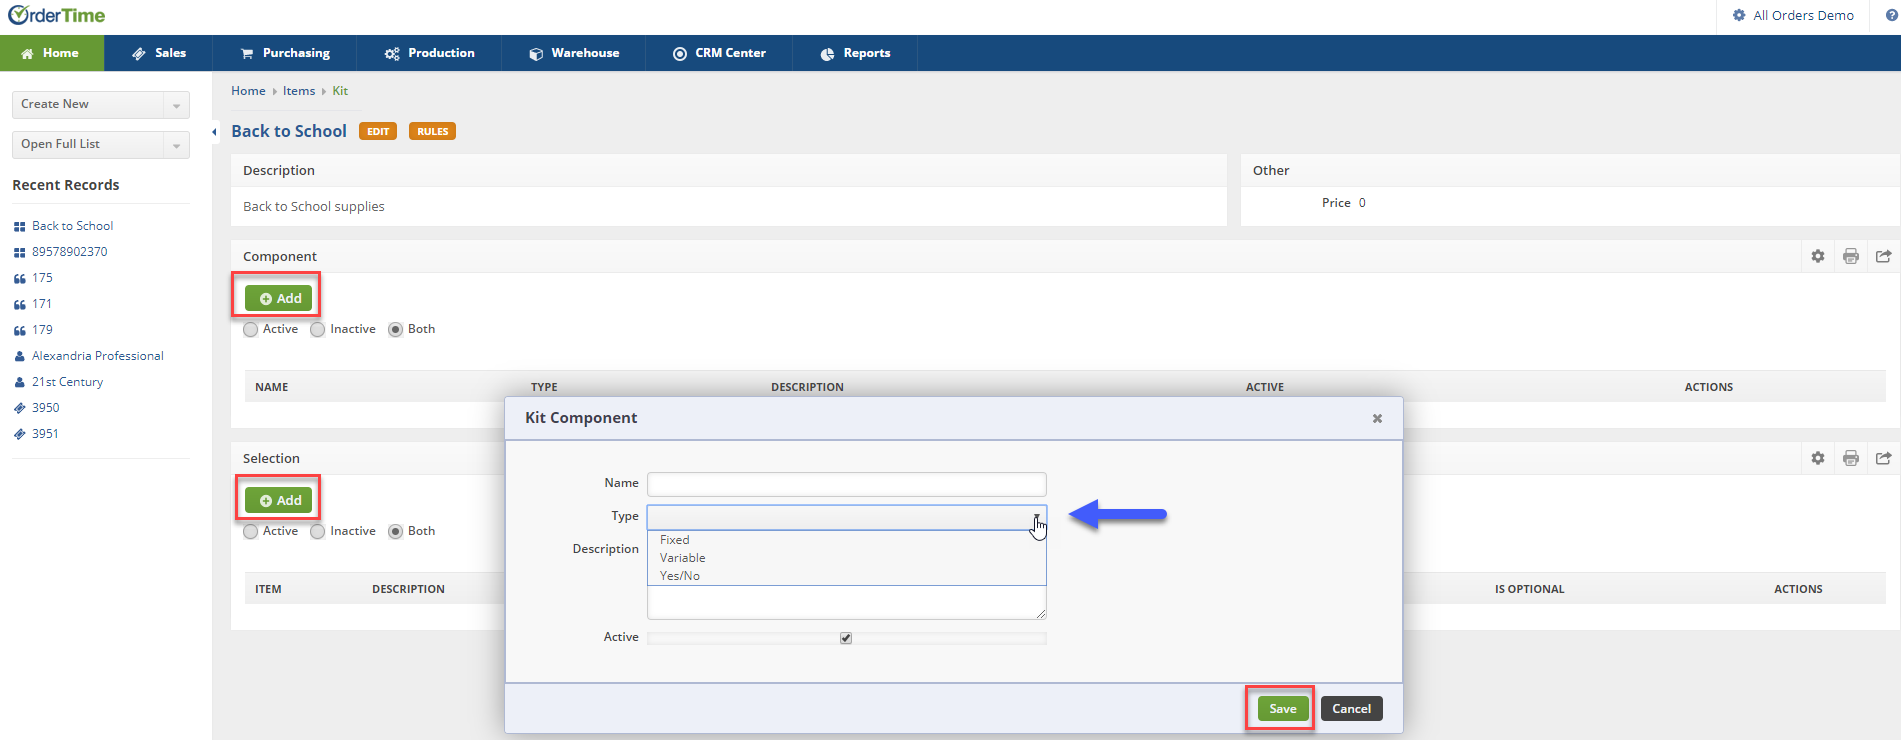
- Open the Kit record and click Edit Kit. Once the Edit Kit screen opens, click the +Add button next to the corresponding area.
- The Kit Component pop-up allows you to enter the Component's Name, Type, Description and select if it is 'Active'.
- The Selections pop-up allows you to enter the Item Name, Price, Quantity, and select if is being used only One Time and if the Selection is 'Active'.

After completing the information requested, click Save.

