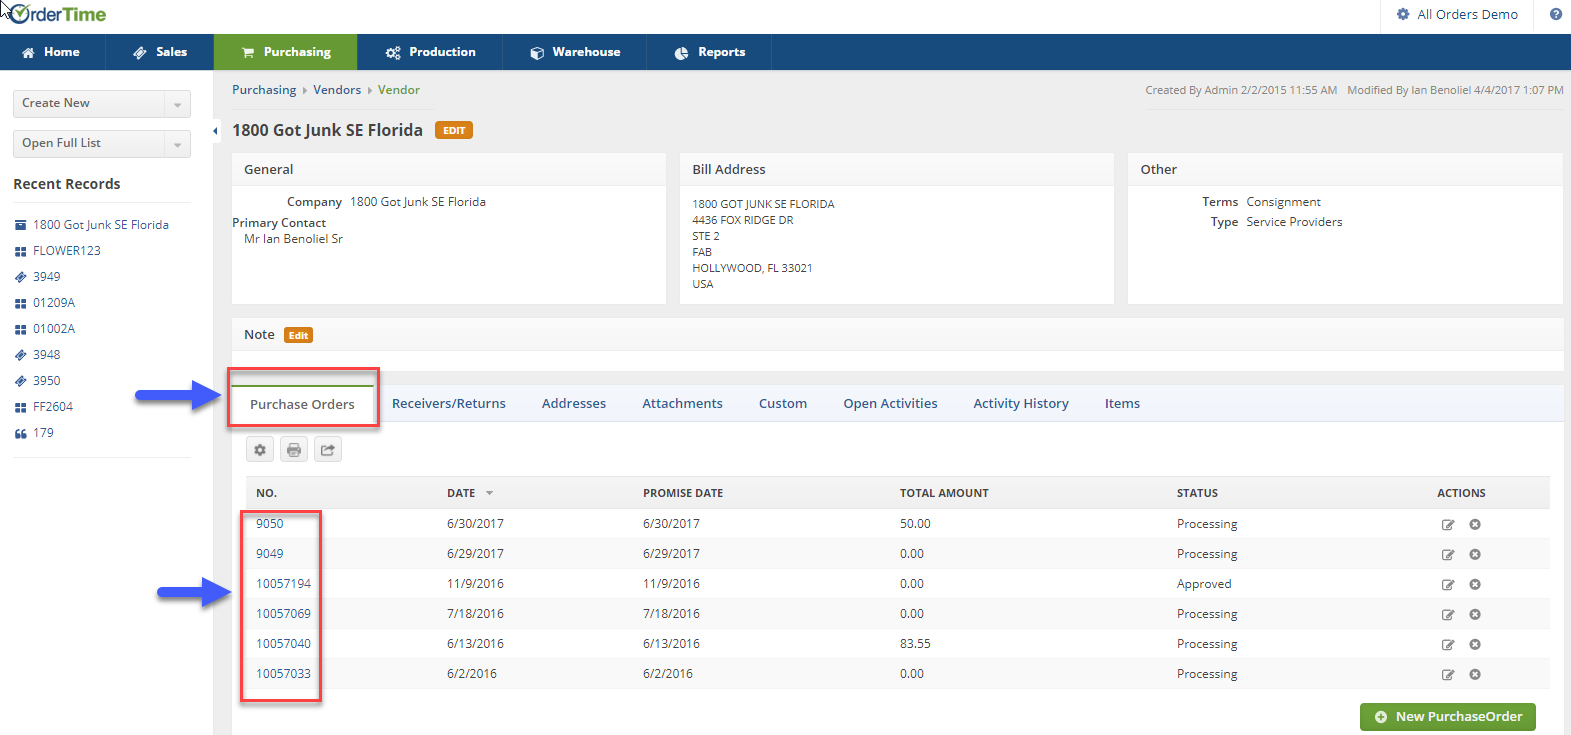
Overview
Tabs act as the major source of navigation within Details pages. Tabs are found on the bottom half of the page and the available tabs will vary depending on which Details Page you are working on.
The Tabs have the same general options as Lists:
- Modify List Options: Ability to filter your data, change the information displayed in the columns & modify the number of records shown per page/the default search by field. The Modify List Options is symbolized as Gear icon.
- Print: Allows you to make a printout of your records. The Print option is symbolized as Printer icon.
- Export: Allows you to move your information from our software into your favorite .CSV viewer/editor. The Export option is symbolized as Export icon.
- Edit: Allows you to edit the specific line item. The Edit option is symbolized as Notepad icon under the Actions column.
- Delete: Allows you to delete the specific line item. The Delete option is symbolized as X icon under the Actions column.
Within each tab all your corresponding records will be displayed. For example, inside your Vendor's detail page, you will find all your Purchase Orders related to that specific Vendor. To select an individual record, simply click on that records name and that specific record will open.
- To create a new record within the tabs, click on + New or +Add icon and fill in the required fields. After filling out the new record, press the Save icon. (The +New or +Add icon will display on selected tabs)
- To change the order of the tab's list, click on the Column header. Clicking on the header once will put your tab in descending order, while clicking on it a second time will organize your tab in ascending order.
On the Addresses Tab below, the user has the option to +Add information to this record:

Under the Open Activities tab, the user has the option to add an event or add a task:
